
Cat In The Hat Paper Plate Craft
As we celebrate Dr. Seuss Day this year, what better way to start off than with the iconic character? Using just a simple paper plate and a handful of basic supplies, kids can bring the mischievous feline to life through this Cat in the Hat paper plate craft!
Print
Pin
Video
Materials
- Paper Plate
- Black Paint
- Paint Brush
- Colored cardstock or construction paper
- Scissors
- Glue
- Markers
- Cat in the Hat Template
Instructions
- Download the Cat in the Hat template, print, and cut out the pieces you need.
- Begin by painting the paper plate in 1-2 thin coats of black paint. Let it dry completely before moving on. Once it is already dry, place the cat’s face in the middle of the paper plate.

- Place the bowtie at the bottom of the head and glue it in place.
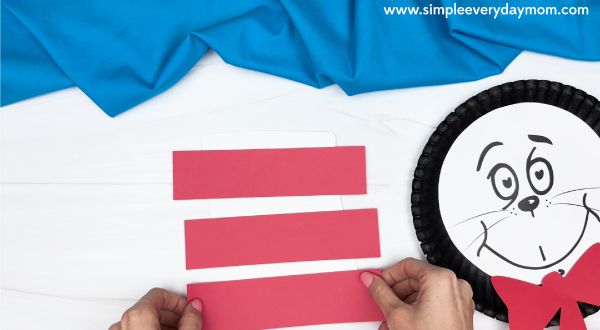
- Make the hat by gluing the three red stripes onto the main piece. Cut off any paper that hangs off the sides.
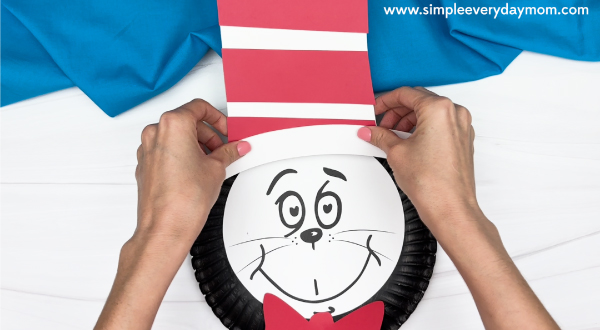
- Next, glue the base of the hat to the main part of the hat.
- Take the completed hat and glue it to the top of the cat’s face.
- Finish up by gluing the ears on both sides of the head.