Chick Popsicle Stick Craft For Kids
This chick popsicle stick craft is a fun and easy Easter activity that will keep kids entertained and busy.
Print
Pin
Video
Materials
- Mini popsicle sticks
- Paint
- Paintbrush
- Glue stick
- Permanent glue dots
- Colored cardstock or construction paper
- Scissors
- Chick template
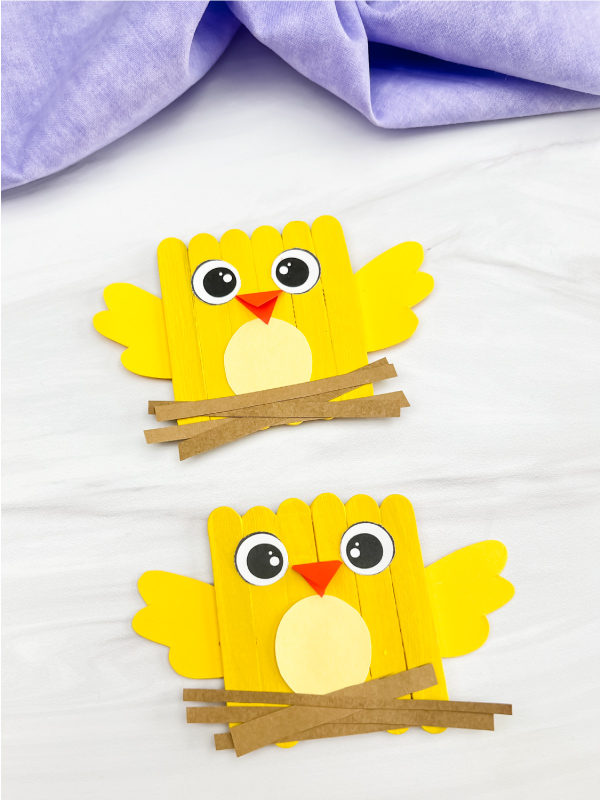
Instructions
- Download the chick template, print, and cut out the pieces you need.
- Grab 6 popsicle sticks and line them up. Cut 2 mini popsicle sticks to fit the width of the 6 popsicle sticks. Stretch out a glue dot to go on one of the cut popsicle sticks. Place this horizontally on the 6 popsicle sticks to glue them together. Repeat this for the 2nd cut popsicle stick.
- If you don't want to use glue dots, replace them with hot glue and do the same steps as above.
- Paint the front of the popsicle sticks in a thin coat of yellow paint and let it dry completely.
- Take the belly and glue it to the middle of the popsicle sticks, near the bottom end.
- Next, fold the beak in half and glue one side of the beak to the the middle of the body, right above the belly.
- Place the eyes on either side of the beak and glue them in place.
- Position the wings on both sides of the body and glue them to the back of the popsicle sticks.
- Optionally: Cut thin strips of brown paper to make a nest. Glue these thin strips along the bottom of the chick's body.