Handprint Cookie Monster & Elmo Craft
Learn how to make this handprint Cookie Monster & Elmo craft for kids!
Print
Pin
Video
Materials
- Colored card stock in blue, red, orange and black
- White card stock
- Glue stick this one is our top pick
- Cookie Monster & Elmo template
Instructions
- Download the free template and print out on the cardstock. Cut out all the pieces.
- Trace your child's hand onto the red and blue paper. Cut them both out.
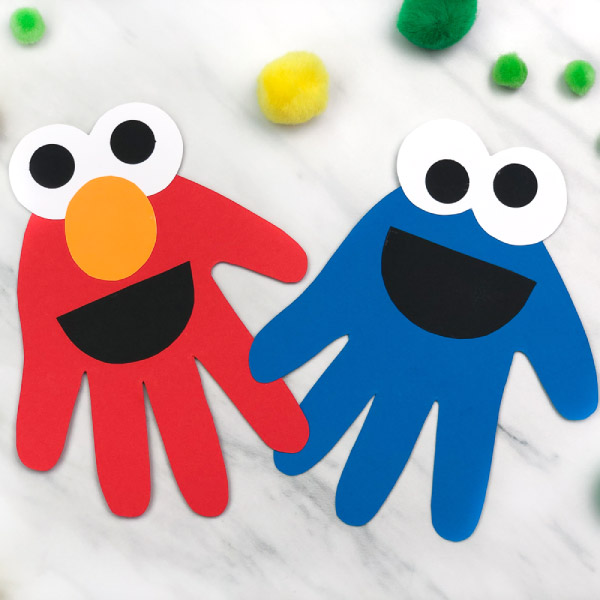
- Trace Elmo's nose onto the orange card stock and cut out. Trace Elmo's mouth onto the black card stock and cut out. Use the .5" circle punch or scissors to cut out 2 eyes from the black card stock.
- Arrange the red handprint with the fingers pointing down. Assemble Elmo by gluing the white eyes from the template onto the top of the handprint.
- Glue the 2 black circles onto the middle of the white eyes from the template.
- Glue the orange nose onto the bottom of the eyes, with about 1/3 of the nose overlapping the eyes.
- Glue the eye/nose combo onto the top of the red handprint.
- Secure the black smile beneath the nose with glue.
- Trace Cookie Monster's mouth onto the black card stock and cut out. Use the .5" circle punch or scissors to cut out 2 eyes from the black card stock.
- Assemble Cookie Monster's eyes by gluing one black circle to the top left part of the white eye. Glue the other black circle to the bottom right part of the white eye. This will give Cookie his signature silly look. Arrange the blue handprint with the fingers pointing down. Glue the completed eyes to the top of the handprint. Attach the smile with glue just beneath Cookie's eyes.