Handprint Ladybug Craft
Spring is just around the corner and this handprint ladybug craft is a perfect way to celebrate.
Print
Pin
Video
Materials
- Colored cardstock or construction paper
- Scissors
- Pencil
- Glue stick
- Ladybug template
Instructions
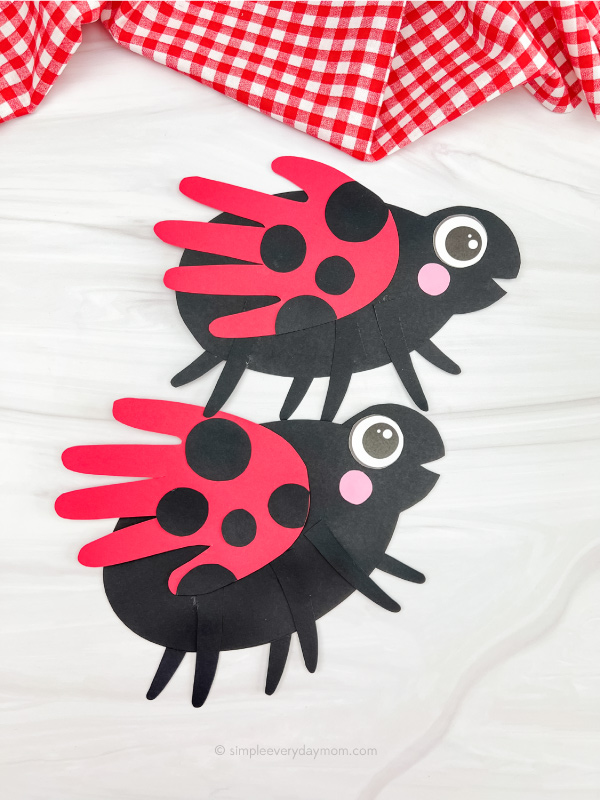
- Download the ladybug template, print, and cut out the pieces you need.
- Begin by gluing the eye to the head portion of the ladybug's body.
- Place the cheek just to the left and slightly below the eye and glue it down.
- Next glue the legs to the bottom of the ladybug's body. Glue three of the legs on the front of the body to represent the legs closest to you and the three other legs to the back of the ladybug's body to represent the legs on the other side of the ladybug's body.
- Trace your child's hand onto a piece of red paper and cut it out.
- Glue the black spots onto the handprint and cut off any paper that hangs off the sides.
- Finish off by gluing the handprint wing onto the ladybug's body.