Paper Bag Walrus Craft For Kids
This paper bag walrus craft is a fun and easy arctic animal project for kids to make!
Print
Pin
Video
Materials
- Paper bag
- Colored cardstock or construction paper
- Glue
- Scissors
- Black marker
- Walrus template
Instructions
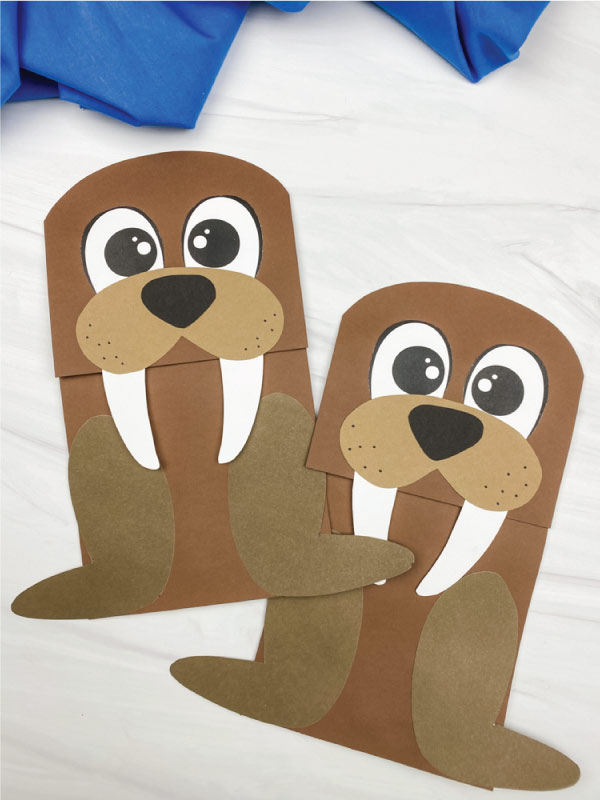
- Download the walrus template, print, and cut out the pieces you need.
- Glue the head piece to the top flap of the paper bag, then glue the body to the lower portion of the paper bag.
- Trim off the excess paper bag with scissors or a paper trimmer.
- Glue the eyes towards the top of the walrus head.
- Make the walrus' mouth/nose by gluing the nose in the middle of the mouth piece. Take the tusks and glue them behind the mouth, like in the picture below.
- Use the black marker to draw whisker holes along the bottom of the mouth.
- Place the completed nose and mouth piece slightly overlapping the bottom of the eyes and glue it in place.
- Glue the flippers, one on each side, on the bottom of the body piece.