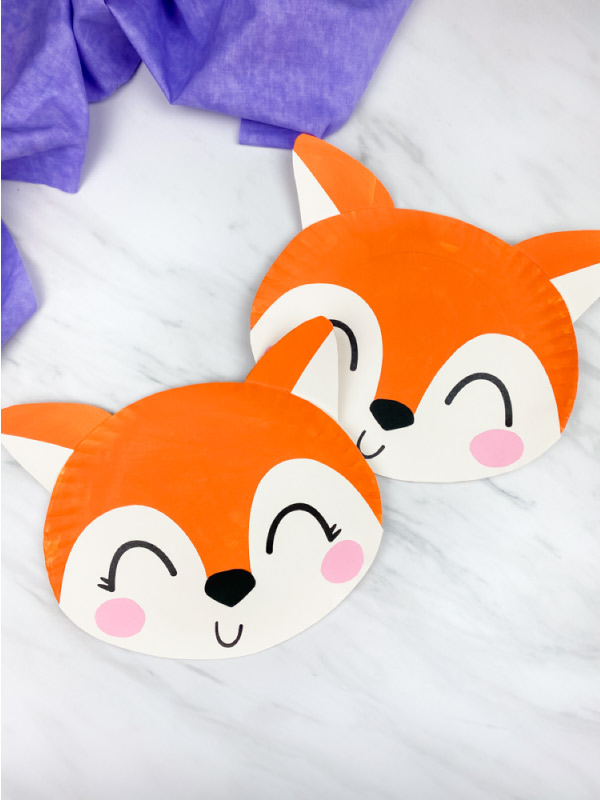
Paper Plate Fox Craft
Learn how to make this easy paper plate fox craft for kids! It's a simple project for preschool, kindergarten and elementary children.
Print
Pin
Video
Materials
- Paper plates
- Orange paint
- Pencil
- Glue stick
- Tape
- Colored cardstock cream/white, pink, orange and black
- Fox template download form located at the end of this post
Instructions
- Download the free fox template, print, and cut out the pieces.
- Paint the paper plate orange and let it dry completely before moving on. Decide whether you want the fox's ears to be made from a paper plate or cardstock. If you're going to make the ears from a paper plate, paint a second paper plate orange.
- Place the fox's head template on top of the dried paper plate, trace with a pencil, and cut out.
- Glue the fox face onto the bottom half of the paper plate, lining the edges up.
- Place the fox's nose at the bottom of the white face, in between the eyes and glue in place.
- Glue the pink cheeks on either side of the face, just below the eyes. If you don't want to use cardstock, you can always swap it out for a pink marker/crayon and draw in the cheeks.
- Alight the straight edge of the inner ear to the straight edge of the outer ear and glue in place. Repeat for both sides.
- Take a piece of double-sided tape or loop a piece of regular tape and place at the bottom of the fox ears. Position the ears along the top, outside of the paper plate, and secure in place.