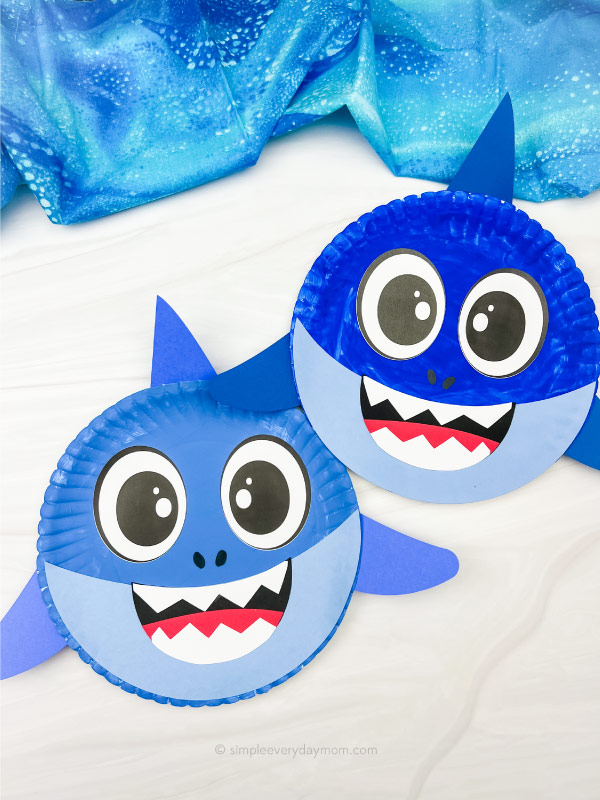
Paper Plate Shark Craft For Kids
This shark paper plate craft is perfect for kids of all ages. It's a great way to spend some summer fun and ocean themed crafting time.
Print
Pin
Video
Materials
- Paper plate
- Paint
- Paintbrush
- Glue
- Colored cardstock or construction paper
- Scissors
- Black marker
- Shark template
Instructions
- Download the shark template, print, and cut out the pieces you need.
- Paint a paper plate blue, then let dry completely.
- Begin to create the mouth by gluing the tongue to the bottom of the mouth. Trim off the excess paper.
- Next, take the top and bottom teeth and glue them to the top and bottom of the mouth. Trim off the excess paper.
- Place the completed mouth in the middle and top of the lower face and glue it to the bottom of the painted paper plate. Make sure to firmly press the paper down to all sides so it sticks.
- Take the eyes and glue them in the middle of the paper plate, above the mouth.
- Position the top fin in the middle and back of the paper plate and glue it down to secure it.
- Next, take the side fins and glue them to both sides of the paper plate, near the lower portion of the face.
- Finish off by using a black marker to draw nostril marks in the middle of the paper plate, between the eyes and mouth.