Snowman Paper Plate Craft
Make this cute and easy snowman paper plate craft with the kids this winter!
Print
Pin
Video
Materials
- Paper plates
- Colored cardstock or construction paper
- Glue stick
- Black marker
- Snowman paper plate template
Instructions
- Download the snowman paper plate template, print it, and cut out the pieces.
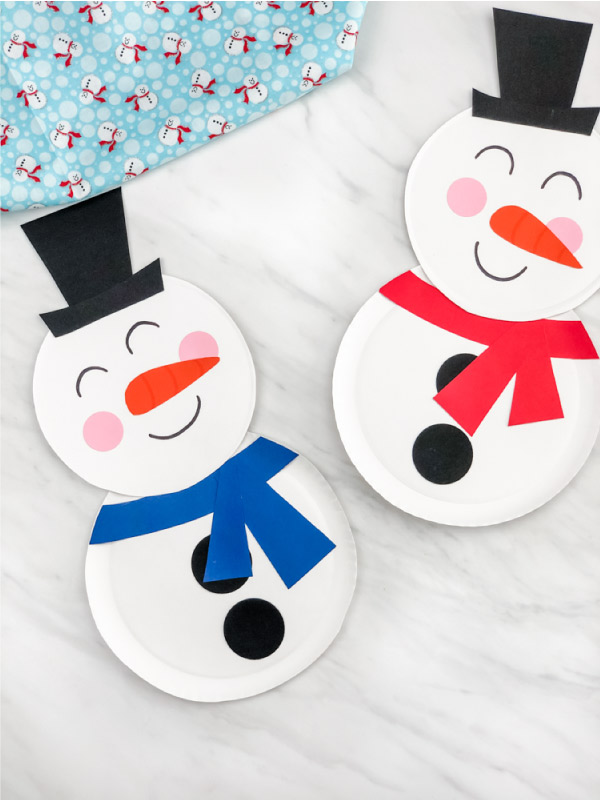
- Begin by cutting out the snowman’s head from the paper plate by cutting just outside the smallest center circle of the plate.
- Cut out the snowman’s body by cutting just inside the line where the ridges end. Place the pink cheeks in the middle of the smaller paper plate, one on each side, and glue them in place.
- Next, glue the snowman’s carrot nose in the middle of the two cheeks.
- Use the black marker to draw on the snowman’s eyes and mouth.
- Assemble the snowman’s hat by gluing the hat rim to the bottom of the main hat piece.
- Place the completed hat on the snowman’s head and glue it in place.
- Now, glue the longest piece of the scarf about an inch below the top of the larger paper plate. Cut off any excess.
- Glue the two circles of black coal just beneath the scarf.
- Finish the scarf by gluing the two pieces at an angle to the long piece of scarf.
- Cut three small (about 1” slits) in the top middle of the snowman’s body. This will flatten the top out and allow it to lay flat when gluing the two pieces together.
- Finish off by gluing the snowman’s head onto the snowman’s body.