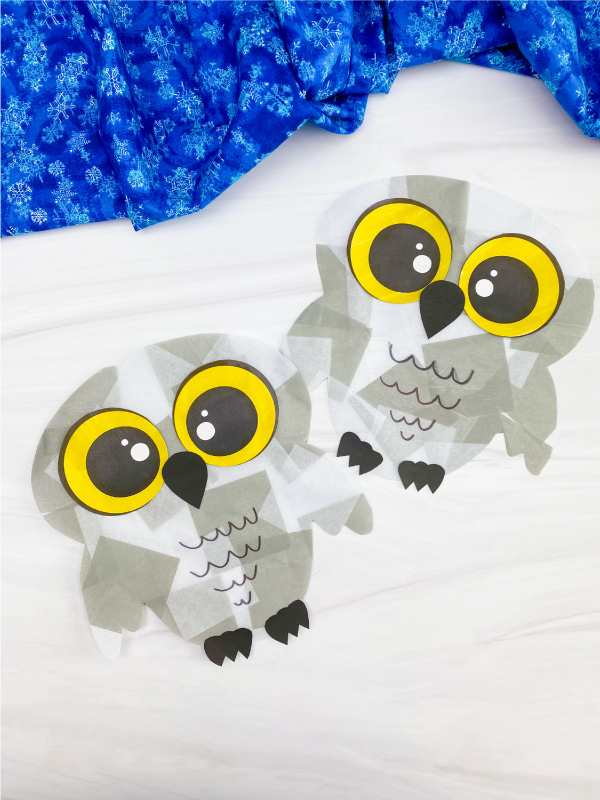
Snowy Owl Contact Paper Craft For Kids
Create a snowy owl contact paper craft with the printable template. This winter-themed sun catcher will look great in any window and will keep kids busy when it's too cold to go outside.
Print
Pin
Video
Materials
- Contact paper
- Scissors
- Tissue paper squares
- Double sided tape
- Glue stick
- Markers
- Snowy owl template
Instructions
- Download the snowy owl template, print, and cut out the pieces.
- Cut out 2 rectangular pieces from the contact paper that are just larger than the snowy owl body outline.
- Pull apart the cover paper from one piece of the contact paper, then place a single layer of light gray and white tissue squares on it. Leave the edges open so it can stick to the 2nd piece of contact paper.
- Once you've covered the area, peel the cover paper off the 2nd piece of contact paper then stick it to the first piece so it glues itself together. Press firmly and smooth it out.
- Place the snowy owl body onto the contact paper and use a marker to trace the outline. Cut it out with scissors.
- Color in the snowy owl's eye whites with a yellow marker, then glue them to the middle of the face.
- Next, take the beak and glue it in between the eyes.
- Glue the feet at the bottom of the body.
- Finish off by drawing on some belly feathers in the middle of the owl's body with the permanent marker.
- Use double-sided tape to stick your snowy owl to the window.