Thankful Turkey Craft For Kids
Kids will love turning an old oatmeal container into this cute thankful turkey craft!
Print
Pin
Video
Materials
- Old oatmeal container
- Colored cardstock or construction paper
- Scissors
- Glue stick
- Glue dots
- Marker or pen
- Turkey template
Instructions
- Download the turkey template, print, and cut out the pieces you need.
- Take an 8.5"x11" piece of brown paper and cut it down to the height of your oatmeal container (ours was 7.5" high).
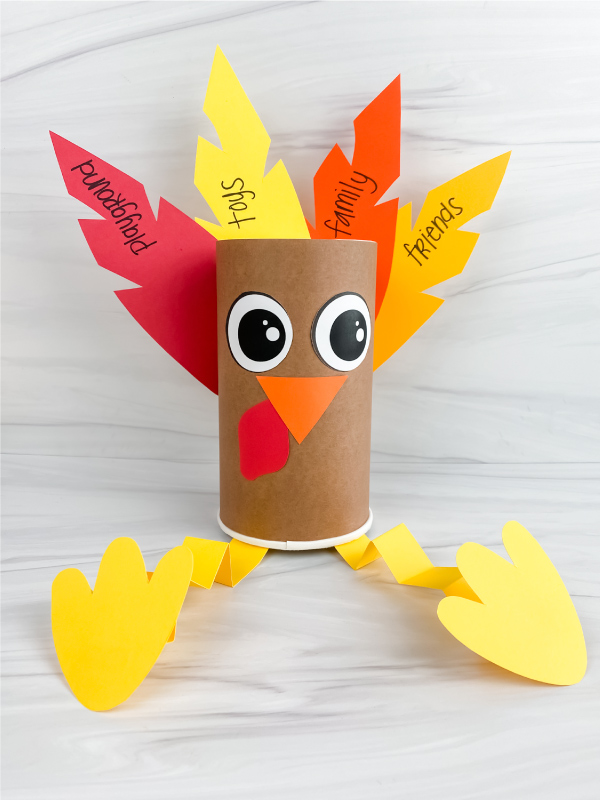
- Begin by gluing the turkey eyes a little below the top of the brown paper, in the middle.
- Take the turkey's snood and glue it behind and on the side of the beak.
- Position the completed beak and snood and glue it just below the eyes.
- Next, make the turkey's legs by folding the legs accordion style.
- Glue the turkey feet on one end of both of the legs.
- Wrap the brown paper around the container and glue or tape it in place. There will be a gap in the back where the paper doesn't meet, but don't worry - it'll be covered by the feathers.
- Now, take the other end of the leg and attach it to the bottom and inside of the turkey cylinder. We used glue dots for this because they are strong and easy to use.
- Take the feathers and have your child or students write one thing they are thankful for on each feather. Make sure it's towards the top so you can see it once it's glued on.
- Arrange the feathers in a fan and glue them to each other. Finish the turkey by gluing (we also used glue dots here) the feathers to the back and middle of the turkey cylinder.