Torn Paper Polar Bear Craft For Kids
Kids can get crafty with our torn paper polar bear! They’ll tear and glue pieces of paper to create their own polar bear craft wrapped up in a cozy scarf.
Print
Pin
Video
Materials
- Colored cardstock
- White construction paper
- Scissors
- Glue
- Markers
- White paint pen or Crayola Bold & Bright markers optional
- Polar Bear Template
Instructions
- Download the polar bear template, print, and cut out the pieces you need.
- Begin by spreading glue over a section of polar bear background paper.
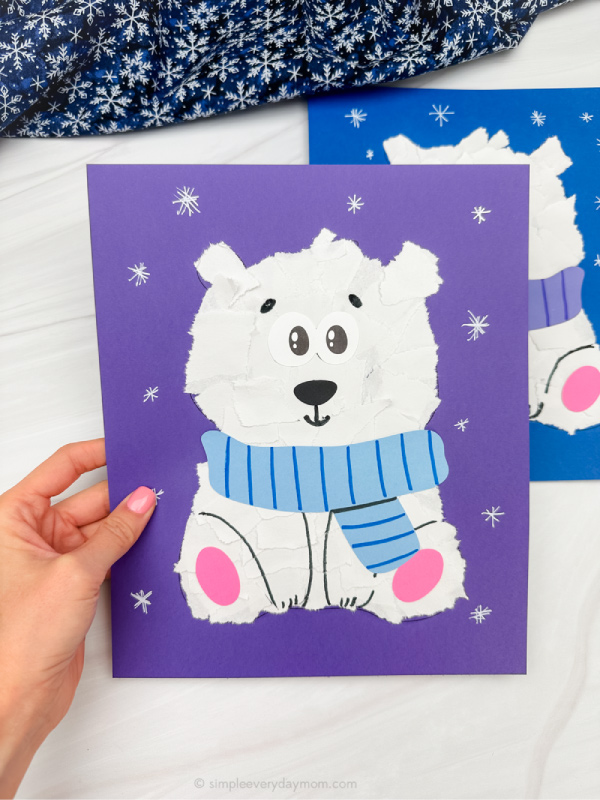
- Next, start tearing the white paper into small pieces. Then, begin gluing them on the polar bear’s body. Repeat these steps until the entire polar bear is filled.
- Using a black marker, draw the curved lines of the feet on both sides of the polar bear. Then, draw the two dangling arms in the middle of the polar bear's body.
- Take the foot pads and glue them in the middle of the feet you created.
- Glue the scarf to the neck portion of the polar bear, then draw a design on the scarf with a marker.
- Place the polar bear’s nose about 1.5" inches above the scarf and glue it in place.
- Now, glue both eyes just above the nose.
- Use a black marker to draw the mouth just below the nose and the eyebrows above the eyes.
- Optionally: Finish up by drawing snowflakes on the background paper with the white paint pen or marker.