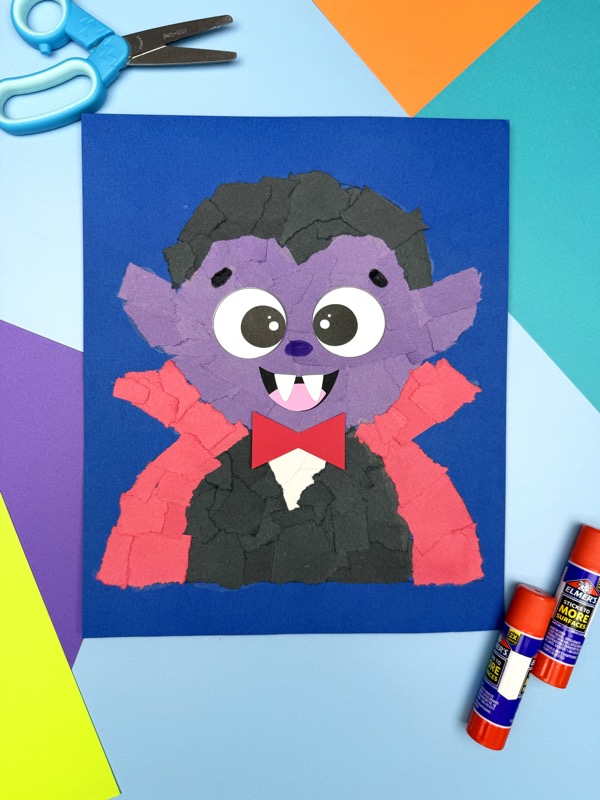
Vampire Torn Paper Craft
Creating this vampire torn paper craft is a great way for kids to work on their fine motor skills and make a spooky piece of art they will love.
Print
Pin
Video
[adthrive-in-post-video-player video-id="CYUloJNa" upload-date="2025-09-29T20:58:57+00:00" name="Vampire Torn Paper Craft" description="Halloween is a fun time to bring hands-on projects into the home or classroom! It's even better when they support learning and skill development.
Creating this vampire torn paper craft will give kids an opportunity to practice tearing, arranging, and gluing pieces of paper to strengthen their fine motor control and make a spooky piece of art they'll love!" player-type="default" override-embed="default"]
Materials
- Construction paper
- Colored cardstock
- Scissors
- Marker
- Glue
- Vampire Torn Paper Template
Instructions
- Download the template, print it, and cut out the pieces you need.
- Start by tearing paper into small pieces and gluing them onto the vampire's face.
- Then, glue the torn paper pieces onto the hair section of the vampire outline.
- Next, glue the paper pieces onto the neck outline.
- After that, glue ripped paper pieces onto the vampire’s suit.
- Continue by gluing the torn pieces onto the cloak outline.
- Glue the eyes onto the vampire’s face.
- Follow by gluing the mouth just below the eyes.
- Add the tongue to the lower part of the mouth, gluing it down.
- Next, glue each fang onto the top of the vampire’s mouth.
- Glue the bowtie onto the vampire’s neck.
- Draw the vampire’s nose and eyebrows with a marker.