Chick Handprint Card Craft
Learn how to make this cute chick handprint card craft for spring time!
Print
Pin
Video
Materials
- Colored card stock in yellow, dark yellow, orange, and pink
- White card stock
- Brads
- Pencil
- Glue stick
- Handprint chick template download form located at the end of the page
Instructions
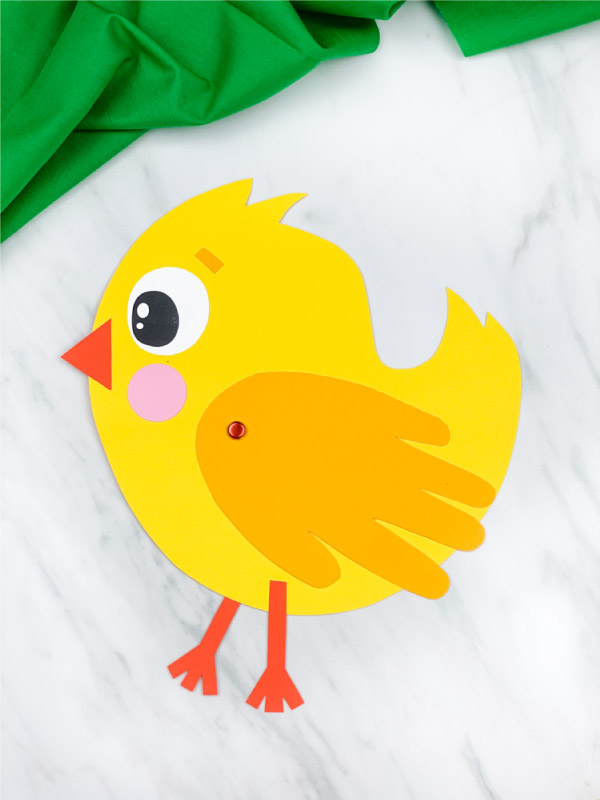
- Download the handprint chick template, print and cut out the pieces.
- Trace your child's hand onto the darker yellow colored paper and cut out.
- Begin to assemble the chick by placing the handprint onto the middle of the chick's body. Once you find the right spot, use the hole punch to cut a circle out of the handprint for the brad.
- Push the brad through the hole and through the chick's body. Separate the brad and push it into place.
- Glue the eye on the chicks' face.
- Place the triangle beak on the edge of the face and glue in place.
- Position the cheek just below the eye and glue down.
- Finish assembling the chick by gluing the left leg on the backside of the chick and the right leg on the front of the chick.
- Swivel the handprint up and write a fun message under the wing!