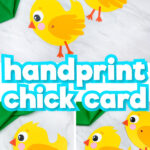
Chick Handprint Card Craft [Free Template]
All activities require adult supervision. By using this site, you agree to our terms of use. This post may contain affiliate links. As an Amazon Associate and a participant in other affiliate programs, I earn a commission on qualifying purchases. Read our disclosure policy.
Even though it’s not quite here yet, we’re already looking forward to spring!
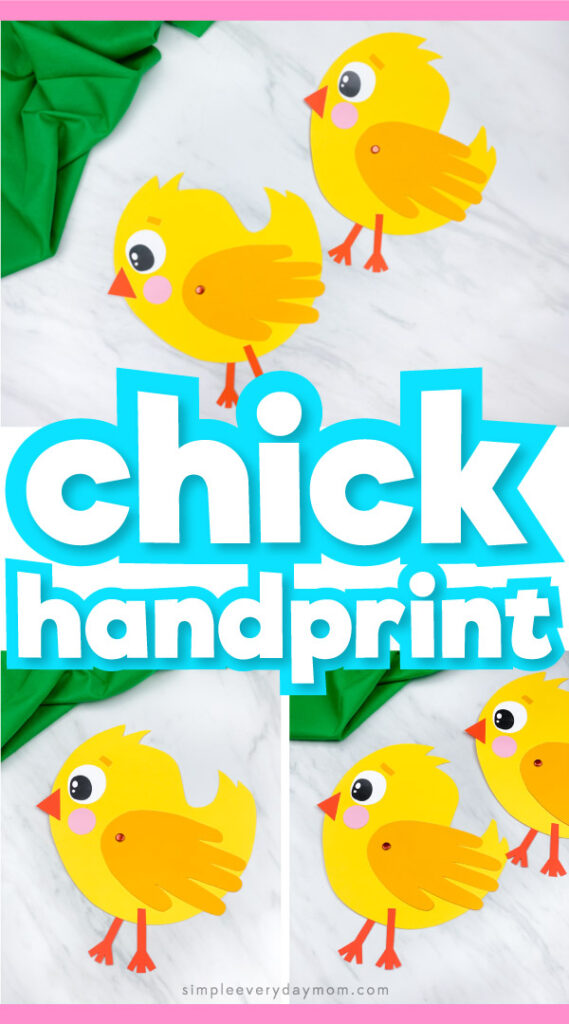
This chick handprint card craft is our first craft of the spring season because we love seeing all the chicks at our local feed store. They’re fluffy, tiny, and oh so cute!
It’s really the only time we find ourselves at the feed store. 🙂
If your kids can’t get enough of the chicks, they’ll also want to make their own handprint card.
We’re adding this chick craft to our growing collection of Easter handprint crafts. If you’re looking for more easy, fun, and cute Easter crafts, be sure to check out our collection.
Read our simple directions or watch our quick video tutorial to see how to make this easy papercraft with your kids or students!
Handprint Chick Craft
Supplies
- Colored card stock (in yellow, dark yellow, orange, and pink)
- White card stock
- Brads
- Pencil
- Hole punch
- Glue stick
- Scissors
- Handprint chick template (download form located at the end of the page)
Directions
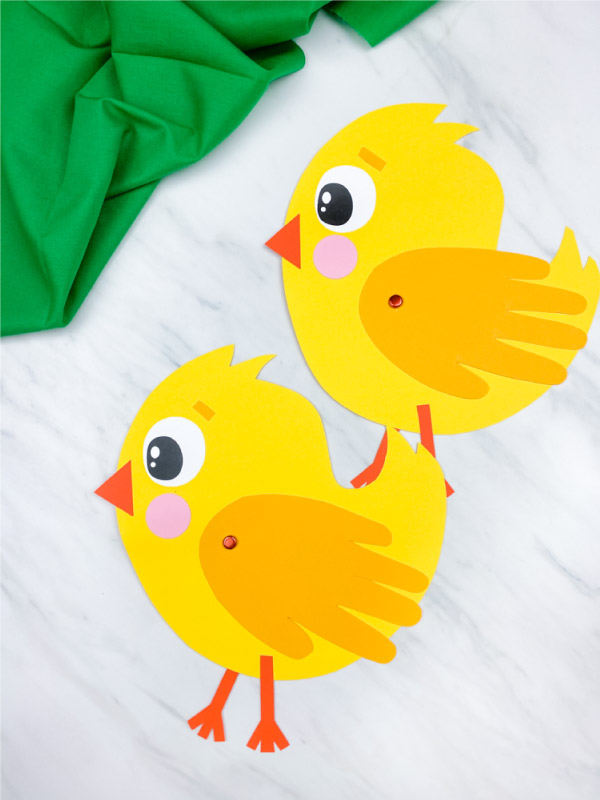
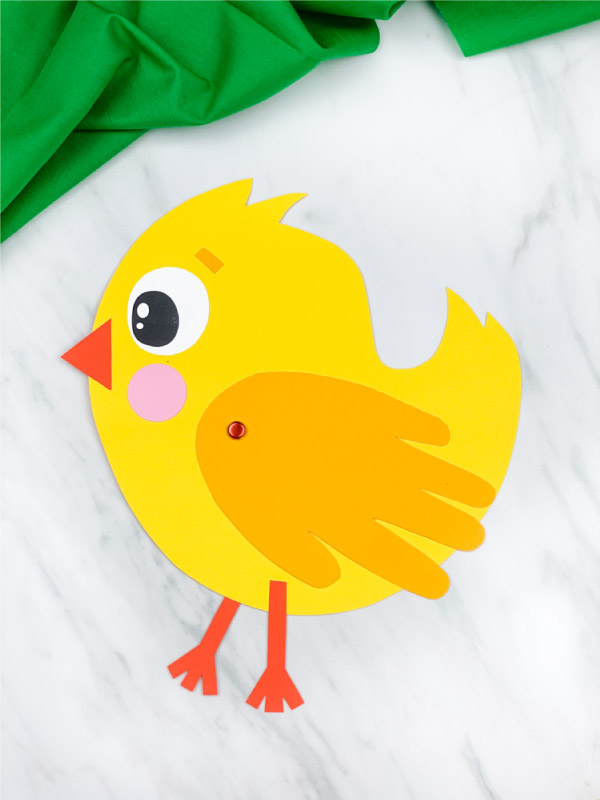
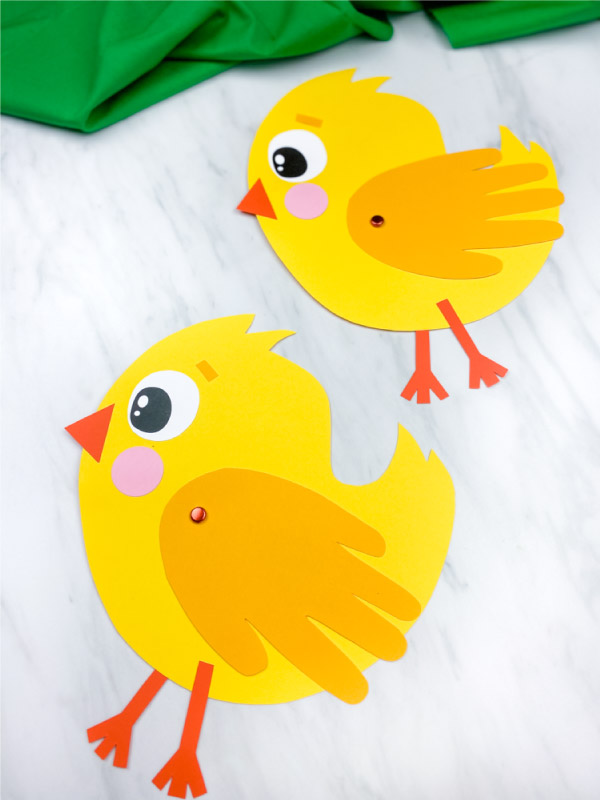
Download the handprint chick template, print and cut out the pieces.
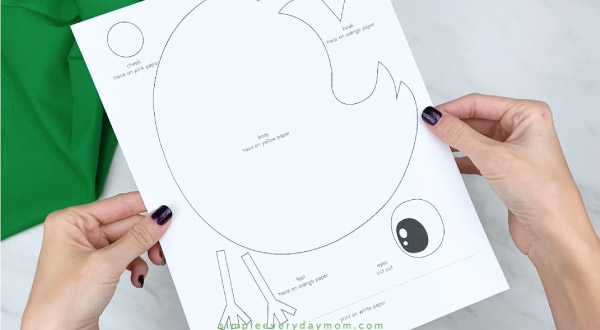
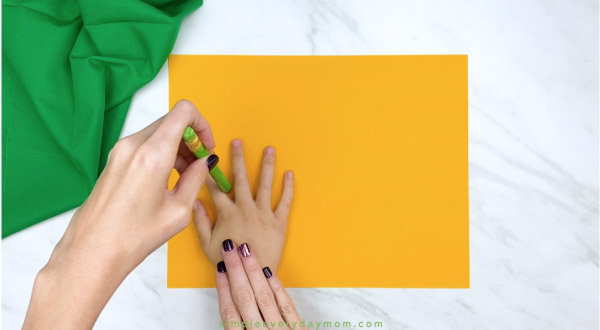
Trace your child’s hand onto the darker yellow colored paper and cut out.
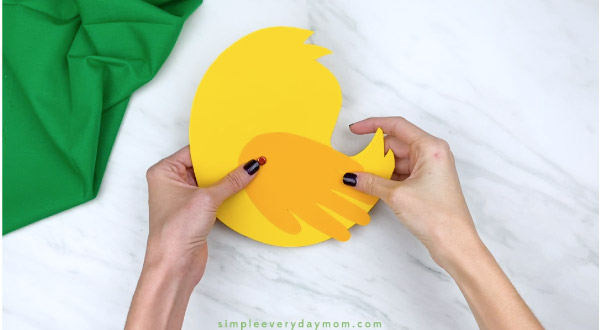
Begin to assemble the chick by placing the handprint onto the middle of the chick’s body. Once you find the right spot, use the hole punch to cut a circle out for the brad in the handprint.
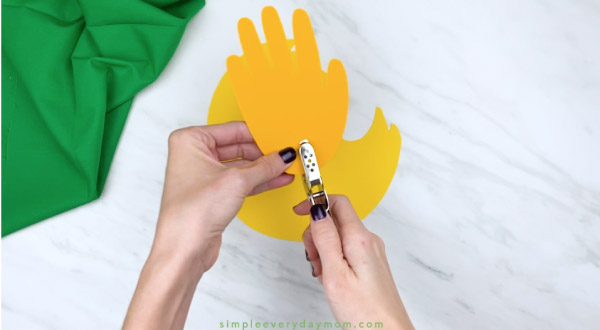
Push the brad through the hole and through the chick body. Separate the brad and push it into place.
Glue the eye on the chicks’ face.
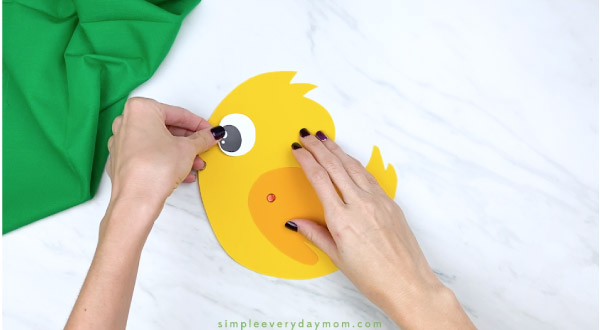
Place the triangle beak on the edge of the face and glue in place.
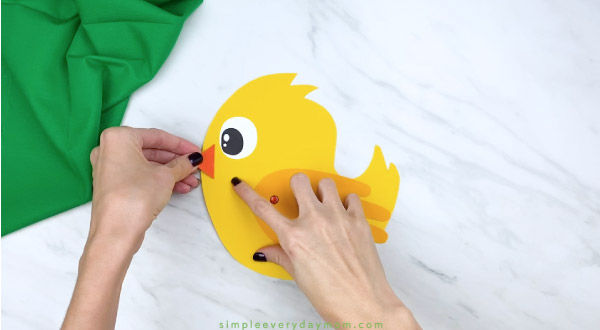
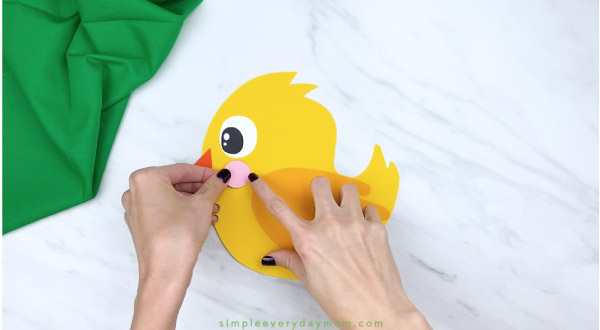
Position the cheek just below the eye and glue down.
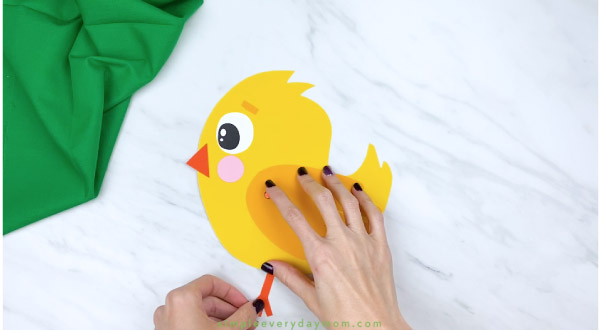
Finish assembling the chick by gluing the left leg on the backside of the chick and the right leg on the front of the chick.
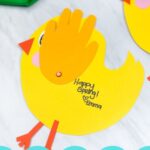
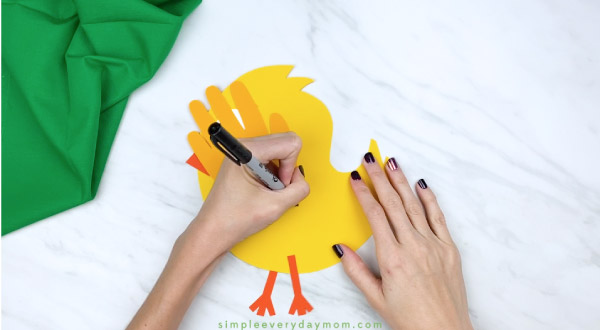
Swivel the handprint up and write a fun message under the wing!
Isn’t that a cute little springtime craft for kids?
Related: Paper Plate Pig Craft
My preschooler’s favorite part is moving the wing up and down. He says it’s like a secret message to uncover over and over again!
If you make these chicks at home, they’d make a great homemade card from Grandparents and if you make them in the classroom, send them home to give to Mom and Dad!
We love how big this craft is because it makes it even easier for little hands to help make!
This chick craft is a fun way to help teach children and work on valuable skills like scissor skills.
If you’re working with very young kids, like toddlers, have all the pieces cut out and ready to go when you start the craft.
You can help them recognize colors and shapes by asking questions like:
- Where’s the pink circle?
- What color is the triangle?
- Can you find the orange legs?
- Is the chick’s body or wings darker?
Your kids will never know they’re learning and crafting at the same time!
Related: Handprint Bunny Craft For Kids
More Easter Activities For Kids


Happy Easter Mouse – Everyone knows Mouse from the classic If You Give A Mouse A Cookie book, but now he’s back and ready to celebrate Easter! Kids will love watching him as he goes on an Easter egg hunt!
Pete the Cat: Big Easter Adventure – Join Pete as he races to help the Easter bunny just in time for Easter! This is another new classic kids rate as a must-have!
It’s Not Easy Being A Bunny – Follow PJ the bunny as he tries to discover what kind of animal he’d rather be instead of a bunny! It’s a silly story with a great lesson.
Chick Handprint Card Craft
Video
Equipment
- Hole punch
- Scissors
Materials
- Colored card stock in yellow, dark yellow, orange, and pink
- White card stock
- Brads
- Pencil
- Glue stick
- Handprint chick template download form located at the end of the page
Instructions
- Download the handprint chick template, print and cut out the pieces.
- Trace your child’s hand onto the darker yellow colored paper and cut out.
- Begin to assemble the chick by placing the handprint onto the middle of the chick’s body. Once you find the right spot, use the hole punch to cut a circle out of the handprint for the brad.
- Push the brad through the hole and through the chick’s body. Separate the brad and push it into place.
- Glue the eye on the chicks’ face.
- Place the triangle beak on the edge of the face and glue in place.
- Position the cheek just below the eye and glue down.
- Finish assembling the chick by gluing the left leg on the backside of the chick and the right leg on the front of the chick.
- Swivel the handprint up and write a fun message under the wing!
Did you make this?
Don’t forget to leave a comment below and make sure to follow on Pinterest, Facebook and TikTok for more!
Free Chick Template

Meet Sam
Sam is the crafter and founder of Simple Everyday Mom. She has been featured in Oprah Mag, Good Housekeeping, The Spruce Crafts, Country Living, The Bump, and more.


I cannot find the spot to enter my email and I’ve tried many different ways:(
Sorry! There are some things that are beyond my control, such as if you use an adblocker or firewall. Both may block the forms from appearing. The forms are always near the end of the post, above the comments sections, and under a bolded subheading. Also, some readers say they’re not able to see it on Chrome, but they can on other browsers. You may be able to try that as well ◡̈ But please know they are there and working. Please let me know if you have any other questions!
Very cute! I’m looking for the template!
Of course! All you need to do is enter your email in the form at the end of this post to have the link sent to you 🙂
Super cute – can’t wait to try!
Thanks! Hope everyone has fun!
very cute
Thanks Cindy!
Hello – where do I find the template? Thank you.
All you need to do is enter your email in the form at the end of each post to have the link sent to you ?
Please, could you send me the template?
Thank you so much, great job!
Of course! All you need to do is enter your email in the form at the end of this post to have the link sent to you.
nice work for kids
Thanks!
Ciao mi puoi mandare x favore la sagoma della papera grazie
Of course. All you need to do is enter your email in the form at the end of the post and it’ll be sent to you ?
Hello, I love your craft idea. Thank you for sharing!
Could you please help me get the template. I do not see the link for it. I appreciate your time.
Of course. All you need to do is enter your email in the form just above the comments section and the link will be sent to you ?
super ideas for kids
Thanks for this cute template! love it
you’re welcome! Glad you like it 🙂