How To Make Easy Turtle Painted Rocks For Kids
These easy turtle painted rocks for kids are a fun and creative summer activity for kids!
Print
Pin
Video
Materials
- Smooth flat rocks
- White acrylic paint or white spray paint to prep the rocks
- Pencil
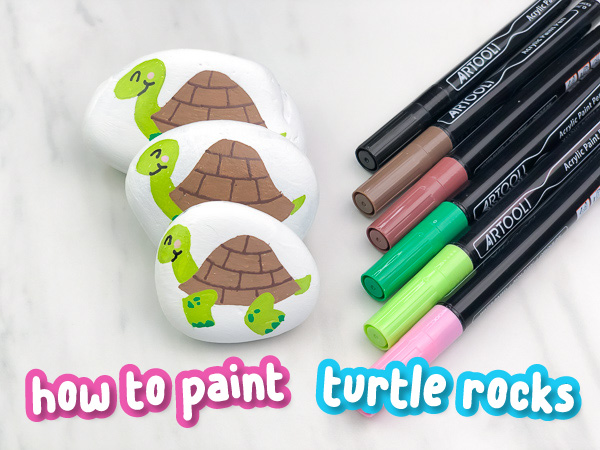
- Paint pens these ones are my newest favorites!!
- Sealant optional
Instructions
- Prepare your rocks by painting them white. With this set of rocks, we used white acrylic paint and painted 2-3 thin coats on each side. Let dry completely before painting the turtle on.
- For all the following directions, use a pencil to draw the turtle on first so you can erase if you make a mistake. Once it looks like you want it to, then use the paint pens over the pencil lines. I like to start by making the shell, then the head, legs and tail.
- Using the light brown paint pen, make the shell by drawing a wide bell shape that flares slightly on the edges.
- Next use the light green paint pen to make the head. Start at the front end of the shell and draw a thin neck and oval shaped head.
- Use the light green paint pen to make the tail. Simply draw a small triangular extension to the back of the shell.
- Continue using the light green paint pen to add two legs, one in front and one in back, each with a bend at the knee.
- Draw the shell pattern on the turtle with the dark brown paint pen. Make 3 slightly curved lines that run to the edge of the shell. Next make a straight line in the middle of the top section of the shell that extends just to the first horizontal line you drew. Continue making vertical lines in each section of the shell by staggering them between the previous vertical lines on the layer before.
- Using the dark green paint pen, draw 2-3 little toes on each of the legs by making semicircles at the bottom of each foot. Draw a few accent spots on the legs as well.
- Use the black paint pen to draw on the eye and smile.
- Draw on a cheek with the light pink paint pen by making a circle that fits just at the end of the turtle's smile line.
- If you want, seal your rock with a sealant.
- Admire your cute turtle rock!