Mickey Mouse Paper Bag Puppet Craft
Learn how easy it is to make these Minnie and Mickey Mouse paper bag puppet crafts!
Print
Pin
Video
Materials
- Brown paper bag
- Colored card stock light pink, dark pink, red, cream and black
- White card stock
- Black light pink and dark pink marker
- Glue stick
- Minnie & Mickey Mouse template download form located at the end of the page
Instructions
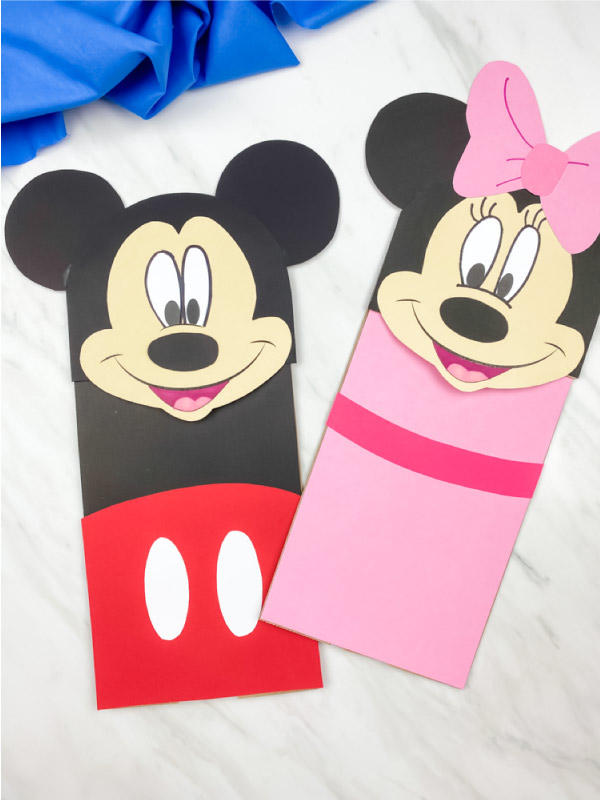
- Download the Mickey and Minnie mouse template, print and cut out the pieces.
- Place Mickey's nose just below the curved mark in the middle of his face and glue in place.
- Position Mickey's eyes so they lay just on top of the curved mark and glue to secure.
- Use the black marker to outline both eyes.
- Use the light pink marker to draw a tongue at the bottom of Mickey's mouth. Use the dark pink marker to fill in the rest of the mouth.
- Glue the head piece to the top flap of the brown paper bag.
- Place Mickey's body piece on the top half of the paper bag.
- Place Mickey's pants on the bottom half of the paper bag.
- Position the two white ovals in the middle of Mickey's pants and glue in place.
- Glue Mickey's head onto the top flap of the bag, making sure a little bit of Mickey's face hangs off the flap.
- Glue Mickey's ears on either side of his head.