Paper Bag Bat Craft
Learn how to make this simple paper bag bat craft with the kids this Halloween season!
Print
Pin
Video
Materials
- Brown paper bags
- Colored cardstock or construction paper in shades of gray, black or purple
- White paper
- Scissors
- Black marker
- Glue stick
- Free bat template download form located at the end of this post
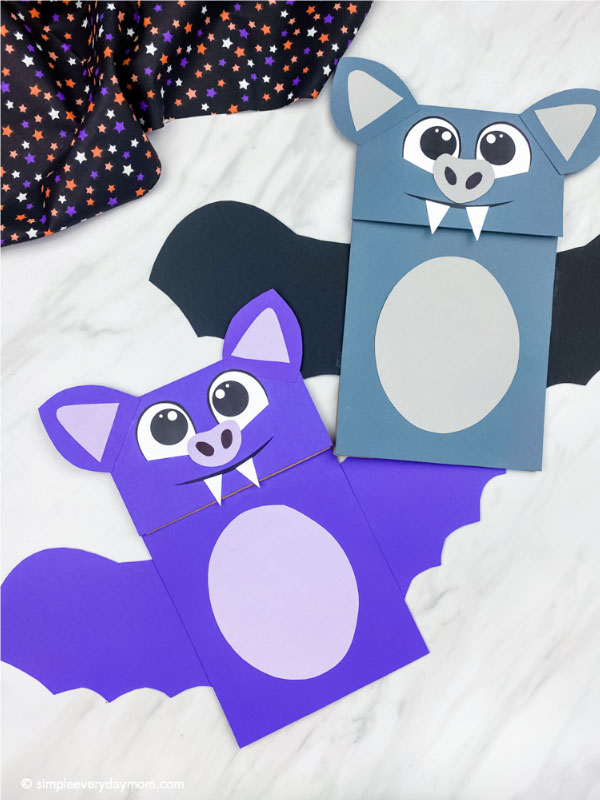
Instructions
- Download the bat template, print and cut out the pieces.
- Begin making the bat by assembling the head. Glue the eyes in the middle of the head piece, then glue the nose in between the eyes, slightly overlapping them.
- Use a black marker to draw the nostrils on the bat's nose.
- Glue the outer ears to the each of the corners, then take the inner ear and glue it to the middle of the outer ear.
- Place the bat's fangs on the smile line and glue in place.
- Take the completed bat face and glue it to the flap portion of the brown paper bag.
- Make the bat's body by gluing the body rectangle to the lower portion of the paper bag. Place the belly in the middle of the body and glue in place.
- Finish off the bat by gluing the wings to the body. We like to open the sides of the bag and glue it in the middle, but you can also glue it the to back of the paper bag if you prefer.