Paper Bag Butterfly Craft
Learn how easy it is to make this colorful paper bag butterfly craft for spring!
Print
Pin
Video
Materials
- Brown paper bag
- Colored card stock or construction paper
- White card stock
- Colorful pipe cleaners
- Glue stick
- Tape optional
- Markers optional
- Butterfly craft template download form located at the end of this page
Instructions
- Download the butterfly template, print and cut out the pieces.
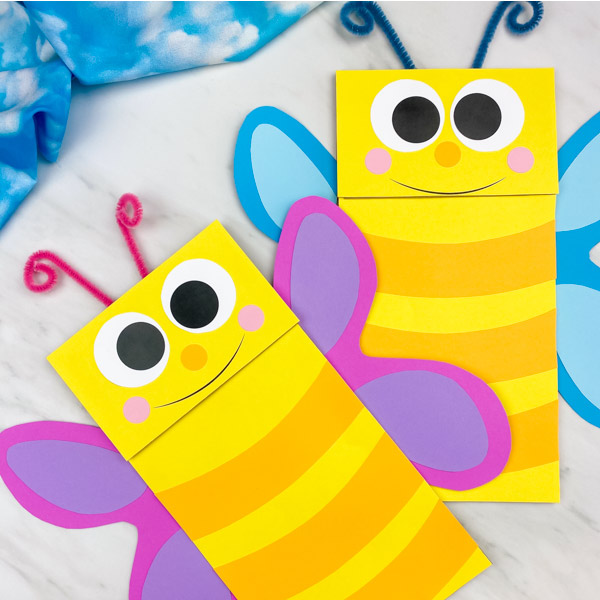
- Glue the eyes onto the face piece.
- Use the circle punch to punch out a nose and two cheeks. Glue them on the face piece.
- Take the stripes and glue them onto the butterfly's body. Use scissors to trim off the excess paper.
- Glue the completed butterfly face to the flap part of the brown paper bag.
- Glue the body to the long portion of the paper bag.
- Decorate the wings with the accent paper and any other embellishments you'd like.
- Glue the completed wings to the inside of the paper bag, on each side.
- Cut the pipe cleaner in half and wrap one end around it to make the butterfly's antennae. Repeat for the other side.
- Flip the paper bag over and tape the antenna to the top of the butterfly's head.