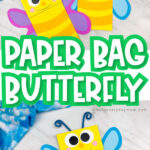
Paper Bag Butterfly Craft For Kids [Free Template]
All activities require adult supervision. By using this site, you agree to our terms of use. This post may contain affiliate links. As an Amazon Associate and a participant in other affiliate programs, I earn a commission on qualifying purchases. Read our disclosure policy.
Looking for a fun and easy spring craft for kids?
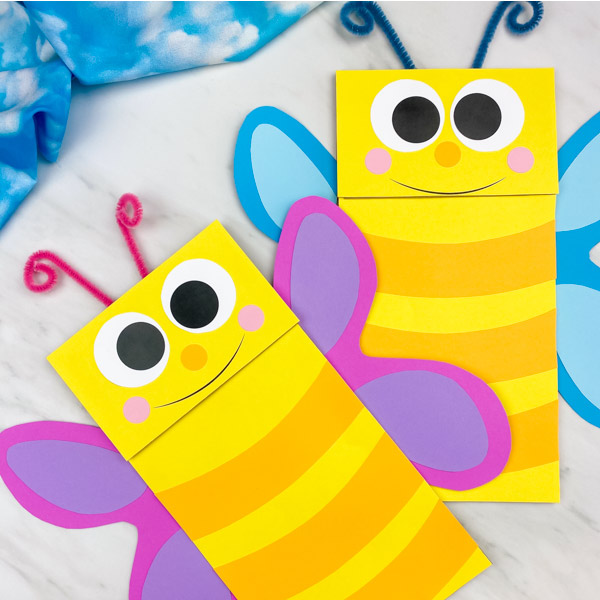
This paper bag butterfly craft is great for little kids in preschool, kindergarten, and elementary school. It’s the newest addition to our butterfly crafts for kids.
And, like many of our other posts, we’ve included a free printable butterfly template to make it even easier on you to make with the kids!
There’s something kids just love about butterflies. It could be their bright colors, their large wings or something else entirely, but kids (and adults!) are mesmerized by them.
We’re showing you how to turn a plain ‘ol brown paper bag into a bright butterfly ready to take flight!
Read our directions or watch our quick video tutorial to see just how easy they are to make!
Butterfly Craft For Preschool
Supplies
- Brown paper bag
- Colored card stock or construction paper
- White card stock
- Colorful pipe cleaners
- Scissors
- Glue stick
- Tape (optional)
- .25″ circle punch (optional)
- Markers (optional)
- Butterfly craft template (download form located at the end of this page)
Directions
Download the butterfly craft template, print out and cut out the pieces you’ll need.
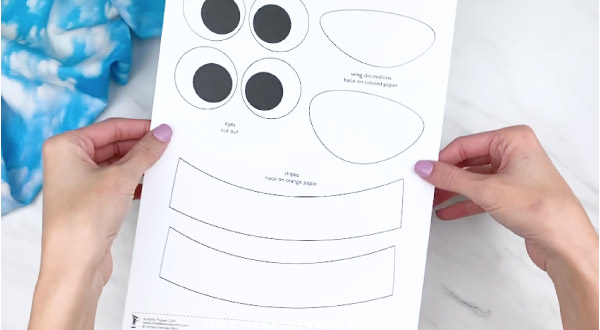
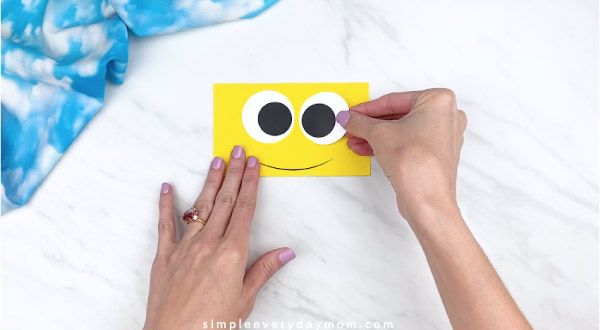
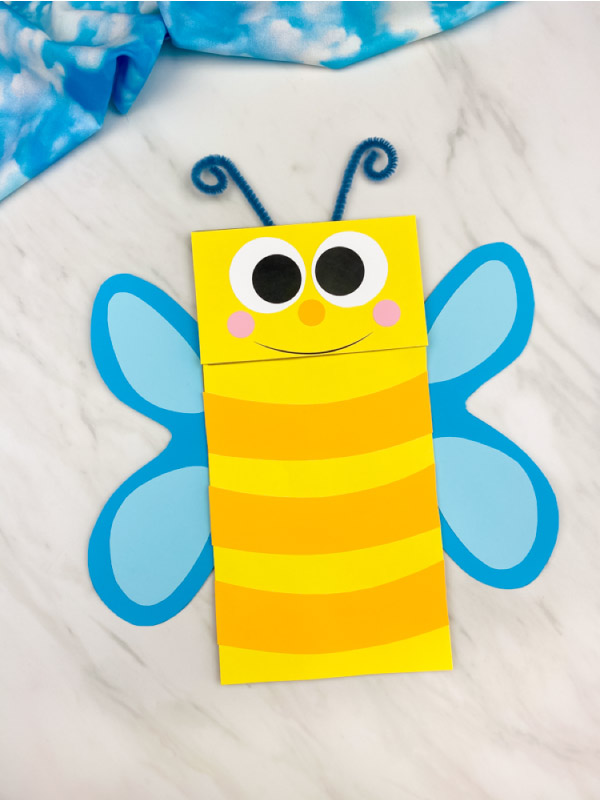
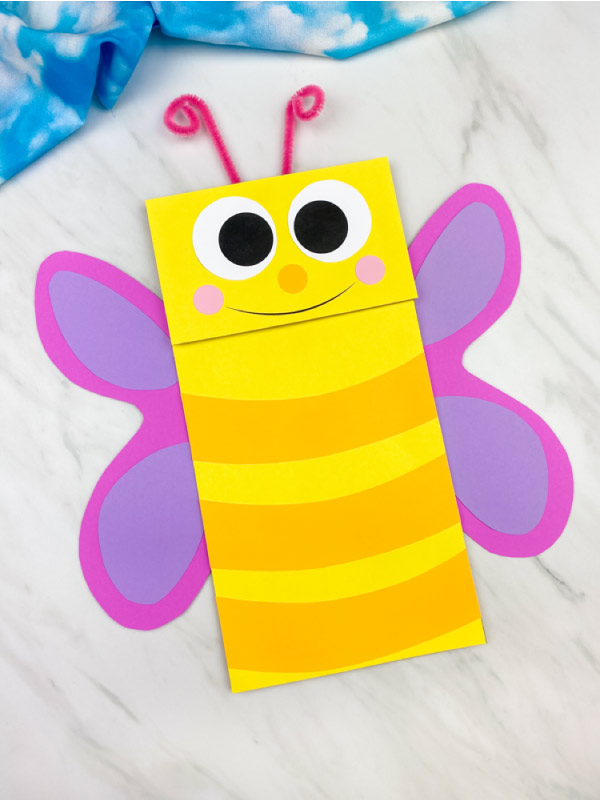
Take each of the butterfly’s eyes and glue them to the middle of the head piece. Use your .25″ circle punch, scissors or markers to make or draw on a small nose underneath the two eyes.
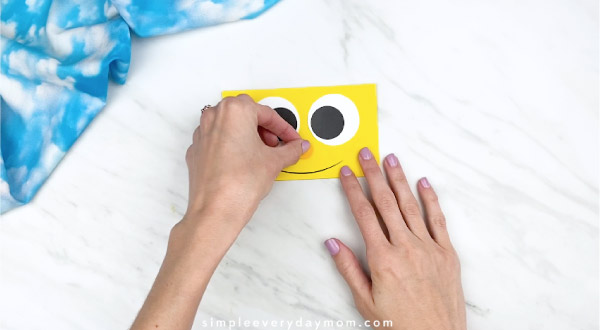
Place the pink cheeks on either side of the mouth and glue in place. Like the nose, if you don’t have a circle punch or you want to save steps, you can have kids color in the cheeks too!
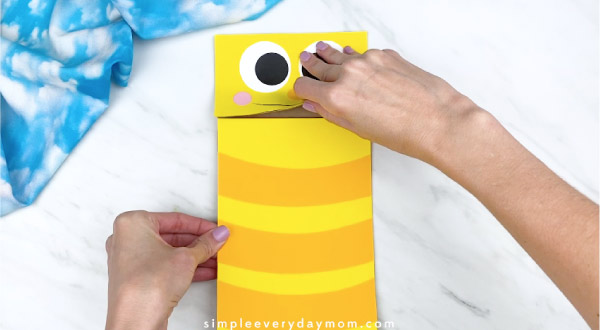
Make the butterfly’s striped body by gluing on the light orange stripes onto the yellow body piece. Once they’re glued on, cut off the excess paper with the scissors. If you need to simplify this craft you can always skip this step or let the kids use markers to decorate instead of adding the paper.

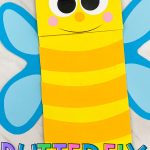
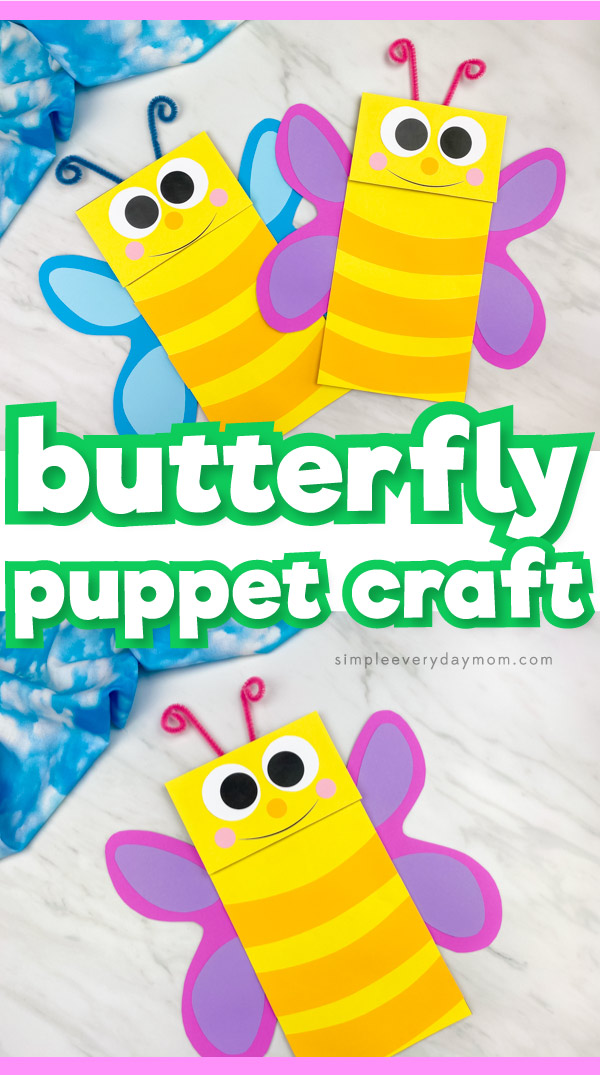
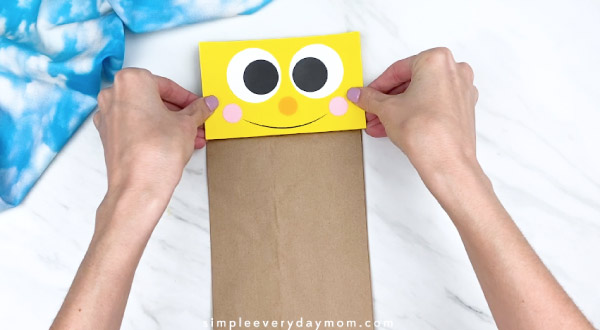
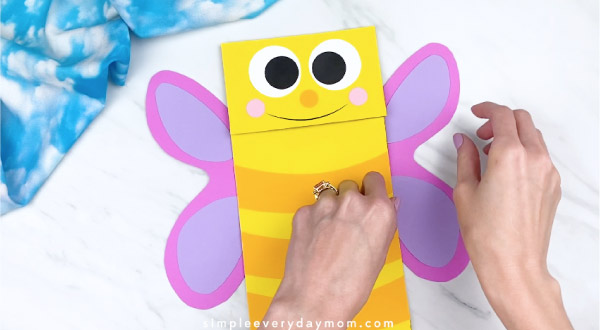
Glue the completed butterfly face onto the top flap of the brown paper bag.
Place the striped body on the bottom part of the paper bag and glue in place.
Make the butterfly’s wings by gluing the paper accents on the inside of the wings. You can get extra fancy and glue on rhinestones, sequins, glitter or stickers too!
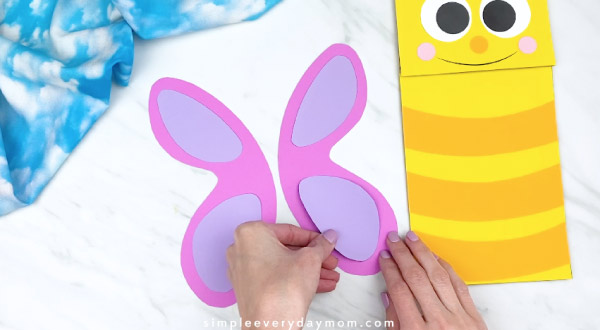
Take the completed butterfly wings and glue them to the inside of the paper bag. You can also glue it to the back of the paper bag, but we think the inside looks better when you’re using it as a puppet.
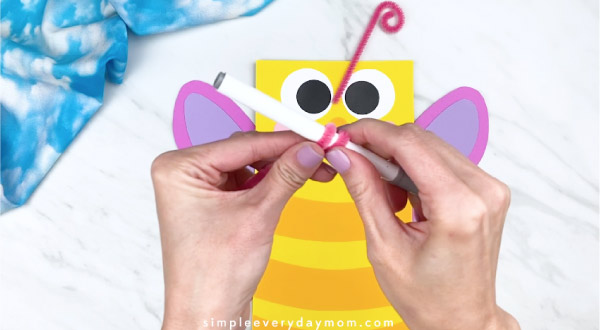
Take your pipe cleaner and cut it in half. Wrap one end of each pipe cleaner around a marker to make the butterfly’s antennae.
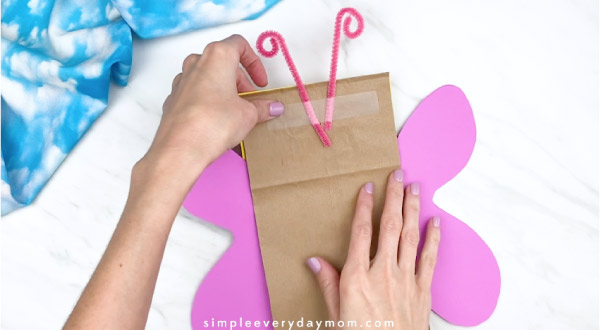
Once you’ve made both antennae, flip the paper bag over and tape the antennae in place. If you don’t have tape or don’t want to use it, you can also use a glue stick. It’ll just take longer to dry and be ready for kids to use.
Now your kids have a colorful and fun butterfly that’s perfect for spring!
Make this easy kids’ craft for when you have a bug study unit or when learning all about butterflies!
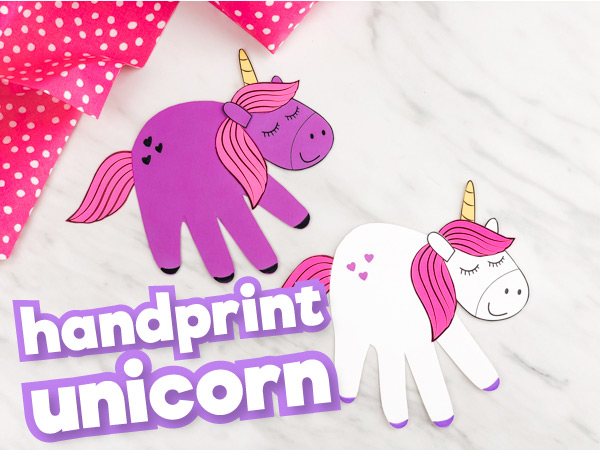
If your kids enjoyed this craft, we’re betting they’ll also love this handprint butterfly craft.
Don’t forget to enter your email in the form at the end of this page to get your free printable template!
More Fun Insect Activities


The Very Quiet Cricket– Everyone loves Eric Carle and this book is just as good as all his others! In it, a cricket is trying to discover how to make a sound, but when he rubs his legs together nothing happens. Follow him on his journey to find his very own sound! Kids love the ending where he and your child can hear the chirping!
Bugs A to Z is a great introductory insect book for kids. It’s great for kids to browse through and look at pictures and to find a short snippet about each bug.
Ten Little Ladybugs – This cute book is not only fun to read, but also fun to touch! Kids will want to read this book day after day and it helps them learn to count.
More Insect Ideas
- Popsicle Stick Dragonfly Craft
- How To Throw A Bug Birthday Party
- Paper Plate Bee Craft
- Ladybug Headband Craft
Share With Us
Did you make this activity with your kids or students? We’d love to feature them on our social media!
For a chance to have your child’s project featured, simply snap a picture of the completed project and post it to our Facebook page, email it to us directly by clicking here, or use #simpleeverydaymom on your social media!
More Ideas For Kids
Paper Bag Butterfly Craft
Video
Equipment
- .25″ circle punch (optional)
- Scissors
Materials
- Brown paper bag
- Colored card stock or construction paper
- White card stock
- Colorful pipe cleaners
- Glue stick
- Tape optional
- Markers optional
- Butterfly craft template download form located at the end of this page
Instructions
- Download the butterfly template, print and cut out the pieces.
- Glue the eyes onto the face piece.
- Use the circle punch to punch out a nose and two cheeks. Glue them on the face piece.
- Take the stripes and glue them onto the butterfly’s body. Use scissors to trim off the excess paper.
- Glue the completed butterfly face to the flap part of the brown paper bag.
- Glue the body to the long portion of the paper bag.
- Decorate the wings with the accent paper and any other embellishments you’d like.
- Glue the completed wings to the inside of the paper bag, on each side.
- Cut the pipe cleaner in half and wrap one end around it to make the butterfly’s antennae. Repeat for the other side.
- Flip the paper bag over and tape the antenna to the top of the butterfly’s head.
Did you make this?
Don’t forget to leave a comment below and make sure to follow on Pinterest, Facebook and TikTok for more!
Free Butterfly Body Template

Meet Sam
Sam is the crafter and founder of Simple Everyday Mom. She has been featured in Oprah Mag, Good Housekeeping, The Spruce Crafts, Country Living, The Bump, and more.


I can’t decide which is the best.
Haha, thank you ☺️
Esta padrisimas la actividad muy llamativa
Thanks!
i love this
Thank you!! Glad you like it!
Thanks for all the awesome post and freebies
You’re very welcome!
You make lovely things for children. I collect some of them to make it with our grandchild.
Eight years ago we had a creativity group for children. We did it for children in our village for over 12 years. I live in Holland!
Wow, that sounds amazing! I’d love to have something like that in our area. Thanks so much for stopping by my site 🙂
this looks so fun. cant wait to try
Thanks; I hope it is 🙂