Paper Plate Frankenstein Craft
Make this simple paper plate Frankenstein craft with the kids this Halloween season!
Print
Pin
Video
Materials
- Paper plates
- Green paint
- Paintbrush
- Colored cardstock or construction paper
- Glue stick
- Scissors
- Black marker
- Frankenstein craft template
Instructions
- Download the Frankenstein craft template, print, and cut out the pieces you'll be using.
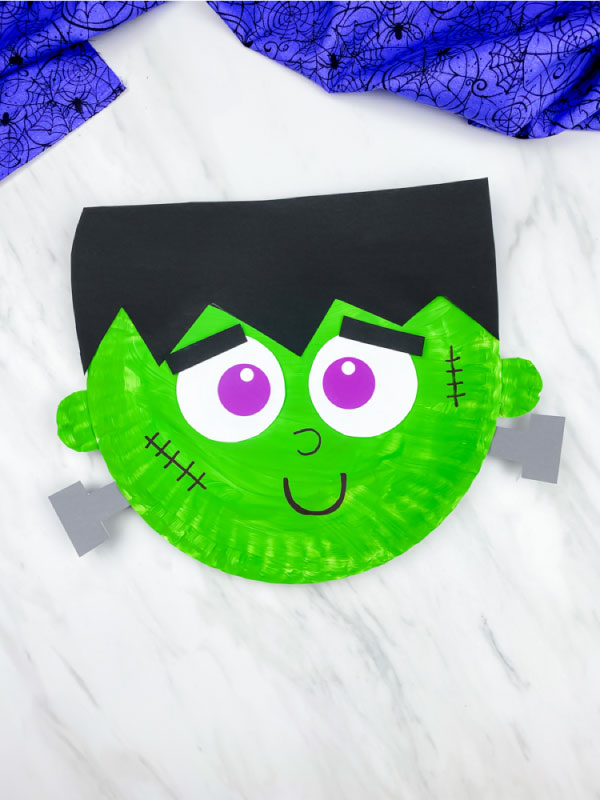
- Paint the paper plate with a thin coat of green paint and let dry completely. Once the paper plate is dry, cut off a few inches from the top of the paper plate. Save this leftover piece to cut the ears out of later.
- Take Frankenstein’s hair and glue it to the side where you cut off the paper plate.
- Glue the eyes just below the hairline, in the middle of the paper plate.
- Use the black marker to draw on Frankenstein’s nose and mouth. Also, draw on a few stitches around the open space of his face.
- Glue the eyebrows on top of each eye.
- Trace the ear template on the paper plate you cut off in Step 2 or on colored cardstock.
- Glue Frankenstein’s ear just below his hairline on each side of the plate.
- For this example, we cut out his ear from the part of the paper plate we cut off in step 2, but you can also use colored cardstock.
- Position the bolts just below Frankenstein’s ears and glue them in place.