Paper Plate Witch House Craft
Turn a paper plate into a witch house craft with your kids. This Paper Plate Witch House Craft is a fun Halloween themed project they'll love creating.
Print
Pin
Video
Materials
- Colored cardstock or construction paper
- Scissors
- Glue
- Paper Plate
- Paint
- Paintbrush
- Witch House Template
Instructions
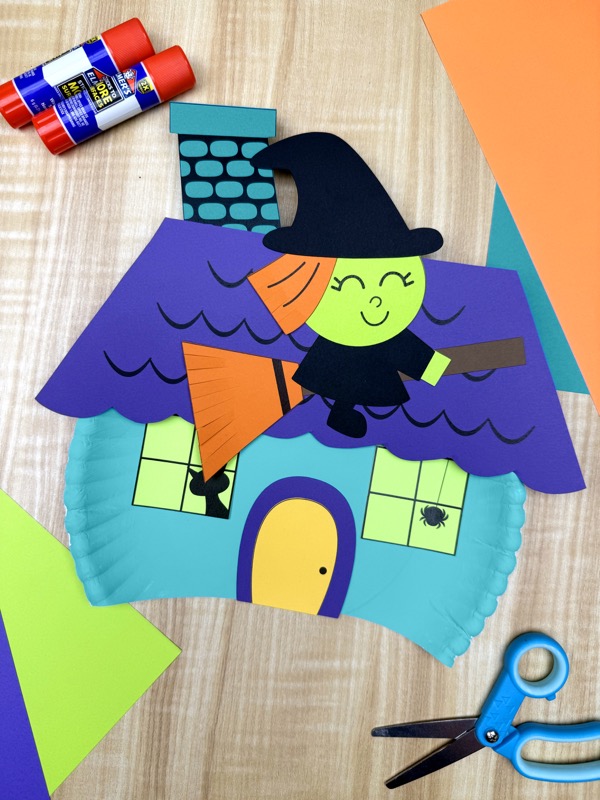
- Download the template, print it, and cut out the pieces you need.
- Start by painting the paper plate for the haunted house base. Alternatively, you can use a party plate and skip this step.
- Once dry, trace the house outline on the plate and cut it out.
- Position the paper plate with the cut side down and glue the larger door in the center, then layer the smaller door on top.
- Add the windows with silhouettes on each side of the door and glue in place.
- Cut a couple of small slits at the top of the plate to help it flatten.
- Glue the roof on top of the paper plate, then attach the chimney on the side.
- Optionally, cut small pieces into the bottom of the witch’s hair piece to give it dimension.
- Glue the hair on the left side of the witch's face.
- Place the hat on her head and glue it down.
- Glue the dress to the back and bottom of the head.
- Now grab the leg and glue it to the back and middle of the dress.
- Position the hand behind the dress sleeve and glue in place.
- Cut snips into the broom piece then glue it to the broomstick to finish the broom.
- Finish up the witch by gluing the broomstick to the back of the witch, so it looks like she's riding it.
- Finally, paste the witch onto the roof of the paper plate.