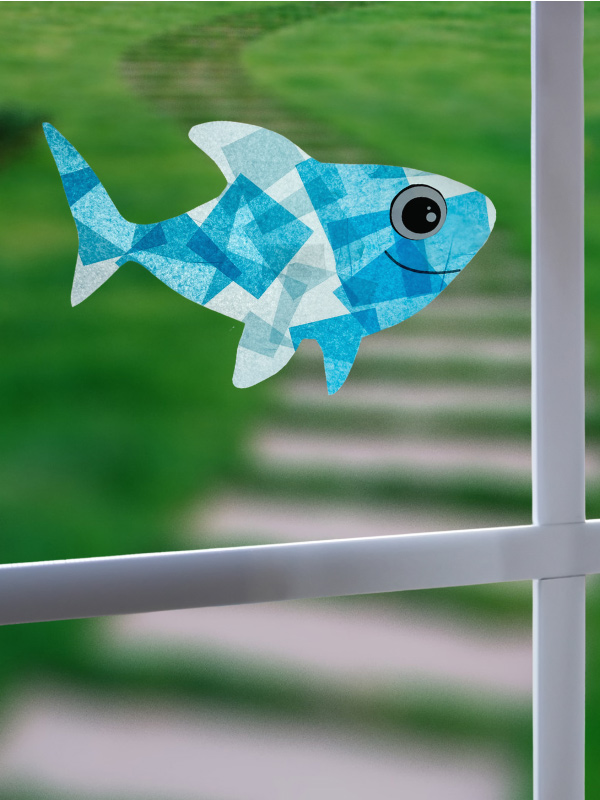
Shark Suncatcher Craft For Kids
Looking for a fun summer craft for the kids? Why not try making this shark suncatcher craft! All you need is some tissue paper and contact paper, and you can let the kids loose to create their own unique designs
Print
Pin
Video
Materials
- Contact paper
- Blue tissue paper
- White cardstock or printer paper
- Glue dot
- Black marker
- Double sided tape
- Shark template
Instructions
- Download the shark template, print, and cut out the pieces you need.
- Begin by cutting out two pieces of contact paper that are larger than the shark’s body.
- Place the cut out shark template on the tabletop, then place a piece of contact paper above it, with the sticky side facing up. We recommend taping the four corners of the contact paper to the table so your child doesn't accidentally touch it with their hands and pull it up.
- Use tissue squares to cover the shark outline in a thin 1-2 layer of tissue paper. The reason you want the tissue paper thin is so it sticks to the other side of the contact paper and stays sealed.
- Parents: Peel off the other piece of contact paper and place it sticky side down onto the tissue paper. Smooth out any wrinkles.
- Take the shark body and trace it on top of the sealed tissue paper. Cut the shark shape out.
- Secure the shark's eye near the end of the head with a piece of double-sided tape or a permanent glue dot.
- Use a permanent marker to draw a smile below the eye.
- Finish up by taping it to a window or sliding glass door with double-sided tape.