Toilet Paper Roll Baby Yoda Craft
Learn how to make this cute and easy toilet paper roll Baby Yoda! It's a simple kids' craft project.
Print
Pin
Video
Materials
- Toilet paper roll core
- Colored cardstock in green, brown and light brown
- White out pen optional
- Glue stick
- Brown marker
- Baby Yoda paper roll template download form located at the end of this post, just above the comments
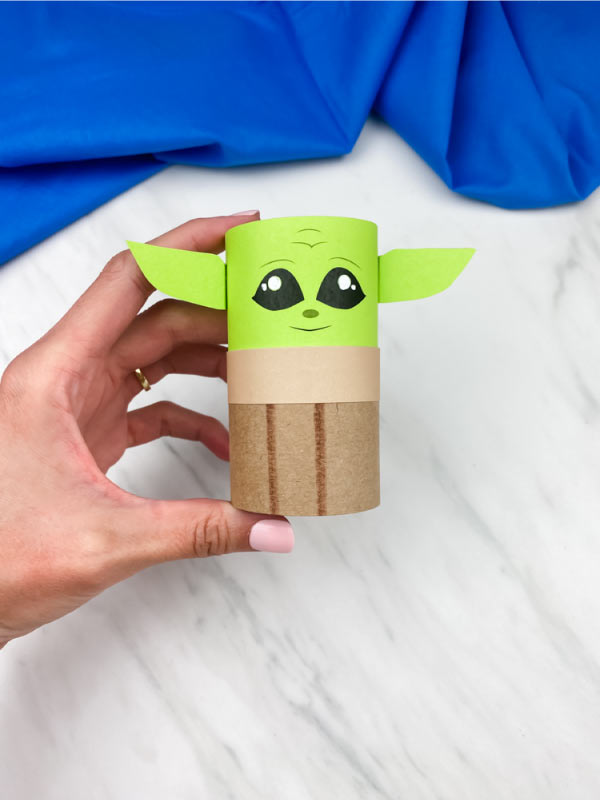
Instructions
- Download the free Yoda template, print and cut out the pieces.
- If you want white on the eyes, use the white-out pen to color in the two circles in the eye. Let dry before continuing.
- Use the brown marker to draw two straight lines in the middle of Yoda's jacket. Glue the coat to Yoda's main body piece, about .5" below his mouth.
- Glue the light brown part of Yoda's coat on top of the coat, below his mouth. Place the completed Baby Yoda paper on the toilet roll and use a pencil to measure where it ends.
- Use scissors to trim the toilet paper roll down to the same size as the printable.
- Add glue to the back of the completed Yoda body and wrap it around the toilet paper roll. Hold for a few seconds or add paperclips to each end until the glue is completely dry.
- Fold the end of Yoda's ears to make a rectangle. Add the glue to this rectangle and place it on the side of Yoda's head, close to the top. Let dry and repeat on the other side for the opposite ear.