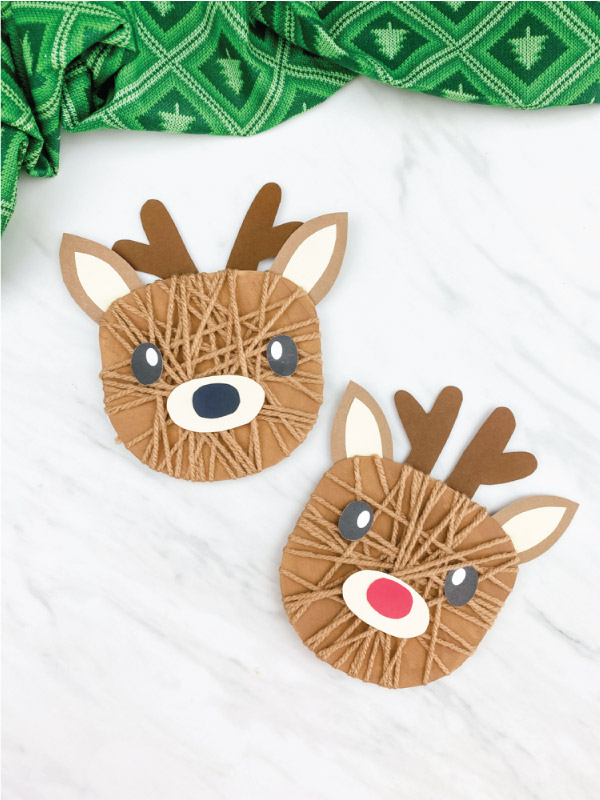
Yarn Wrapped Reindeer Craft
Learn how to make this easy yarn wrapped reindeer with the kids this Christmas! It's fun and great for fine motor practice!
Print
Pin
Video
Materials
- Thin cardboard from a cereal or tissue box
- Brown yarn
- Tape
- Scissors
- Glue
- Colored cardstock or construction paper
- Permanent glue dots optional, but recommended
- Giant 2" pom pom optional
- Paint optional
- Paintbrush
- Reindeer template
Instructions
- Download the reindeer template, print and cut out the pieces you need.
- Use the template to trace the reindeer head onto the thin cardboard. Use scissors to cut it out.
- Paint the cardboard in a thin coat of brown paint. Let dry completely before moving on. You can skip this step if you plan to wrap the entire piece of cardboard in yarn.
- Tape one end of your yarn onto the backside of the reindeer's head. Wrap the yarn around as many times as you'd like. When you're finished tape the end piece of the yarn to the back of the head. If there's no cardboard space to tape it to, just tie the end to another portion of the wrapped yarn.
- Glue the reindeer nose to the muzzle, then glue it to the lower portion of the wrapped reindeer head. We used glue dots to secure the nose/mouth area to the yarn because it's quick, easy, and there's no mess, but you can also use liquid glue. Just make sure to let the craft sit long enough for the glue to dry completely.
- Position the eyes above and on either side of the nose and glue in place.
- Finish the reindeer's ear by gluing the inner ears to the outers, then glue them to the top, backside of the head.
- Complete the reindeer by gluing the antlers to the top, back of the head, in between the ears.