Yarn Wrapped Reindeer Craft For Kids [Free Template]
All activities require adult supervision. By using this site, you agree to our terms of use. This post may contain affiliate links. As an Amazon Associate and a participant in other affiliate programs, I earn a commission on qualifying purchases. Read our disclosure policy.
Even if you’re a family that doesn’t do much crafting, Christmas changes everything!
You have more time home with the kids, everyone is feeling cheery, and you want to celebrate. That’s why we’re sharing this easy yarn wrapped reindeer craft.
It’s a simple reindeer craft for kids that’s not only fun but also works on fine motor skills! It’s great for the little ones who like to be busy doing something.
When your kids make this craft, they can paint, cut, glue and wrap their way to an adorable reindeer. Make it one of Santa’s helpers or make it the most famous reindeer of all – Rudolph!
Watch our quick video below to see how simple it is to make with your children!
Easy Reindeer Craft

Supplies
- Thin cardboard from a cereal or tissue box
- Brown yarn
- Tape
- Scissors
- Glue
- Colored cardstock or construction paper
- Permanent glue dots (optional, but recommended)
- Giant 2″ pom pom (optional)
- Paint (optional)
- Paintbrush
- Reindeer template (click the “click here to get your freebies” image at the end of the post)
Directions
Download the reindeer template, print and cut out the pieces you need.
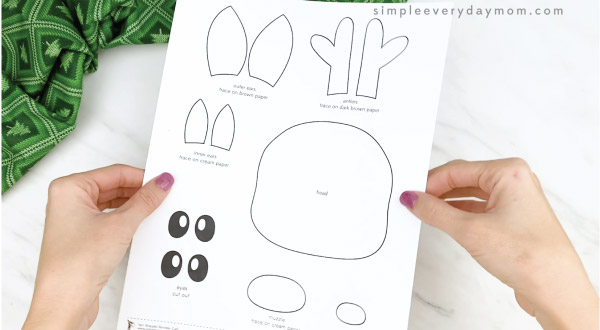
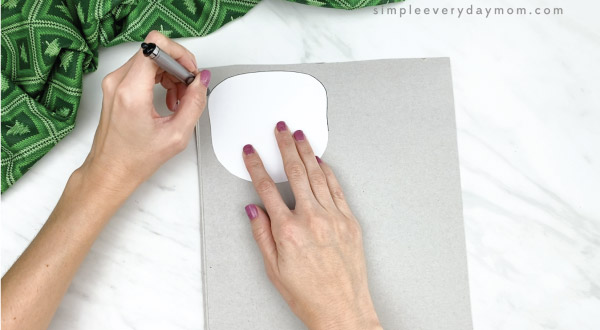
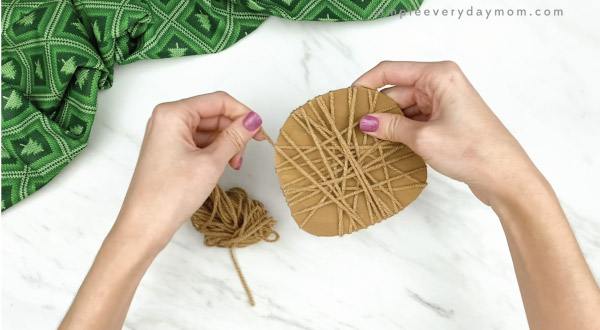
Use the template to trace the reindeer head onto the thin cardboard. Use scissors to cut it out.
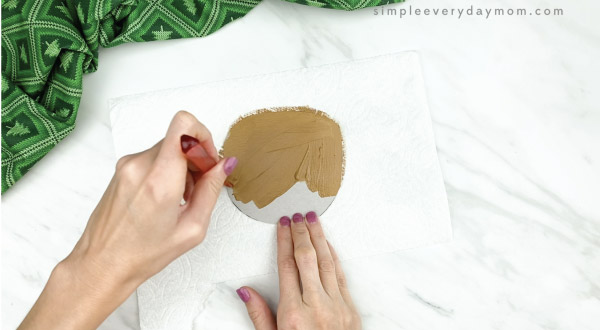
Paint the cardboard in a thin coat of brown paint. Let dry completely before moving on. You can skip this step if you plan to wrap the entire piece of cardboard in yarn.
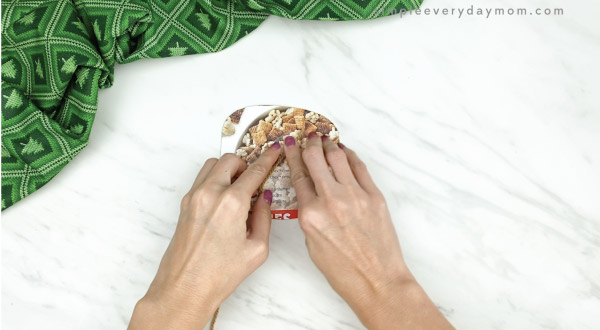
Tape one end of your yarn onto the backside of the reindeer’s head. Wrap the yarn around as many times as you’d like. When you’re finished tape the end piece of the yarn to the back of the head. If there’s no cardboard space to tape it to, just tie the end to another portion of the wrapped yarn.
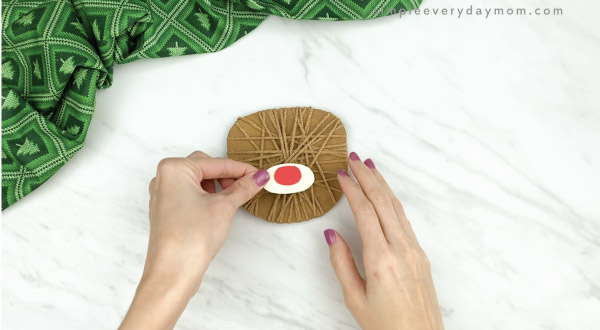
Glue the reindeer nose to the muzzle, then glue it to the lower portion of the wrapped reindeer head.
*We used glue dots to secure the pieces to the yarn because it’s quick, easy, and there’s no mess, but you can also use liquid glue. Just make sure to let the craft sit long enough for the glue to dry completely.*
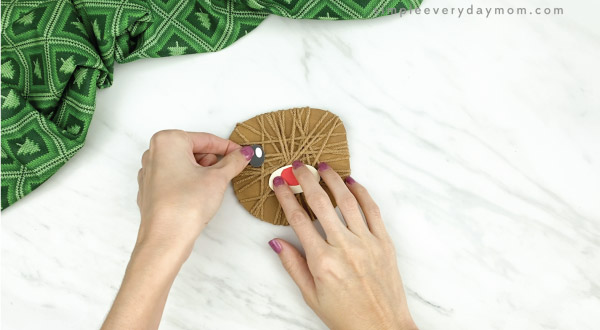
Position the eyes above and on either side of the nose and glue in place.
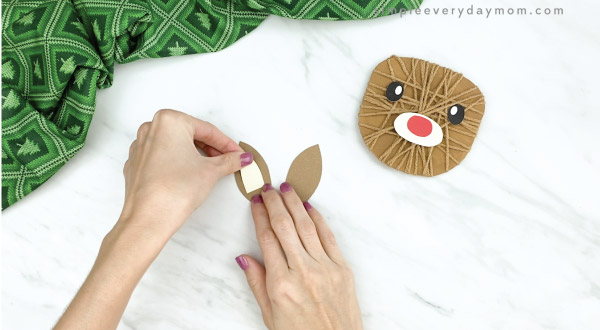
Finish the reindeer’s ear by gluing the inner ears to the outers, then glue them to the top, backside of the head.
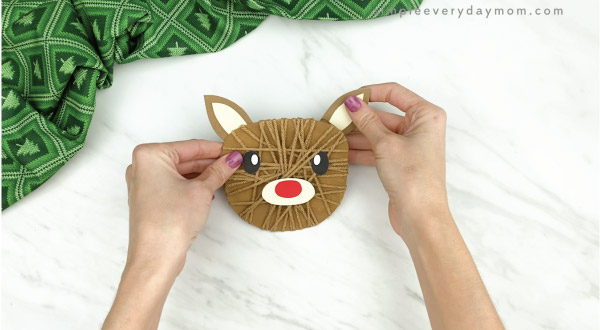
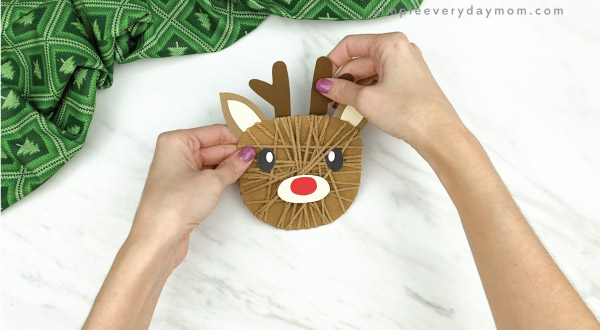
Complete the reindeer by gluing the antlers to the top, back of the head, in between the ears.
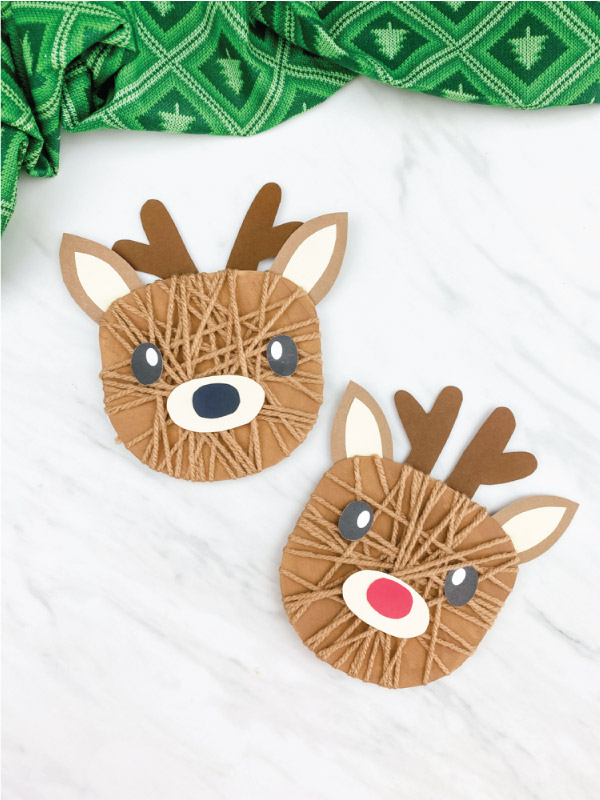
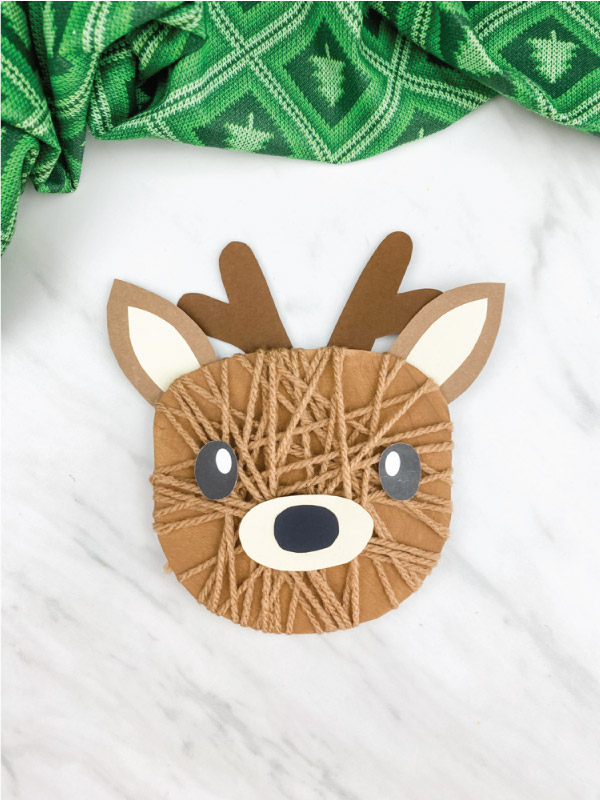
Isn’t this such an easy reindeer craft? You can make it for Christmas or just for a winter animal theme!
If you’re finding your child is having a difficult time wrapping the yarn around the head, you can always cut small slits along the outside of the head. These will catch the yarn so it’ll stay in place.
This is a fun activity you can make with preschoolers, pre-k, or kindergarten children.
We hope your child has a blast making their own cute little reindeer!
Share With Us
Did you make this project with your kids or students? We’d love to feature them on our social media!
For a chance to have your child’s project featured, simply snap a picture of the completed project and post it to our Facebook page, email it to us directly by clicking here, or use #simpleeverydaymom on your social media!
Fun Winter Crafts For Kids
Yarn Wrapped Reindeer Craft
Video
Materials
- Thin cardboard from a cereal or tissue box
- Brown yarn
- Tape
- Scissors
- Glue
- Colored cardstock or construction paper
- Permanent glue dots optional, but recommended
- Giant 2″ pom pom optional
- Paint optional
- Paintbrush
- Reindeer template
Instructions
- Download the reindeer template, print and cut out the pieces you need.
- Use the template to trace the reindeer head onto the thin cardboard. Use scissors to cut it out.
- Paint the cardboard in a thin coat of brown paint. Let dry completely before moving on. You can skip this step if you plan to wrap the entire piece of cardboard in yarn.
- Tape one end of your yarn onto the backside of the reindeer’s head. Wrap the yarn around as many times as you’d like. When you’re finished tape the end piece of the yarn to the back of the head. If there’s no cardboard space to tape it to, just tie the end to another portion of the wrapped yarn.
- Glue the reindeer nose to the muzzle, then glue it to the lower portion of the wrapped reindeer head. We used glue dots to secure the nose/mouth area to the yarn because it’s quick, easy, and there’s no mess, but you can also use liquid glue. Just make sure to let the craft sit long enough for the glue to dry completely.
- Position the eyes above and on either side of the nose and glue in place.
- Finish the reindeer’s ear by gluing the inner ears to the outers, then glue them to the top, backside of the head.
- Complete the reindeer by gluing the antlers to the top, back of the head, in between the ears.
Did you make this?
Don’t forget to leave a comment below and make sure to follow on Pinterest, Facebook and TikTok for more!
Free Yarn Wrapped Reindeer Craft Template


Meet Sam
Sam is the crafter and founder of Simple Everyday Mom. She has been featured in Oprah Mag, Good Housekeeping, The Spruce Crafts, Country Living, The Bump, and more.


I cannot find an unlock button on many of the templates.
The unlock button is on the image at the end of the post. If you’re already logged in, you won’t see the unlock button. Instead, you’ll see the blue image that says, “Click Here To Go To The Download Page”. Please let me know if you have any other questions ◡̈
Can you please send the template for me ?
Hi! To access the template, please follow these steps:
1. Locate Locked Image: Look for the “Click To Unlock!” button on the locked image. The image will be located under the subheading that starts with “Get Your….By Signing Up or Logging In”
2. Sign Up or Log In: Click the button to create a free SEM+ account or log in if you already have one.
3. Access Content: Once logged in, the image will be unlocked. Click it to go to the download page.
Zou ik het sjabloon kunnen ontvangen voor het garen rendier?
Of course! To get the template, you’ll need to have a free Grow account. If you are a free SEM+ Grow subscriber, please login (by clicking the “login or sign up free to unlock” button on the image) and it’ll unlock the download image. If not, you can sign up for free and it’ll also unlock.
Where can I get the template for the yarn reindeer
All you need to do is enter your email in the form at the end of this post to have the link sent to you ?
@Sam, Entering your email in the form at the end of the post isn’t working. I have been trying been doing that and it just circles me back through your website.
When you enter your email in the form after you’re an email subscriber (which you are), it redirects you to the download page. It may look similar, but it’s not the same page. If you scroll past the photo, all you need to do is click the blue “download now” button to open the file.
@Sam, Nevermind! It came! Thank you so much, I can’t wait to make these with my daughter.
Oh, good!
This is the cutest fine motor craft and so original.
Oh, thanks so much!