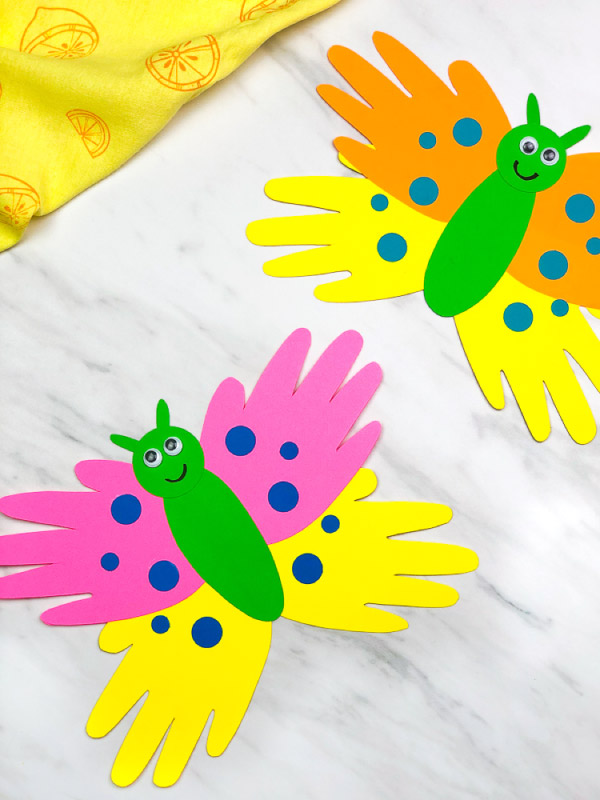
Are you looking for a fun and easy activity for the kids this spring or summer? If so, this butterfly craft is the perfect answer for you!
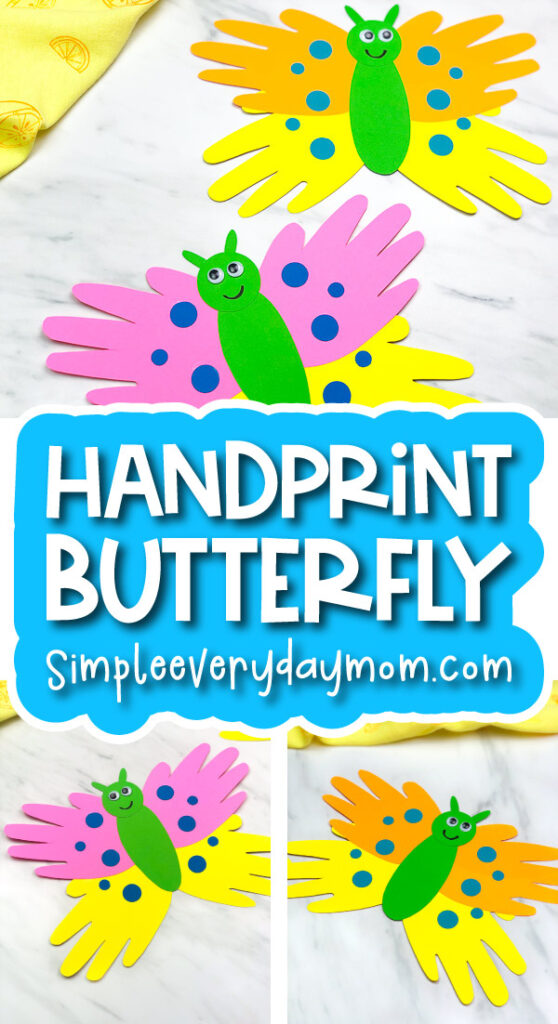
This handprint butterfly craft for kids makes a fun activity for spring, summer, or anytime your kids are learning about insects!
As you may know, around here we love handprint crafts for kids.
Using your child’s handprint turns a regular craft into a cherished possession for years to come. No mom wants to forget how little their child’s hands once were!
Learn how to make this easy butterfly handprint craft with your kids. Also, be sure to check out all of our butterfly crafts for kids!
Butterfly Handprint Craft Idea

This post may contain affiliate links. As an Amazon Associate and a participant in other affiliate programs, I earn a commission on qualifying purchases. Read our disclosure policy.
Supplies
- Colored cardstock (in your choice of colors)
- Googly eyes
- Black marker
- Scissors
- Glue stick
- Pencil
- 1.5″ circle punch (optional)
- .5″ circle punch (optional)
- .25″ circle punch (optional)
How To Make A Handprint Butterfly
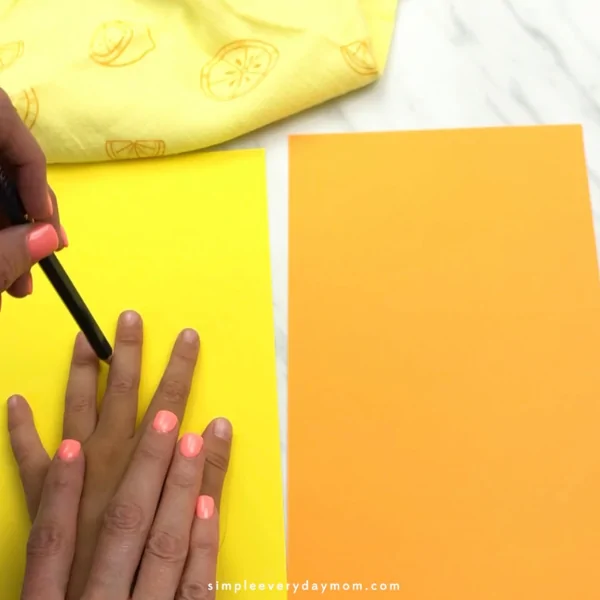
Trace your child’s hand onto 2 different colors of paper. Repeat again to end up with 4 handprints.

Use the 1.5″ circle punch or your scissors to cut out a circle from the green card stock. This will be your butterfly’s head.
Use your scissors to cut out a stretched out oval shape for the butterfly’s body. Make sure it’s long enough to extend to the bottom of the child’s handprints.
Cut out two small ovals from the green card stock that will become the butterfly’s antennae.
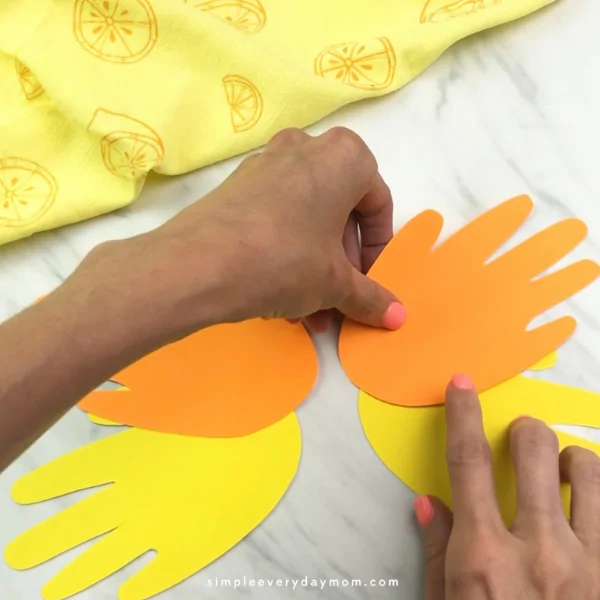
Position one colored handprint with the thumb facing up, the fingers to the side and rotated out slightly. Take the other colored handprint and position the hand the same way, except this time rotate the hand down.
Glue the hands together where they overlap. Repeat with the opposite side. These are the butterfly’s wings.
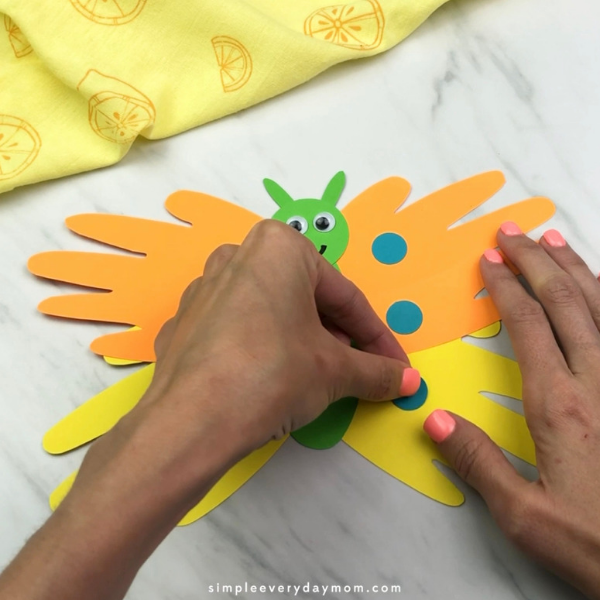
Take both sets of handprint wings with the bottoms of the hands facing in, slightly overlap them, and glue them together.

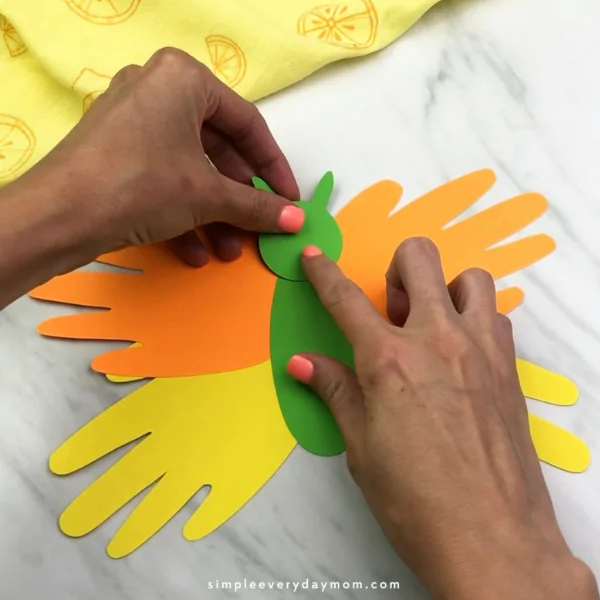
Assemble the butterfly body by gluing the antennae to the back of the circle head. Glue the completed head to the top of the green body.
Place the completed body in the middle of the handprint wings and glue it into place.

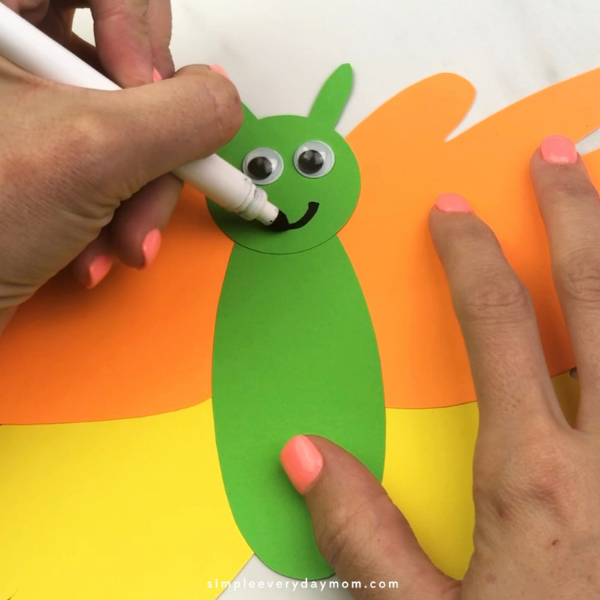
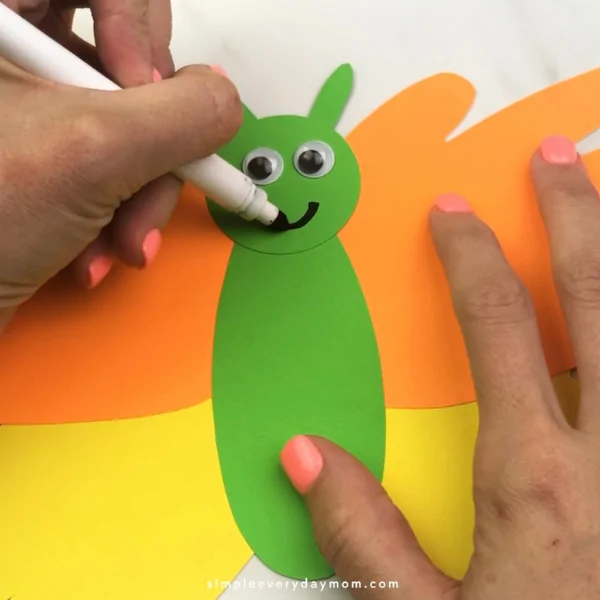
Glue the googly eyes to the head and use the marker to draw a smile beneath the eyes.
If you want to add more detail to the butterfly, use the smaller circle punches (or scissors) to cut out circles. Glue these circles to the wings.

Isn’t this such an easy spring craft for kids?! We love it!

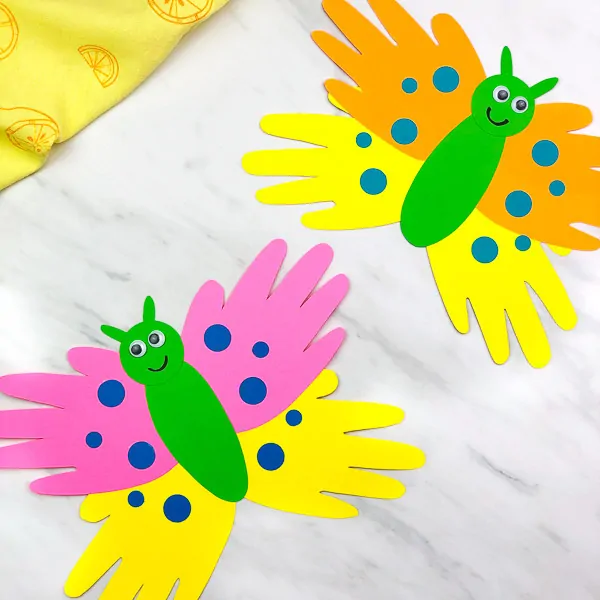
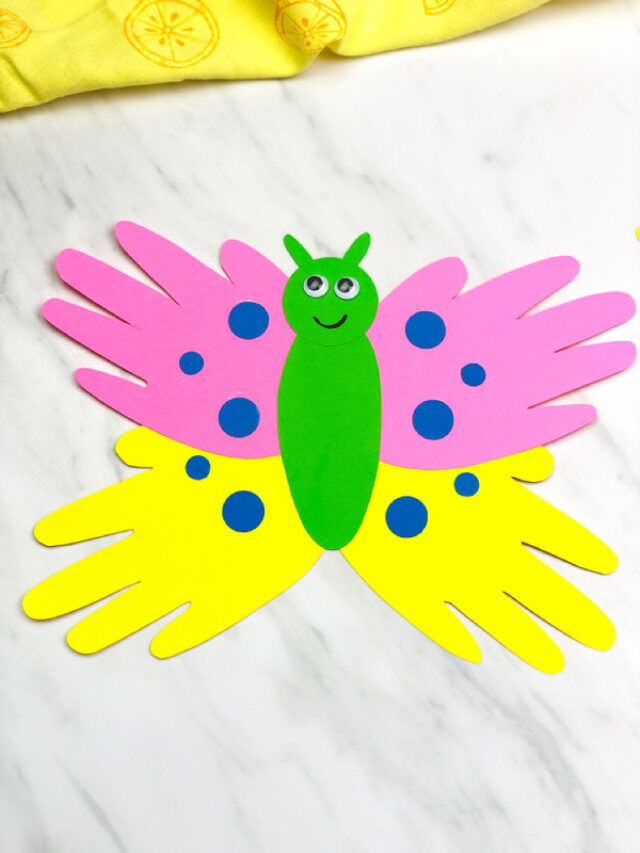
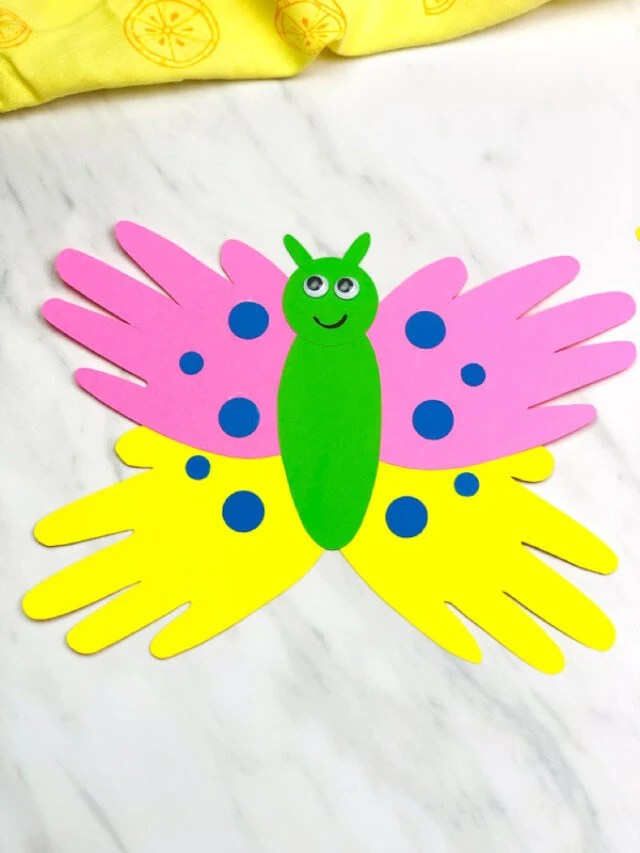
That’s all there is to it to make this cute handprint butterfly!
More Insect Ideas For Kids
Create a unit study in an instant with these fun ideas! Pick and choose the best ones that your child or students will love!
Whenever we introduce a new theme or if we want to go deeper into it, we always start with children’s books! They’re an easy way to fill time and help kids learn to read or develop their vocabulary. Below are some of our favorite insect books for kids!


The Very Quiet Cricket– Everyone loves Eric Carle and this book is just as good as all his others! In it, a cricket is trying to discover how to make a sound, but when he rubs his legs together nothing happens. Follow him on his journey to find his very own sound! Kids love the ending where he and your child can hear the chirping!
Bugs A to Z is a great introductory insect book for kids. It’s great for kids to browse through and look at pictures and to find a short snippet about each bug.
Ten Little Ladybugs – This cute book is not only fun to read, but also fun to touch! Kids will want to read this book day after day and it helps them learn to count.
More Insect Crafts
Craft time is a great way for kids to express their creativity and have some fun. It can also be a great learning experience. Through crafts, kids can learn about colors, shapes, and textures. They can also learn how to follow directions and work on their fine motor skills. In addition, crafting can be a great way for kids to socialize and share ideas.
If you’re looking for more insect crafts try out these crafts:
Paper Plate Bee Craft – This craft is so great for spring and lets your kiddo paint, cut, and glue!
Handprint Ladybug Craft – No messy paint needed, this craft is made just from paper!
Dragonfly Craft – Grab your popsicle sticks and our free template to make this colorful dragonfly!
Pom Pom Spiders – Spiders never looked so cute! This craft is simple and fun!
Insect Activities For Kids
If you’re looking for some fun and educational preschool bug activities, you’ve come to the right place! These printables are perfect for helping your child learn important skills like scissor skills, handwriting, and learning patterns. Plus, they’re also great for enhancing memory and recall. Simply print out the activity sheets and let your child have fun while they learn!
Looking for a fun way to get your kids screen-free and engaged in some number recognition? Then print out these bug color by numbers! With a range of different bugs to color in, this printable is sure to engage and entertain your little entomologists!
If you’re looking for a fun and engaging activity to do with your kids, a bug sensory bin is a perfect choice. This hands-on activity allows kids to explore. This sensory bin is the perfect opportunity for kids to get up close and personal with these fascinating little creatures.


Share With Us
Did you make this craft with your kids or students? We’d love to feature them on our social media!
For a chance to have your child’s craft featured, simply snap a picture of the completed project and post it to our Facebook page, email it to us directly by clicking here, or use #simpleeverydaymom on your social media!


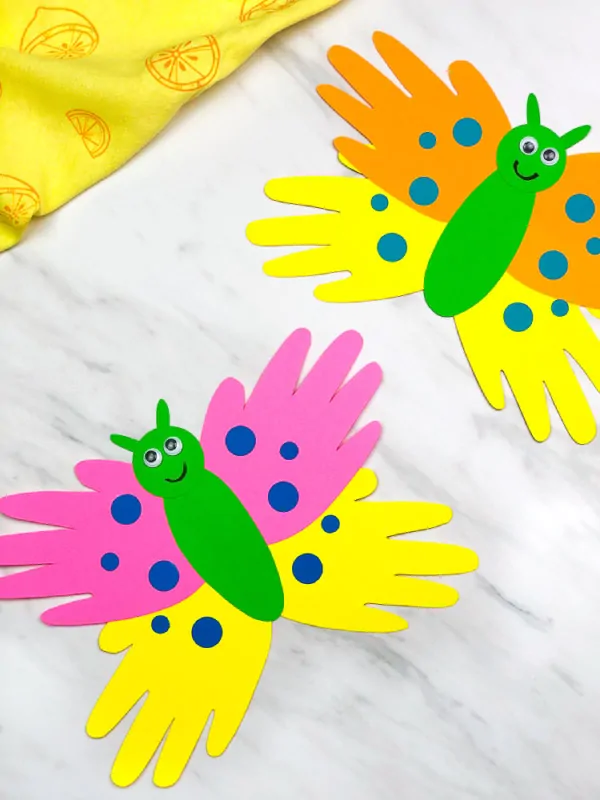
Handprint Butterfly Craft For Kids
Learn how to make this easy handprint butterfly craft for kids! Perfect for spring, summer or Mother's Day!
Materials
Tools
- Black marker
- Scissors
- Pencil
- 1.5" circle punch (optional)
- .5" circle punch (optional)
- .25" circle punch (optional)
Instructions
- Trace your child's hand onto 2 different colors of paper. Repeat again to end up with 4 handprints.
- Use the 1.5" circle punch or your scissors to cut out a circle from the green card stock. This will be your butterfly's head.
- Use your scissors to cut out a stretched out oval shape for the butterfly's body. Make sure it's long enough to extend to the bottom of the child's handprints.
- Cut out two small ovals from the green card stock that will become the butterfly's antennae.
- Position one colored handprint with the thumb facing up, the fingers to the side and rotated out slightly. Take the other colored handprint and position the hand the same way, except this time rotate the hand down. Glue the hands together where they overlap. Repeat with the opposite side. These are the butterfly's wings.
- Take both sets of handprint wings with the bottoms of the hands facing in, slightly overlap them and glue them together.
- Assemble the butterfly body by gluing the antennae to the back of the circle head. Glue the completed head to the top of the green body.
- Place the completed body in the middle of the handprint wings and glue into place.
- Glue the googly eyes to the head and use the marker to draw a smile beneath the eyes.
- If you want to add more detail to the butterfly, use the smaller circle punches (or scissors) to cut out circles. Glue these circles to the wings.


Sam is the crafter and founder of Simple Everyday Mom. She has been featured in Oprah Mag, Good Housekeeping, The Spruce Crafts, Country Living, The Bump and more. Read more.
Maryam
Wednesday 24th of April 2024
I need the template for handprint butterfly craft for kids . Thanks
Sam
Wednesday 24th of April 2024
Hi! This is one of the few crafts that doesn't have a template ◡̈
Janice Simms
Thursday 26th of May 2022
For some reason I cant get the template for the handprint butterfly,
som
Monday 9th of May 2022
Thank you very much.
Sam
Monday 9th of May 2022
You're welcome!
Neil
Wednesday 27th of January 2021
This was a great activity for kids!!
Sam T
Thursday 28th of January 2021
So glad to hear that! Thanks!
Serdar
Monday 25th of January 2021
Thanks
Sam T
Wednesday 27th of January 2021
You're welcome!