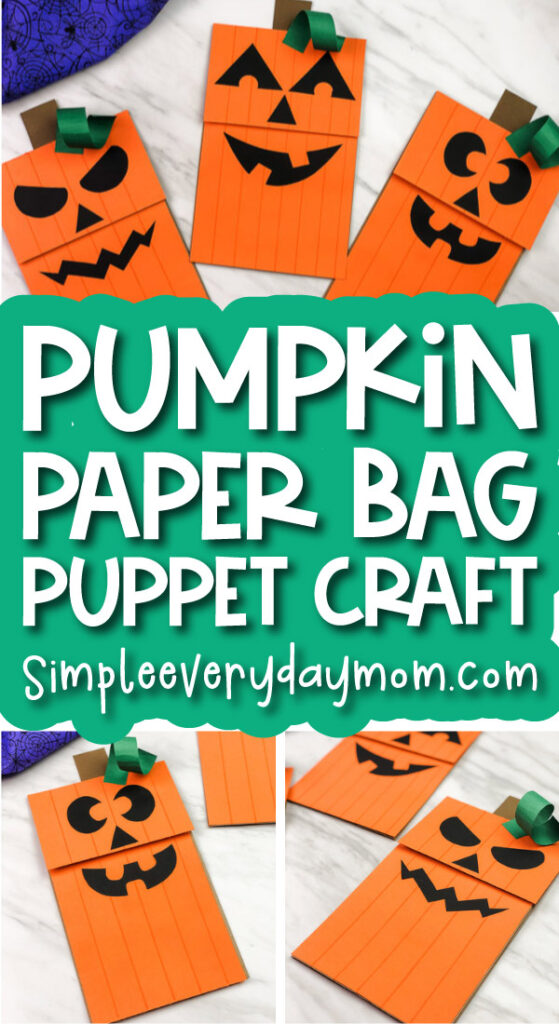
Halloween Paper Bag Puppets For Kids (Free Printable PDF Template)
All activities require adult supervision. By using this site, you agree to our terms of use. This post may contain affiliate links, sponsored links, and ads. As an Amazon Associate and participant in other affiliate programs, I earn from qualifying purchases.. Read our disclosure policy.
Does your family love Halloween and pumpkin carving? If so, they will love creating these homemade Halloween paper bag puppets.
They are a simple pumpkin craft for kids that will keep the kids entertained, working on creativity, and anxiously anticipating Halloween!
Moms (and teachers) will love that there are no messy pumpkin insides to deal with, and kids will love making their unique puppets.
Plus, this pumpkin craft can be modified to work with kids of almost any age and skill level! Make this Halloween craft for kids this October! Read below to see how to make this Halloween craft with your kids or students.
Jack O’Lantern Pumpkin Paper Bag Puppet
Supplies
- Brown paper bag
- Card stock (in black, orange, and green)
- Orange marker
- Scissors
- Glue stick
- Ruler
- Jack O’lantern face template (click the “click here to get your freebies” image at the end of the post)
Directions
Start by downloading the template and printing it out. Once the template is printed, gather the materials for this fun activity. Get those scissors ready, and let’s help the kids bring this Jack O’Lantern to life!
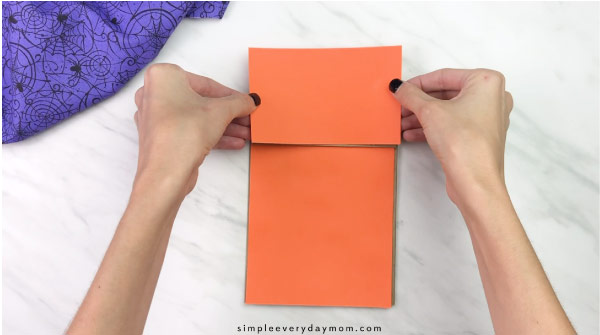
Begin by gluing the bottom part of the pumpkin piece underneath the paper bag flap and to the bottom of the bag.
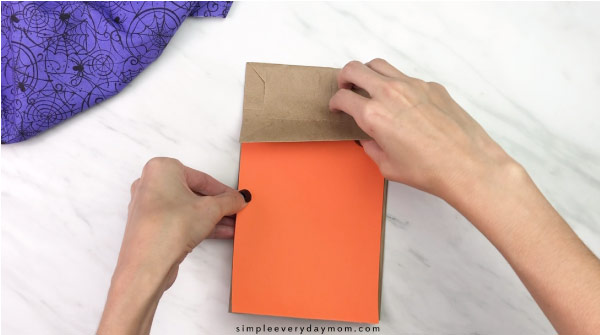
Next, glue the top part of the pumpkin piece onto the top of the paper bag flap.
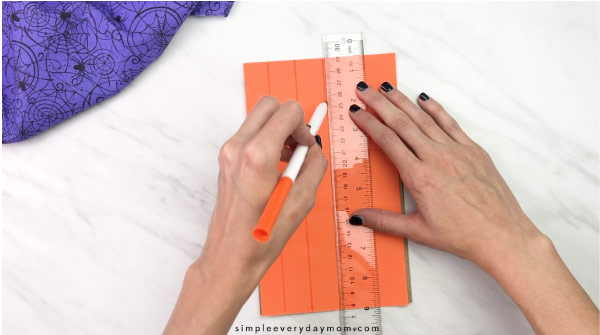
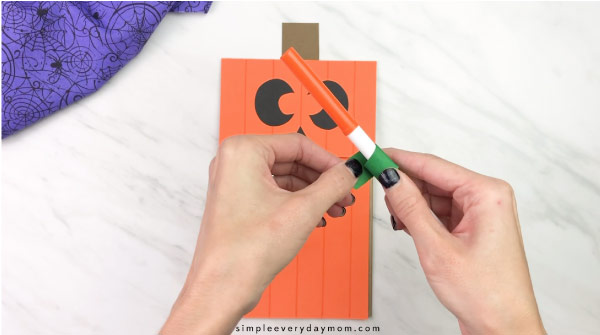
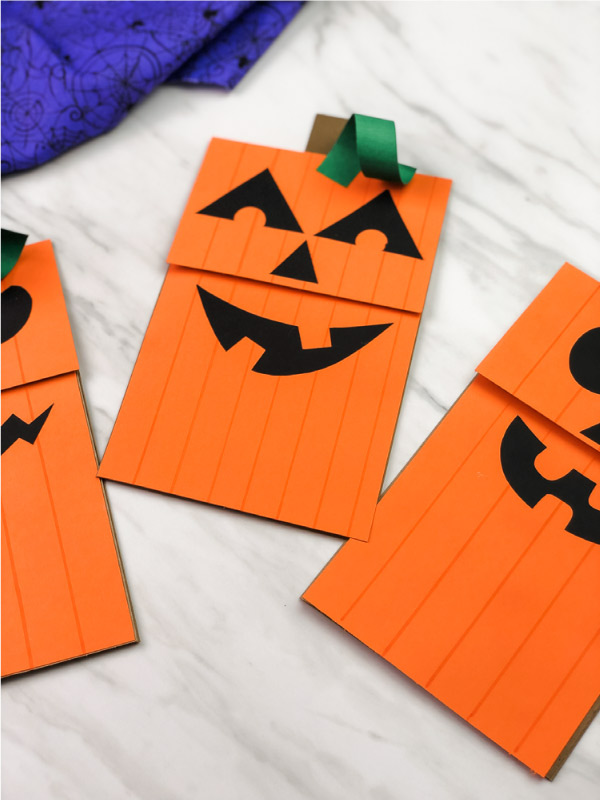
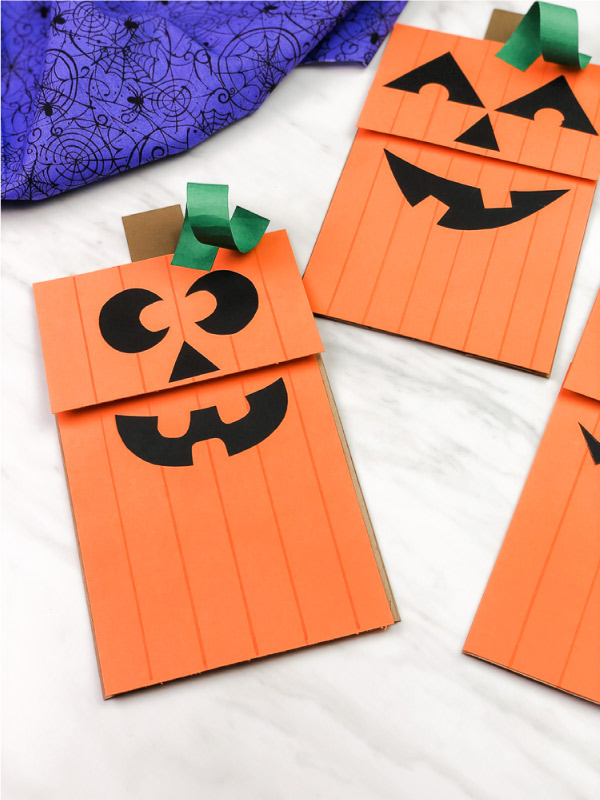
Optional: Using a ruler and the orange marker, draw straight lines down the length of the paper bag pumpkin puppet.
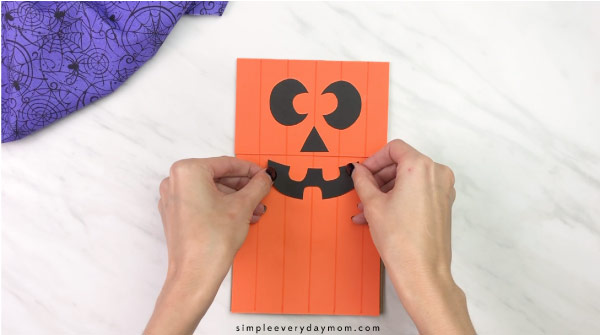
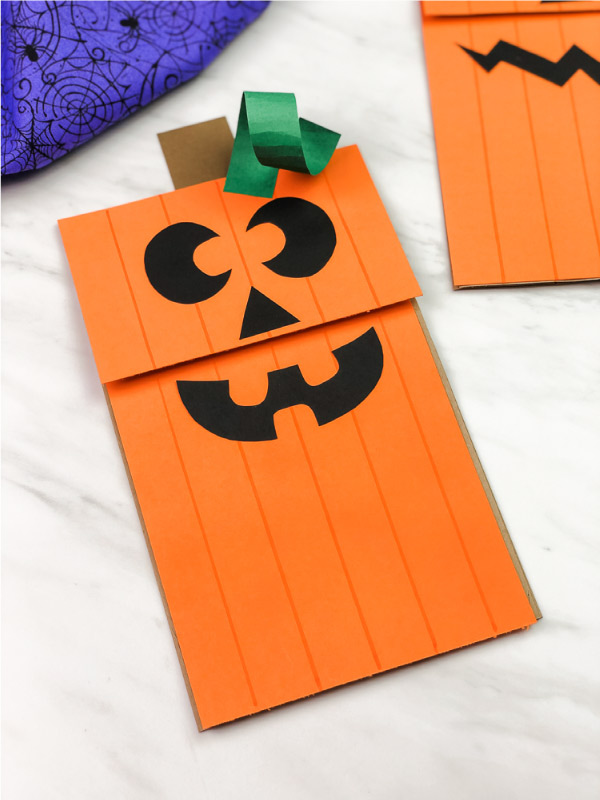
Now, glue the eye and the nose onto the orange flap.
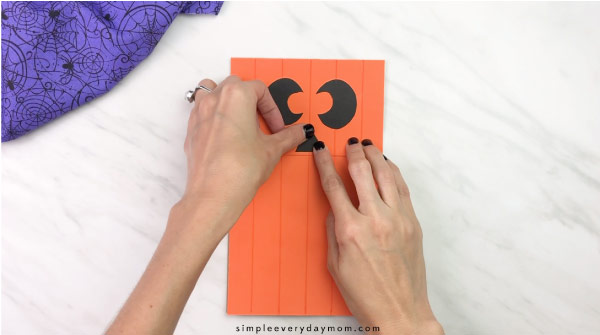
Glue the mouth onto the main “body” section, just below the flap.
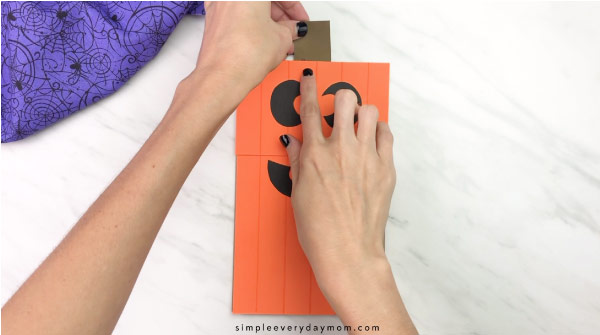
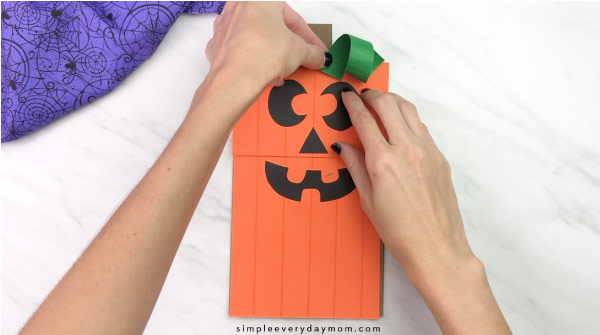
Take the stem and glue it behind the bag at the top of the head.
Next, take the leaf piece and wrap it around a pencil or your finger to curl it.
Finish off by gluing the leaf to the top of the paper bag flap near the stem.
Be sure to check out our Halloween crafts while you’re here! Your kids will love creating more fun DIYs like this one!
Halloween Ideas For Kids
If you’re looking for more Halloween ideas for young children, we’ve got you covered! Whether your little ones like to craft or read spooky stories, you’ll find plenty of inspiration in these activities below.

Preschool Halloween Books

Room On The Broom: This has to be one of our favorite Halloween books of all time! The story follows a witch and her cat as they happen upon some animals who help the witch. There’s danger, mystery, and friendship in this adorable children’s story.
5 Minute Spooky Stories: We love Disney’s 5-minute storybooks and this one is perfect for Halloween! See how all your favorite Disney characters celebrate this spooky holiday.
Ten Timid Ghosts: This is a fun countdown book about a witch who moves into a haunted house where 10 ghosts already live. The witch scares the ghosts out one by one until they devise a scheme to get her out of their house. This Halloween children’s book is good for kids who love rhyming stories!
Easy Halloween Crafts
Handprint Bat Craft For Kids – This adorable handprint craft is perfect for Halloween! You only need some construction paper, scissors, and a little glue to create these cute bats. The finished product is a great decoration for your home or classroom!
Spooky Fun Halloween Do A Dot
Paper Plate Pumpkin Craft – Get ready for some mess-free crafting with this paper plate pumpkin craft! These little pumpkins are perfect for the fall season, and your kids can customize them however they want.

Frankenstein Card Craft – Looking for craft ideas that also double as cute cards for loved ones? This Frankenstein card craft is perfect! Kids can practice their cutting and gluing skills while creating this spooky little character.
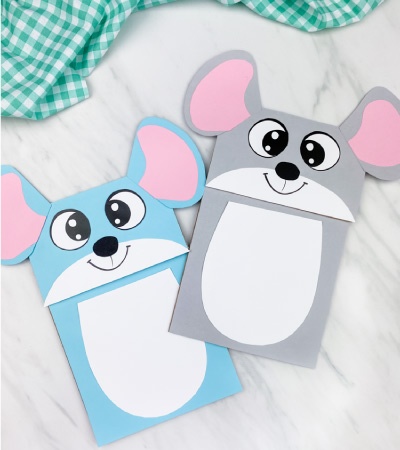
Zombie Cat Puppet Craft – Using a little bit of creativity and a paper bag, your children can create their very own zombie cat puppet. This craft is great for imaginative play and perfect for a Halloween-themed storytime! Download our free template to make crafting it even easier.


Printable Halloween Activities
Our witch activity sheets are a great way to entertain your kids on a rainy day. These free printables include a matching page, count and graph activity, and more! Who said learning can’t be fun on Halloween?
Try this Bat Shape Craft
Coloring is one of our favorite low-prep activities for kids. These free Halloween coloring pages are perfect for little ones to practice their fine motor skills and unleash their creativity. You can also use them as decorations around the house!

Download this Halloween matching game for kids and get ready for some spooky fun! This game is perfect for practicing memory skills and features all your favorite Halloween characters. There are a few different ways to play, so everyone can join in on the fun.
These Halloween tracing worksheets are a great way for kids to practice handwriting and fine motor skills. Plus, they’ll have fun tracing all the different shapes! Print them out and add them to your child’s Halloween activity binder or lesson plans.
Frankenstein Tissue Paper Craft
Share With Us
Did you make this activity with your kids or students? We’d love to feature them on our social media!
For a chance to have your child’s project featured, simply snap a picture of the completed project and post it to our Facebook page, email it to us directly by clicking here, or use #simpleeverydaymom on your social media!
More Halloween Ideas For Kids
Pumpkin Paper Bag Puppet For Halloween
Video
Equipment
- Scissors
- Ruler
Materials
- Brown paper bag
- Card stock in black, orange and green
- Orange marker
- Glue stick
- Jack O’lantern face template
Instructions
- Download the pumpkin template, print it, and cut out the pieces you need.
- Begin by gluing the bottom part of the pumpkin piece underneath the paper bag flap and to the bottom of the bag.
- Next, glue the top part of the pumpkin piece onto the top of the paper bag flap.
- Optional: Using a ruler and the orange marker, draw straight lines down the length of the paper bag pumpkin puppet.
- Now, glue the eye and the nose onto the orange flap.
- Glue the mouth onto the main "body" section, just below the flap.
- Take the stem and glue it behind the bag, at the top of the head.
- Next, take the leaf and wrap it around a pencil or your finger to curl it.
- Finish off by gluing the leaf to the top of the paper bag flap, near the stem.
Did you make this?
Don’t forget to leave a comment below and make sure to follow on Pinterest, Facebook and TikTok for more!
Free Pumpkin Paper Bag Puppet Craft Template


Meet Sam
Sam is the crafter and founder of Simple Everyday Mom. She has been featured in Oprah Mag, Good Housekeeping, The Spruce Crafts, Country Living, The Bump, and more.


Hi Sam,
Your Halloween Paper Bag Puppets are just adorable. I have featured them both on Full Plate Thursday, 763 in our Kids Corner. You have a great week and thanks so much for sharing with us, come back to see us soon!
Miz Helen
Oh wow, thanks a ton for the feature! So grateful to be part of Full Plate Thursday!
A great craft for primary students. I made many paper bag puppets when I was a teacher.
Thank you! Love that it brought back some classroom memories!
I wanted to get the free printable Halloween paper bag puppets for kids?
Of course! To get the template, you’ll need to have a free Grow account. If you are a free SEM+ Grow subscriber, please login (by clicking the “login or sign up free to unlock” button on the image) and it’ll unlock the download image. If not, you can sign up for free and it’ll also unlock. For more information on how this works, you can check out the details here.
I like it
Awesome! Thanks for the kind words!
You make this too difficult to download these activities. I struggle everytime to find the “blue download ” can we just click on the picture and get it??
Sorry about that! We’re slowly transitioning all download to this style. To get the template, you’ll need to have a free Grow account. If you are a free SEM+ Grow subscriber, please login (by clicking the “login or sign up free to unlock” button on the image at the end of the post) and it’ll unlock the download image at the end of the post. If not, you can sign up for free and it’ll also unlock. For more information on how this works, you can check out the details here.
I really like to try this with my kindergartners
Great! To get the printables, you’ll need to have a free Grow account. If you are a free SEM+ Grow subscriber, please login (by clicking the “login or sign up free to unlock” button on the image at the end of the post) and it’ll unlock the download image at the end of the post. If not, you can sign up for free and it’ll also unlock. For more information on how this works, you can check out the details here.