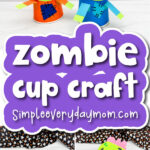
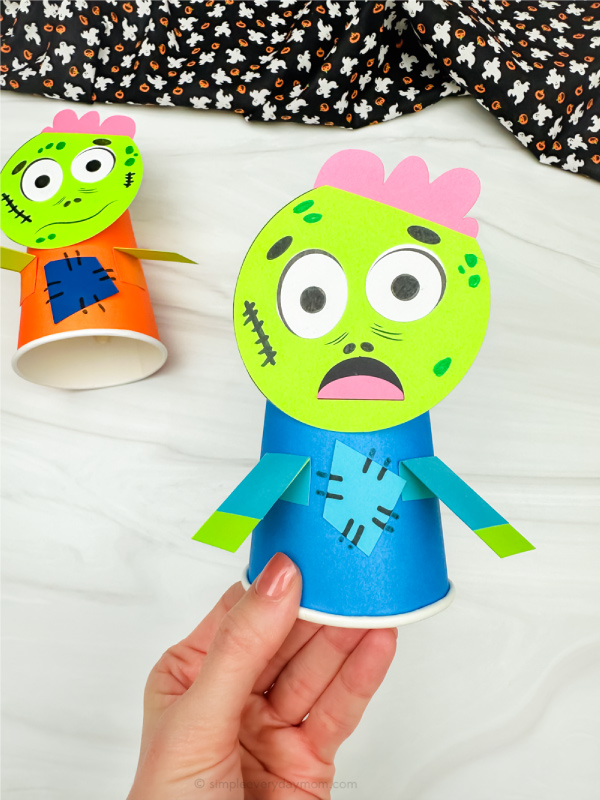
Zombie Paper Cup Craft For Kids [Free Template]
All activities require adult supervision. By using this site, you agree to our terms of use. This post may contain affiliate links. As an Amazon Associate and a participant in other affiliate programs, I earn a commission on qualifying purchases. Read our disclosure policy.
It’s a magical season where we decorate with things spooky and mysterious, but we like to keep it light-hearted and child-friendly.
That’s why this Halloween we have a fantastic craft idea that strikes just the right balance between silly and spooky – a zombie paper cup craft!
Kids can get into the Halloween spirit without any nightmares by transforming a simple paper cup into a zombie! Your kiddos will have an absolute blast making this little zombie that’s hungry for creativity and fun.
If your kids are hungry for more spooky fun, be sure to check out our collection of Halloween crafts for kids.
Make A Zombie From Paper Cup
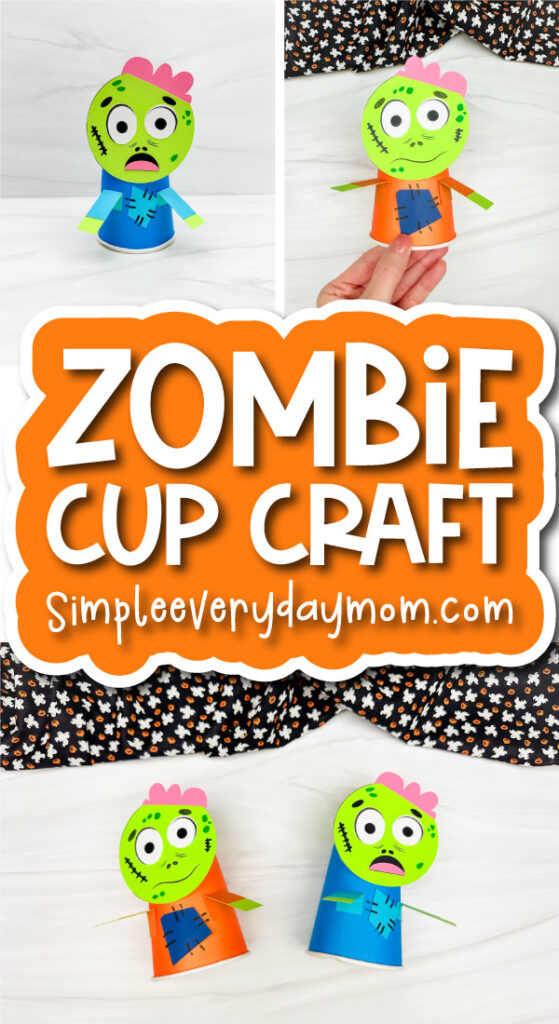
This craft encourages kids to refine their fine motor skills, boost creativity, and foster patience and attention to detail. Plus, once they’re done, their spooky creation can be proudly displayed as a festive Halloween decoration.
To get started on this spooktacular project, you’ll need a few basic supplies including a paper cup, colored paper, scissors, glue, and markers. We’ve got you covered with a free template that will make the crafting process a breeze!
Supplies
- Colored Paper Cup
- Colored cardstock or construction paper
- Scissors
- Glue
- Colored Marker
- Zombie template (enter your email in the form at the end of this post to have the link sent to you)
Directions
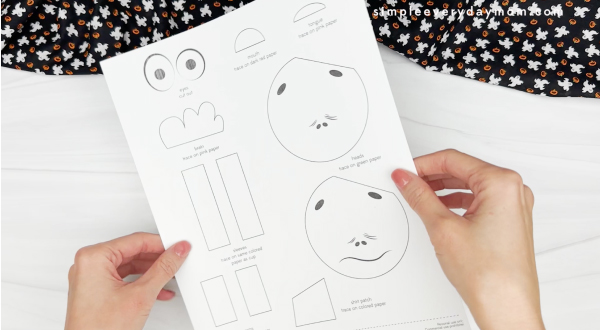
Download the zombie template, print, and cut out the pieces you need.
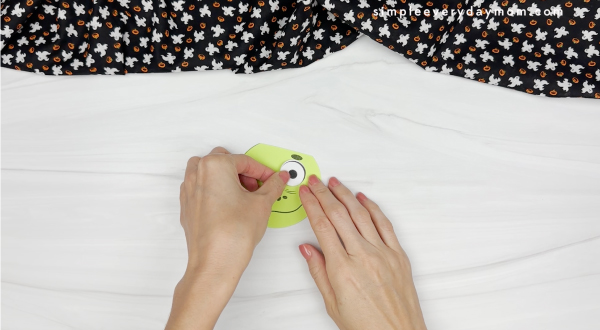
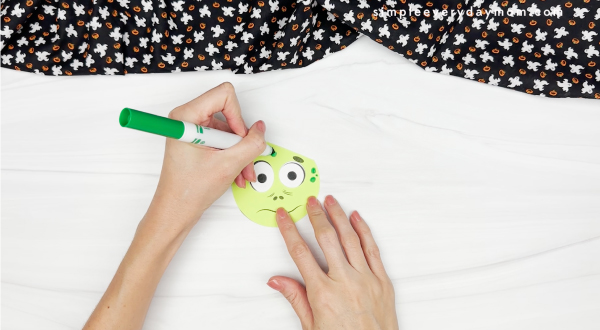
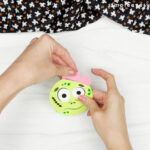
Start by gluing the eyes onto the head portion.
Use a dark green marker to draw on skin spots.
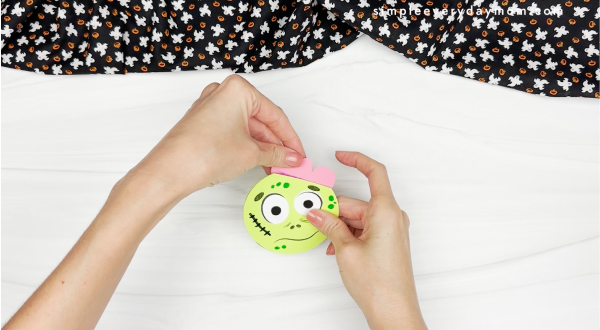
Using glue, position the brain somewhere at the top of the zombie’s head.
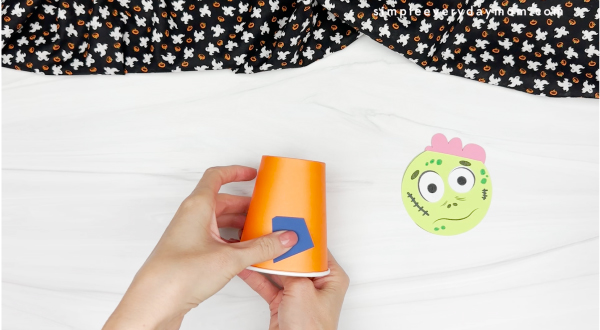
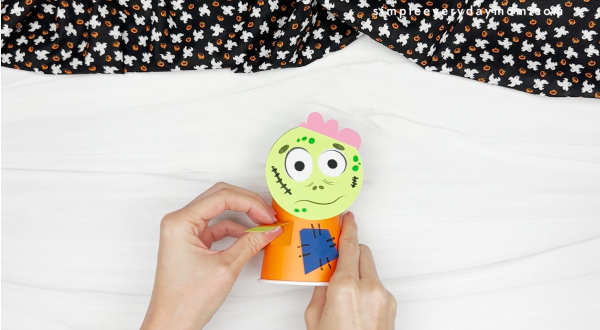
Place the paper cup upside down with its rim facing downward, then use glue to attach the shirt patch to the bottom (rim portion) of the cup and use a marker to draw stitch lines around it.
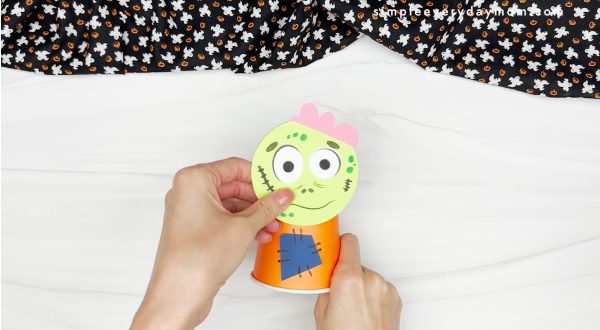
Next, attach the head to the upper and middle parts of the cup.
Assemble the arms by attaching them to the sleeves.
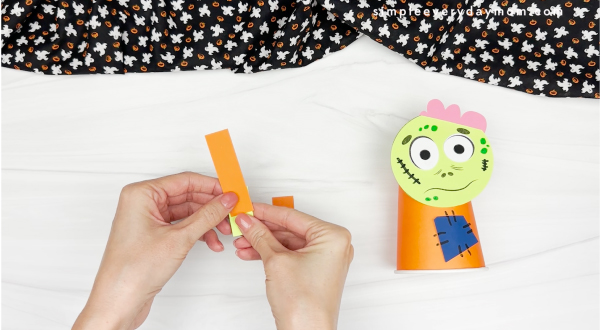
Finish up by gluing the arms to both sides of the cup.
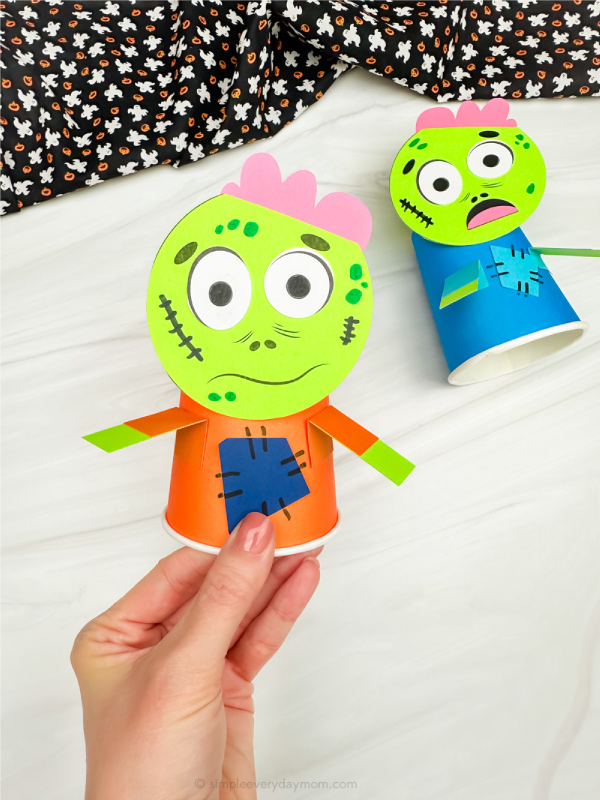
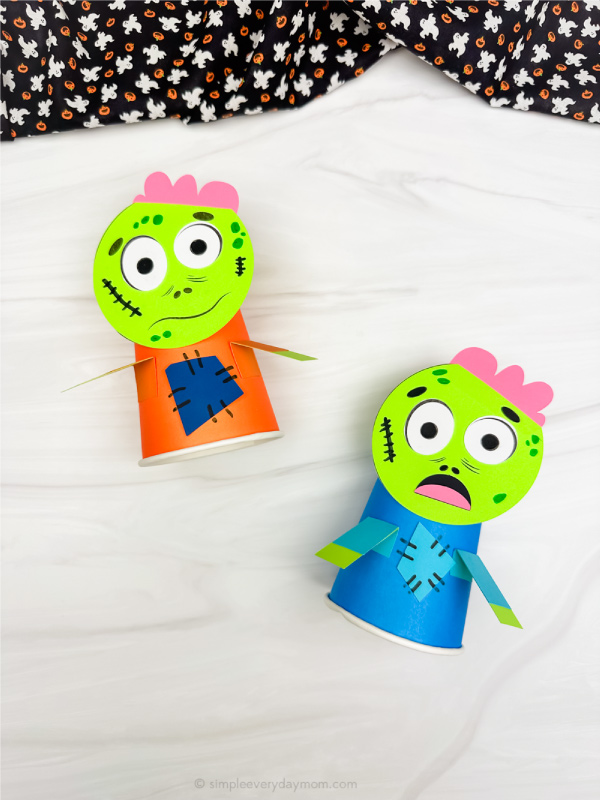
Don’t you find this zombie paper craft adorable? We think your kids will love creating it! Be sure to check out some of our other favorite paper cup crafts for your kiddos while you’re here!
Halloween Ideas for Kids
October is a fantastic month for kiddos to explore their creativity while learning new things. Whether you’re looking for creative crafts or engaging activities, we have lots of fun Halloween ideas for kids.
Keep reading below to discover a range of projects that will spark their curiosity, keep them entertained, and ensure a memorable Halloween season filled with fun and learning!


Halloween Books For Kids


Room On The Broom: This has to be one of our favorite Halloween books of all time! The story follows a witch and her cat as they happen upon some animals who help the witch. There’s danger, mystery, and friendship in this adorable children’s story.
5 Minute Spooky Stories: We love Disney’s 5-minute storybooks and this one is perfect for Halloween! See how all your favorite Disney characters celebrate this spooky holiday.
Ten Timid Ghosts: This is a fun countdown book about a witch who moves into a haunted house where 10 ghosts already live. The witch scares the ghosts out one by one until they devise a scheme to get her out of their house. This Halloween children’s book is good for kids who love rhyming stories!

Quick and Easy Halloween Crafts
Witch Gnome Craft – Brew up some crafting magic and bring this enchanting character to life! Kids will create a witch gnome that’s complete with a pointy hat and a cauldron conjuring up some holiday fun. It’ll be a spellbinding time this Halloween!
Frankenstein Headband Craft – Gather up your little mad scientists to create their own Frankenstein with this electrifying craft! Depending on your child’s skill level, there are versions for hands-on crafting or coloring in this headband. Get ready for a monstrous amount of fun!
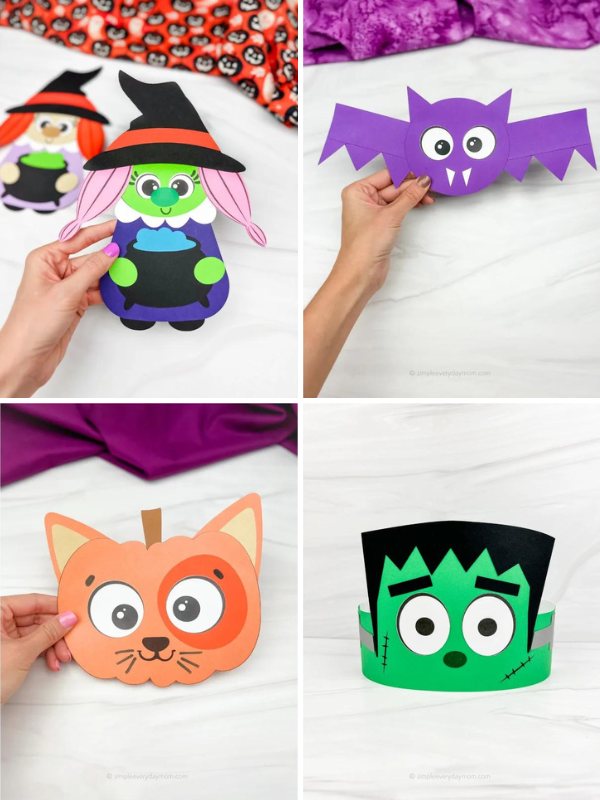
Bat Shape Craft – Use circles, rectangles, and triangles to create the spookiest, coolest bat decoration with the kids. It’s like a puzzle of shapes, and when they put them all together, they’ll have a bat to make your Halloween decorations extra special.
Kitty Pumpkin Craft – This paper pumpkin craft is the purr-fect solution for when your young kiddos want to decorate a pumpkin, too!
This one is ideal for little cat lovers and will be a hit this Halloween. You’ll need just a few supplies and our free template to create an adorable pumpkin decoration.
Fun Halloween Activities
To ignite your little one’s Halloween excitement, we’ve conjured up a free printable pack of candy corn worksheets designed just for preschoolers! These delightful printables are fantastic for enhancing handwriting, fine motor skills, and letter recognition.
This set includes 5 pages where kids will navigate a letter C maze, practice writing the letter C, trace lines, and recognize and dot the letter C.
This October, use these Halloween do a dot printables for a simple yet engaging activity that’s perfect for kids at home or school! There are 23 pages to explore, including Halloween themed dot coloring pages, number hunts, and letter challenges, there’s something for everyone.
They’re ideal for children in preschool, pre-k, or kindergarten to learn, have fun, and stay engaged this holiday season! These printables make learning a blast, so grab your dot markers and let the Halloween magic begin.
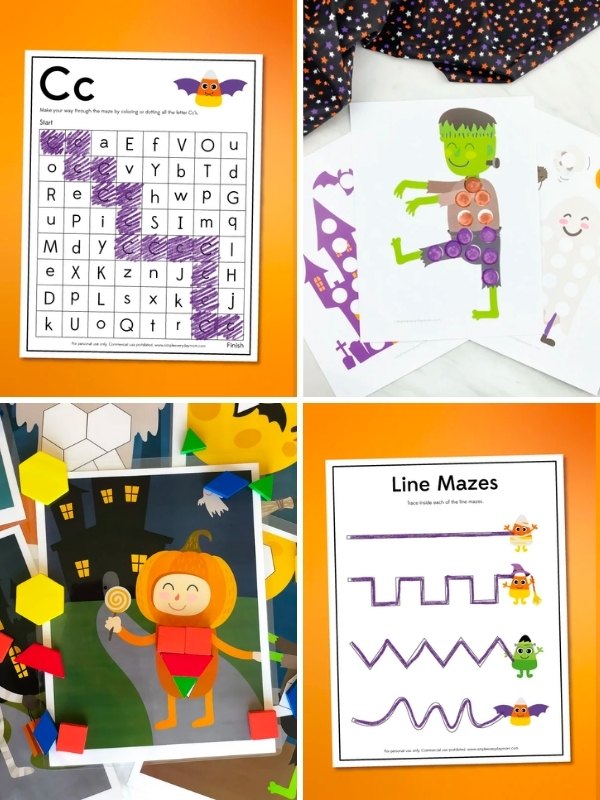
Introduce a dash of Halloween fun into your learning routine with our Halloween pattern block mats. This is a fantastic STEAM activity that requires no prep!
As kids place each block into the shape outlines, they’ll hone their fine motor skills while working on planning and problem-solving skills. These mats are a treat all October long by simply laminating them for endless spooktacular fun!
Gather your ghosts and ghouls for a ghostly good time with these G is for host printables. Education meets Halloween fun with these engaging worksheets that offer a variety of activities from letter recognition to beginning sounds.
Handwriting practice, fine motor skills, color words, and even number order up to 50. Find a mix of color by numbers, connect the dots, tracing, letter hunts, and more in a cute ghost theme.
Share With Us
Did you make this activity with your kids or students? We’d love to feature them on our social media!
For a chance to have your child’s project featured, simply snap a picture of the completed project and post it to our Facebook page, email it to us directly by clicking here, or use #simpleeverydaymom on your social media!
Zombie Paper Cup Craft For Kids
Video
Materials
- Colored Paper Cup
- Colored cardstock or construction paper
- Scissors
- Glue
- Colored Marker
- Zombie template
Instructions
- Download the zombie template, print, and cut out the pieces you need
- Start by gluing the eyes onto the head portion.

- Use a dark green marker to draw on skin spots.
- Using glue, position the brain somewhere at the top of the zombie’s head.
- Place the paper cup upside down with its rim facing downward, then use glue to attach the chest patch to the bottom (rim portion) of the cup and use a marker to draw a line around it.
- Next, attach the head to the upper and middle parts of the cup.
- Assemble the arms by attaching them to the sleeves.
- Finish up by gluing the arms to both sides of the cup.

Did you make this?
Don’t forget to leave a comment below and make sure to follow on Pinterest, Facebook and TikTok for more!
Zombie Paper Cup Template

Meet Sam
Sam is the crafter and founder of Simple Everyday Mom. She has been featured in Oprah Mag, Good Housekeeping, The Spruce Crafts, Country Living, The Bump, and more.


less preparation time, easy to follow instruction
Thanks a bunch for the kind words and the 5 stars! I’m glad it was quick to get going and clear to follow.
Amazing!
Thanks, Gemma! Hopefully you can make it for Halloween!