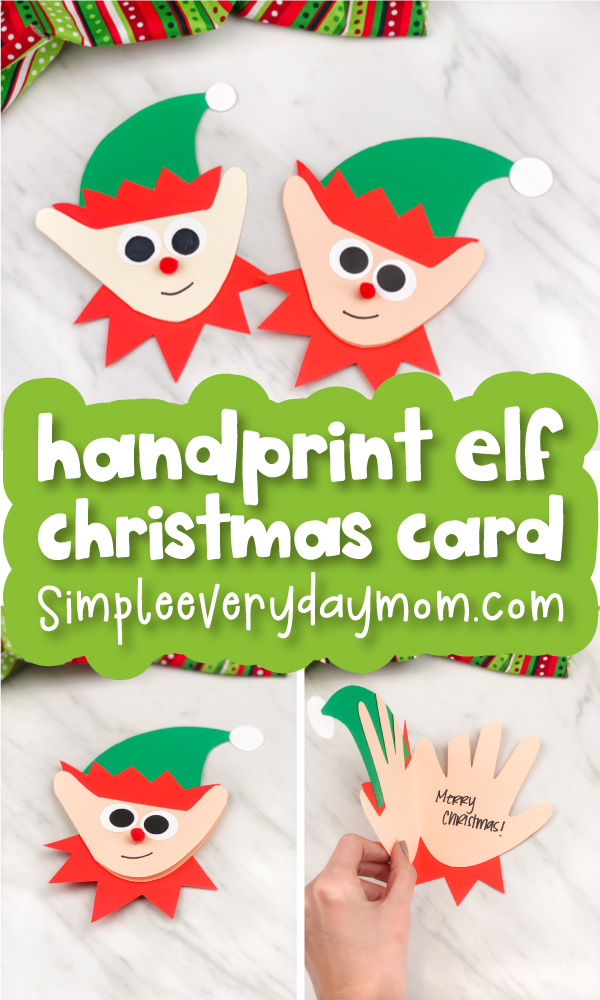
Elf Handprint Christmas Card For Kids [Free Template]
All activities require adult supervision. By using this site, you agree to our terms of use. This post may contain affiliate links. As an Amazon Associate and a participant in other affiliate programs, I earn a commission on qualifying purchases. Read our disclosure policy.
Every time we get into the car during December, we always play Christmas music! To us, there’s never enough time to celebrate Christmas!
Even though there are so many fun Christmas songs, one of our favorite songs is We Are Santa’s Elves. Each time we hear it, we can’t help but sing along. Even the kids know the words to it!
Because of this, we decided to craft this cute elf handprint Christmas card.
Handprint art and crafts are one of our favorite activities to do for every holiday (or just because)! They’re super simple to make and this one comes with a free printable template so you can make it easily too!
Read on below or watch our step by step video tutorial to see how to make them with your kids.
Also, be sure to check out all of our elf activities for kids for even more ideas.
Elf Craft For Preschool
Handprint crafts are really easy to make and they don’t require many supplies.
All you need for this one is some paper, glue, and scissors!
Supplies
- Colored card stock (in skin color, red, green and white)
- Small red pom pom
- Black marker
- Glue stick (this is our new favorite type)
- Scissors
- Pencil
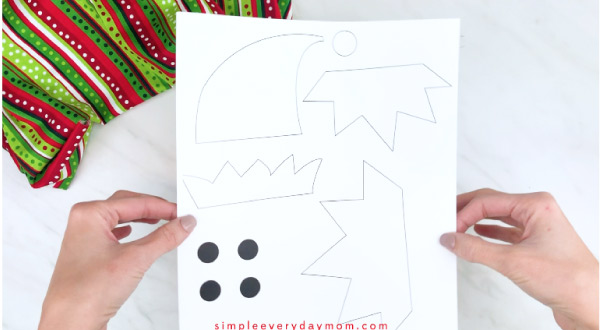
- Elf handprint card template (click the “click here to get your freebies” image at the end of the post)
Directions
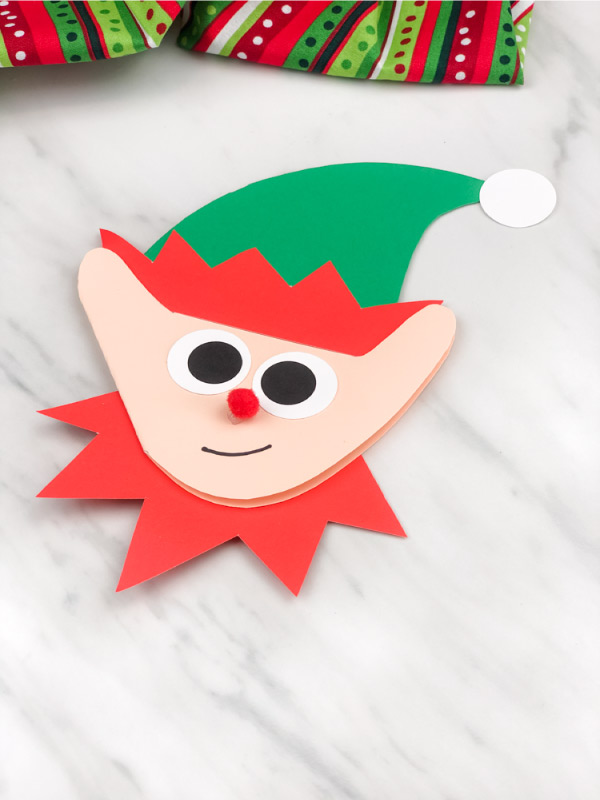
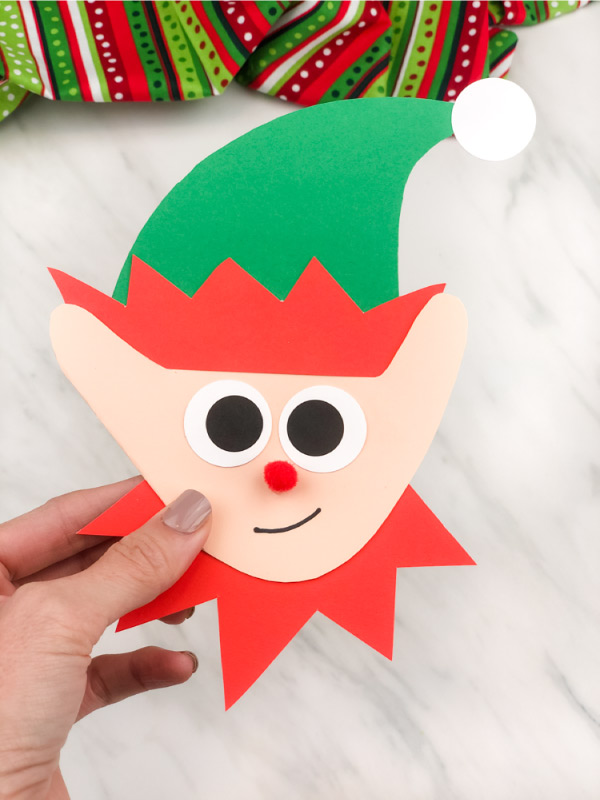
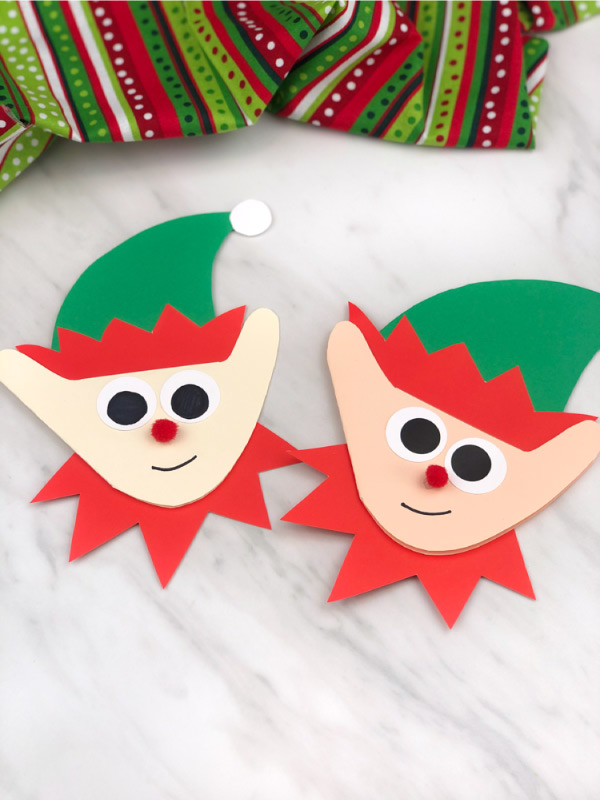
Download the elf handprint card template, print and cut out the pieces.
Take a piece of skin colored paper and fold in half “hamburger” style and position your child’s left hand along the folded end so the pinky lines up with the fold. Trace the handprint and cut out.
Begin by assembling the elf’s hat. Glue the red hat trim to the bottom of the green hat.
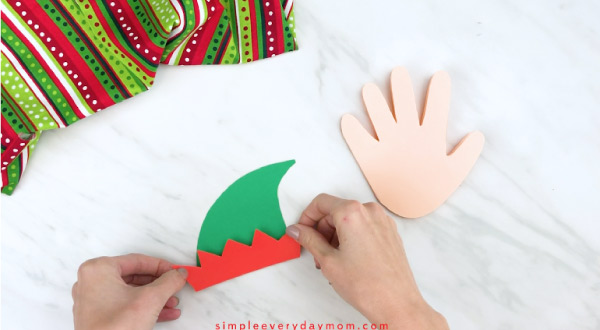
Take the white puffball and glue to the tip of the hat.
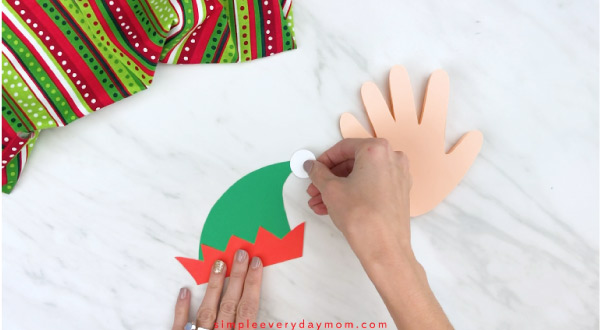
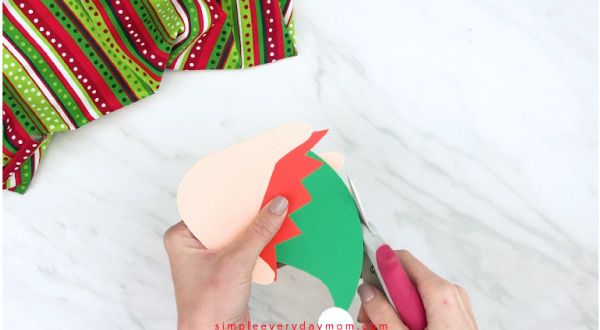
Take the completed elf hat and place it over the three middle fingers, leaving the thumb and pinky above the hat. Glue in place.
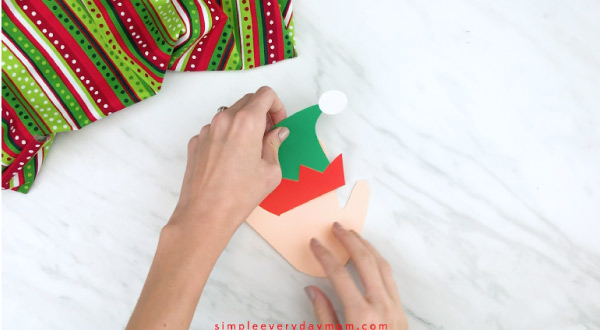
Trim off the excess paper that sticks out from behind the hat.
Glue the eyes just below the hat.
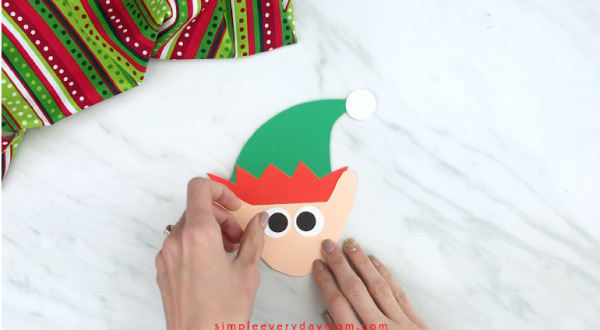
Use the black marker to draw on a smile.
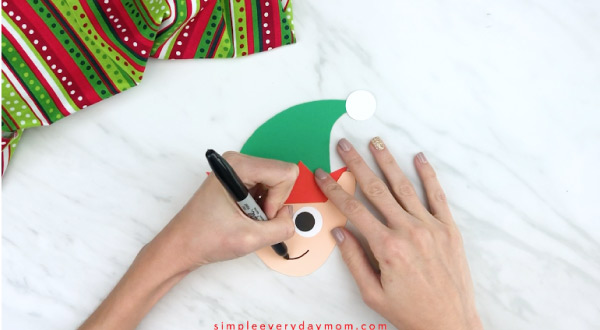
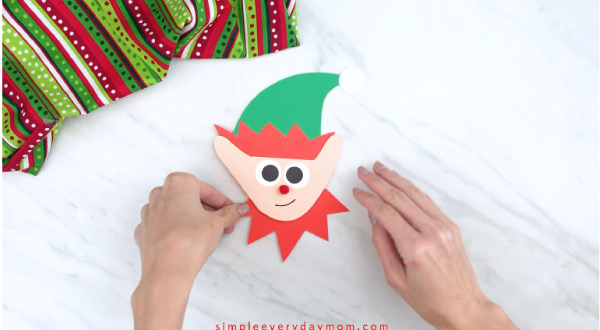
Stick the red pom pom on with some glue or a glue dot, right below the eyes.
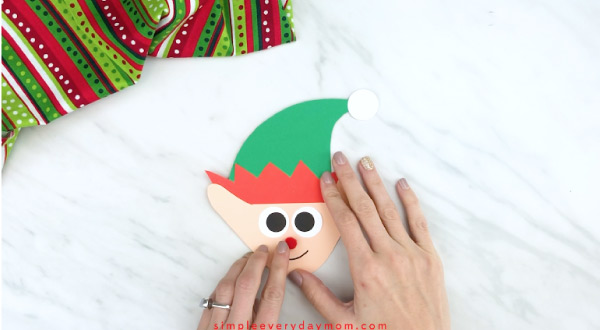
Place the elf’s neck trim behind the back of the handprint card and glue in place.
That’s it! It’s as simple as that!
12 Days of Christmas Activities
We think this easy Christmas elf craft can be used in a wide variety of settings. Of course, you can use it at home with your children. Make it a quick craft you do as a countdown to Christmas.
It would be a blast to do a 12 Days of Christmas crafts as a family! Each night, you can do a simple 10-15 minute craft.
We have lots of ideas to get you started from our paper plate crafts for Christmas!
Or, you could also turn it into a fun movie night.
Watch Rudolph the Red-Nosed Reindeer or have it on in the background while all the kids make a special elf card!
Related: Toilet Paper Roll Reindeer Craft
You can give the completed cards to friends and family or simply hang them up to display on the fridge.
To share Christmas cheer, consider bringing them to some elderly people in your neighborhood or even the local retirement home.
If you’re a teacher or daycare leader, this elf card craft is perfect for the kids to make and bring home to Mom & Dad.
Whether you attach it to another homemade gift or just have the children surprise their parents with a festive card, we’re sure parents will love this handprint keepsake card.

If you want some more activities, try reading to your kids. It’s a great way to spend family time together and it’s great for their development!


Dasher: This wonderfully illustrated Christmas book for kids gives you the back story on one of Santa’s favorite reindeer, Dasher! Girls will especially love to read this since Dasher is a girl.
Construction Site On Christmas Night: Fans of the fun characters of the construction site books have to add this Christmas-themed story to their collection. See how the trucks get ready for Christmas!
How To Catch An Elf: Kids everywhere love the silliness of this Christmas story. The rhymes and the illustrations will draw the kids in as well. This is a Christmas book kids will want to read every year!
Share With Us
Did you make this activity with your kids or students? We’d love to feature them on our social media!
For a chance to have your child’s project featured, simply snap a picture of the completed project and post it to our Facebook page, email it to us directly by clicking here, or use #simpleeverydaymom on your social media!
Elf Handprint Card For Christmas
Video
Equipment
- Scissors
Materials
- Colored card stock in skin color, red, green and white
- Small red pom pom
- Black marker
- Glue stick this is our new favorite type
- Pencil
- Elf handprint card template download form located at the end of the page
Instructions
- Download the elf handprint card template, print and cut out the pieces.
- Take a piece of skin colored paper and fold in half "hamburger" style and position your child’s left hand along the folded end so the pinky lines up with the fold. Trace the handprint and cut out.
- Begin by assembling the elf’s hat. Glue the red hat trim to the bottom of the green hat.
- Take the white puffball and glue to the tip of the hat.
- Take the completed elf hat and place it over the three middle fingers, leaving the thumb and pinky above the hat. Glue in place.
- Trim off the excess paper that sticks out from behind the hat.
- Glue the eyes just below the hat.
- Use the black marker to draw on a smile.
- Stick the red pom pom on with some glue or a glue dot, right below the eyes.
- Place the elf’s neck trim behind the back of the handprint card and glue in place.
Did you make this?
Don’t forget to leave a comment below and make sure to follow on Pinterest, Facebook and TikTok for more!
Free Handprint Elf Card Template


Meet Sam
Sam is the crafter and founder of Simple Everyday Mom. She has been featured in Oprah Mag, Good Housekeeping, The Spruce Crafts, Country Living, The Bump, and more.


Love it Elf template
Thanks! All you need to do is click the image at the end of the post that says, “Click Here To Get Your Freebie” and then enter your email in the form, and you’ll get the template link ◡̈
i would love the elf card template
Of course! All you need to do is click the image at the end of the post that says, “Click Here To Get Your Freebie” and then enter your email in the form, and you’ll get the template link ◡̈
Great video, thanks for the idea
No problem! So happy you like it!
Please may I have an elf handprint copy?
Of course! All you need to do is click the image at the end of the post that says, “Click Here To Get Your Freebie” and then enter your email in the form, and you’ll get the template link ◡̈
Very cute!
Happy you like it!
Thank you
You’re very welcome!
Want to have template for my class
Great! To get the template, click the “Click To Unlock!” button on the image at the end of the post, sign up or log in to your free SEM+ account, and then click the unlocked image to go to the download page.
Elf Handprint
Hi! To get the template, click the “Click To Unlock!” button on the image at the end of the post, sign up or log in to your free SEM+ account, and then click the unlocked image to go to the download page.
Hello, love this craft!
Really appreciate that— Thanks!
Hiii!!!! Can I please have the template
Of course! All you need to do is enter your email in the form at the end of this post to have the link sent to you. Once you’ve been confirmed as an email subscriber (by clicking the link in the first email), you simply enter your email in any of the forms and it’ll automatically redirect you to the download page.
elfo