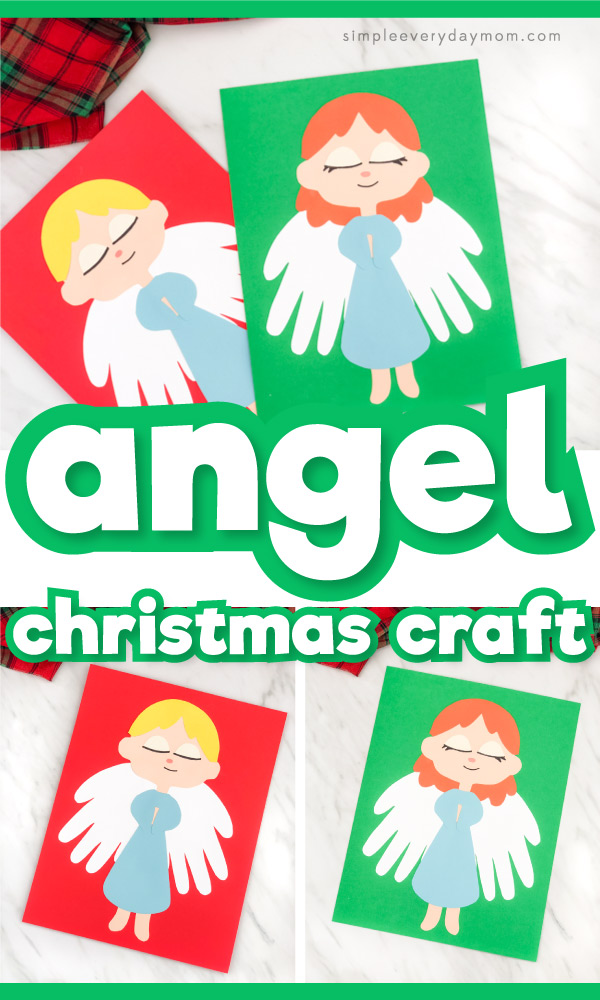
Angel Handprint Christmas Craft For Kids [Free Template]
All activities require adult supervision. By using this site, you agree to our terms of use. This post may contain affiliate links. As an Amazon Associate and a participant in other affiliate programs, I earn a commission on qualifying purchases. Read our disclosure policy.

This angel handprint Christmas craft is a sweet keepsake any parent would love!
We’ve been sharing loads of Xmas crafts for kids lately, but this one is unlike most of our others.
Instead of focusing on Santa Claus, Rudolph, and elves (which we love), we’re taking a moment to think of the nativity scene.
We wanted to have a way to incorporate the nativity and this angel turned out to be a perfect way!
If you’re looking for a Christian based Christmas craft for kids to do at home or in Sunday school, we think you’ll love this easy angel craft.
Read our detailed directions below or watch our simple video tutorial to see how easy it is to make!
Angel Christmas Craft Idea
One of the best things about paper crafts is how simple and inexpensive they are! Check out our supply list below.
Supplies
- Colored card stock or construction paper
- Scissors
- Glue stick
- Markers
- Pencil
- Angel Christmas template (enter your email in the form at the end of this post to have the link sent to you)
Directions
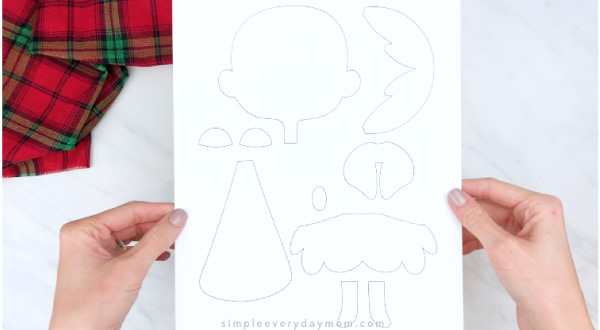
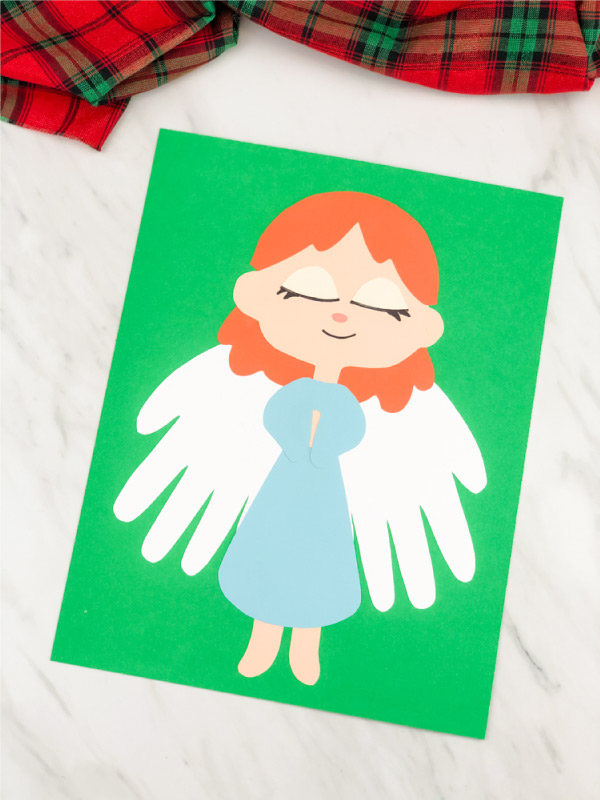
Download the angel template, print, and cut out the pieces.
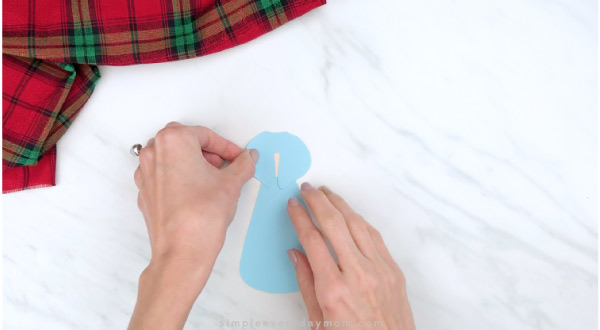
Begin by assembling the angel’s body. Place the small oval “hands” at the top of the angel robe and glue them in place.

Glue the blue angel robe sleeves on top of the arms.
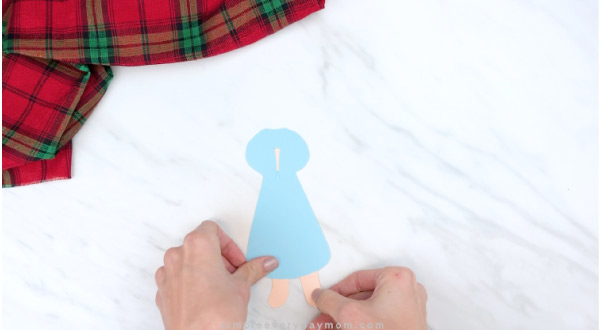
Position the two legs at the bottom of the robe and glue them to the backside of the robe.
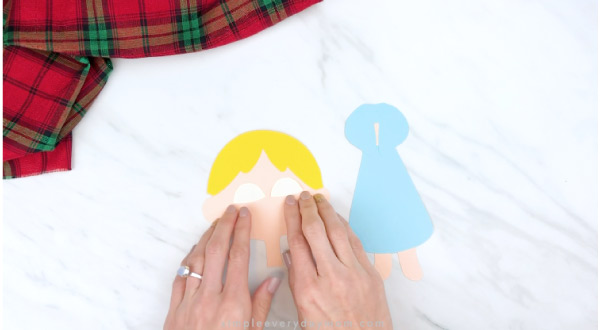
Create the angel’s head by gluing the hair to the top of the head. If you’re making a girl angel, use the other hair piece and glue it to the back of the head.
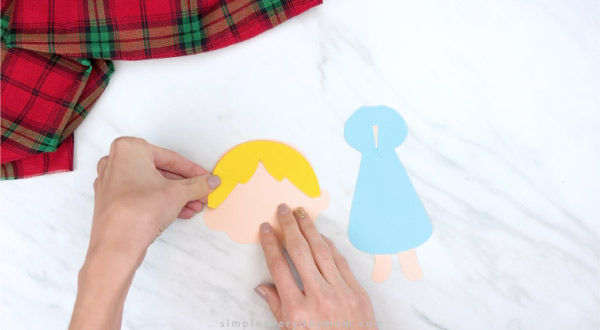
Position the eyelids in the center of the head and glue them in place.
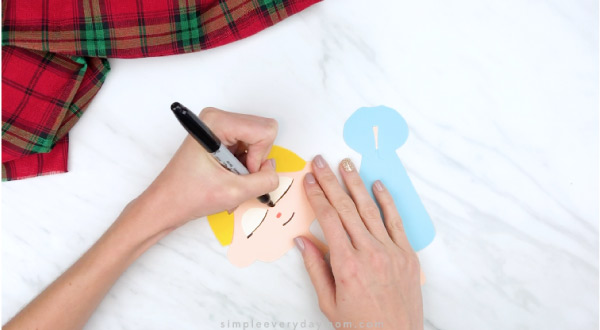
Use the pink marker to draw on a small oval nose.
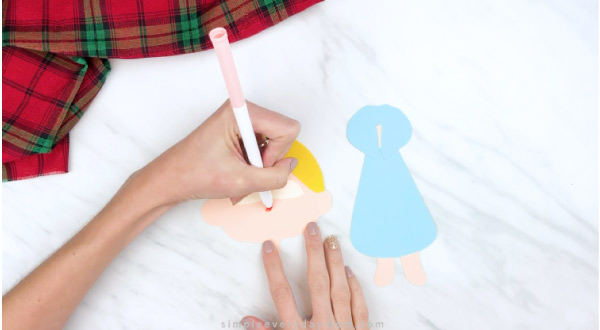
Underneath the nose, use the black marker to draw a small smile.
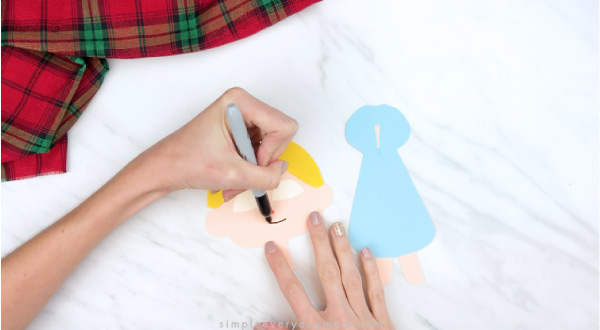
Use the black marker to draw on the eyelashes at the bottom of the eyelid.
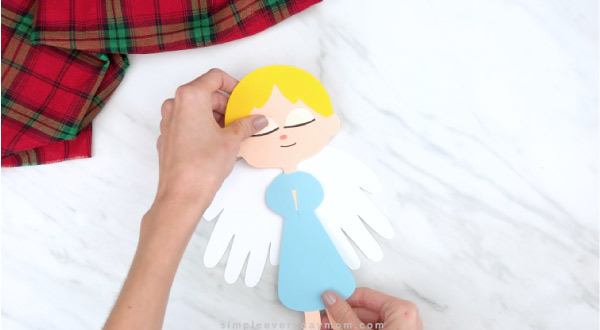
Glue the completed robe to the bottom of the angel’s neck.
Trace your child’s hands onto the white card stock two times. To make the wings symmetrical, trace the left and right hand. Cut out the handprints.
Place the handprints face down with the thumbs on the end and glue them behind the completed angel.
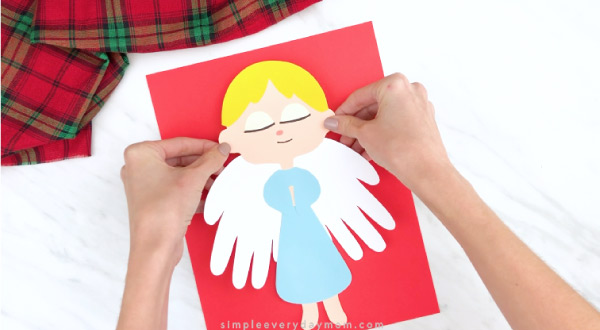
Take the completed angel and glue it to a colored piece of card stock.
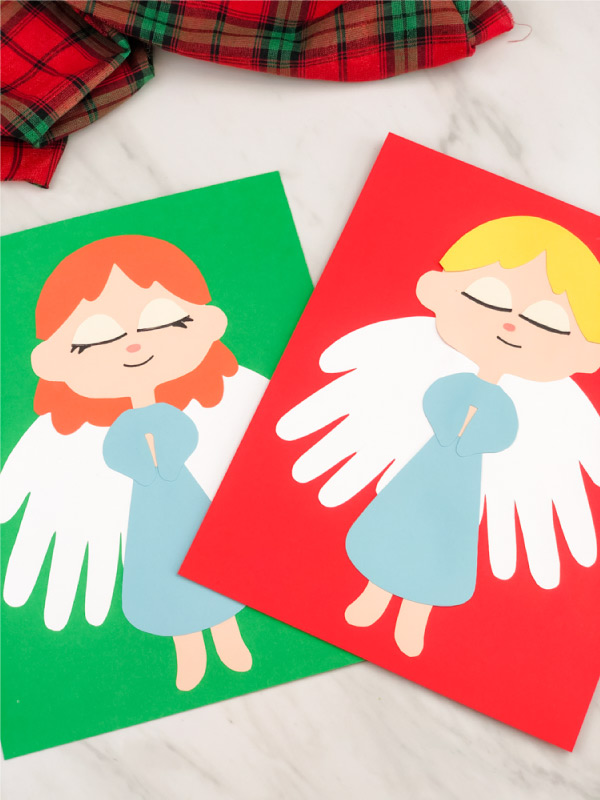
Aren’t these angels just darling? If you loved them, be sure to check out all of our fun handprint crafts for kids!
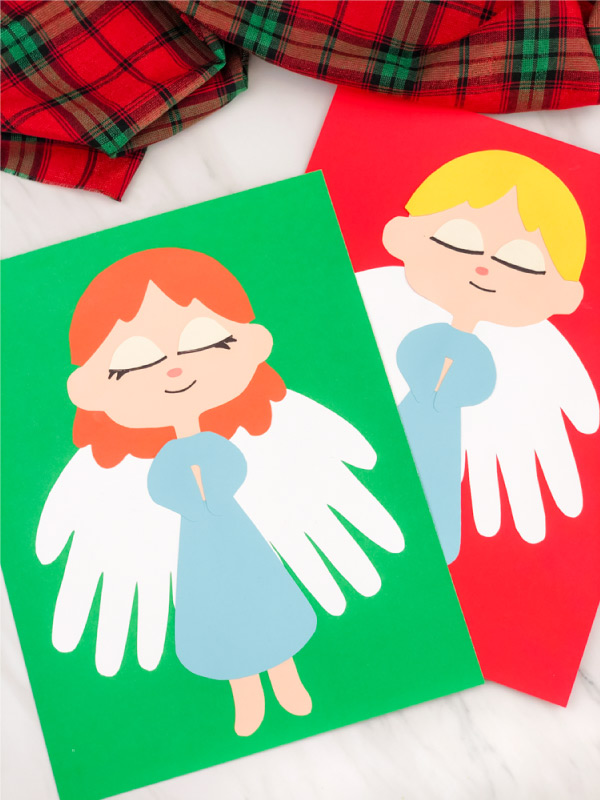
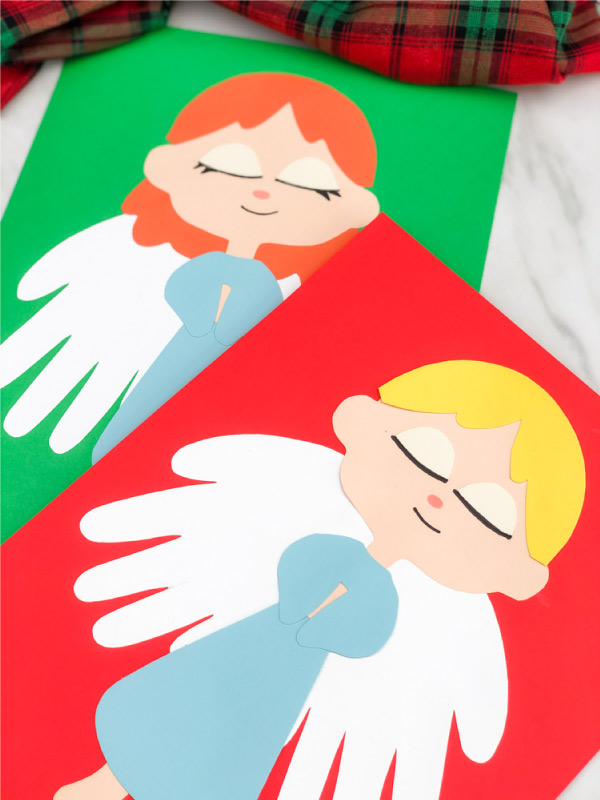
We love how they can be customized as well!
You can change the color of the head and arms to best suit the skin tone of your child. You can also customize the hair color and hairstyle!
Even though we offered two basic hair types for boys and girls, don’t let that stop you! You can come up with your own fun hairstyle if you’d like to. Just experiment and see how you can make this craft your own.
Finally, you can also change the background paper’s color.
Once you’ve helped your child make a handprint angel that they like best, make sure you proudly display their hard work!
We’re sure parents and grandparents will love to receive this keepsake this Christmas!
Share With Us
Did you make this activity with your kids or students? We’d love to feature them on our social media!
For a chance to have your child’s project featured, simply snap a picture of the completed project and post it to our Facebook page, email it to us directly by clicking here, or use #simpleeverydaymom on your social media!
Angel Handprint Christmas Craft
Video
Equipment
- Scissors
Materials
- Colored card stock in skin color, hair color, white and light blue
- Glue stick
- Markers pink and black
- Angel Christmas template download form located at the end of the page
Instructions
- Download the free angel template, print and cut out the pieces.
- Begin by assembling the angel’s body. Place the small oval "hands" at the top of the angel robe and glue in place.
- Glue the blue angel robe sleeves on top of the arms.
- Position the two legs at the bottom of the robe and glue to the backside of the robe.
- Create the angel’s head by gluing the hair to the top of the head. If you’re making a girl angel, use the other hair piece and glue it to the back of the head.
- Position the eyelids in the center of the head and glue in place.
- Use the black marker to draw on the eyelashes at the bottom of the eyelid.
- Use the pink marker to draw on a small oval nose.
- Underneath the nose, use the black marker to draw on a small smile.
- Glue the completed robe to the bottom of the angel’s neck.
- Trace your child’s hands onto the white card stock two times. To make the wings symmetrical, trace the left and right hand. Cut out the handprints.
- Place the handprints face down with the thumbs on the end and glue behind the completed angel.
- Take the completed angel and glue to a colored piece of card stock.
Did you make this?
Don’t forget to leave a comment below and make sure to follow on Pinterest, Facebook and TikTok for more!
Handprint Angel Craft Template

Meet Sam
Sam is the crafter and founder of Simple Everyday Mom. She has been featured in Oprah Mag, Good Housekeeping, The Spruce Crafts, Country Living, The Bump, and more.


hola, quiero la plantilla por favor. gracias
Since you’re already an email subscriber, all you need to do is enter your email in the form at the end of any post and it’ll automatically redirect you to the download page ?
Thank you
You’re welcome!
Thank you for these easy crafts!! You’re saving our Christmas break boredom!
Haha, so happy to hear that! You’re welcome!