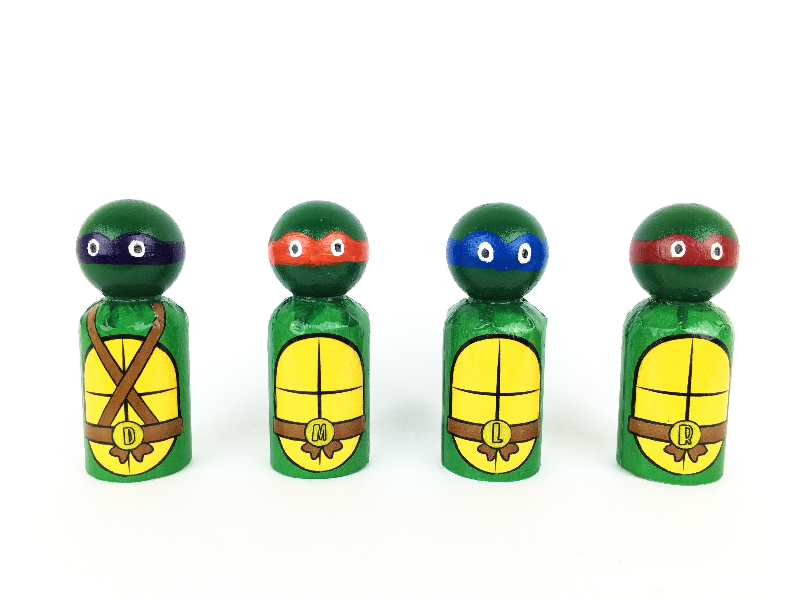
Ninja Turtle Peg Doll Tutorial
All activities require adult supervision. By using this site, you agree to our terms of use. This post may contain affiliate links. As an Amazon Associate and a participant in other affiliate programs, I earn a commission on qualifying purchases. Read our disclosure policy.
Inside: Make these fun Ninja Turtle peg dolls even if you don’t have a ton of artistic talent with the free printable bodies.
I hate to say this, but sometimes I just see a DIY on Pinterest and think, oh I can definitely do that! And then I try it. And fail miserably….
Yeah, those Pinterest fails are real.
But this Ninja Turtle peg doll tutorial you can totally do! And you know why?
Because this peg doll DIY is a printable. *Cue the ooohhs and aaahhs* Yes, the entire body is a printable that you slap on. All you have to do is paint the head!
Some of the links below are affiliate links which means that if you choose to make a purchase from them then I will earn a commission, at no additional cost to you. I am very grateful for your support in running this website.
Supplies:
- Ninja Turtle Free Printable Body
- LaserJet Printer (this is the one I use) or print at office supply store
- 4 Wooden Peg Dolls; they MUST be 7/8″ x 2 5/16″ if you want to use the free printable ninja turtle body. I bought one like this in an 8 pack at Hobby Lobby.
- Scissors
- Modge Podge
- Paintbrushes (one good, small one for the details and one “junker” for the mod podge)
- Acrylic paint in these colors:
- Americana in green beret (head and neck)
- Americana Dioxazine Purple (For Donatello)
- Orange (For Michelangelo (I used FolkArt in Orange Poppy, but it was terrible for this project. Shoot for a bright orange by Americana instead)).
- FolkArt in Cardinal Red (For Raphael)
- Americana True Blue (For Leonardo)
- FolkArt in Noir Pur
- Americana in Snow (Titanium White)
- FolkArt Artists’ Varnish Gloss (if you want them glossy like mine are)

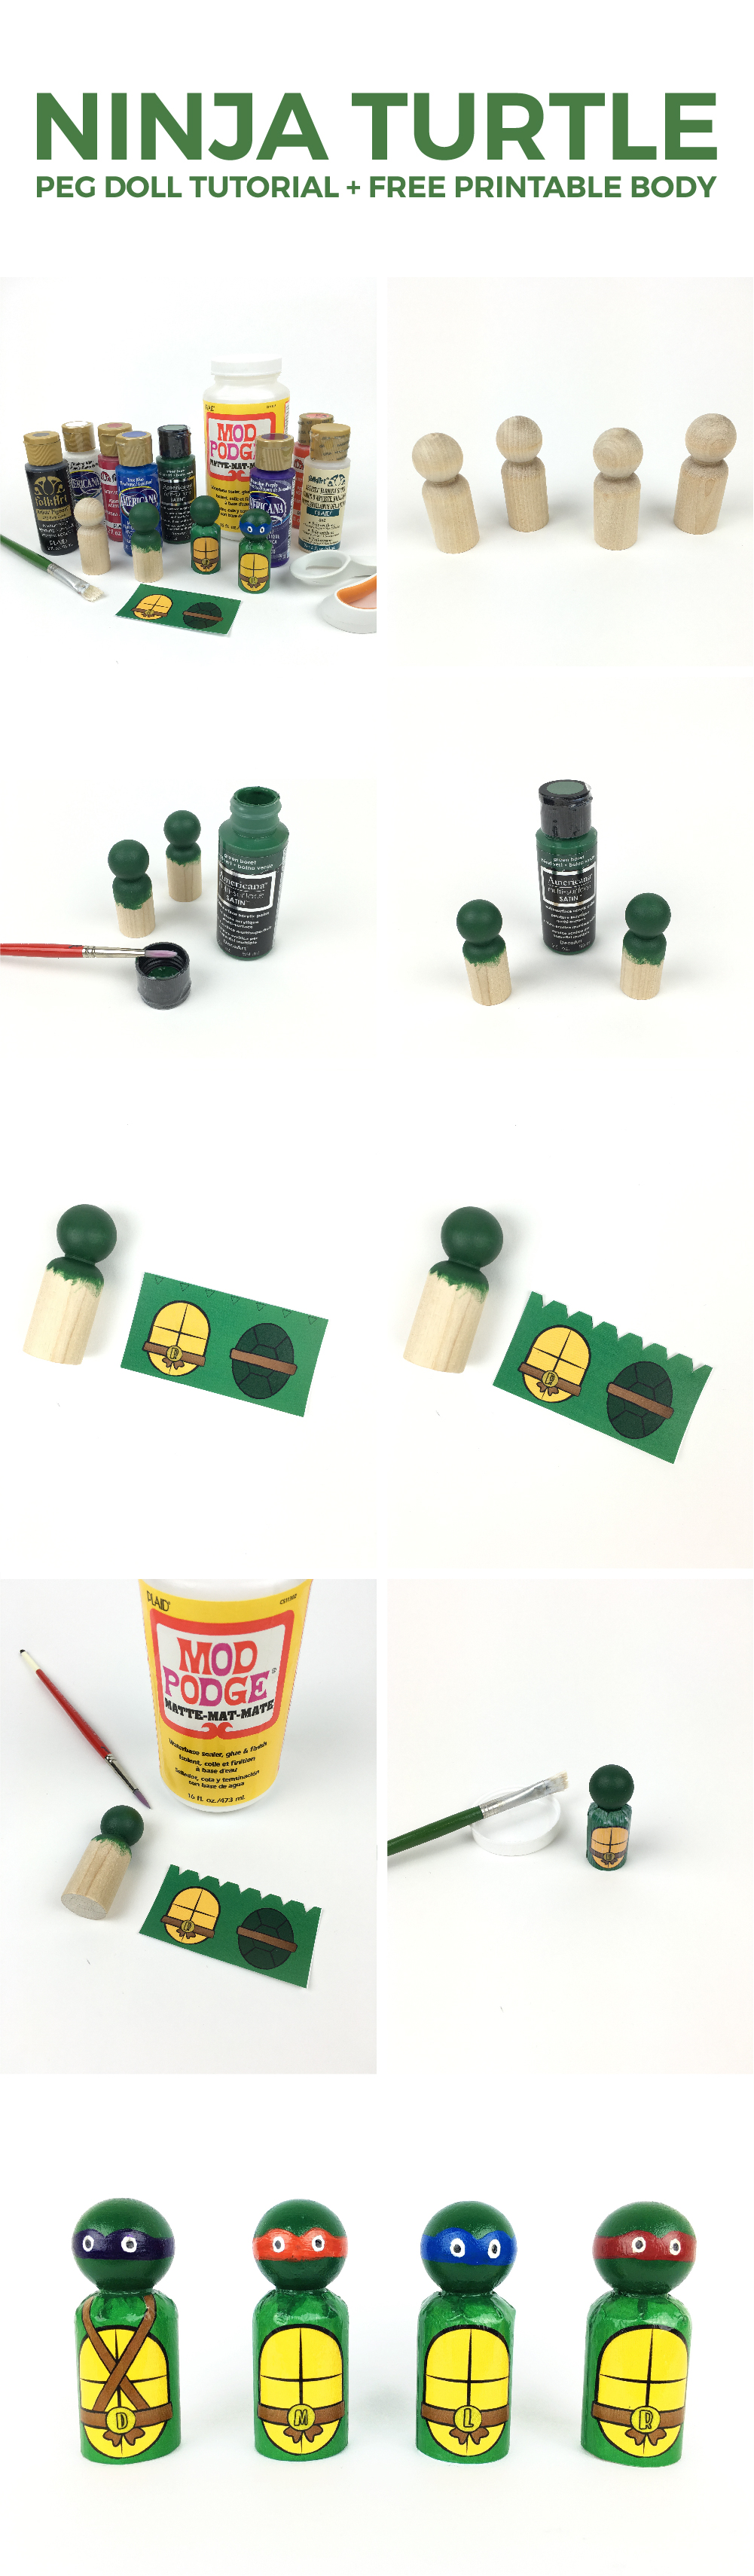
Directions:
- Paint the entire ninja turtle head in Americana green beret. I painted one coat, let dry, then painted a second coat.
- After the head and neck are completely dry, paint the bandanas for each ninja turtle with the respective paint listed above.
- While the heads are drying, cut out the printable bodies for each ninja turtle. Make sure to cut out the triangles are the top of each body. These are to help smooth the top of the paper to the doll.
- Once the heads are all dry, grab the modge podge and apply a thin layer to the wooden peg doll from the neck downward.
- Carefully apply the printable body, lining up the bottom edge of the printable to the bottom edge of the peg doll. Smooth the paper body and press the top of the printable around the rounded neckline.
- Apply another thin coat of modge podge on top of the printable body. Using the rounded edge of the paintbrush (or your finger), push the top of the paper down and into the neck. This takes a little getting used to the feel of it, but eventually they will stay down. Smooth out as much as possible.
- Apply 1 or 2 more thin coats of modge podge to the body to help the paper stick.
- Finally, apply one thin, even coat of the varnish gloss to each ninja turtle.
- Let dry entirely and enjoy you’re work of art!
IMPORTANT NOTES:
- Make sure you print the printable body using a laserjet printer, NOT an inkjet printer. The laserjet print process will not run or smear when it gets wet with modge podge.
- Use plain weight paper. I originally used a heavy weight paper and it was much harder to get it to stick to the wooden peg doll body. Learn from my mistake!
If you want to see me making them, then check out this video tutorial:

>>Click here to download the free printable TMNT body<<
Linking up at Lil’ Luna

Meet Sam
Sam is the crafter and founder of Simple Everyday Mom. She has been featured in Oprah Mag, Good Housekeeping, The Spruce Crafts, Country Living, The Bump, and more.


One Comment