Toy Story Alien Rock Painting For Kids [Video Tutorial]
All activities require adult supervision. By using this site, you agree to our terms of use. This post may contain affiliate links. As an Amazon Associate and a participant in other affiliate programs, I earn a commission on qualifying purchases. Read our disclosure policy.

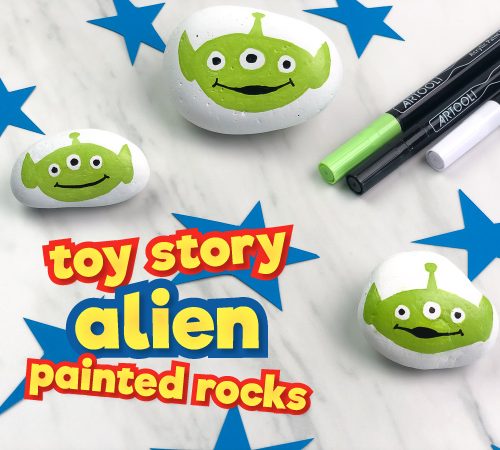
Inside: Learn how to make these easy Toy Story alien rock painting with the kids this summer!
Are you counting down the days until Toy Story 4 arrives?????
We most certainly are and we’re showing our enthusiasm for the newest Disney movie by sharing several Toy Story crafts and activities for kids!
So far we’ve made this Buzz Lightyear paper craft, this DIY Forky craft toy, and these Mr. and Mrs. Potato Head cookies.
It’s been a blast, but we still have a few weeks to go.
While we wait, we decided to add another craft to our list:
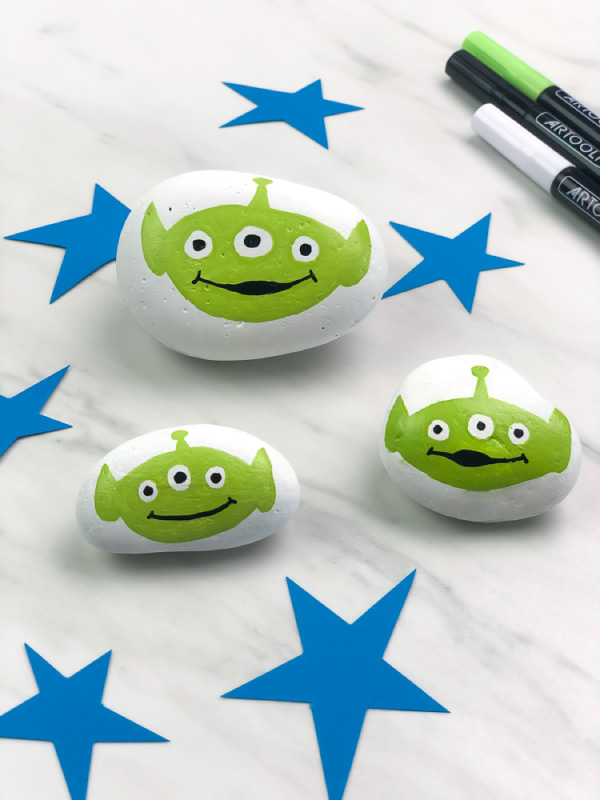
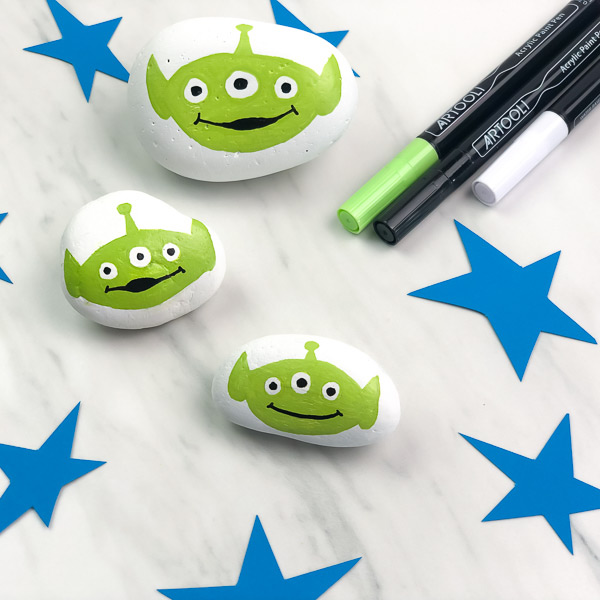
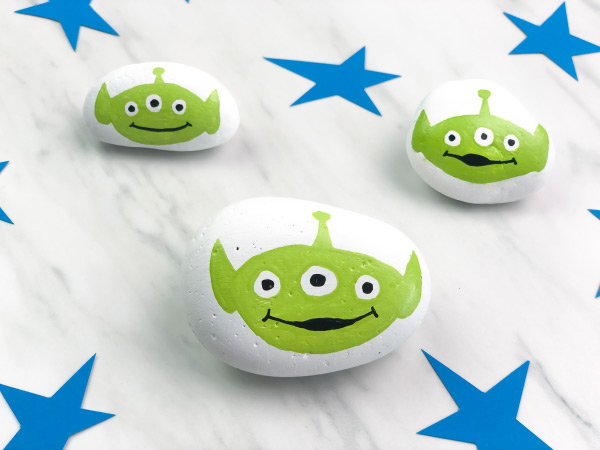
These easy alien painted rocks for kids.
They’re much simpler than you may think and will work with any child who’s able to draw.
Read or watch the video below to see how to make them with your kids this summer!
Toy Story Painted Rocks
This post contains affiliate links for your convenience. You can read my full disclosure here.
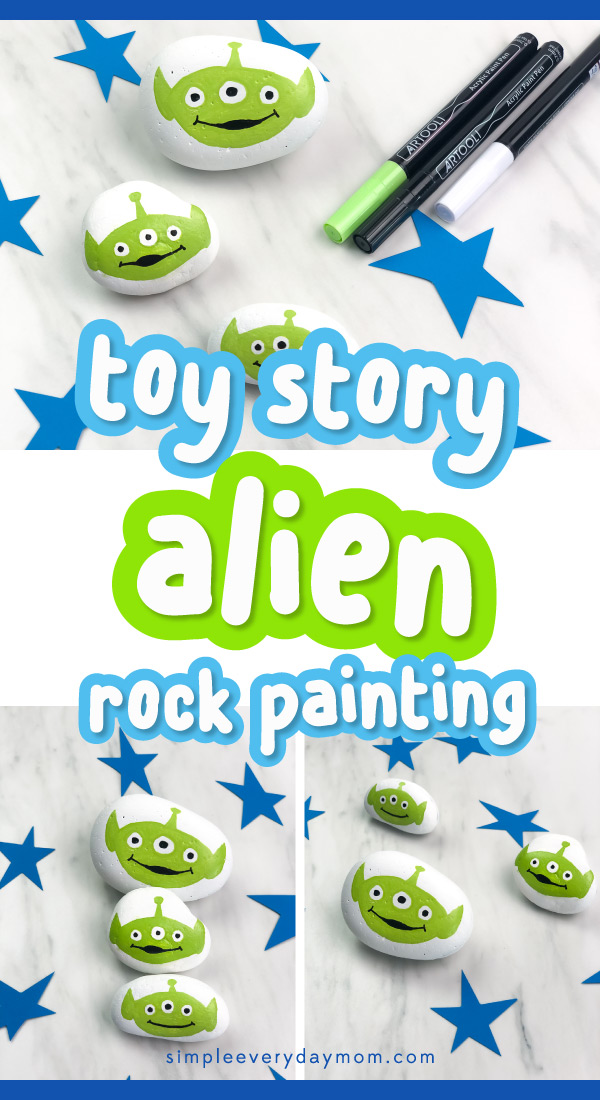
Rock Painting Supplies
- Smooth rocks
- White acrylic paint (if your rocks aren’t white/light gray)
- Paint brush
- Paint Pens (these ones are my NEW favorite!)
- Pencil
- Sealant (optional)
Directions
- If you’re using dark colored rocks, paint your selected rocks in 3-4 coats of white acrylic paint. We use a matte finished paint for the ones pictured here. We also painted both sides of the rock, but it’s really up to you and whether you care if the entire rock is the same color. Let the rocks dry completely before moving on.
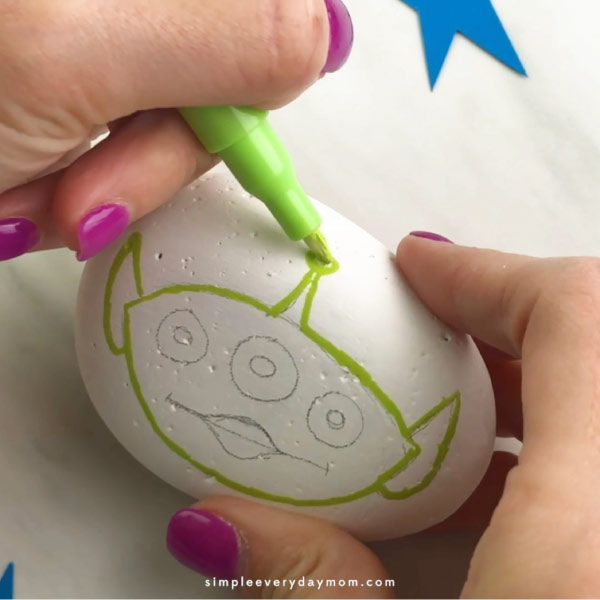
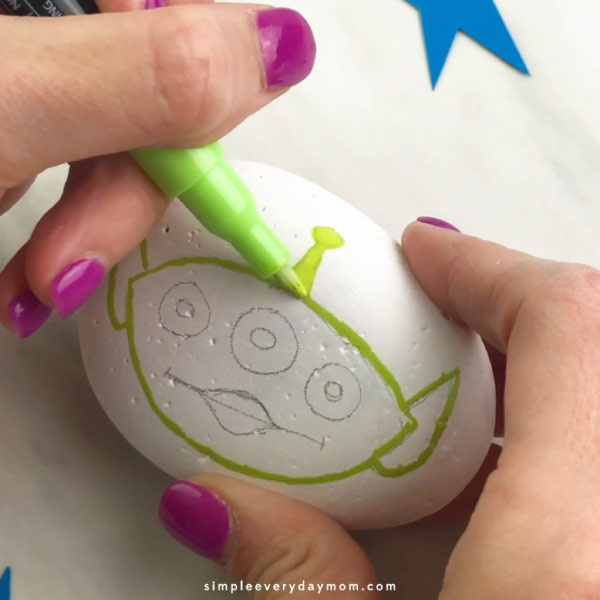
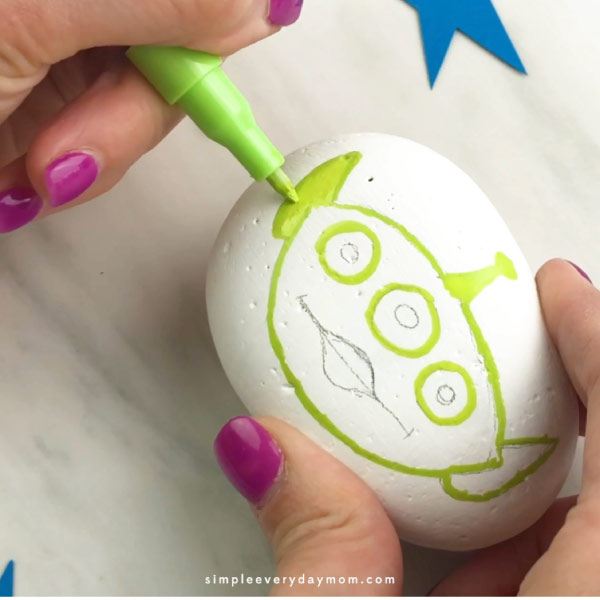
- Sketch out the alien drawing with a pencil before you use the paint pens.

- To draw the alien’s head, begin by making a large shape similar to a football. Use the light green paint pen to outline and fill in the head.
- Draw the alien’s antenna by making a skinny, tall triangle in the middle of his head. Top it off with a small circle on top. Use the light green paint pen to fill in the antenna.
- Sketch on the ears, by drawing a straight line up and out from the side of the head. Draw a triangle shape on the opposite side and slowly smooth out the shape and loop around to create an ear lobe. Use the light green paint pen to fill in the ears.
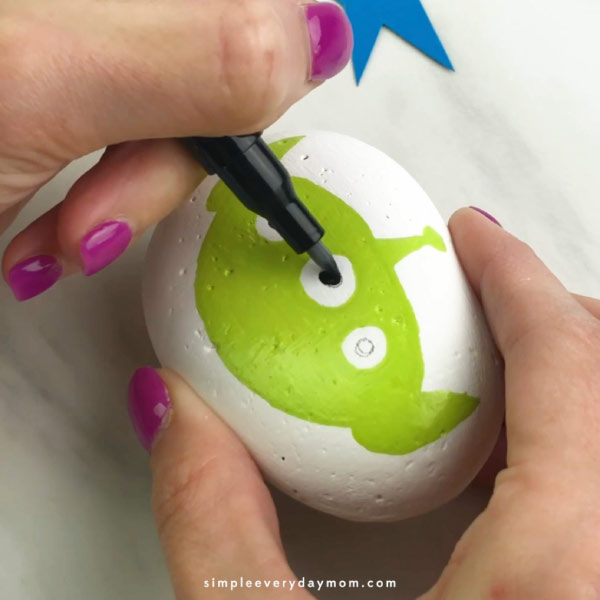
- Make the alien’s eyes by drawing one large, circular eye in the middle of the head, just below the antenna. Next draw eyeballs on each side of the center eye. Make these 2 eyeballs slightly lower than the central eye. Use the black paint pen to draw in the inner eye.
- Draw a smile on your alien. If you want to keep it super simple, make a straight smile. If you want to make it more iconic looking, draw the original smile then draw a flattened oval shape in the middle of the mouth to give it the “oooooooo” look. Use the black pen to draw in the smile.
- If you want to preserve these rocks for a very long time, use a couple of light coats of sealant spray to finish them off.
- Repeat on as many rocks as you’d like!

What Kind Of Rocks Should I Buy?
When it comes to selecting your rocks, you have two options.
If you’re looking to save time, buy white rocks like these ones. You won’t have to paint them with white acrylic paint so you’ll be able to get started on your paintings right away.
If you’re looking to save money, buy less expensive rocks like these ones. They’re very dark so you’ll need to paint them with white acrylic paint to get a nice, light background for your rock paintings.
Both options work great, so you simply need to decide which is more important to you! I will say that if you’re planning to do a lot of rock paintings, the bulk bag of rocks will be the most economical choice for you.
Tips For Rock Painting With Kids
If your child isn’t old enough to draw the design on the rocks themselves, don’t worry! You can draw the shapes on the rocks with a pencil and let them use the paint pens to fill them in.
Remind your child that each time they use a paint pen, they must wait until it is completely dry to draw over it with another paint color. If you don’t wait, it will strip off the previous paint color or blend the 2 paint colors together. Either way will ruin your design so remember to take your time.
The good news is, with these markers, it only takes 2-3 minutes for the paint pen to dry completely.
We loved making these Toy Story alien rock paintings! They’re the perfect summer activity to bring the family together!
More Art Ideas For Kids
- Easy Turtle Painted Rocks
- Handprint Art & Crafts For Kids
- Germ Blow Painting Art With Straws
- Shaving Cream Marbled Paper
Toy Story Alien Painted Rocks
Video
Materials
- Smooth rocks
- White acrylic paint if your rocks aren’t white/light gray
- Paint brush
- Paint Pens these ones are my NEW favorite!
- Pencil
- Sealant optional
Instructions
- If you’re using dark colored rocks, paint your selected rocks in 3-4 coats of white acrylic paint. We use a matte finished paint for the ones pictured here. We also paint both sides of the rock, but it’s really up to you and whether you care if the entire rock is the same color. Let the rocks dry completely before moving on.
- Sketch out the alien drawing with a pencil before you use the paint pens.
- To draw the alien’s head, begin by making a large shape similar to a football. Use the light green paint pen to outline and fill in the head.
- Sketch on the ears, by drawing a straight line up and out from the side of the head. Draw a triangle shape on the opposite side and slowly smooth out the shape and loop around to create an ear lobe. Use the light green paint pen to fill in the ears.
- Draw the alien’s antenna by making a skinny, tall triangle in the middle of his head. Top it off with a small circle on top. Use the light green paint pen to fill in the antenna.
- Make the alien’s eyes by make one large, circular eye in the middle of the head, just below the antenna. Next draw eyeballs on each side of the center eye. Make these 2 eyeballs slightly lower than the central eye. Use the black paint pen to draw in the inner eye.
- Draw a smile on your alien. If you want to keep it super simple, make a straight smile. If you want to make it more iconic looking, draw the original smile than draw a flattened oval shape in the middle of the mouth to give it the “oooooooo” look. Use the black pen to draw in the smile.
- If you want to preserve these rocks for a very long time, use a couple of light coats of sealant spray to finish them off.
- Repeat on as many rocks as you’d like!
Did you make this?
Don’t forget to leave a comment below and make sure to follow on Pinterest, Facebook and TikTok for more!

Meet Sam
Sam is the crafter and founder of Simple Everyday Mom. She has been featured in Oprah Mag, Good Housekeeping, The Spruce Crafts, Country Living, The Bump, and more.


