Easy Recycled Bee Hive Craft For Kids (Free Printable Template)
All activities require adult supervision. By using this site, you agree to our terms of use. This post may contain affiliate links. As an Amazon Associate and a participant in other affiliate programs, I earn a commission on qualifying purchases. Read our disclosure policy.
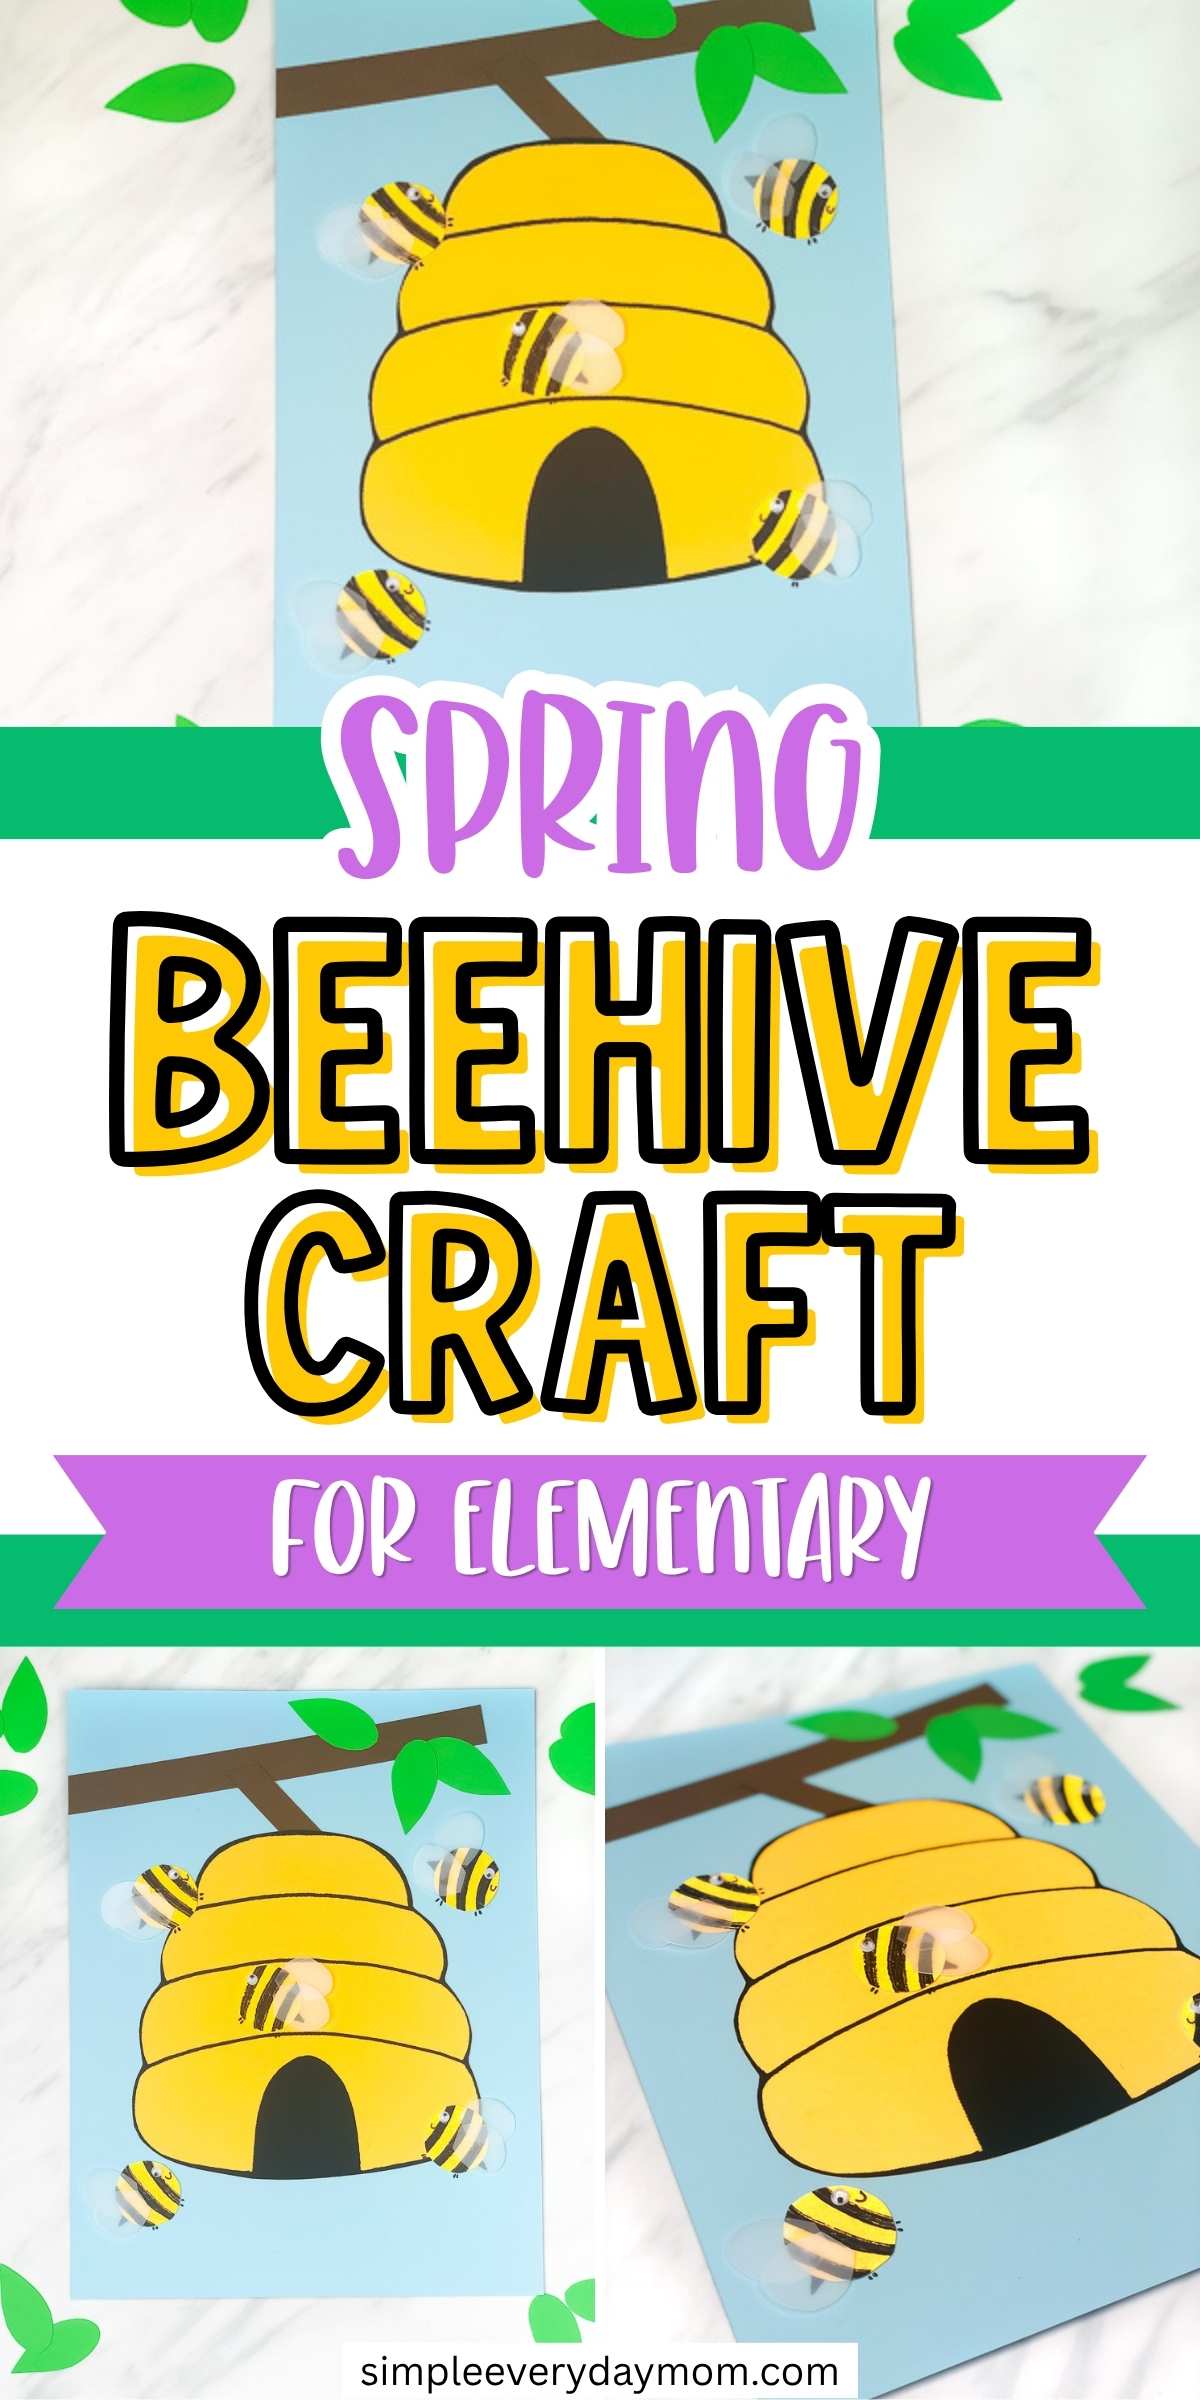
This beehive craft for kids is a fun mixed-media project where kids create a bright paper hive and add buzzing bees with recycled milk jug wings. It’s a great fit for early elementary kids, combining simple cutting, painting, and assembling.
Using materials like cardstock, paint, and upcycled plastic, this craft works well for a spring or insect unit at home or in the classroom. Kids will build fine motor skills while creating a colorful, display-worthy beehive scene in about 30–40 minutes. Check out all of our fun bee activities for kids for more insect ideas!
Bee Craft For Kids
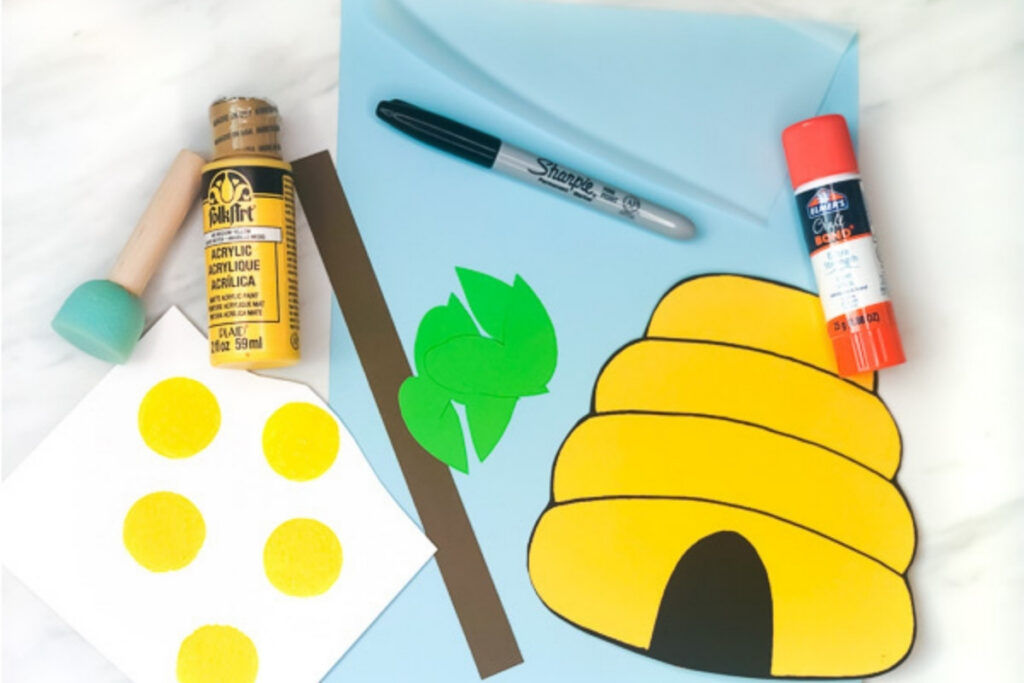
Supplies
- Colored cardstock or construction paper
- White cardstock
- Yellow paint
- Round sponge paint brush
- Scissors
- Paper trimmer (optional)
- Glue stick
- Milk jug
- Small googly eyes
- Black marker
- Beehive template (click the “click here to get your freebies” image at the end of the post)
Directions
Print out the template and cut out the pieces you need.
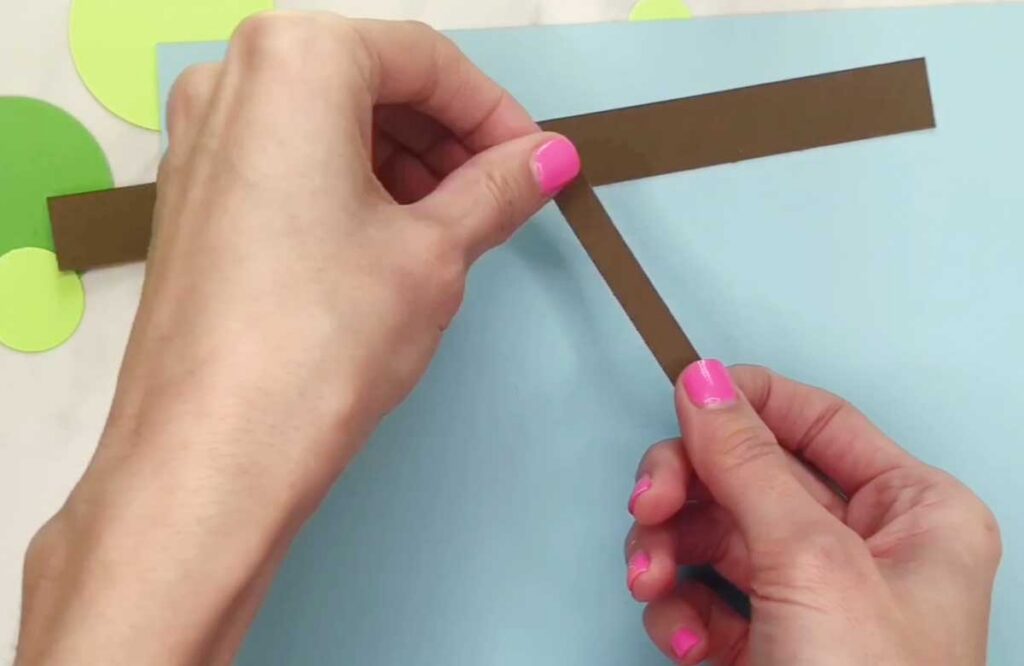
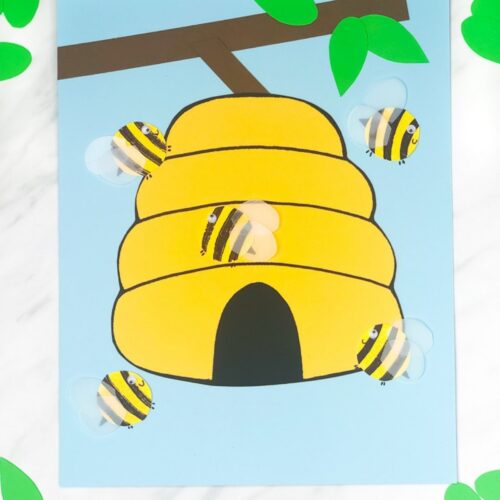
Cut a long rectangle from your paper to make the main tree branch. Then cut a shorter rectangle for the smaller branch that goes off of it. Glue both branches onto the top of your blue cardstock, and add the leaves on top.
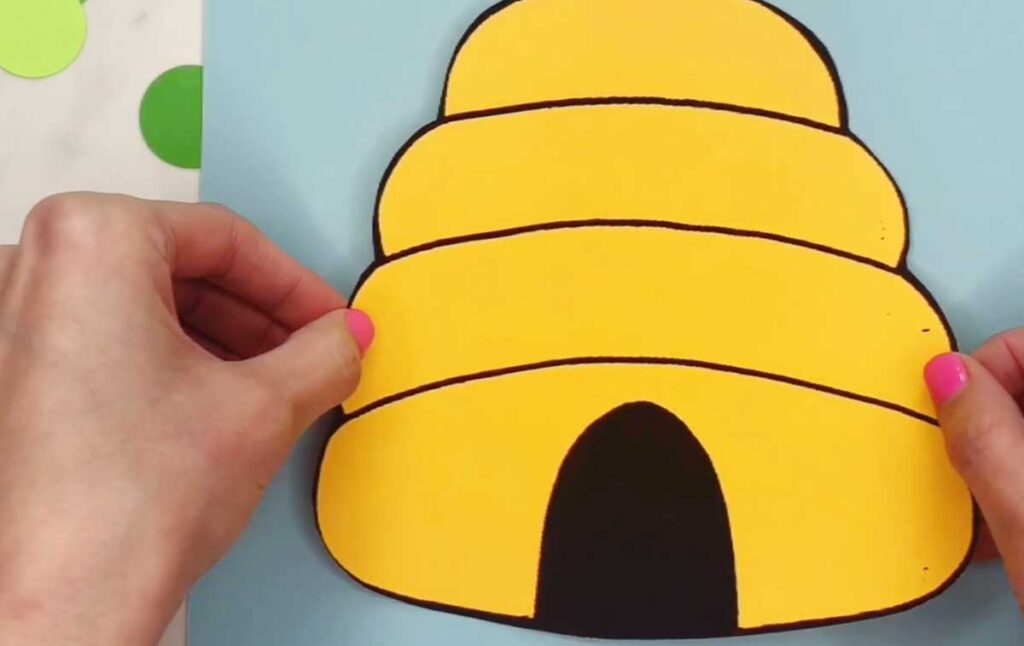
Glue the beehive right at the end of the smaller branch.
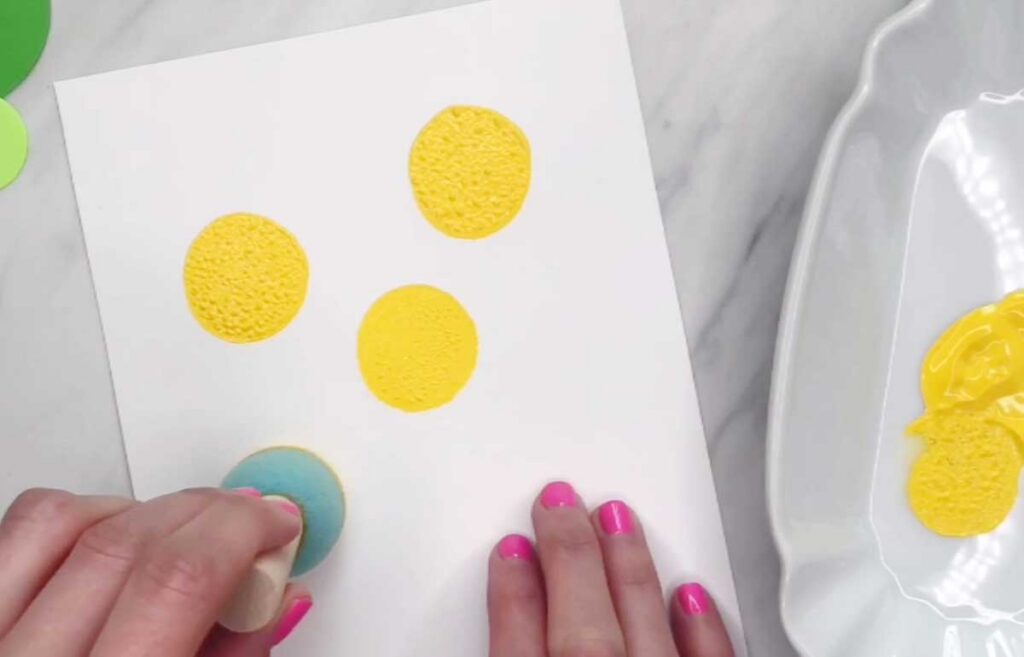
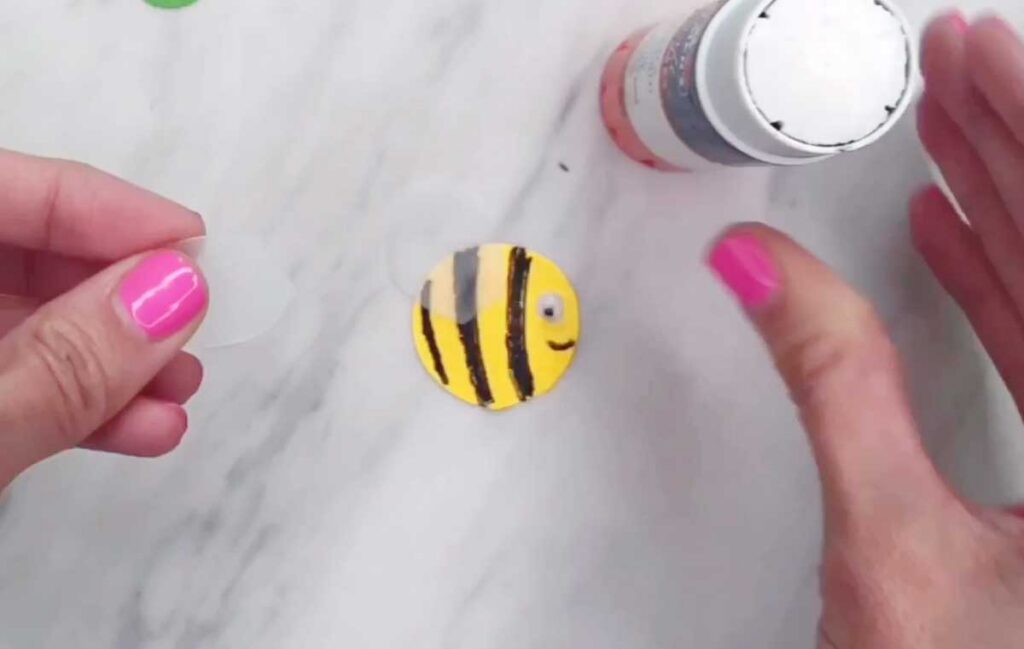
Use the sponge brush and yellow paint to dab a few bee shapes onto white cardstock. Let them dry completely.
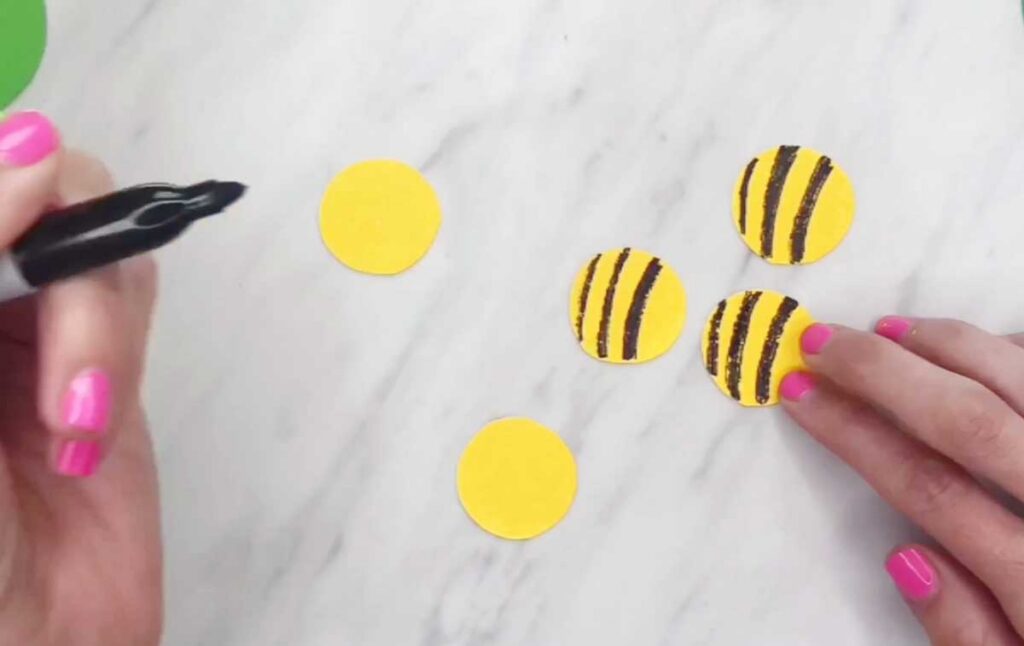
Cut out each circle to make the bee bodies. Then use a black marker to draw stripes across them, and add a little smile on one side of each bee.
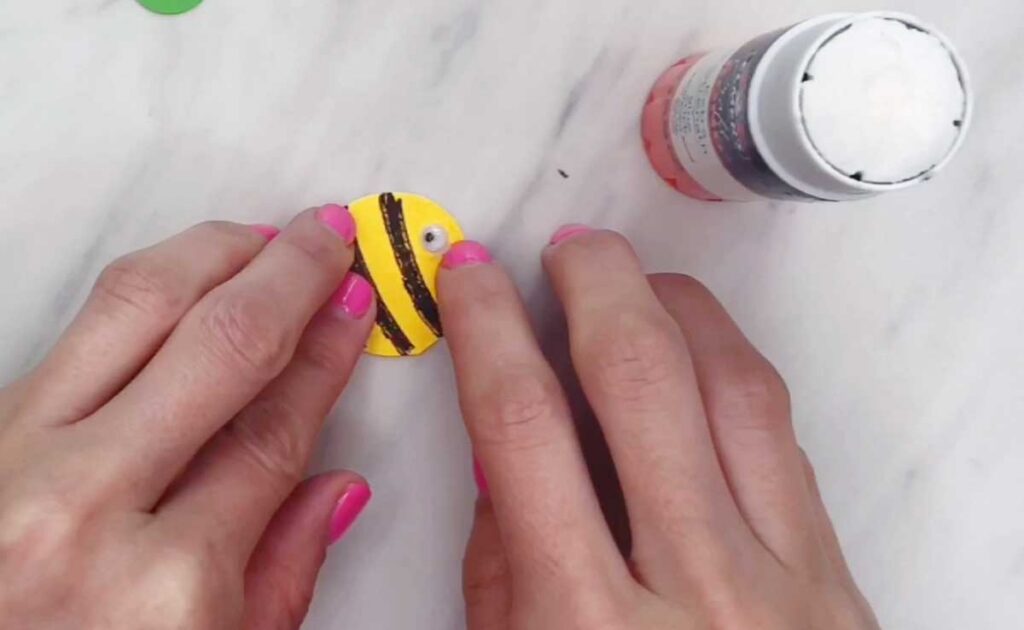
Cut small wings for the bees using scissors and the milk jug, or just use paper if that’s easier. Then glue the wings and googly eyes onto each bee.
Place the bees where you want them on the paper, then use a marker to draw a small stinger behind each one. Glue the bees down so their bodies line up with the stingers.
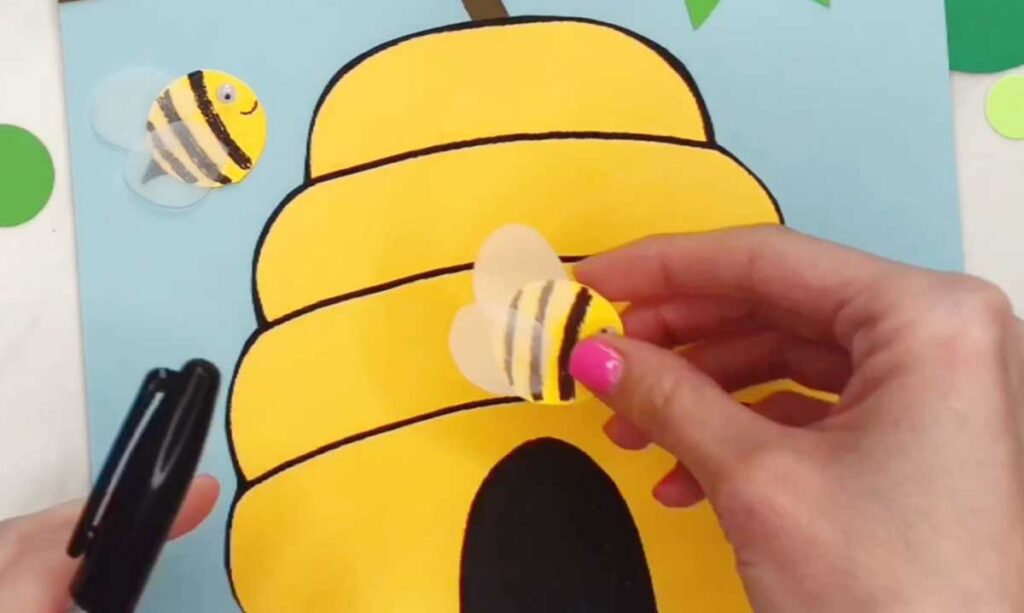
Use a marker to draw small legs under each bee.
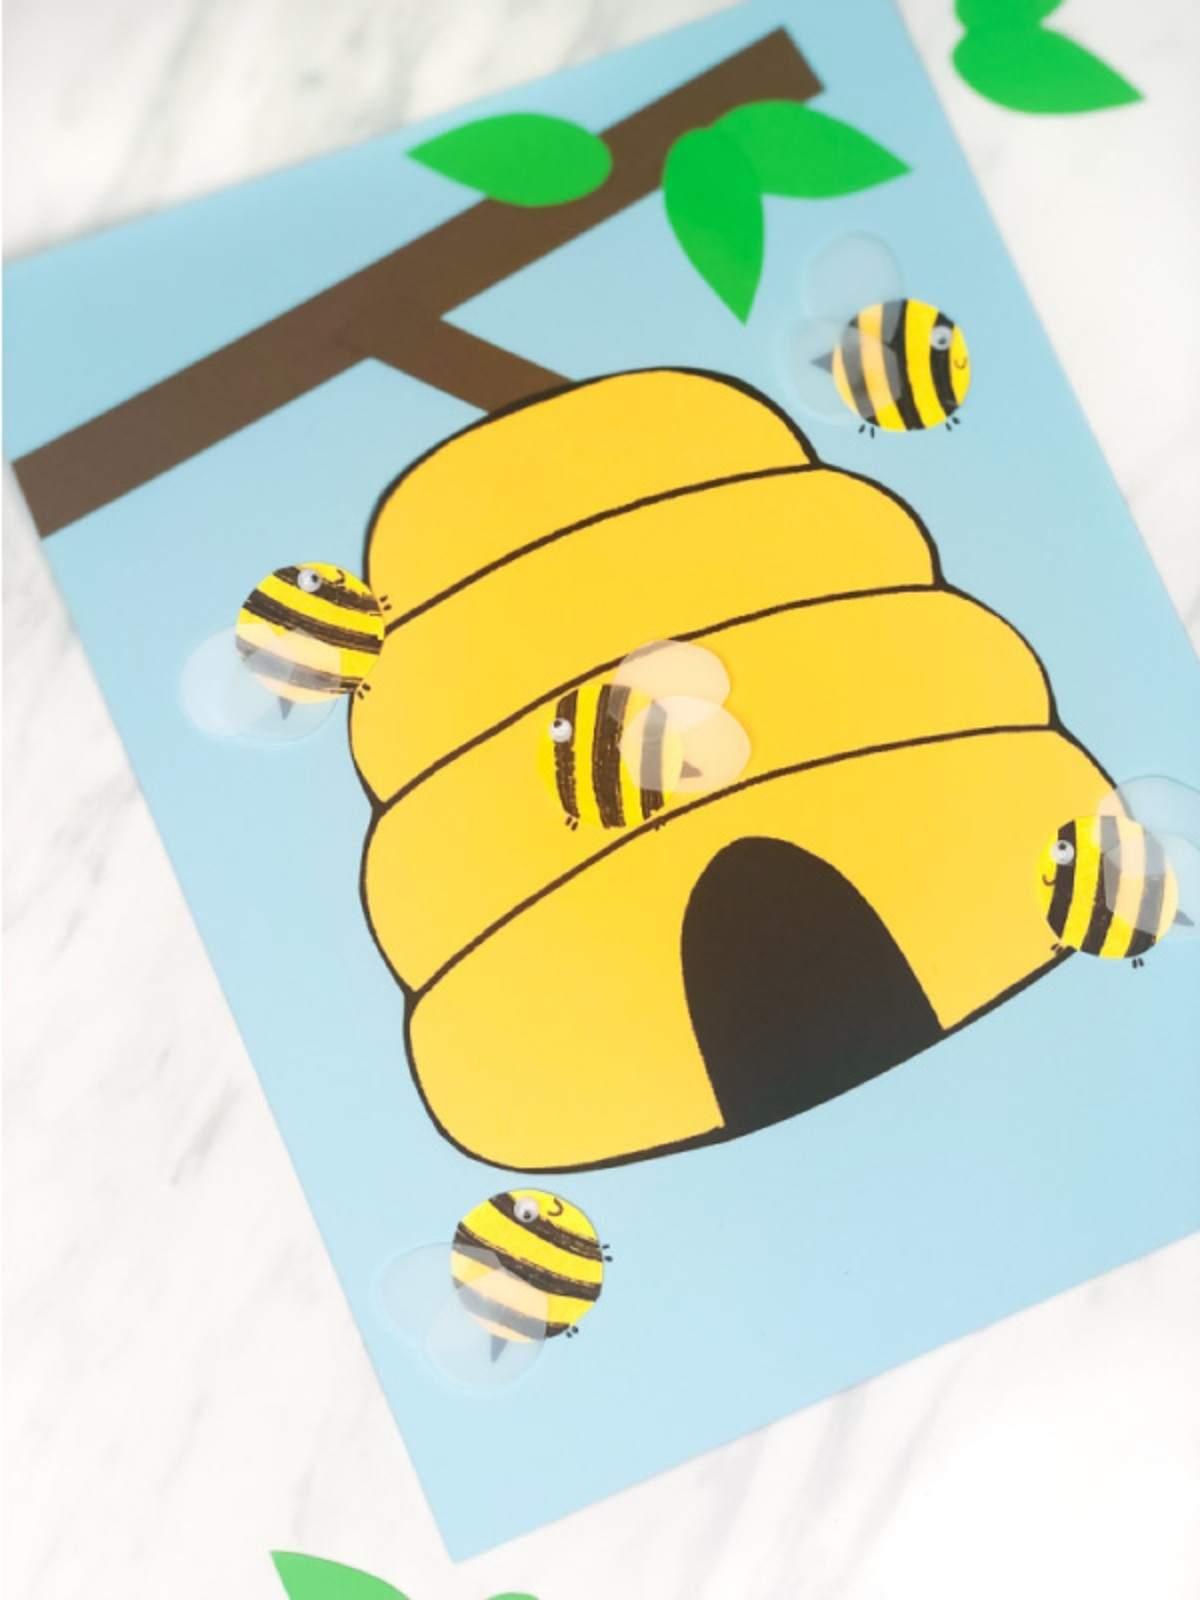
Now you have yourself a cute bee craft your kids will love! This DIY is great for spring, bug units, or anytime your kids are learning about bees and the importance they play in our environment.

Recycled Bee Hive Craft for Kids
Materials
- Colored cardstock
- White cardstock
- Yellow acrylic paint
- Round sponge paint brush
- Scissors
- Glue stick
- Milk jug optional
- Paper trimmer optional
- Black marker
- Beehive template
Instructions
- Print out the template and cut out the pieces you need.
- Using scissors or a paper cutter, cut a long rectangle to make a tree branch. Cut a second, shorter rectangle for a descending branch. Glue the tree branches and the leaves onto the top of the blue cardstock.
- Glue the beehive onto the tip of the descending tree branch.
- Using the yellow paint and the sponge brush, make a few bees by dabbing the brush onto a piece of white cardstock. Let dry completely.
- Cut out each circle to make the bee’s body. Make stripes on the bees by using the black marker to draw lines over the yellow paint circles. Add a smile on one side of the bee.
- Cut out small wings for the bees with the scissors and the milk jug. Alternatively, cut out the wings from paper. Glue the milk jug wings and the googly eyes onto each of the bees.
- Position the bees in the area you want them on the paper and use the marker to draw a stinger on the back end. Glue the bee in place so the body lines up with the stinger.
- With the marker, draw little legs beneath each bee.
Did you make this?
Don’t forget to leave a comment below and make sure to follow on Pinterest, Facebook and TikTok for more!
Free Beehive Printable Template


Meet Sam
Sam is the crafter and founder of Simple Everyday Mom. She has been featured in Oprah Mag, Good Housekeeping, The Spruce Crafts, Country Living, The Bump, and more.


your every crafts are wonderful
Aw, thanks so much!