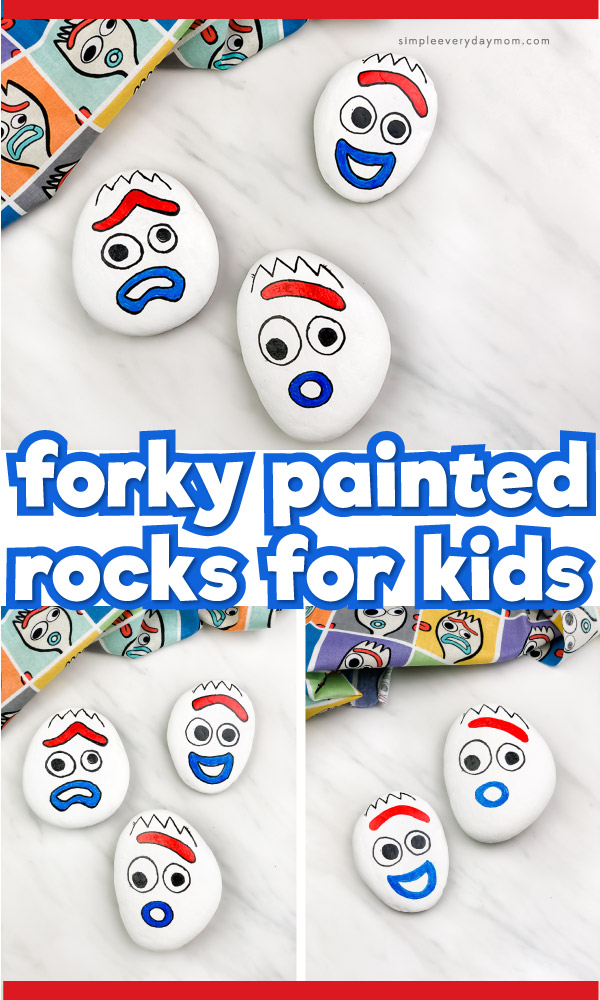
Forky Painted Rocks For Kids
All activities require adult supervision. By using this site, you agree to our terms of use. This post may contain affiliate links. As an Amazon Associate and a participant in other affiliate programs, I earn a commission on qualifying purchases. Read our disclosure policy.

Rock painting has become one of our favorite activities to do as a family during the summer!
Today we’re showing you how easy it is to make these Forky painted rocks with the kids.
If your child is old enough to use paint pens, you’ll be able to show them how they can easily recreate their favorite character from Toy Story 4!
Read our step by step directions and watch our quick video tutorial to see exactly what to do.
Forky Rock Painting
Supplies
- Smooth, flat rocks
- White acrylic paint
- Pencil
- Paint brush
- Paint pens
- Sealant (optional)
Directions
If you’re not starting with white rocks, you’ll need to cover your rocks with 2-3 thin coats of white acrylic paint. Let dry completely before moving on.
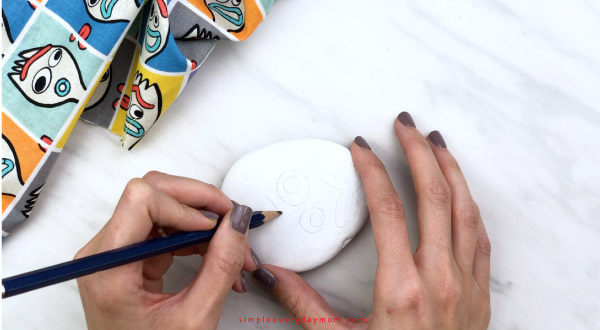
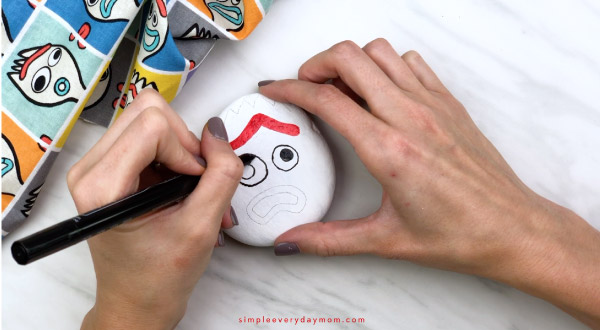
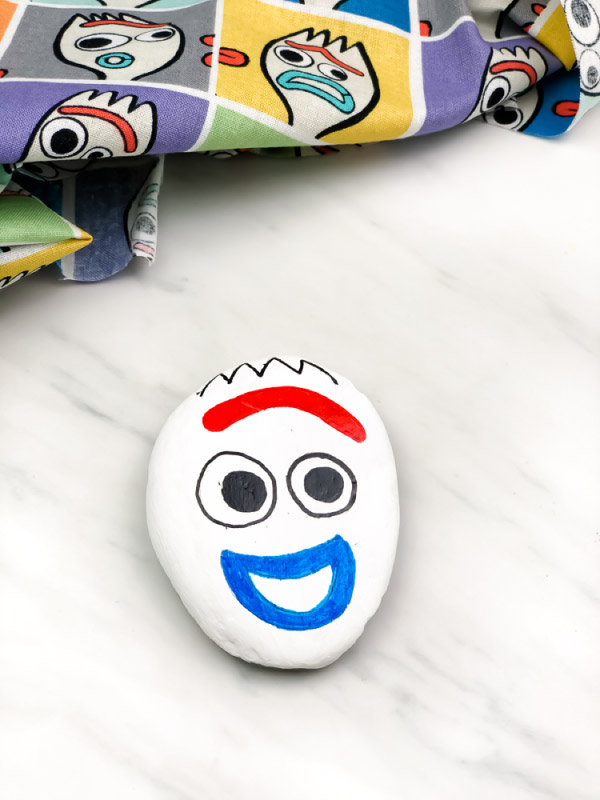
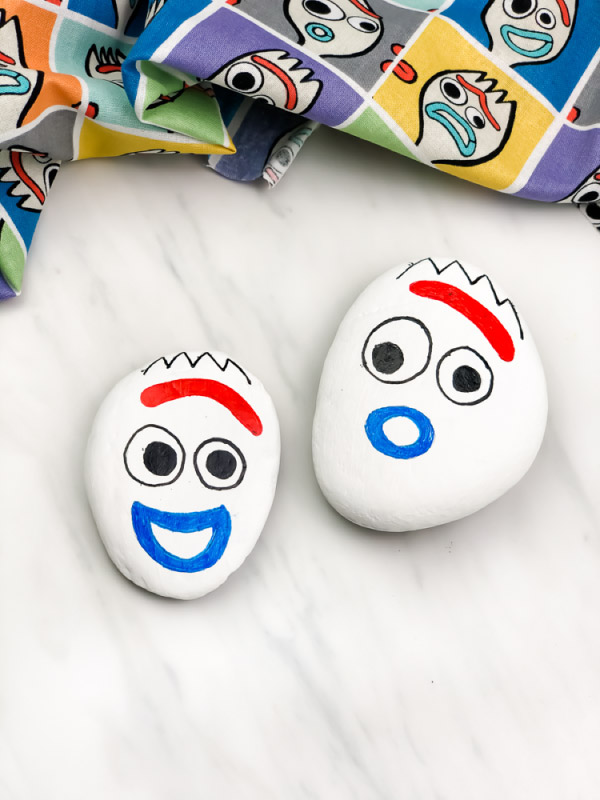
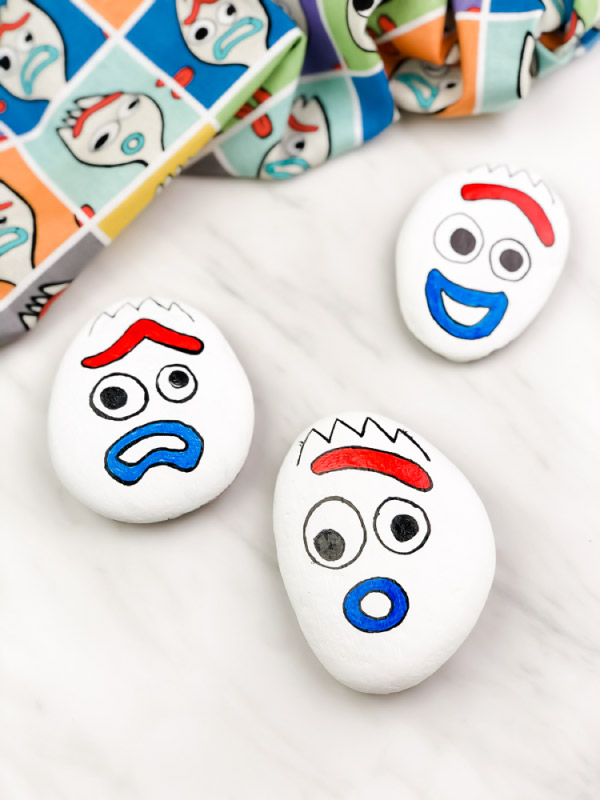
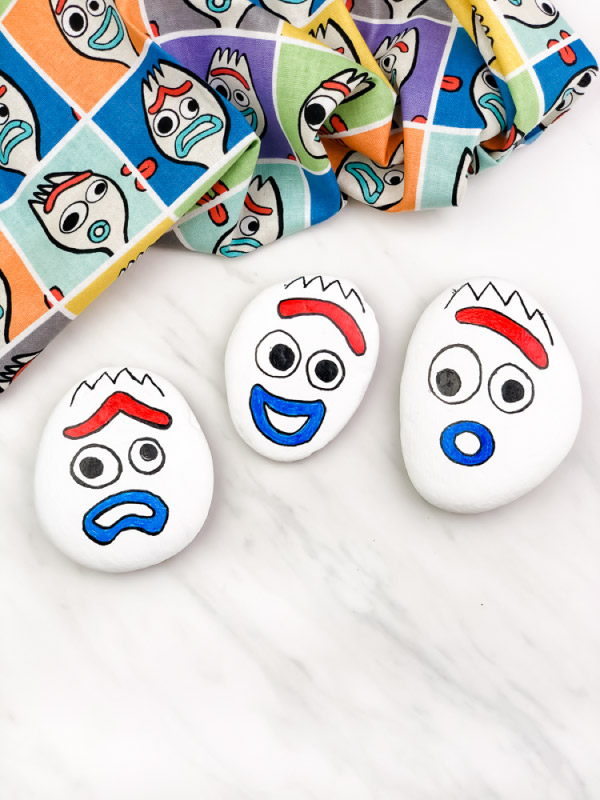
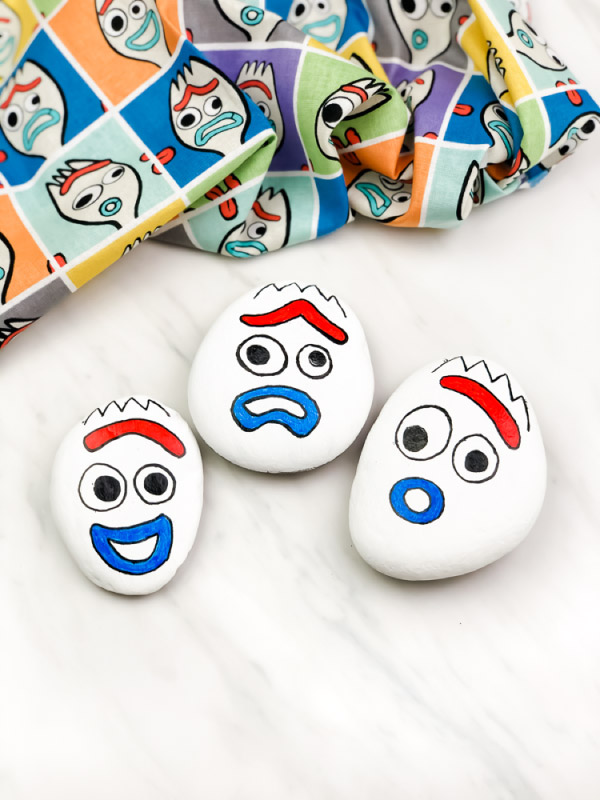
Use a pencil to draw out the face design for Forky. We made three different styles. One happy, one scared and one surprised Forky. To give him the spork look, simply draw on the prongs of the spork above his eyebrow.
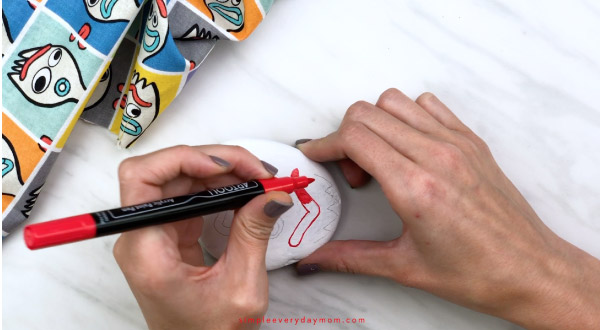
Begin coloring in the rock by painting Forky’s eyebrow red.
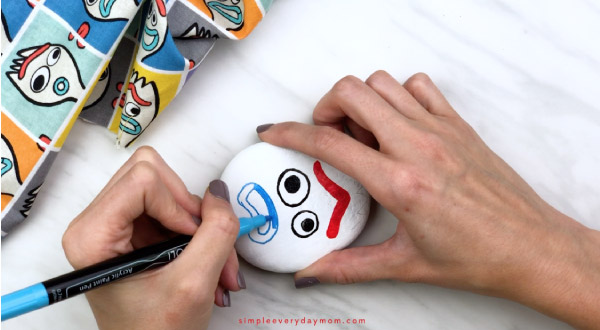
Next, move on to Forky’s eye. Fill in his pupil, then outline both eyes.
Finish Forky’s face by coloring in his mouth a light blue.
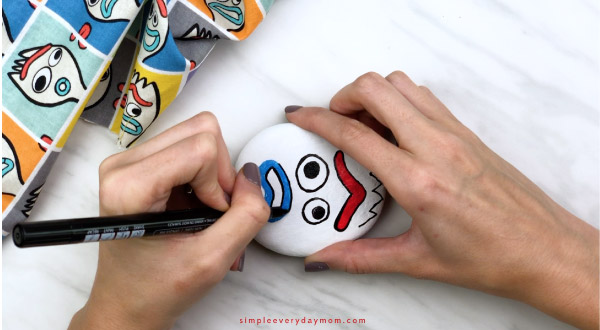
Take a black paint pen and draw over the pencil made spork prongs.
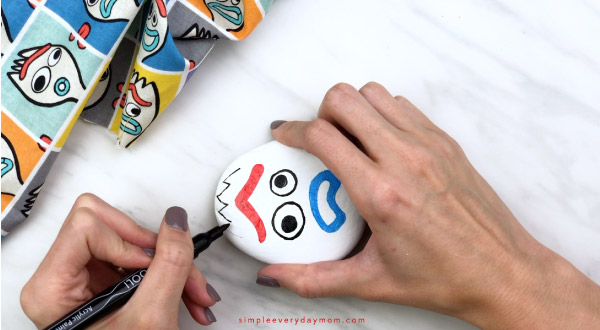
Optional: You can finish there or outline the eyebrow and mouth with the black paint pen.
Related: Frozen 2 Art Project For Kids
Which Paint Pens Are Best?
Over the last year of making painted rocks, we’ve gone through 3 different paint pen brands.
We started off with the Posca paint pens since those are the ones that most people recommend. We did like them and thought they had a good flow, but with such thick tips, they were hard to make fine details with.
After those ran out, we switched to a generic brand that had good reviews on Amazon, but for us, they were not good. They were streaky and “spit” out paint a lot (which ruins when painting, obviously).
Our last paint pen set that we purchased is our favorite. There are 30 pens so you have a nice variety of colors to choose from. The only downside we’ve found is that the white pens are too liquidy to use, so keep that in mind.
What Age Range Is This Activity For?
Unlike most of our other activities, this rock painting is generally suitable for elementary aged children and up.
But, just because younger kids may not be able to draw Forky, doesn’t mean they can’t still participate.
For very young toddlers or preschoolers, just let them scribble on rocks with the family. Trust me, they’ll have just as much fun.
For kindergarten aged kids, we would suggest drawing on Forky’s face with a pencil for them. Then, they can use the guidelines to draw over. This is a fun way to help them practice hand-eye coordination!
What Do I Do With These Rocks When I’m Done?
You can do whatever you’d like with your painted rocks, but we have a few suggestions!
First, if you plan to keep these rocks for an extended amount of time, be sure to cover them with a sealant. If they’ll be outside, make sure that sealant is outdoor safe.
One of the most fun things to do with painted rocks is to go around your local community and hide them! You can make them super obvious or tuck them away and wait for some lucky treasure hunters to find them.
Places we suggest putting them are:
- the playground
- outside an elementary school
- on the library grounds
- in the front planter of a store
Or anywhere else you can think of!
Whether you decide to keep these rocks in your yard or spread them throughout the community, this is a fun art project kids will love creating!
Share With Us
Did you make these Forky rocks with your kids?
We would love to see how they turned out! Snap a quick picture of your painted rocks then post them to our Facebook page or join our private Facebook group and post it in there.
More Rock Painting For Kids
Forky Painted Rocks For Kids
Video
Materials
- Smooth flat rocks
- White acrylic paint
- Paint brush
- Pencil
- Paint pens
- Sealant optional
Instructions
- If you’re not starting with white rocks, you’ll need to cover your rocks with 2-3 thin coats of white acrylic paint. Let dry completely before moving on.
- Use a pencil to draw out the face design for Forky. We made three different styles. One happy, one scared and one surprised Forky. To give him the spork look, simply draw on the prongs of the spork above his eyebrow.
- Begin coloring in the rock by painting Forky’s eyebrow red.
- Next, move on to Forky’s eye. Fill in his pupil, then outline both eyes.
- Finish Forky’s face by coloring in his mouth a light blue.
- Take a black paint pen and draw over the pencil made spork prongs.
- Optional: You can finish there or outline the eyebrow and mouth with the black paint pen.
Did you make this?
Don’t forget to leave a comment below and make sure to follow on Pinterest, Facebook and TikTok for more!

Meet Sam
Sam is the crafter and founder of Simple Everyday Mom. She has been featured in Oprah Mag, Good Housekeeping, The Spruce Crafts, Country Living, The Bump, and more.