Wizard Handprint Craft for Kids [Free PDF Template]
All activities require adult supervision. By using this site, you agree to our terms of use. This post may contain affiliate links, sponsored links, and ads. As an Amazon Associate and participant in other affiliate programs, I earn from qualifying purchases.. Read our disclosure policy.
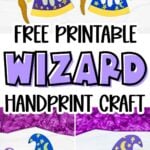
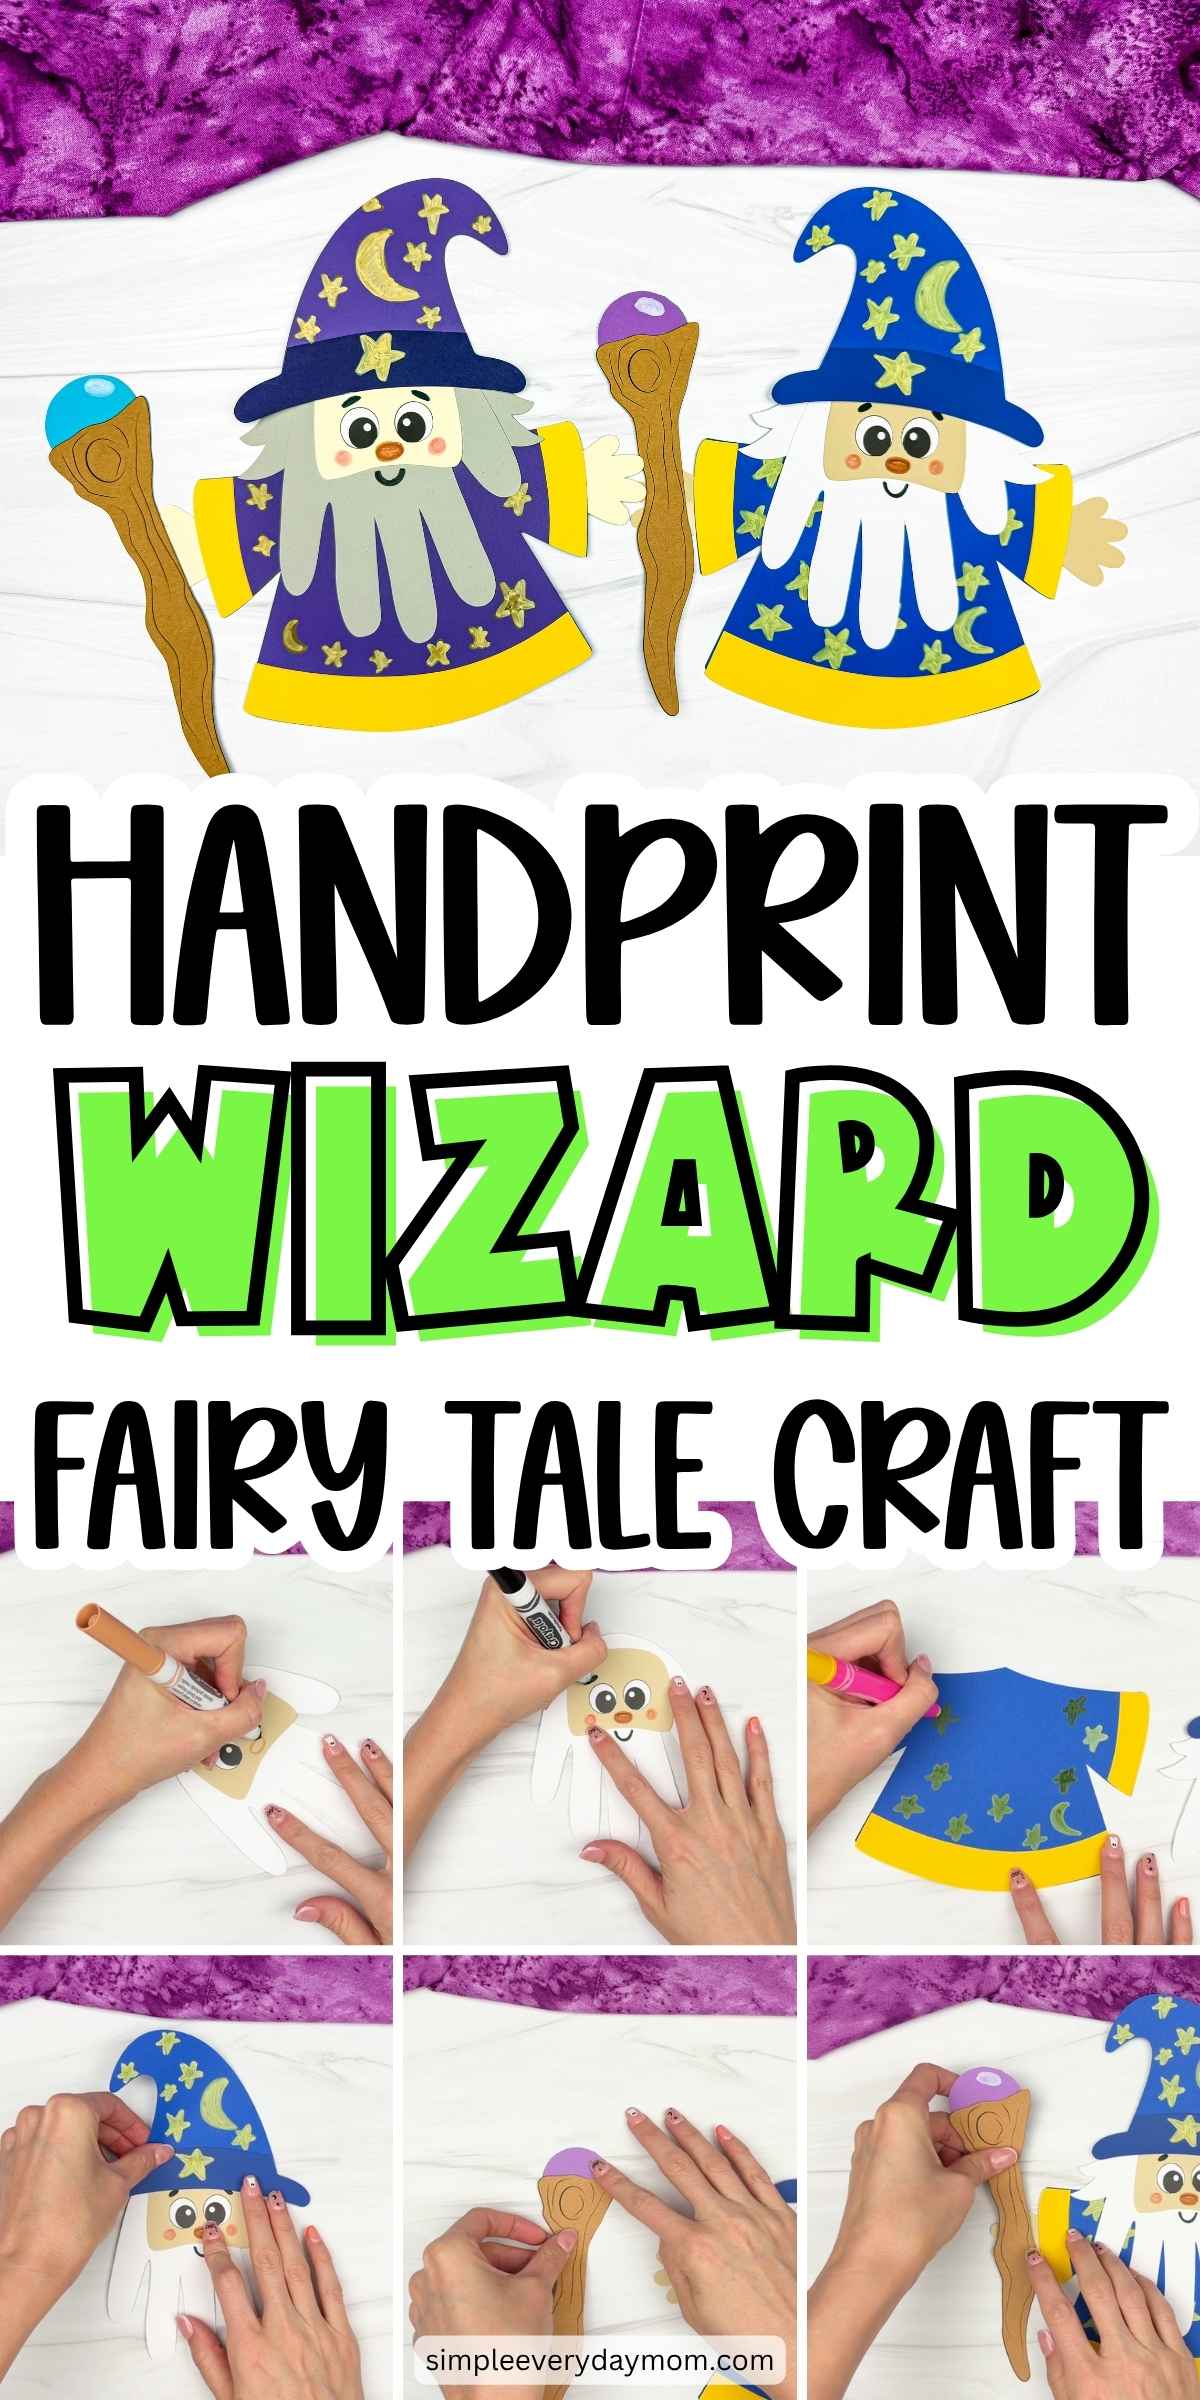
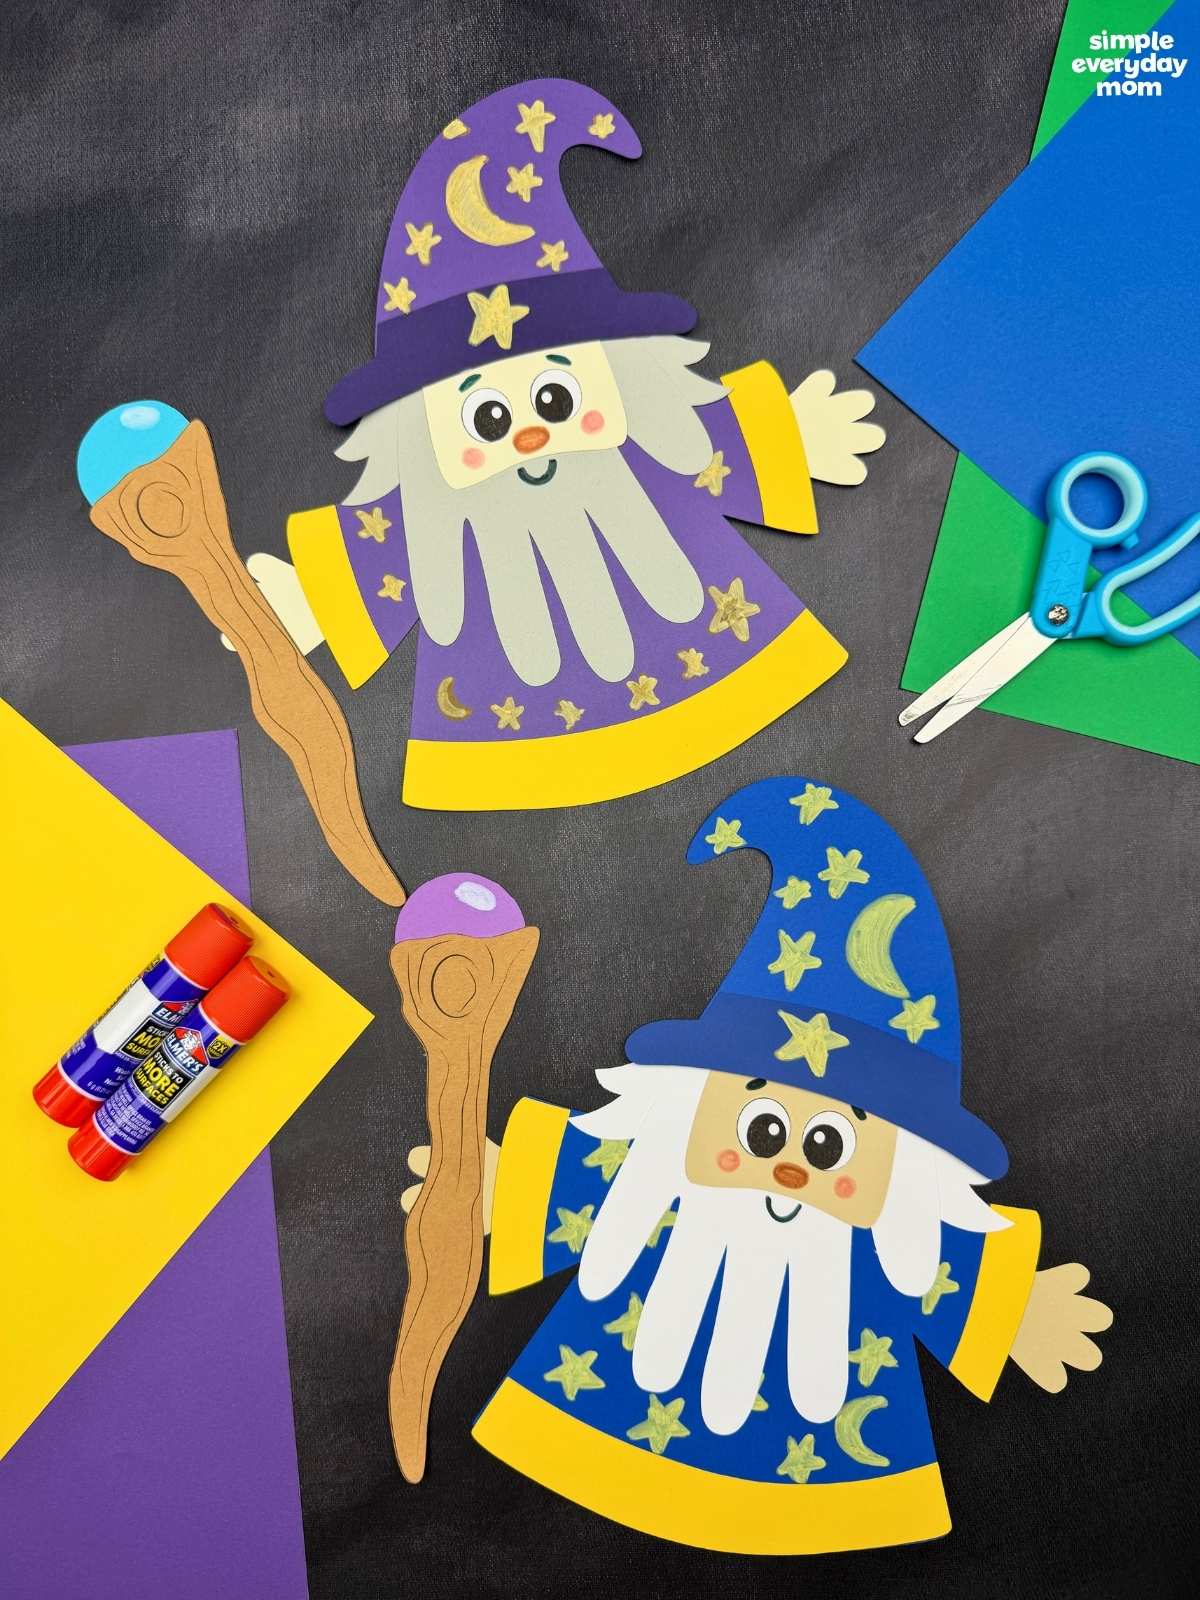
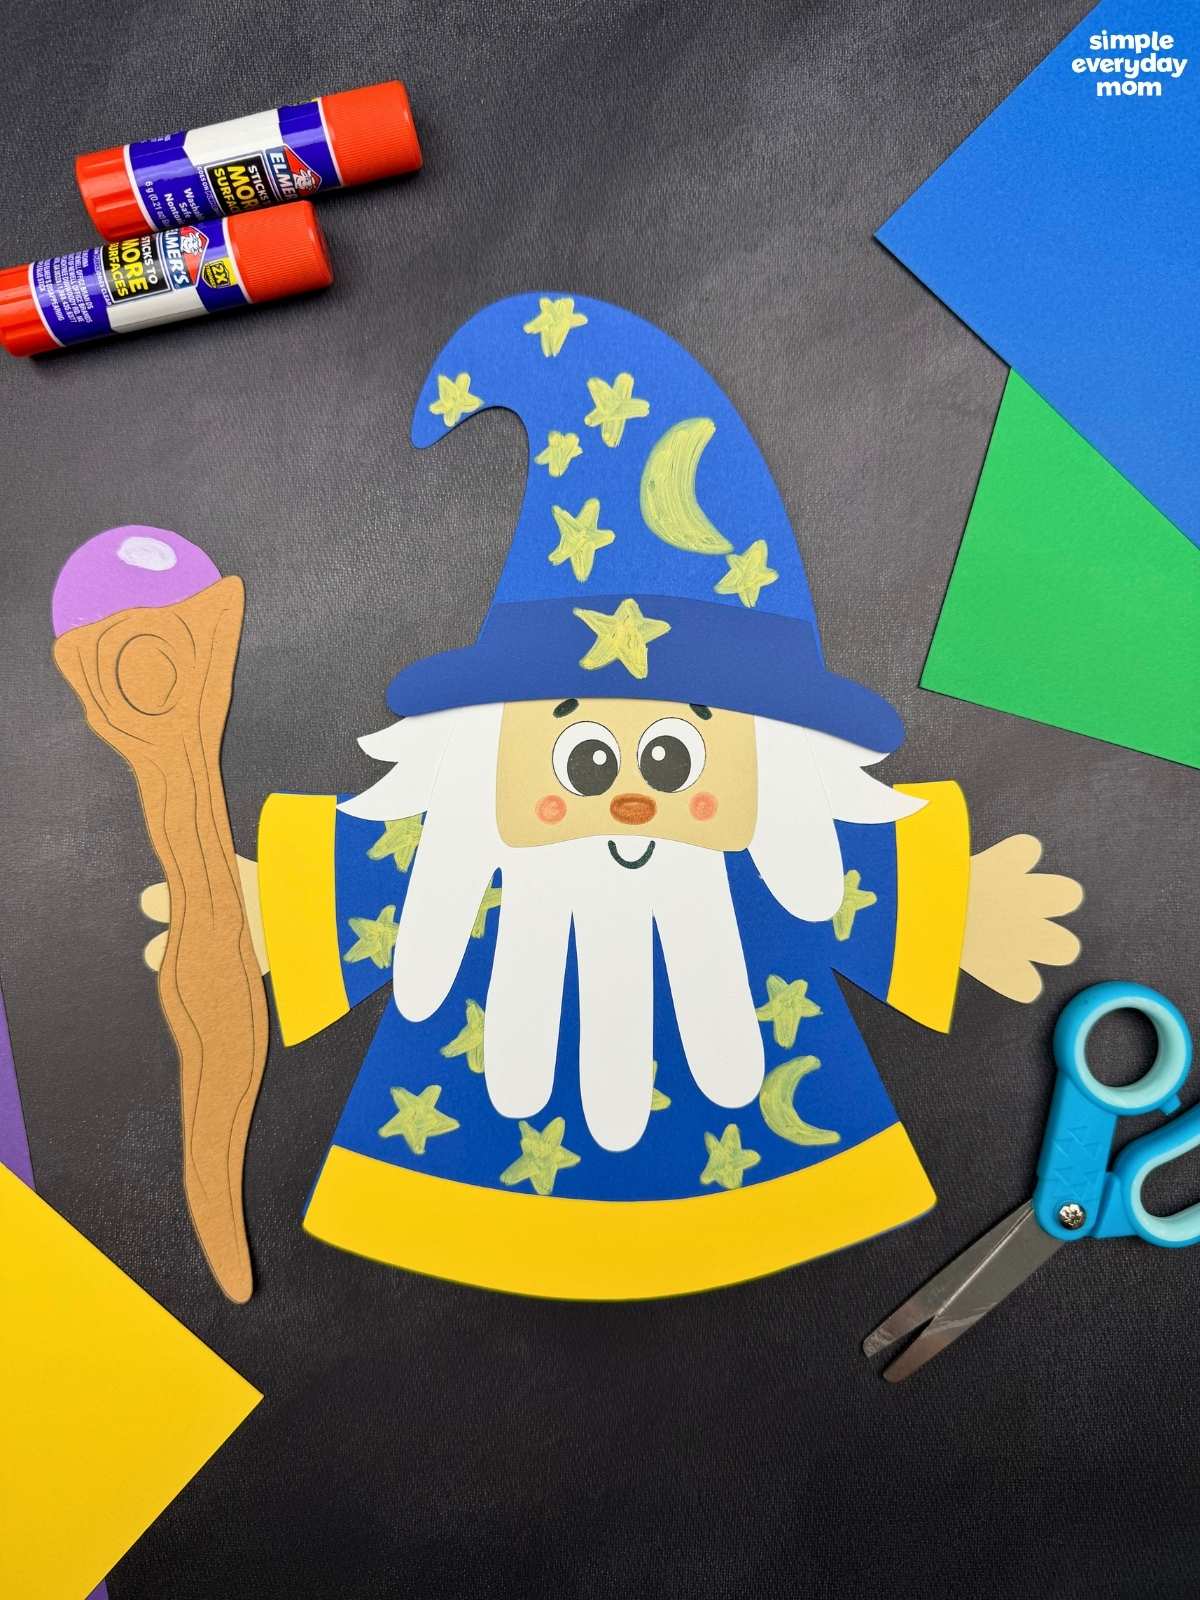
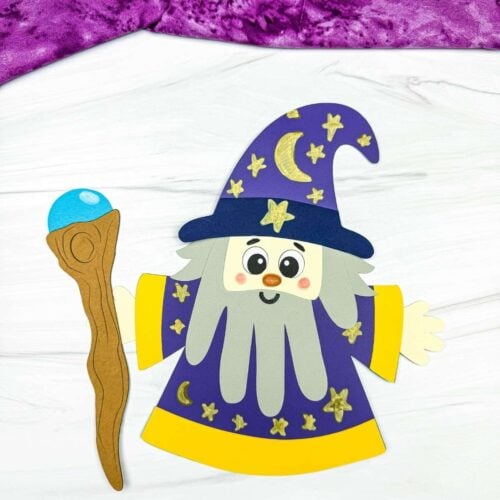
A handprint beard on a wizard? Yes, that works surprisingly well. This wizard handprint craft turns kids’ handprints into a long white beard, then adds a big blue hat, wand, and robe for the full magical look. It’s a good fit for 5-8 year olds, and plan on about 30-45 minutes from start to finish.
Handprints can become just about anything once you start looking at them differently. Our handprint crafts for kids collection has tons of other ideas that turn those familiar finger shapes into animals, characters, and seasonal projects.
Good To Know
- Themes: Wizards, magic, fantasy, handprint crafts
- Activity: Trace and cut out a child’s handprint, then assemble it with the printable pieces to create the wizard’s beard and body
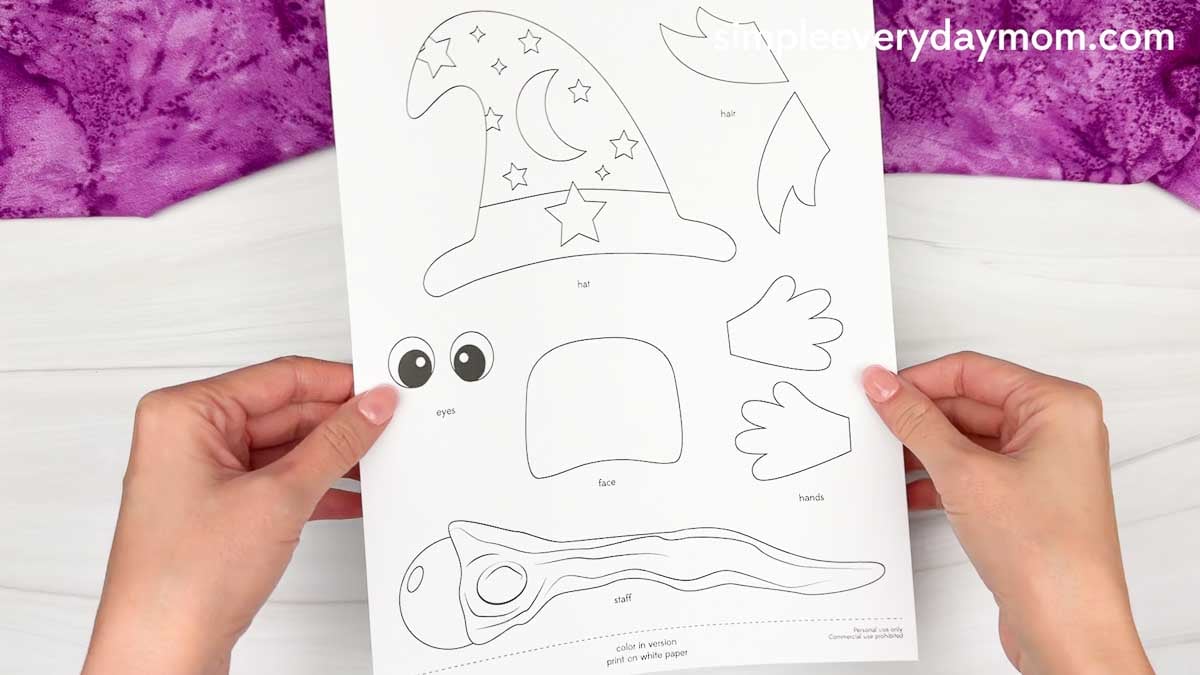
- Template: Includes a free printable wizard handprint craft template with the hat, face, robe, arms, hands, and staff pieces
- Ages: Preschool through early elementary
- Time: 20-30 minutes
- Skills: Fine motor skills, scissor skills, tracing, hand-eye coordination, gluing, and creative expression
Magical Keepsake Craft Idea
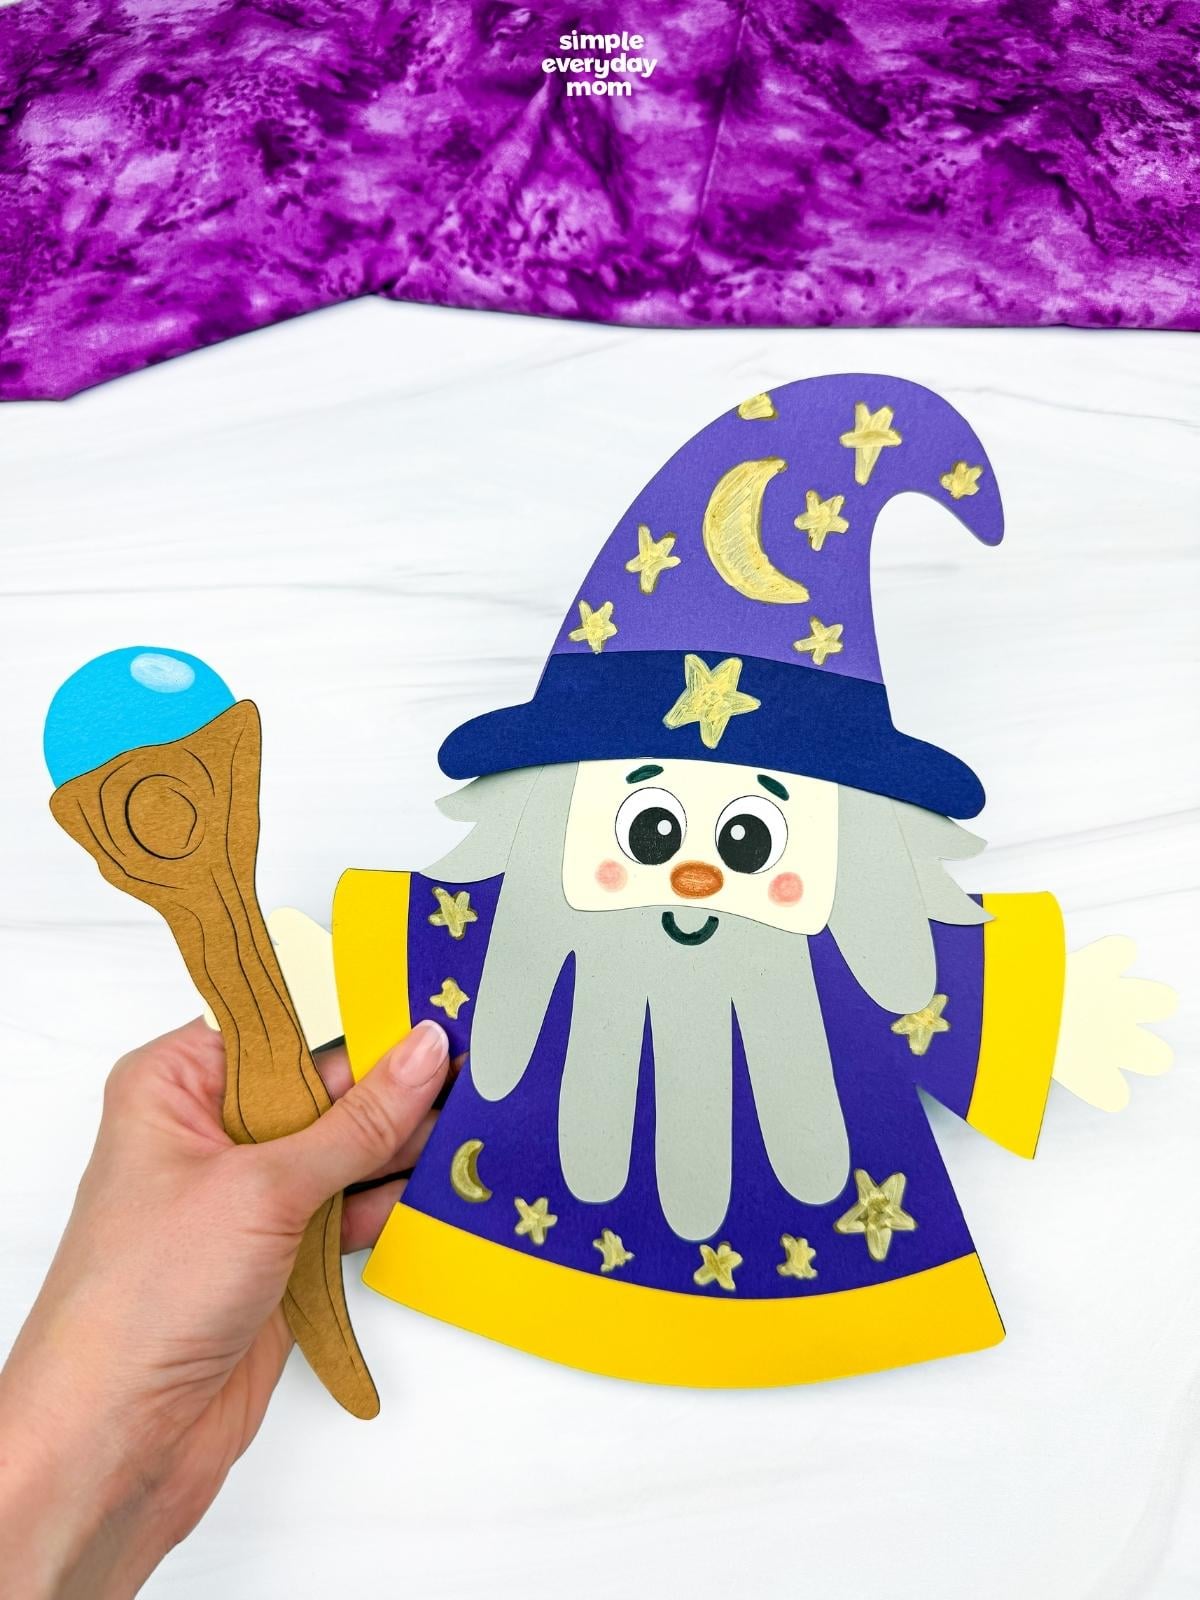
The hand drawn stars and moons are what really make this wizard fun. Kids can decorate the tall hat and matching robe however they want, so there’s no reason every wizard needs to come out looking the same. Add that purple-tipped wand, and he looks ready to start casting spells.
There’s plenty for kids to do while they put him together, from cutting out the paper pieces to positioning the handprint beard and adding their own painted details. All that decorating gives them fine motor practice without making the project feel like an exercise.
The printable template helps with the main wizard pieces, while the handprint gives the finished craft a more personal touch. With basic craft supplies and a little time for decorating, kids can make a wizard that feels completely their own.
Supplies
- Colored cardstock or construction paper
- Scissors
- Glue
- Markers
- Crayola Bold & Bright markers
- Wizard handprint template (click the “click here to get your freebies” image at the end of the post)
Directions
Start by printing the template, then gather the materials for this fun activity. Get those scissors ready, and let’s help the kids bring this wizard to life!
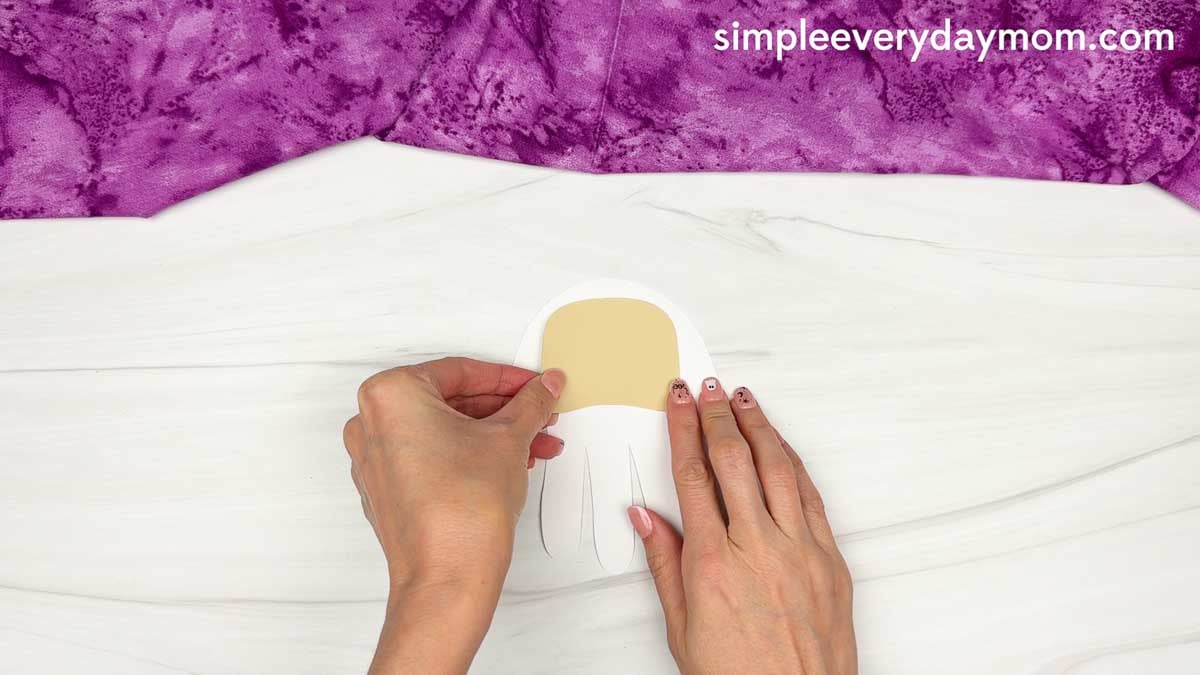
Trace your child’s hand onto white paper, then cut it out. Position the handprint with the fingers pointing down, then glue the face onto the upper part of the palm, centered above the fingers.
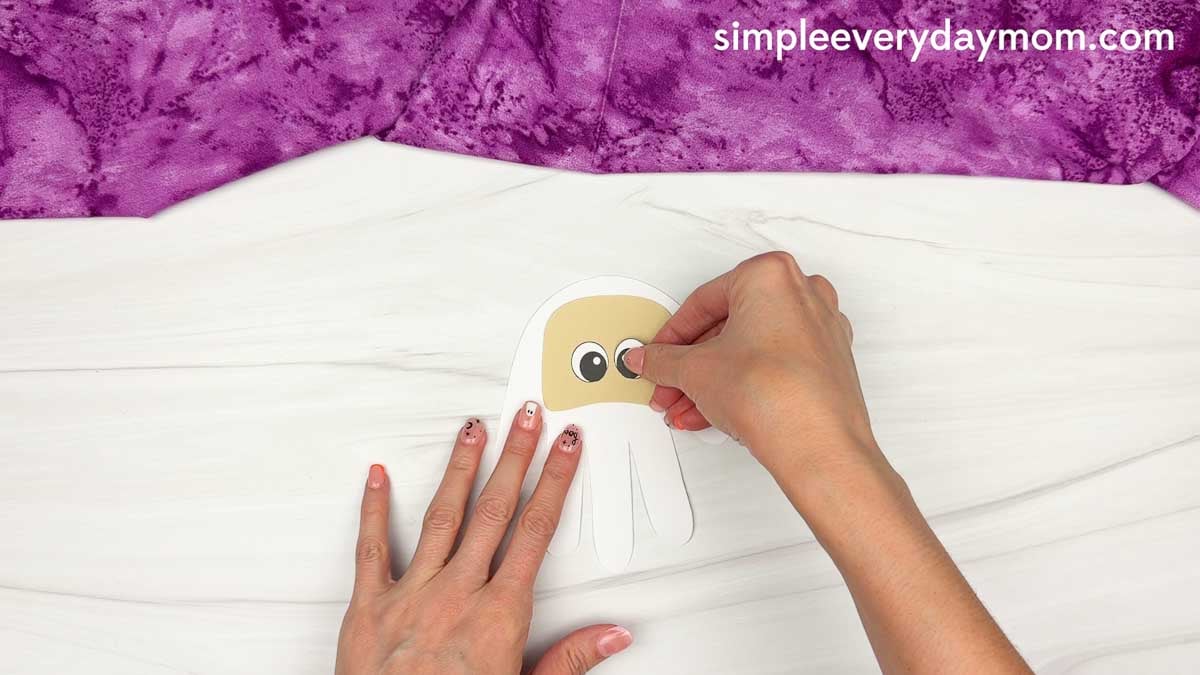
Grab the eyes and glue them to the center of the face. Let your child line them up side by side before pressing them down.
Use a marker to draw a small nose below and between the eyes. Kids can make it round, oval, or give their wizard a silly nose of their own.
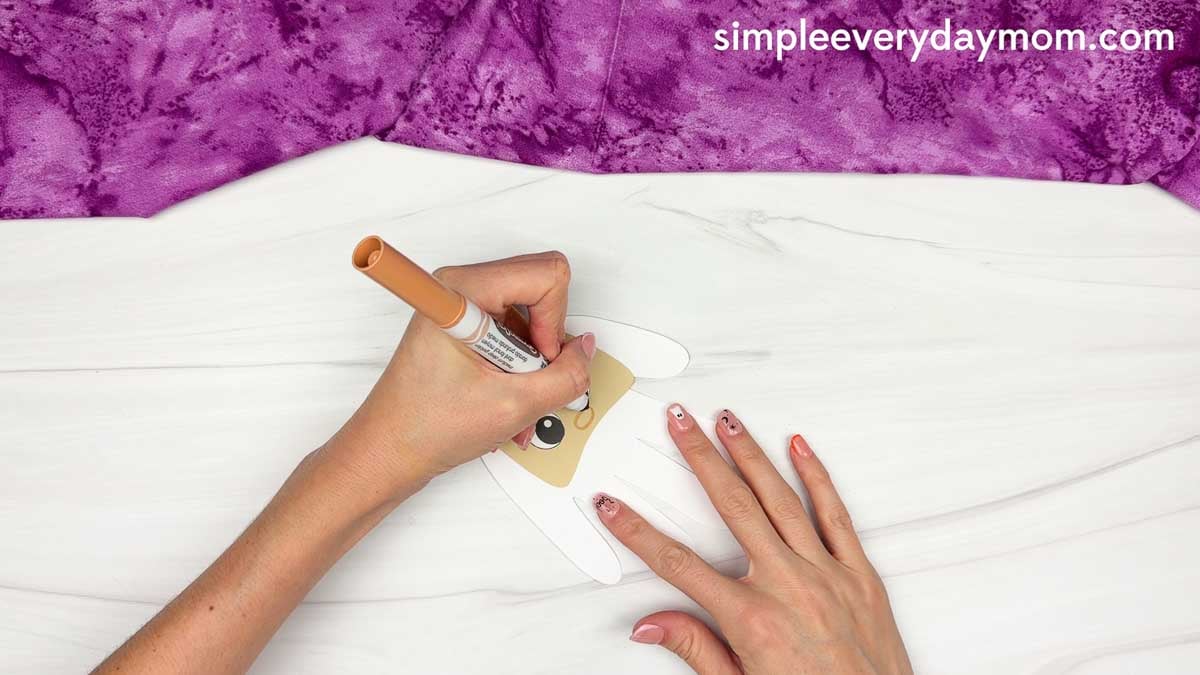
Add a little color to the cheeks with a marker. A small circle on each side of the face gives the wizard an extra cheerful look.
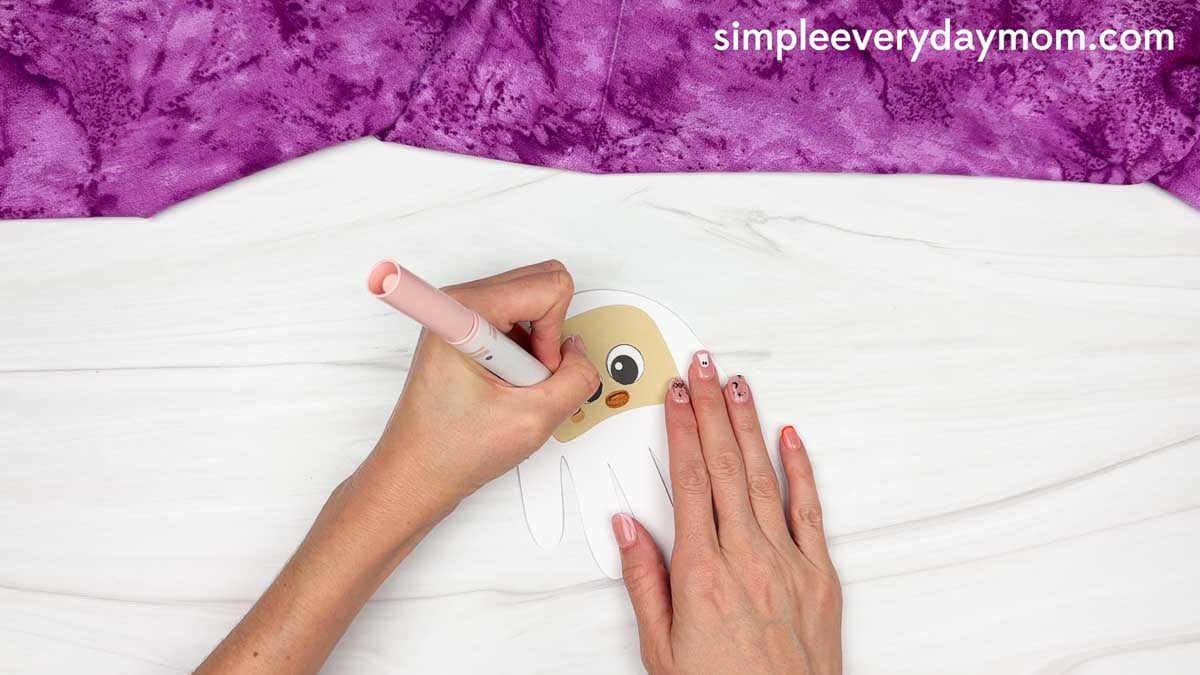
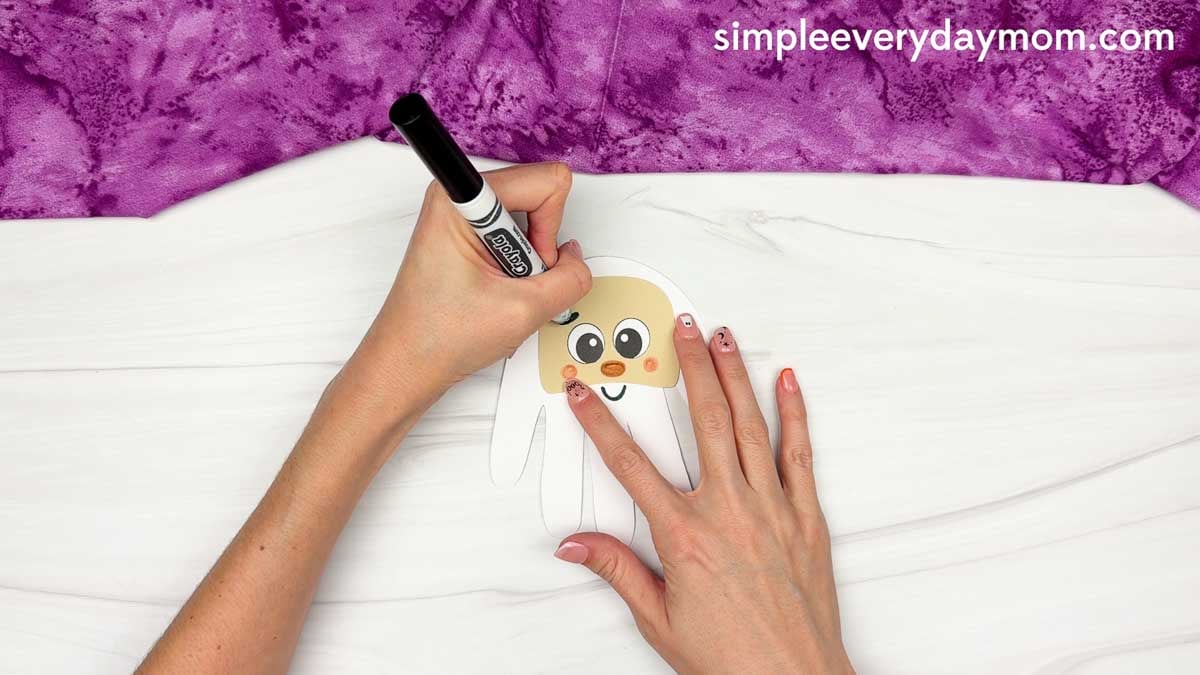
Grab a black marker to draw the eyebrows above the eyes. Finish the face with a small smile below the nose to give your wizard some personality.
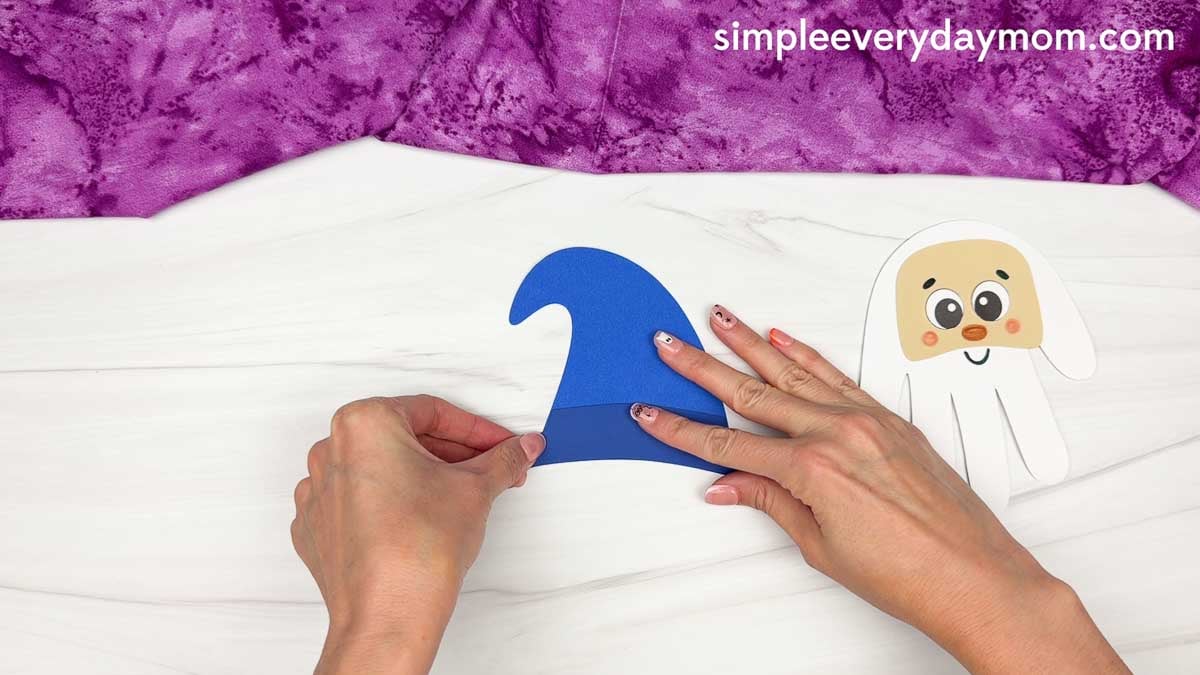
Look for the hat and hat bottom pieces. Glue the hat bottom along the bottom edge of the hat, lining up the pieces so they sit neatly together.
Here comes the magical part! Let your child decorate the hat with stars, moons, or other fun designs using bold & bright marker. They can make every wizard hat look completely different.
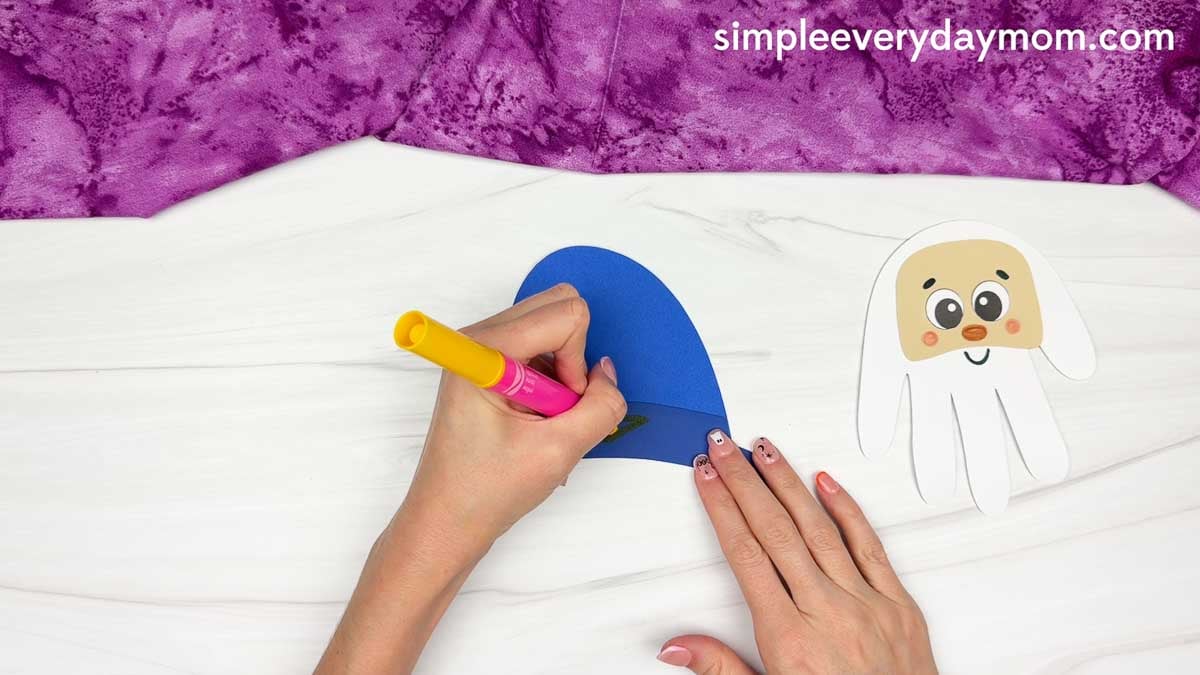
Once the hat is decorated, glue it to the top of the wizard’s head, with the hat bottom sitting just above the eyes.
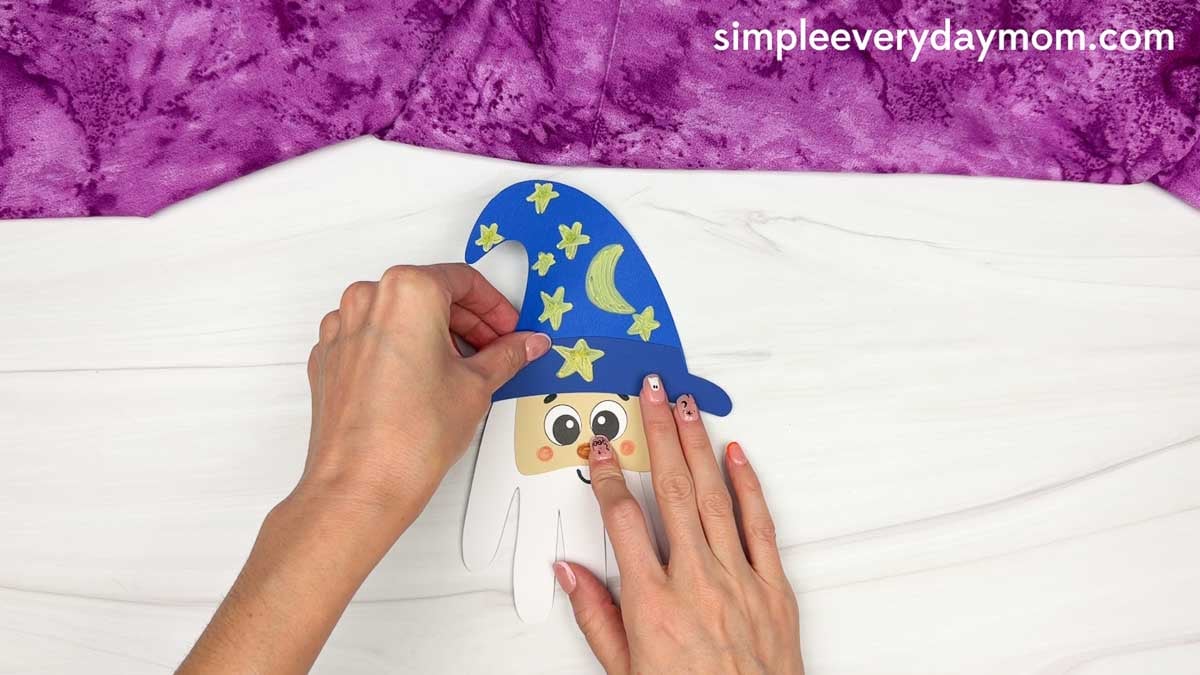
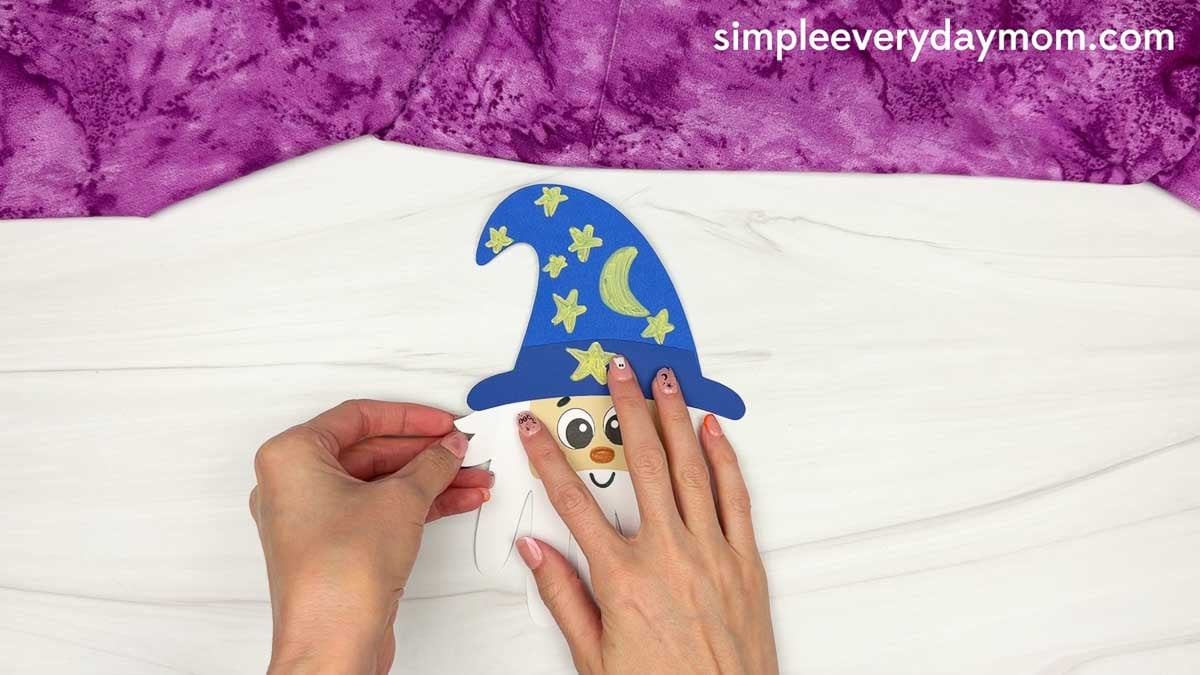
Glue the hair pieces along the sides of the face so they peek out from underneath the hat. Repeat on the other side to give your wizard a full head of hair.
Look for the robe, robe trim, and sleeve cuff pieces. Glue the robe trim along the bottom edge, then glue the sleeve cuffs to the ends of the sleeves.
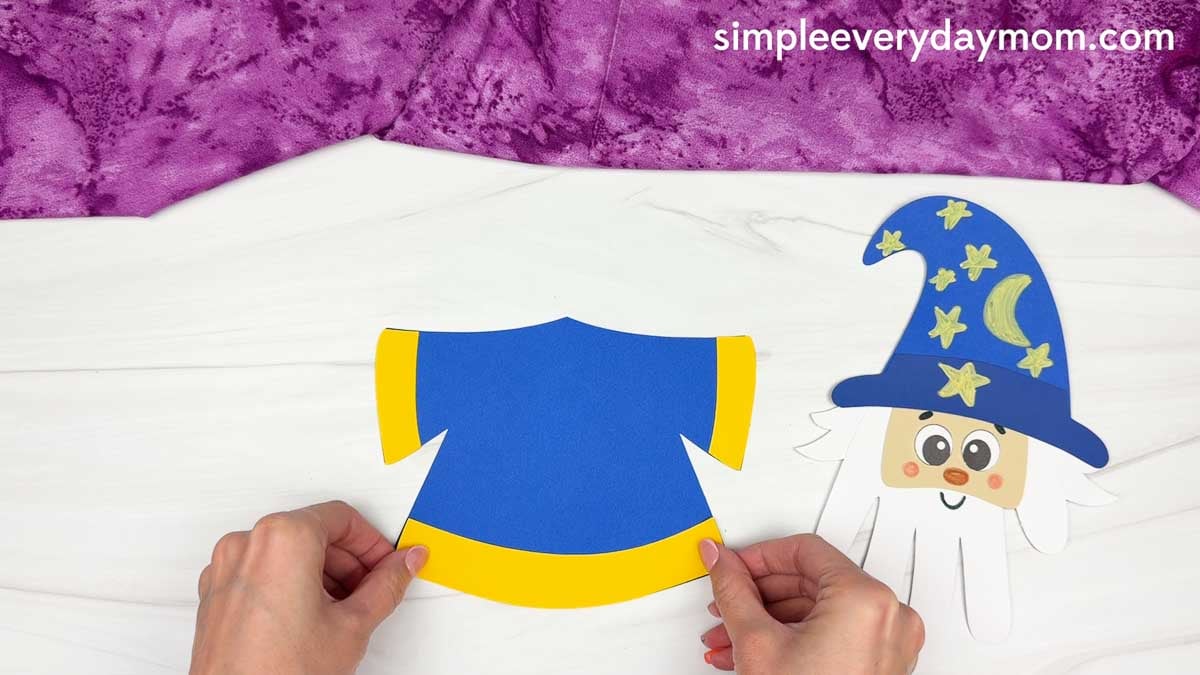
Have fun decorating the robe! Add stars, moons, or other magical designs using a bright & bold marker. This is a great spot for kids to get creative and make their wizard completely unique.
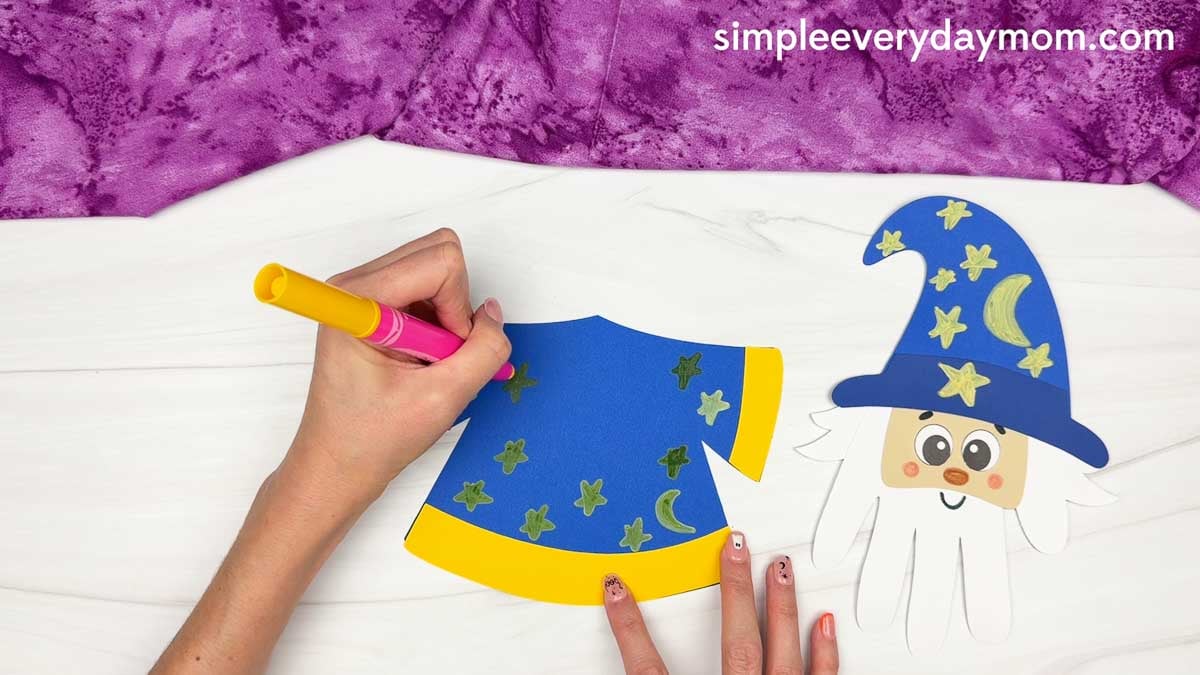
Glue the finished wizard head to the top center of the robe. Now your wizard is almost complete!
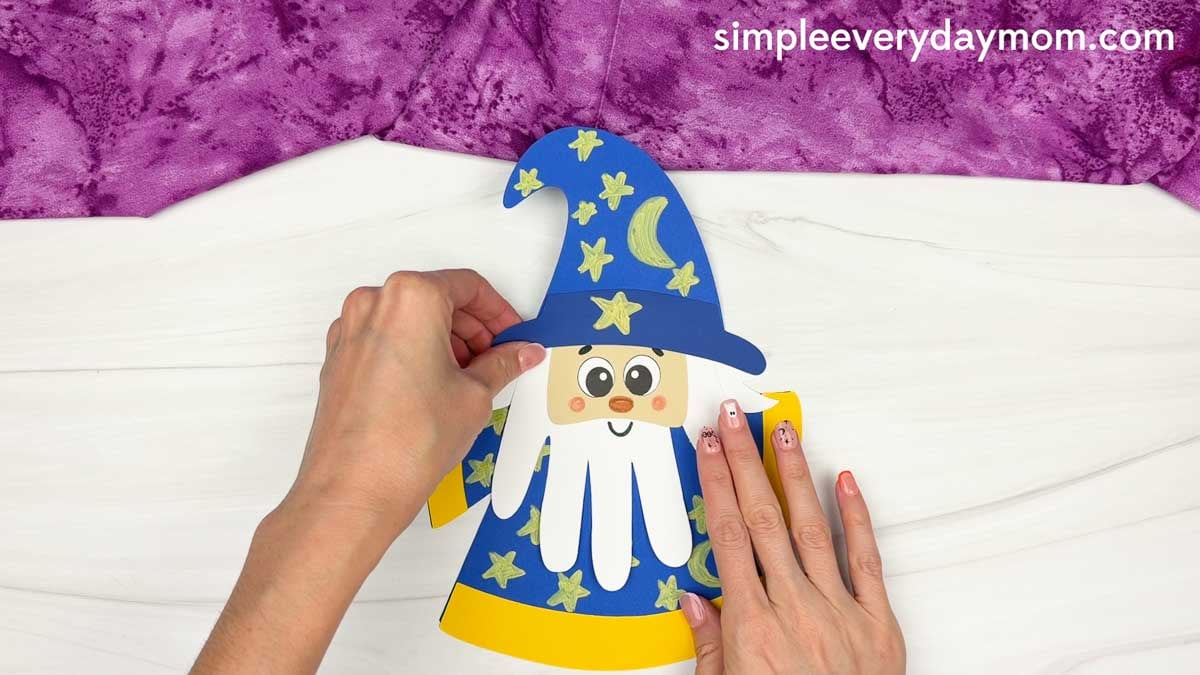
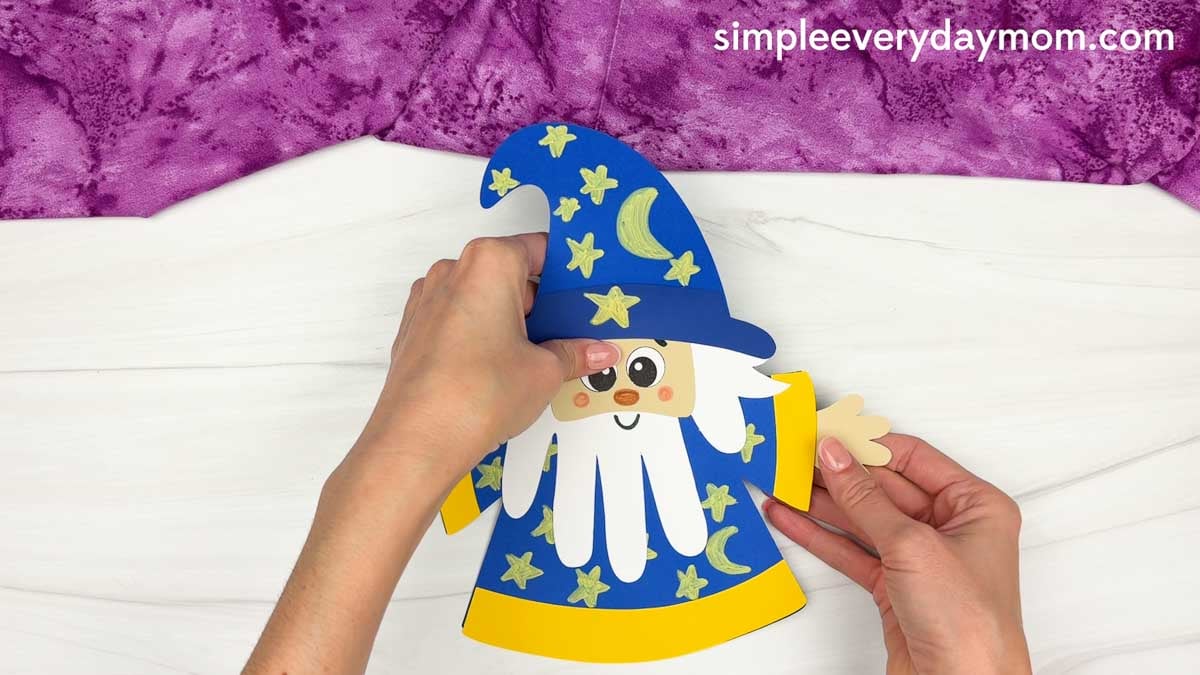
Grab the hands and glue one to the end of each sleeve, just past the sleeve cuffs. Let the fingers peek out from the sides so it looks like the wizard is stretching out both arms.
Take the staff and glue the orb to the top, slightly overlapping the two pieces.
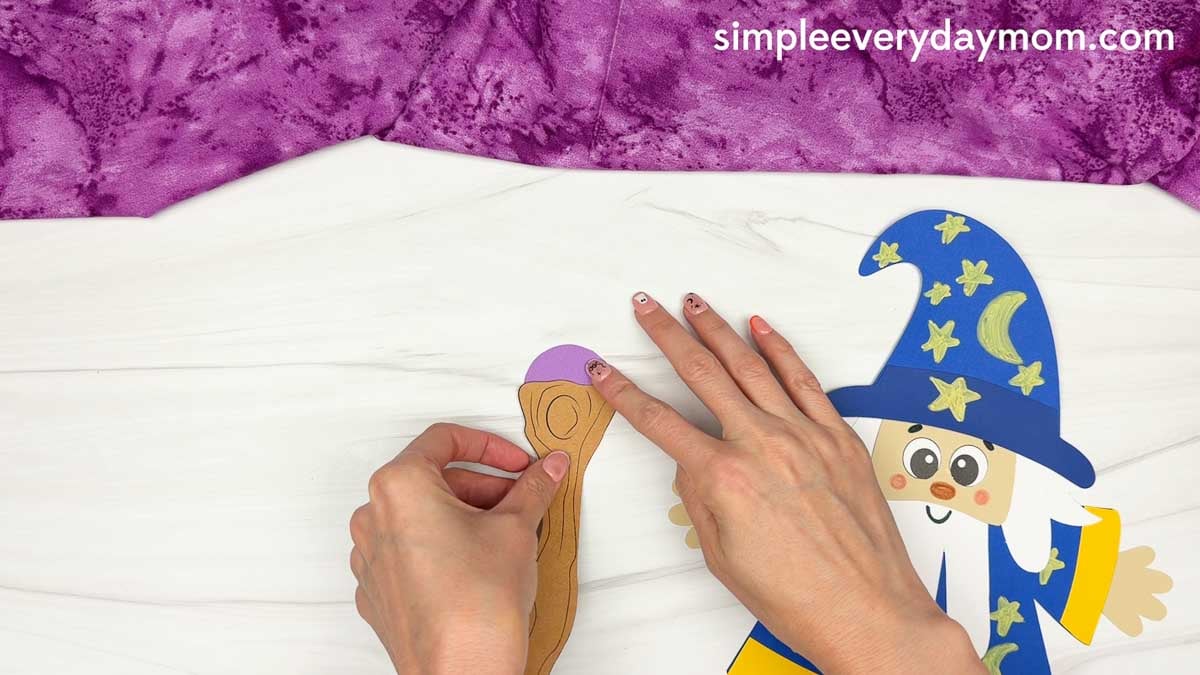
Give the orb a little magical shine by adding a small highlight with a bright & bold marker.
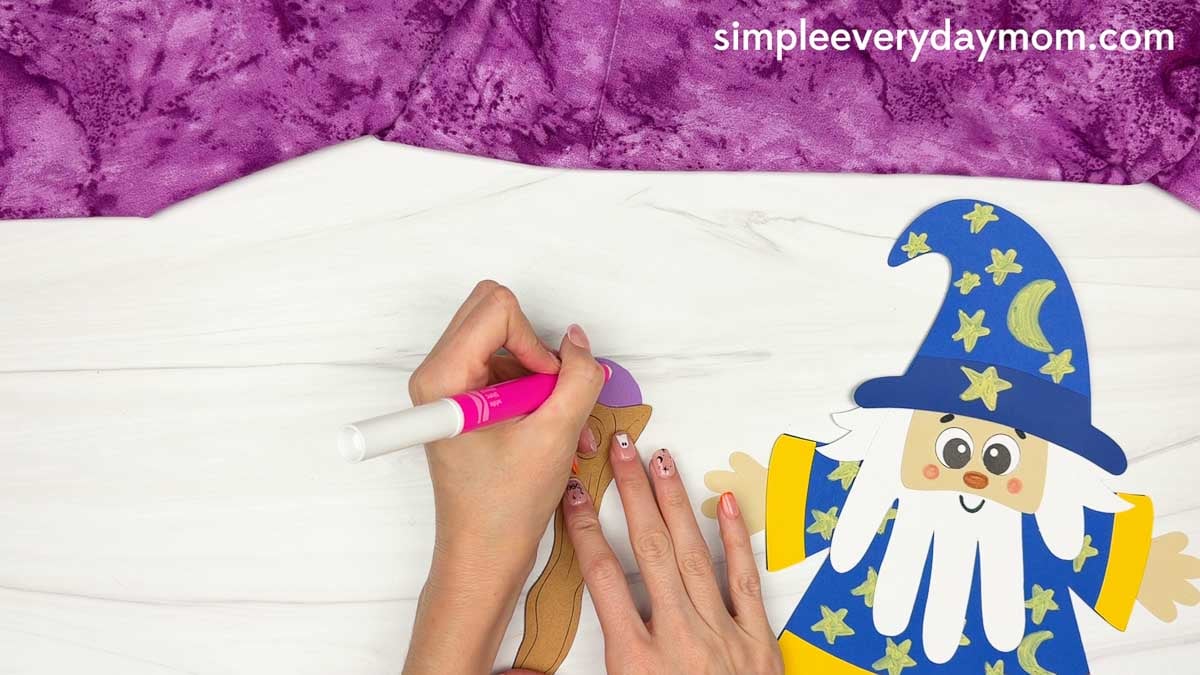
Finally, glue the completed staff next to one of the wizard’s hands so it looks like the wizard is holding it.
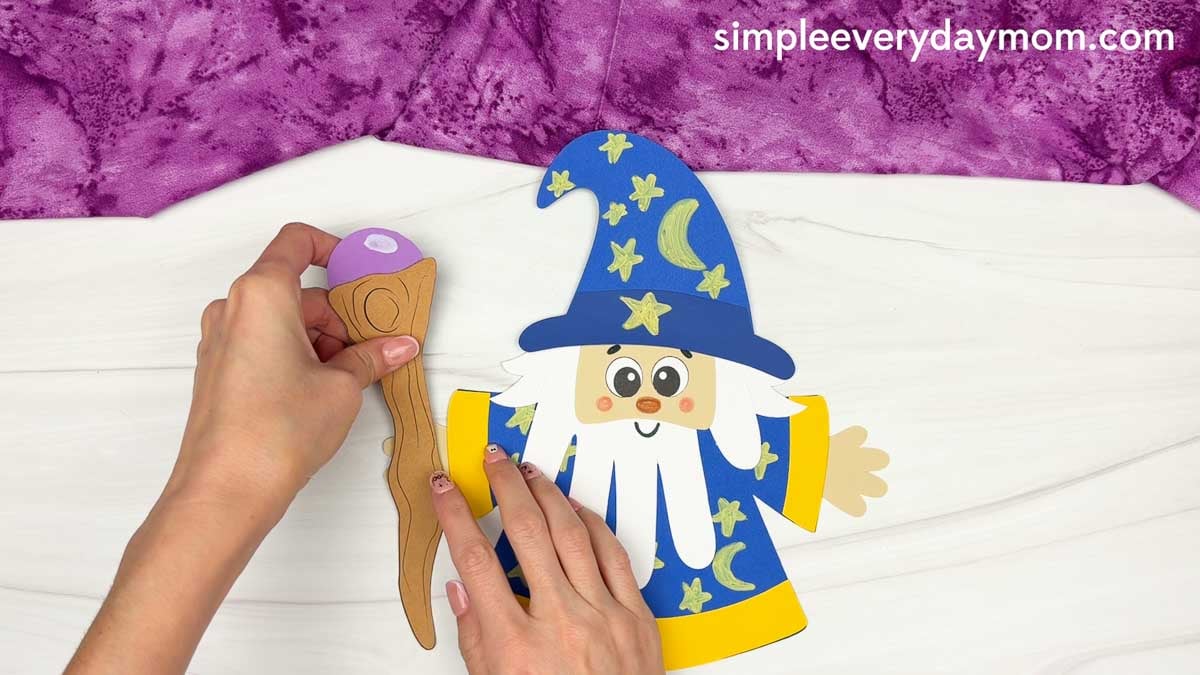
And just like that, your little wizard is ready to work some magic! Kids can have fun showing off their creation while practicing creativity and fine motor skills along the way. Check out the related crafts and activities below for more magical ideas to add to your lesson plans or fairy tale theme.
Fun Children’s Books


If You Give A Mouse A Cookie – This classic children’s book is still a favorite of kids today! It’s a silly story that kids will love and parents will remember!
Can I Be Your Dog? – This is the cutest storybook about a dog named Arfy who’s a homeless dog. Follow his journey to finding the right family to adopt him!
The Kissing Hand -This sweet book will not only have kids captivated but may also help with separation anxiety. We definitely recommend adding this one to your collection!
Magical Crafts for Kids
Dragon Puppet Craft – A dragon is already fun, but making one kids can actually play with afterward is even better. This project turns a paper bag into a dragon complete with wings and fire coming from its mouth, so it can go straight from craft time into pretend play.
Princess Handprint Craft – Those two handprints aren’t just part of the dress, they become the princess’s full ball gown. Kids add the crown, hair, and other paper pieces around them, and that handprint skirt gives the finished princess such a fun shape.
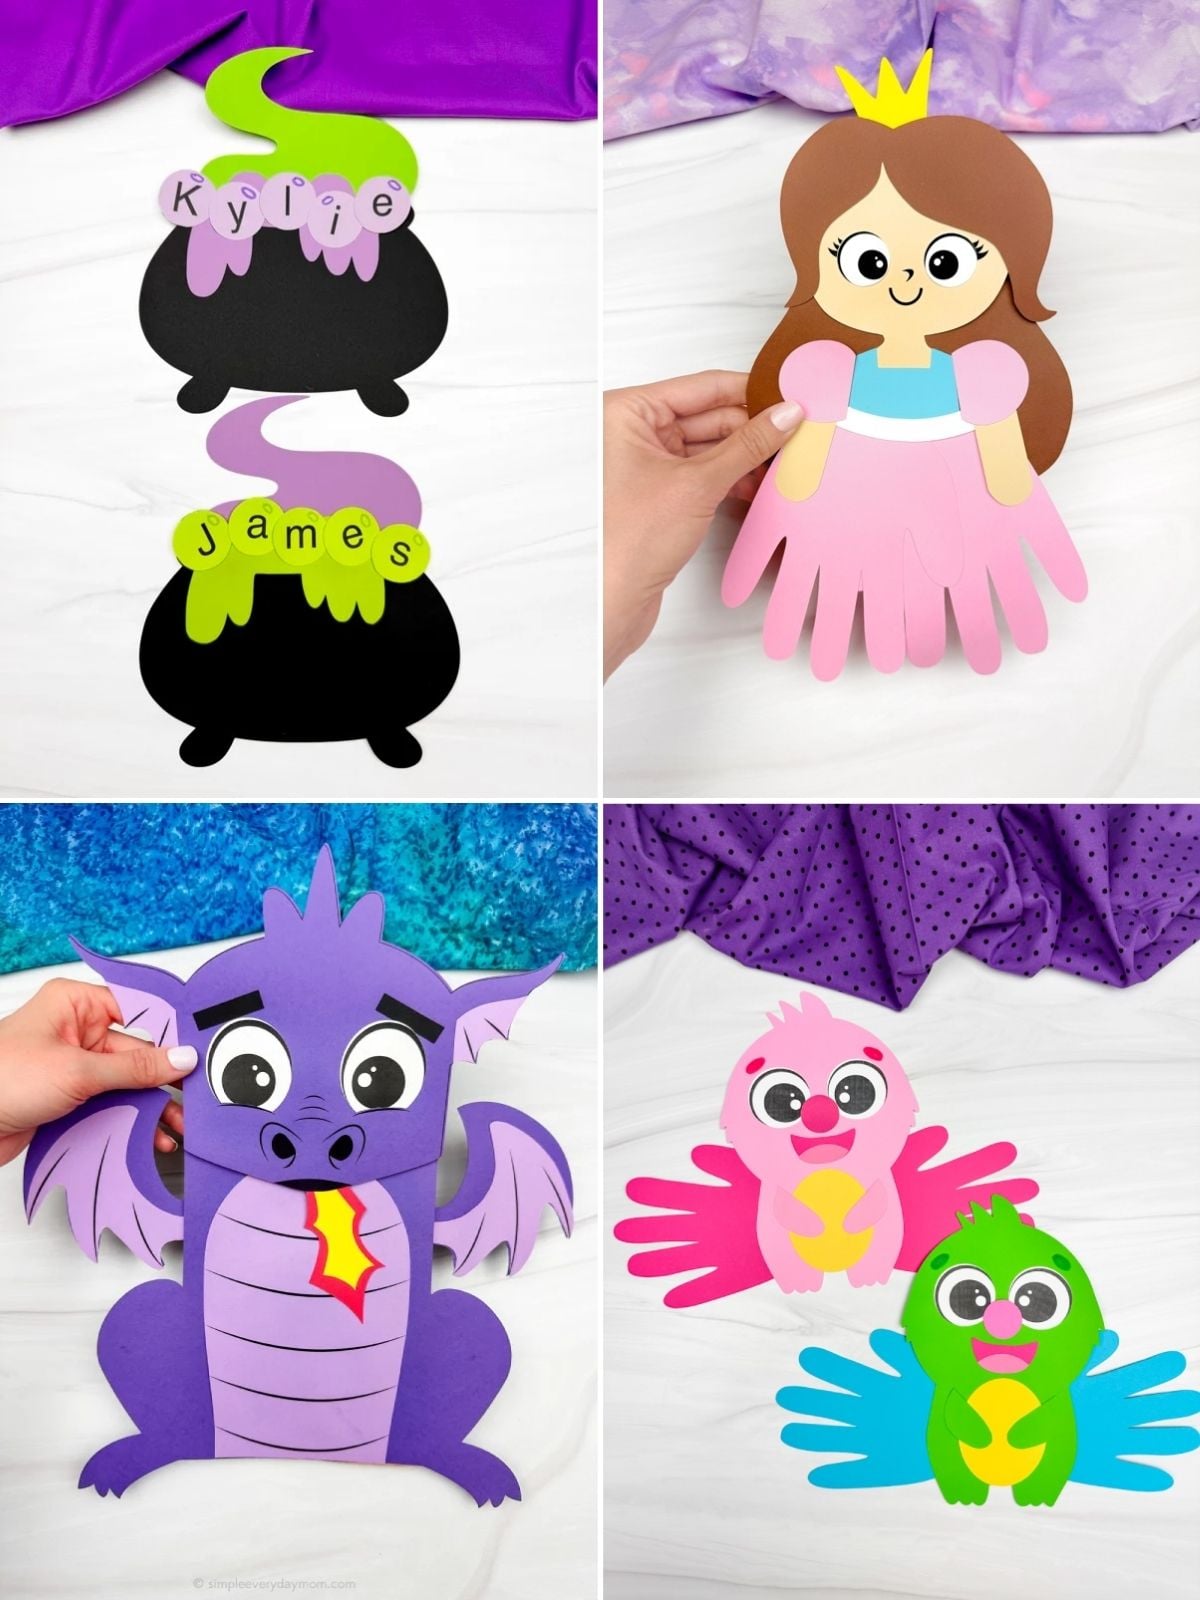
Monster Handprint Craft – Monsters don’t need to follow many rules, which is exactly what makes this one fun. Kids choose the colors for their monster and use handprint cutouts as wings, then finish the face with details like the eyes, tongue, and eyebrows.
Witches Brew Name Craft – Putting a child’s name inside a bubbling cauldron is much more interesting than writing it across another plain page. Each letter goes into its own bubble along the brew, and kids can even draw extra bubbles above them to finish the potion.


Fantasy Learning Printables
Dragons make alphabet practice a lot less ordinary with these dragon worksheets. Kids can hunt for uppercase and lowercase D’s through a letter maze, and there’s also a page where they cut and paste labels onto the different parts of a dragon. Much more fitting for a fantasy theme than another generic letter page.
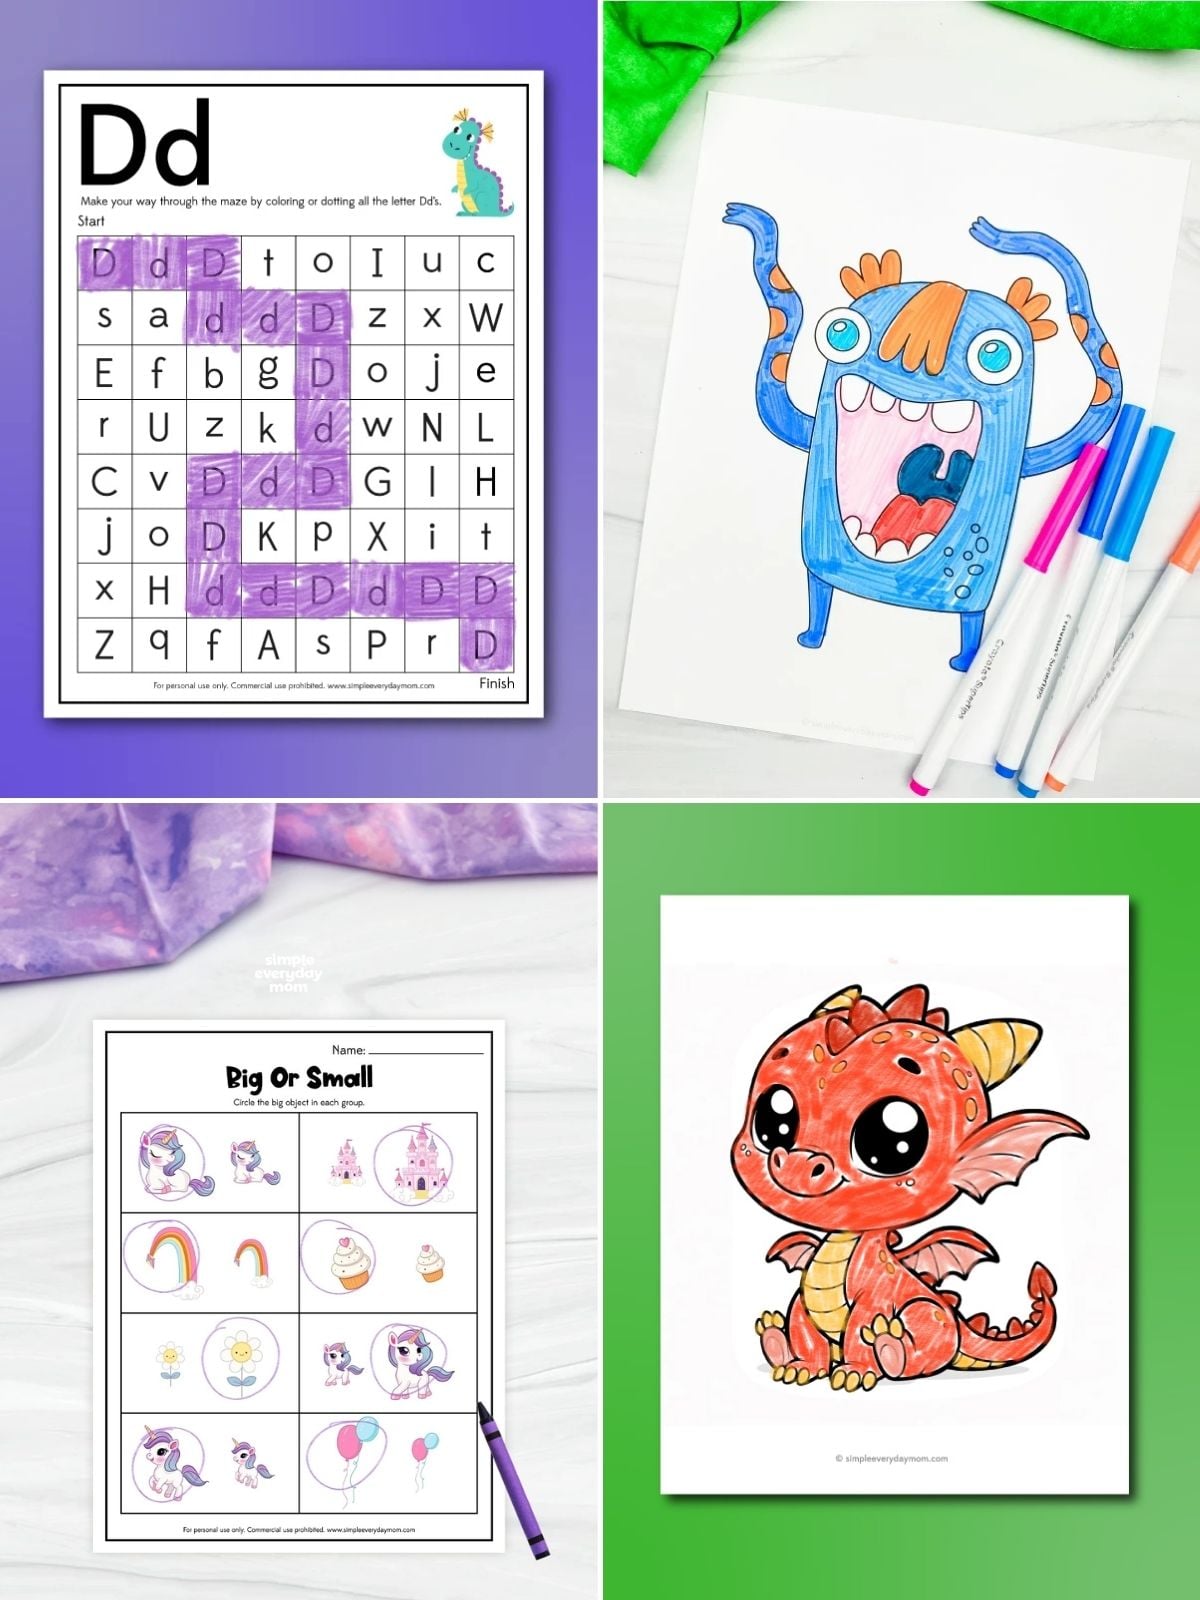
The pictures do a lot of the work in these unicorn math worksheets, which is exactly what you want for younger kids. They can count and graph unicorn-themed pictures, compare sizes, and figure out what comes next in colorful patterns while working on early math skills.
Not every monster has to be spooky. These monster coloring pages have five silly monster designs for kids to color however they want, which leaves plenty of room for purple fur, rainbow horns, or whatever else they decide a monster should have.
A dragon can be practically any color kids can imagine, so these dragon coloring pages are especially fun to hand over with a big box of crayons or markers. There are four different dragon illustrations to customize, making them an easy addition to a fantasy-themed quiet activity.
Fun Activities For Kids
Share With Us
Did you make this activity with your kids or students? We’d love to feature them on our social media!
For a chance to have your child’s project featured, simply snap a picture of the completed project and post it to our Facebook page, email it to us directly by clicking here, or use #simpleeverydaymom on your social media!
Wizard Handprint Craft
Video
Materials
- Colored cardstock or construction paper
- Scissors
- Glue
- Markers
- Crayola Bold & Bright markers
- Wizard handprint template
Instructions
- Print the template and gather the materials for this fun activity.
- Begin by tracing your child’s hand onto paper, then cut out the handprint.
- Position the handprint with the fingers pointing down and glue the face onto the upper part of the palm.
- Glue the eyes to the center of the face.
- Use a marker to draw a small nose below and between the eyes.
- Let your child get creative and use a marker to add cheeks, eyebrows, and a smile to the face.
- Glue the hat bottom along the bottom edge of the hat.
- Use a Bold & Bright marker to decorate the hat with stars, moons, or other designs.
- Glue the completed hat to the top of the wizard’s head.
- Glue the hair pieces to back of both sides of the face.
- Glue the robe trim along the bottom edge of the robe and the sleeve cuffs to the ends of the sleeves.
- Decorate the robe with stars, moons, or other magical details using a Bold & Bright marker.
- Glue the finished wizard head to the top center of the robe.
- Glue the hand pieces to the back and ends of the sleeves.
- Take the staff and glue the orb to the top and back.
- Use a Bold & Bright marker to add a small highlight or decorative detail to the orb.
- Finally, glue the completed staff beside one of the wizard’s hands so it looks like the wizard is holding it.
Did you make this?
Don’t forget to leave a comment below and make sure to follow on Pinterest, Facebook and TikTok for more!
Free Wizard Handprint Template


Meet Sam
Sam is the crafter and founder of Simple Everyday Mom. She has been featured in Oprah Mag, Good Housekeeping, The Spruce Crafts, Country Living, The Bump, and more.