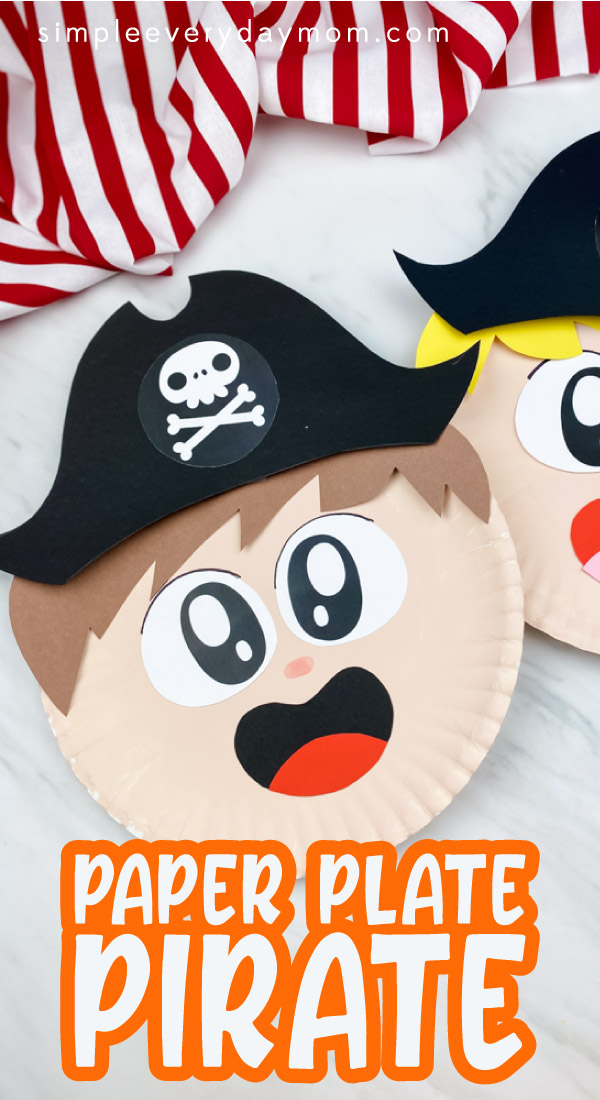
Paper Plate Pirate Craft For Kids [Free Template]
All activities require adult supervision. By using this site, you agree to our terms of use. This post may contain affiliate links. As an Amazon Associate and a participant in other affiliate programs, I earn a commission on qualifying purchases. Read our disclosure policy.
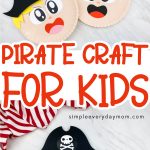
Summer is the perfect time to spend some quality time crafting! And if you’re searching for a more boyish craft, this paper plate pirate craft is perfect.
We make lots of paper plate crafts around here, so when we started a pirate theme, we knew we needed to add this easy pirate craft to the list.
It’s a fun way to combine both arts and crafts since kids get to paint their pirate’s skin color.
Like usual, we’ve added a free pirate template for you to download so it’s easy to recreate this craft at home (or at school) with your kids.
Read our simple directions or watch our quick video tutorial to see this craft in action.
Pirate Craft For Kids
Supplies
- White paper plate
- Skin colored paint
- Colored cardstock (in black, red/pink, hair color)
- White cardstock
- Markers (black and pink)
- Glue stick
- Tape
- Scissors
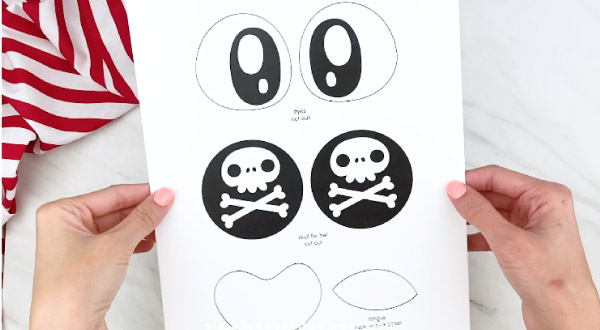
- Pirate template (download form located at the end of this post, just above the comments)
Related: Handprint Pirate Craft
Directions
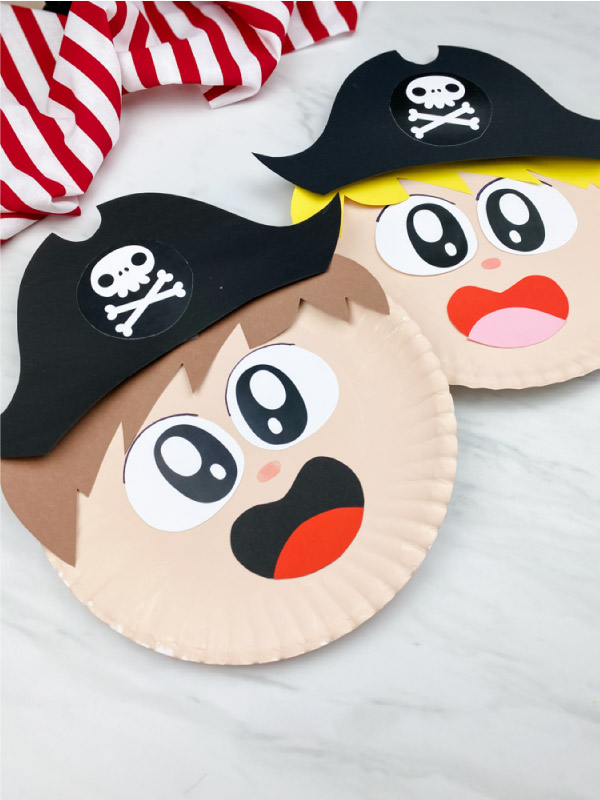
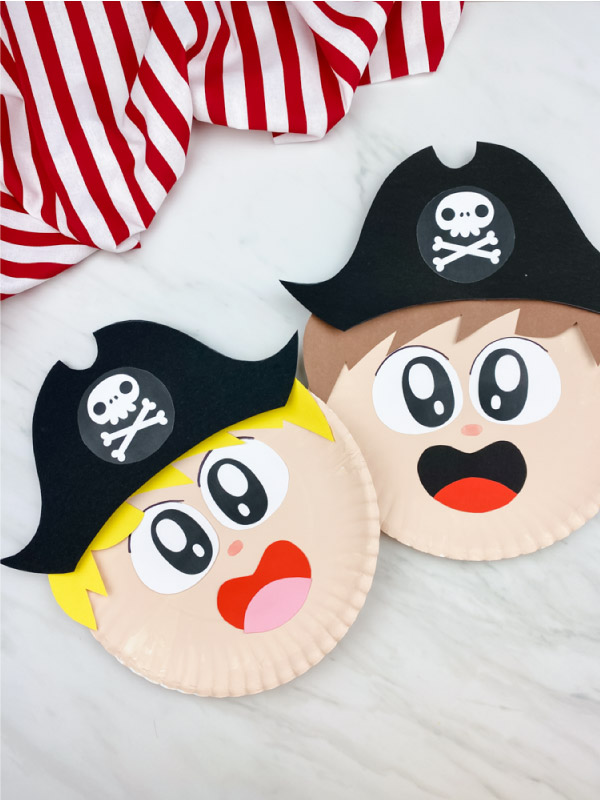
Download the paper plate pirate template, print and cut out the pieces.
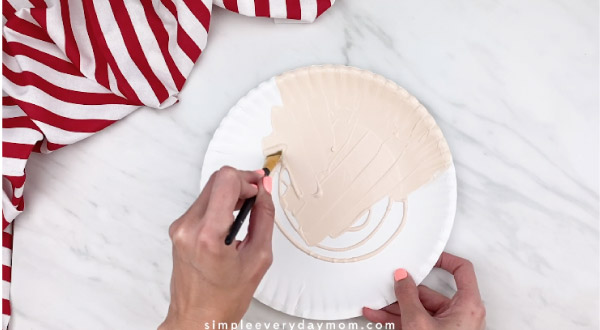
Begin by painting the paper plate in your choice of skin-colored shades. Let it dry completely. If you’re short on time, you can use a hairdryer to speed up the process.
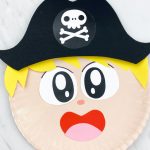
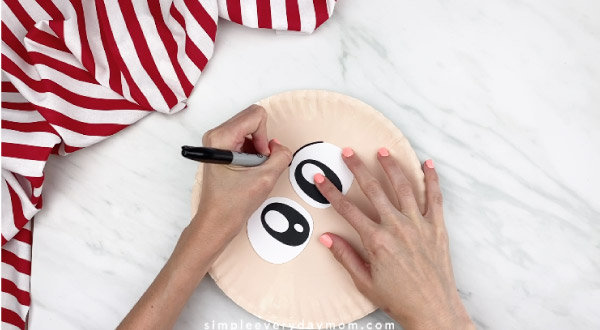
Once the paper plate is completely dry, glue the eyes to each side of the plate, like in the pictures. You’ll want to glue it down a few inches from the top so you have room to put on the hair and pirate hat.
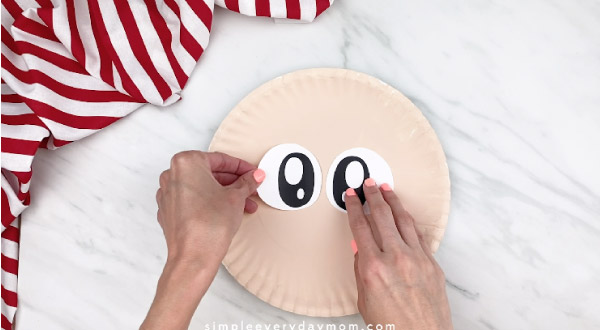
We used a black marker to outline the eyes because we think it gives it a more finished look, but you can skip this if you don’t want to trace it.
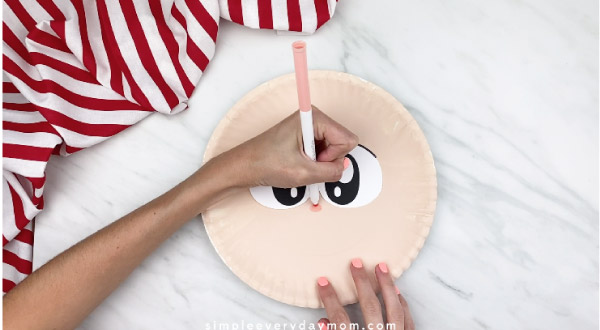
Use a pale pink marker to draw on a small, oval-shaped nose just below the eyes.
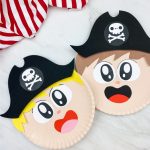
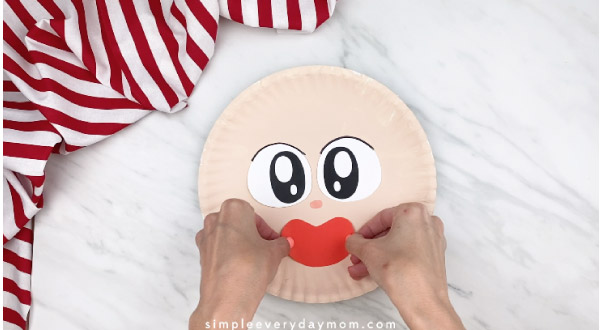
Place the mouth piece just below the nose and glue down. You can see from the pictures we did one pirate mouth red and one pirate mouth black. We’re not sure which one we like better! Choose whichever you prefer.
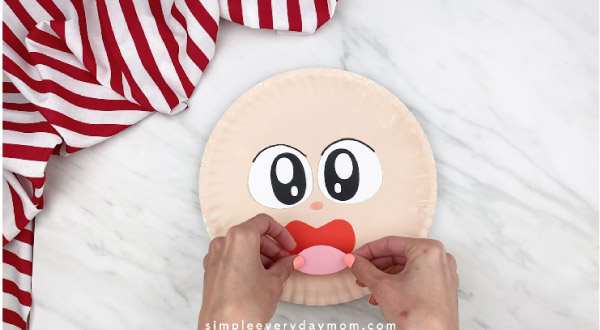
Next, glue the pink tongue to the bottom of the mouth.
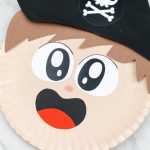
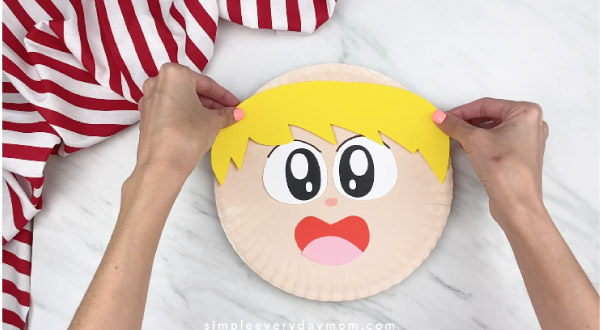
Take the pirate boy’s hair and glue it just above his eyes. Make sure if you’re using a glue stick you have enough glue on it to securely glue it to the paper plate. If you use the normal amount you would for a flat surface, it won’t stick on the plate very well.
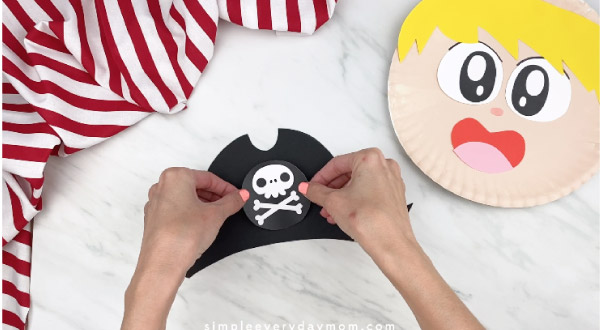
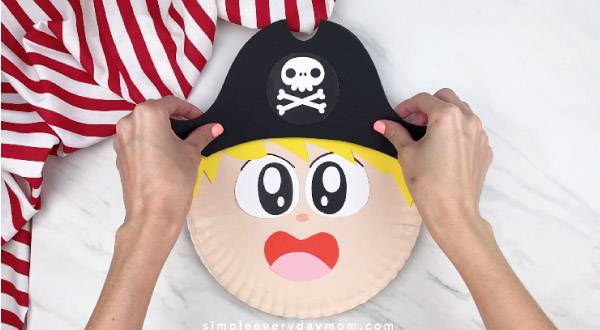
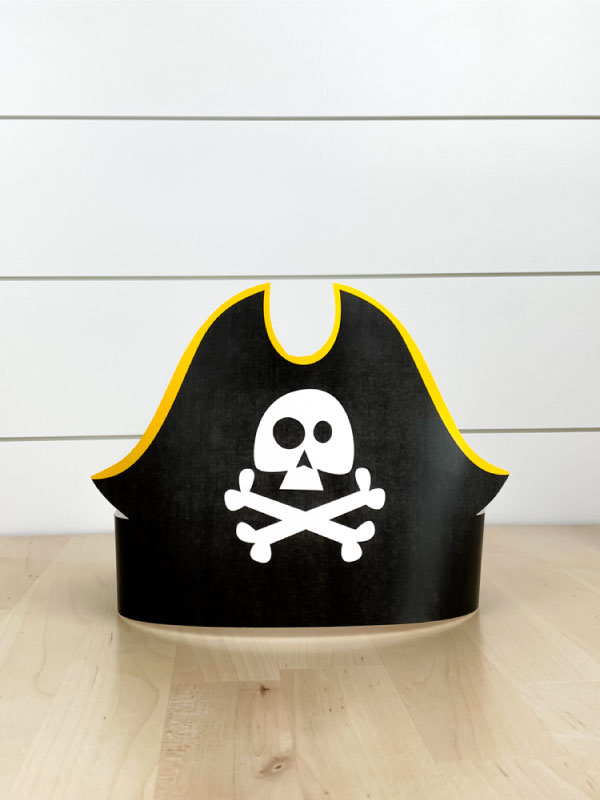
Position the skull and crossbones in the middle of the pirate hat and glue in place. Next, take the completed pirate hat and tape to the top of the pirate boy’s hair.
We looped a piece of tape on itself (basically creating double-sided tape) and placed it in the middle, bottom of the hat so it stayed in place. Then, we flipped the paper plate over and added one piece of tape to each side of the hat to secure it.
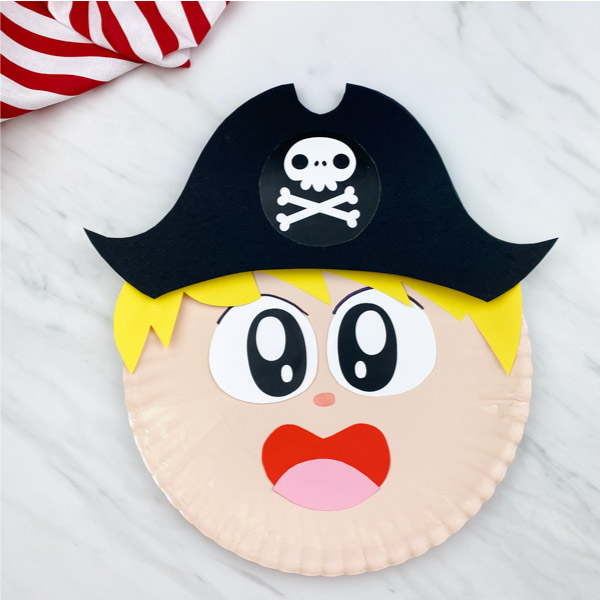
Now you have a fun pirate boy!
Share With Us
Did you make this paper plate pirate with your kids or students? We want to see how they turned out!
Take a quick picture of your completed project and post it to our Facebook page or join our private Facebook group and share it there.
More Summer Ideas For Kids
Pirate Activities For Kids
Paper Plate Pirate Craft
Video
Equipment
- Scissors
Materials
- White paper plate
- Skin colored paint
- Colored cardstock in black, red/pink, hair color
- White cardstock
- Markers black and pink
- Glue stick
- Tape
- Pirate template download form located at the end of this post, just above the comments
Instructions
- Download the pirate template, print and cut out the pieces.
- Paint the paper plate in your choice of skin colored paint and let dry completely before moving on.
- Glue the eyes a few inches from the top of the paper plate.
- Optional: Use a black marker to draw the top half of the eyes to define them.
- Use a pink marker to draw on a small oval nose just underneath the eyes.
- Glue the mouth just under the nose, then glue the tongue to the bottom of the mouth.
- Glue the pirate’s hair just above the eyes.
- Glue the skull and crossbones to the middle of the pirate’s hat, then tape the completed hat to the top of the paper plate.
Did you make this?
Don’t forget to leave a comment below and make sure to follow on Pinterest, Facebook and TikTok for more!
Free Pirate Template

Meet Sam
Sam is the crafter and founder of Simple Everyday Mom. She has been featured in Oprah Mag, Good Housekeeping, The Spruce Crafts, Country Living, The Bump, and more.


Love this craft! I am using it for a Pirate themed Yoga lesson!
Thanks so much! Robinsyoganest
Thanks a bunch! A pirate yoga theme sounds like a blast—hope the kids love it!
I also do not see the form to get the free template
It’s above the comments section, under the heading titled “Free Pirate Template”. If you’re not able to see it, it most likely means you have a firewall or adblocker blocking it from appearing. If you can allow the page or try from a personal device, you should be able to see it. Also, some readers say they’re not able to see it on Chrome, but they can on other browsers. You may be able to try that as well ◡̈ Please let me know if you have any questions!
The form is to enter my email for the free download is missing. Is there another way to get the template?
I just checked and it is still there. It’s at the end of the post under the heading “Free Pirate Template”. If you’re not able to see it, it most likely means you have a firewall or adblocker blocking it from appearing. If you can allow the page or try from a personal device, you should be able to see it. Also, some readers say they’re not able to see it on Chrome, but they can on other browsers. You may be able to try that as well
There is no template download
All you need to do is enter your email in the form at the end of the post and the link will be sent to you ?
please send paper plate pirate template please
Of course! All you need to do is enter your email in the form at the end of the post to have the link sent to you ?