Werewolf Name Craft for Kids (Free Editable Template)
All activities require adult supervision. By using this site, you agree to our terms of use. This post may contain affiliate links, sponsored links, and ads. As an Amazon Associate and participant in other affiliate programs, I earn from qualifying purchases.. Read our disclosure policy.
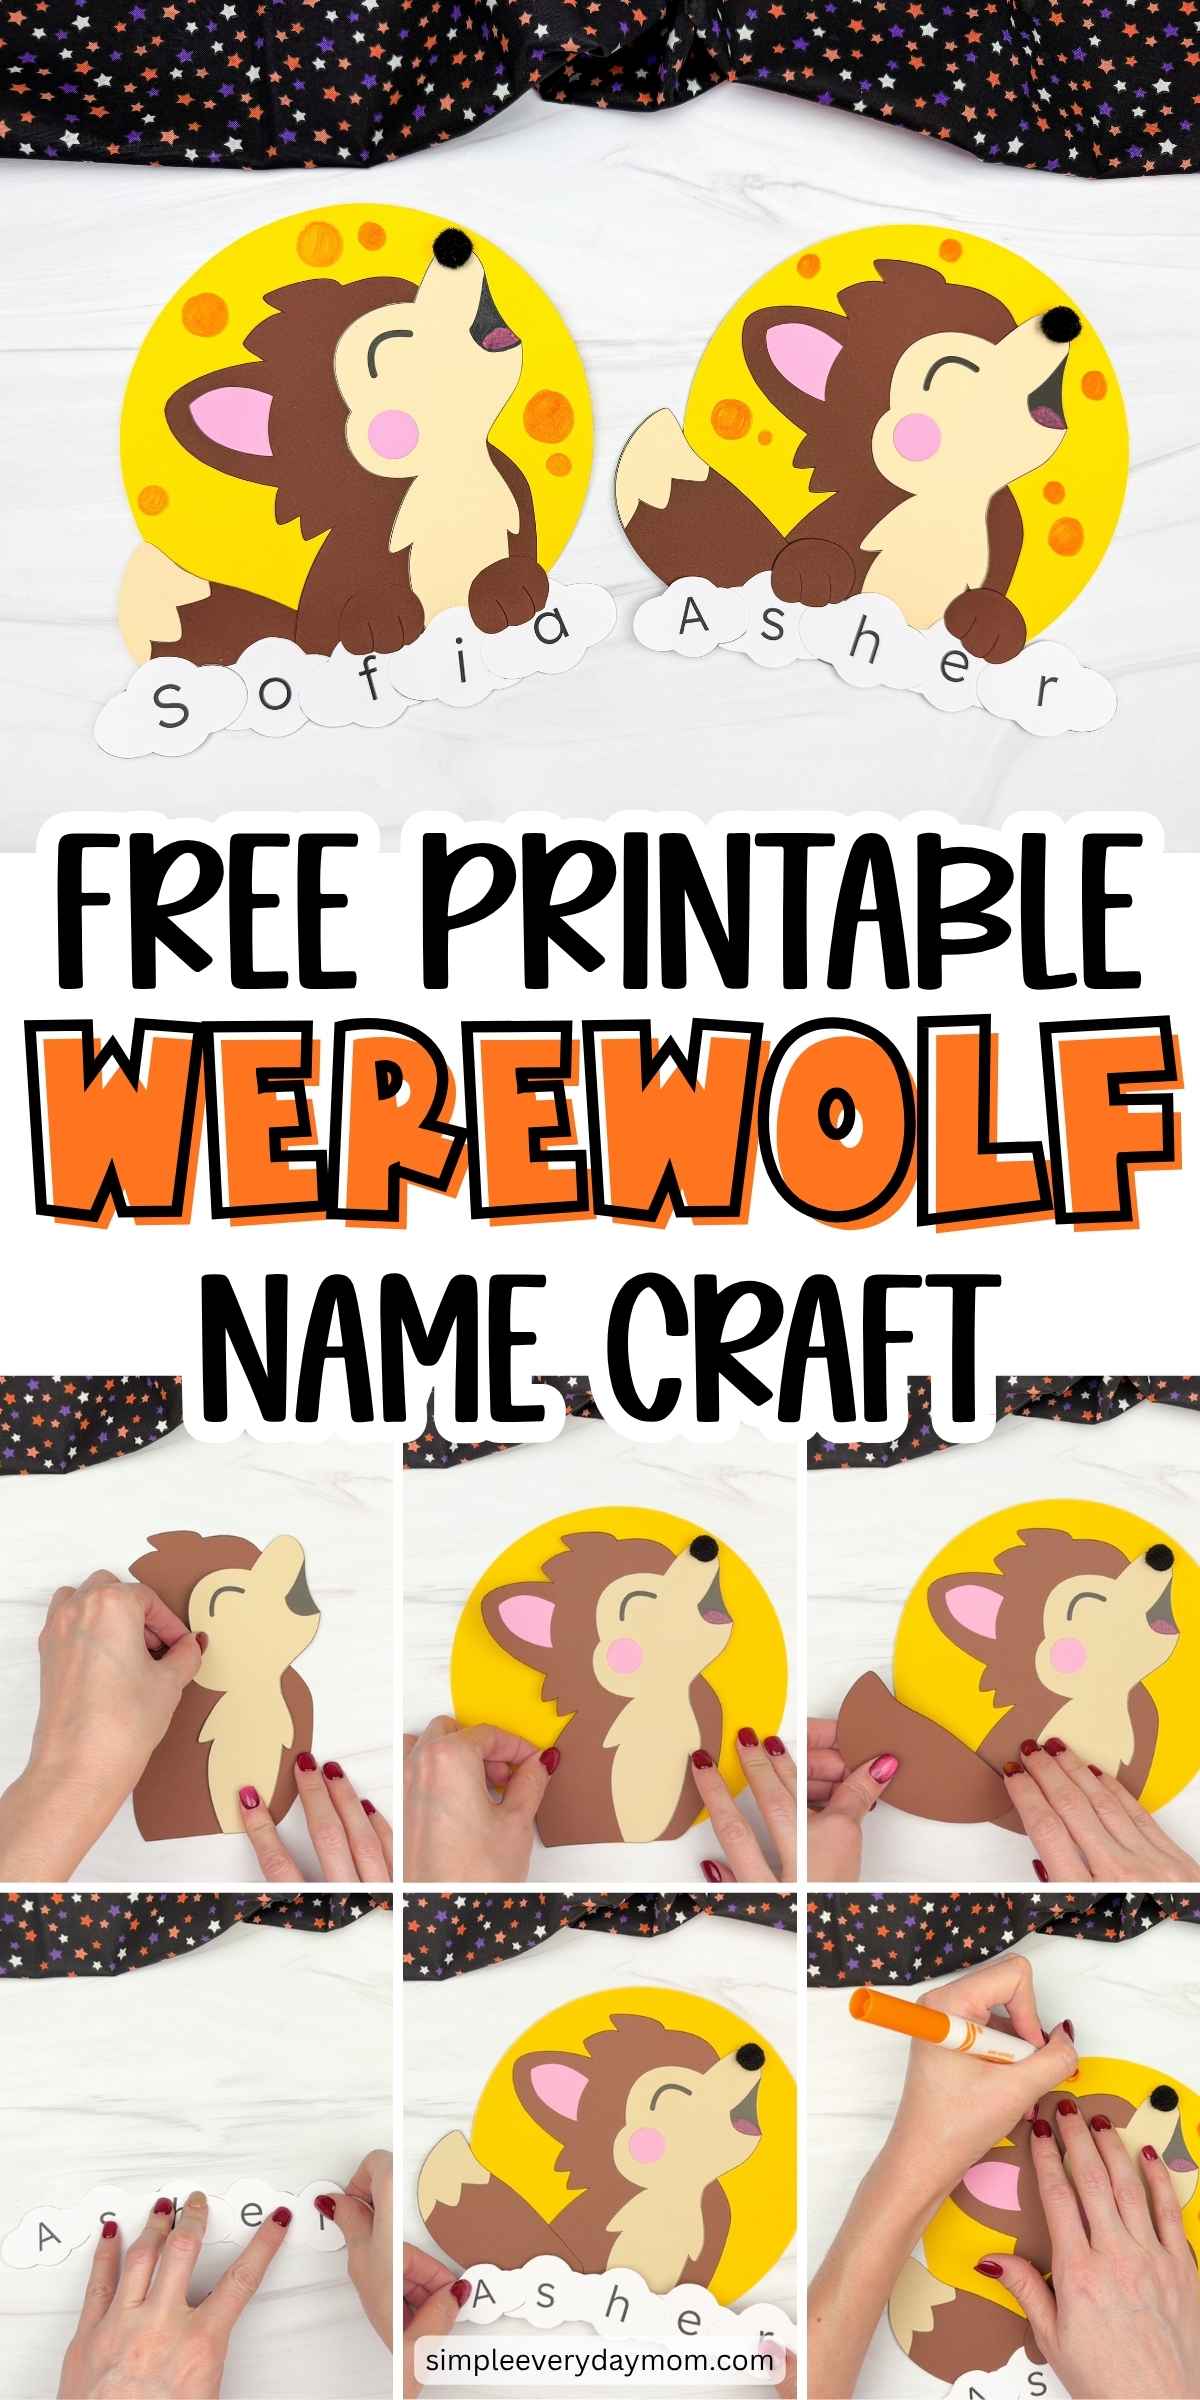
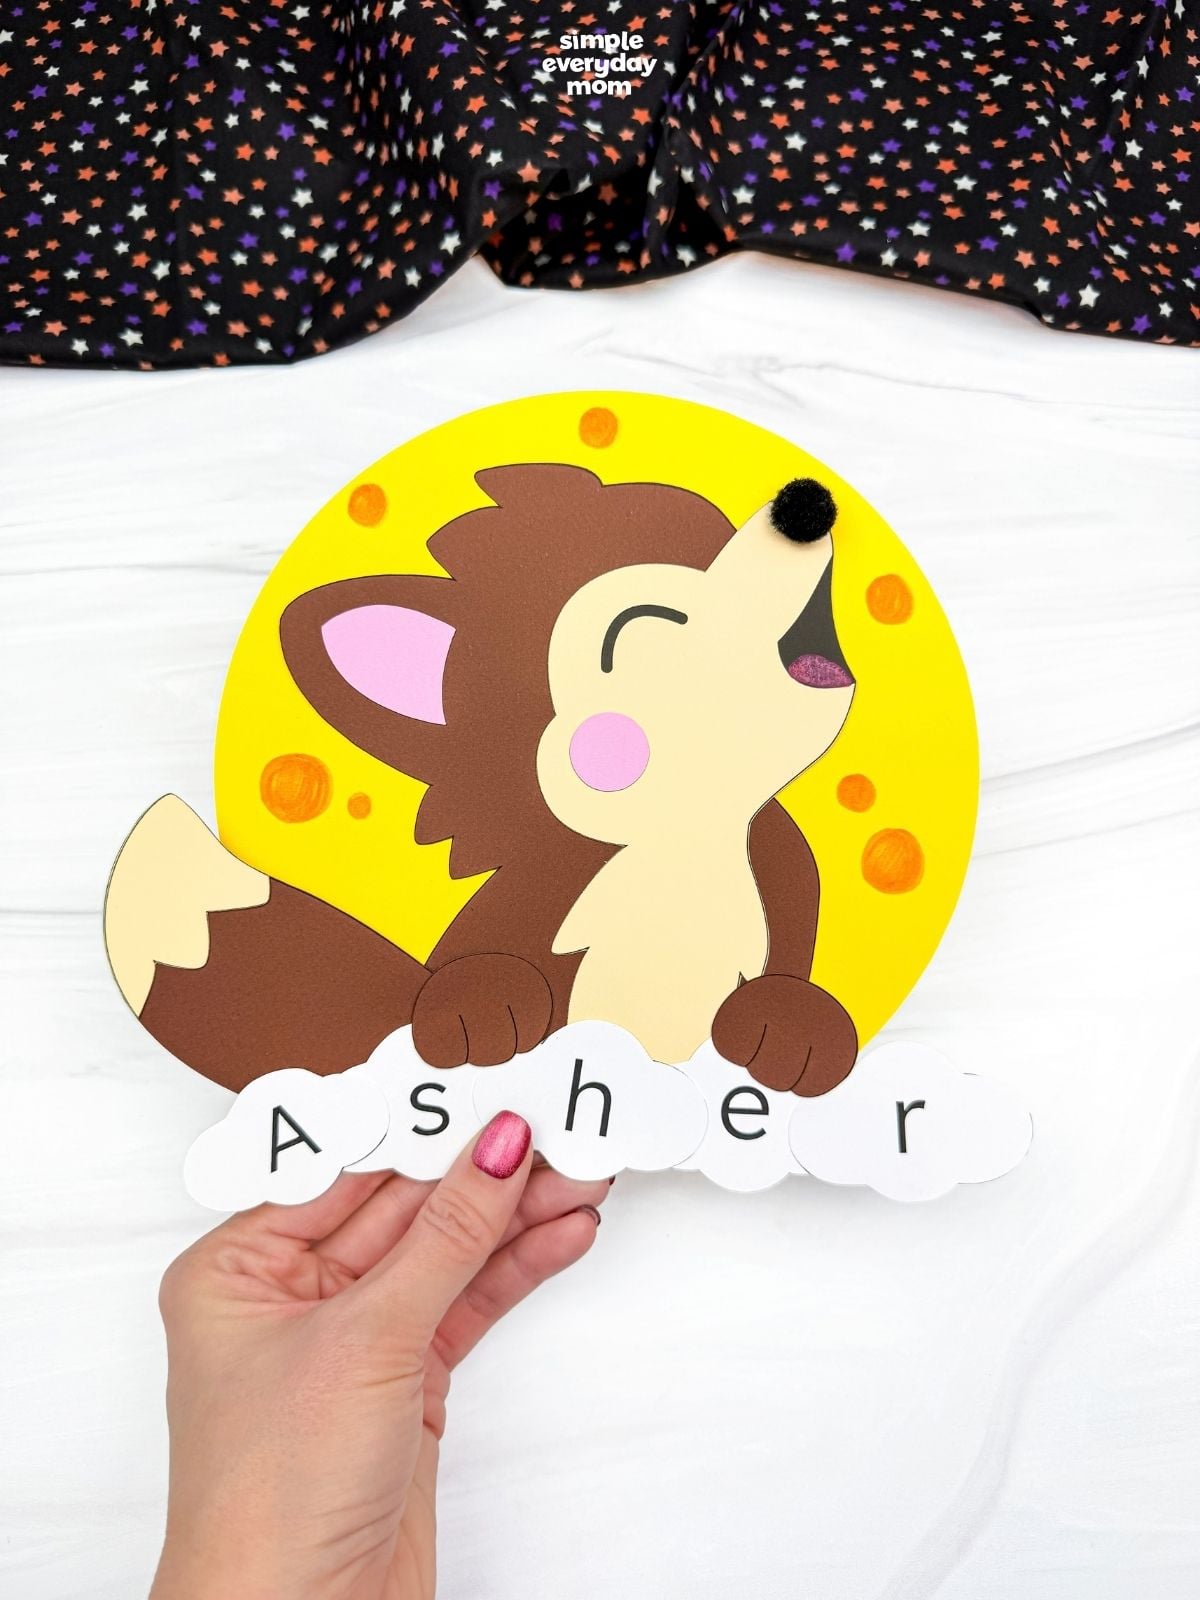
A werewolf howling at the moon is already pretty fun, but spelling a name underneath makes it even better. This werewolf name craft gives preschool and kindergarten kids a Halloween project that feels personal from the start, and it takes about 25-35 minutes to put together.
Werewolves fit right into October without needing to be too scary. Our Halloween crafts for kids have even more kid-friendly monsters and spooky characters to make once the Halloween crafting starts.
Good To Know
- Themes: Halloween, werewolves, name recognition, October crafts
- Activity: Kids cut out and assemble the werewolf craft, then place the letter pieces in order to spell their name.
- Template: Includes a free printable werewolf name craft template with the werewolf pieces, moon background, cloud name pieces, and letter circles for spelling names. Ages: Preschool through kindergarten
- Time: 25-35 minutes
- Skills: Fine motor skills, scissor skills, letter recognition, name spelling, letter sequencing, hand-eye coordination, and gluing
Halloween Name Recognition Activity
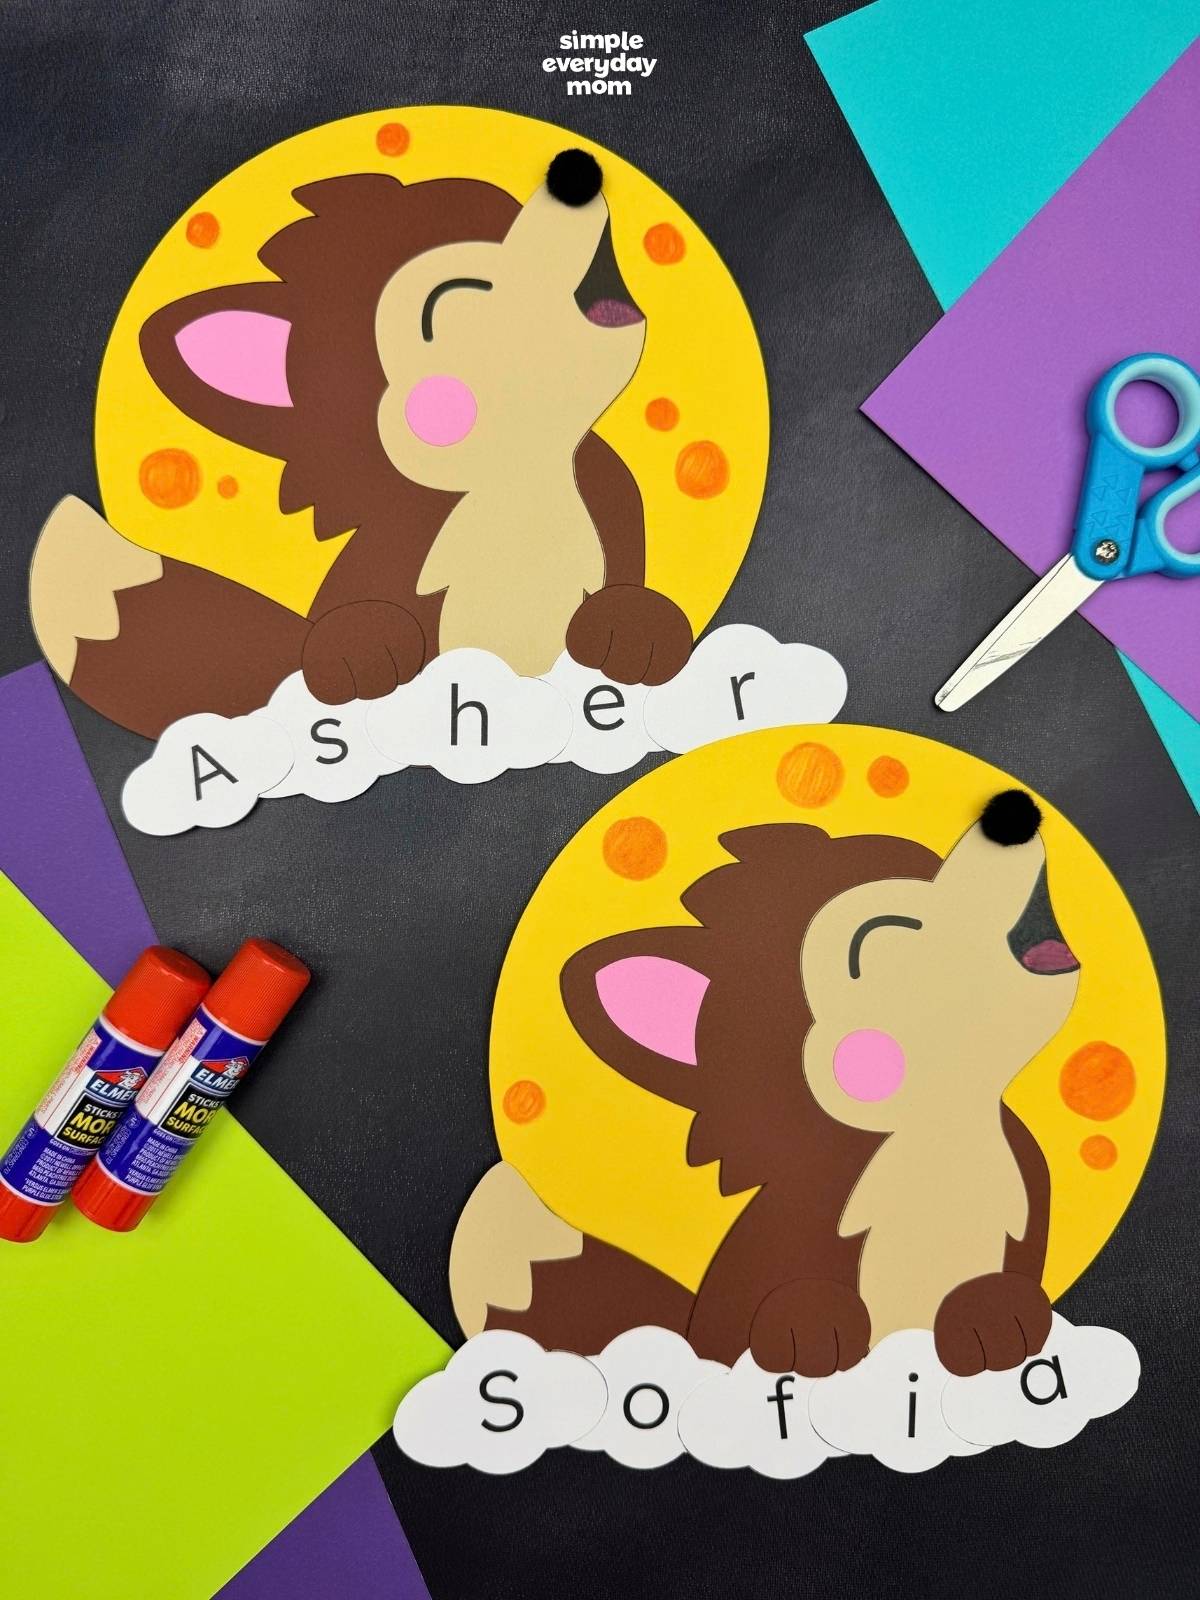
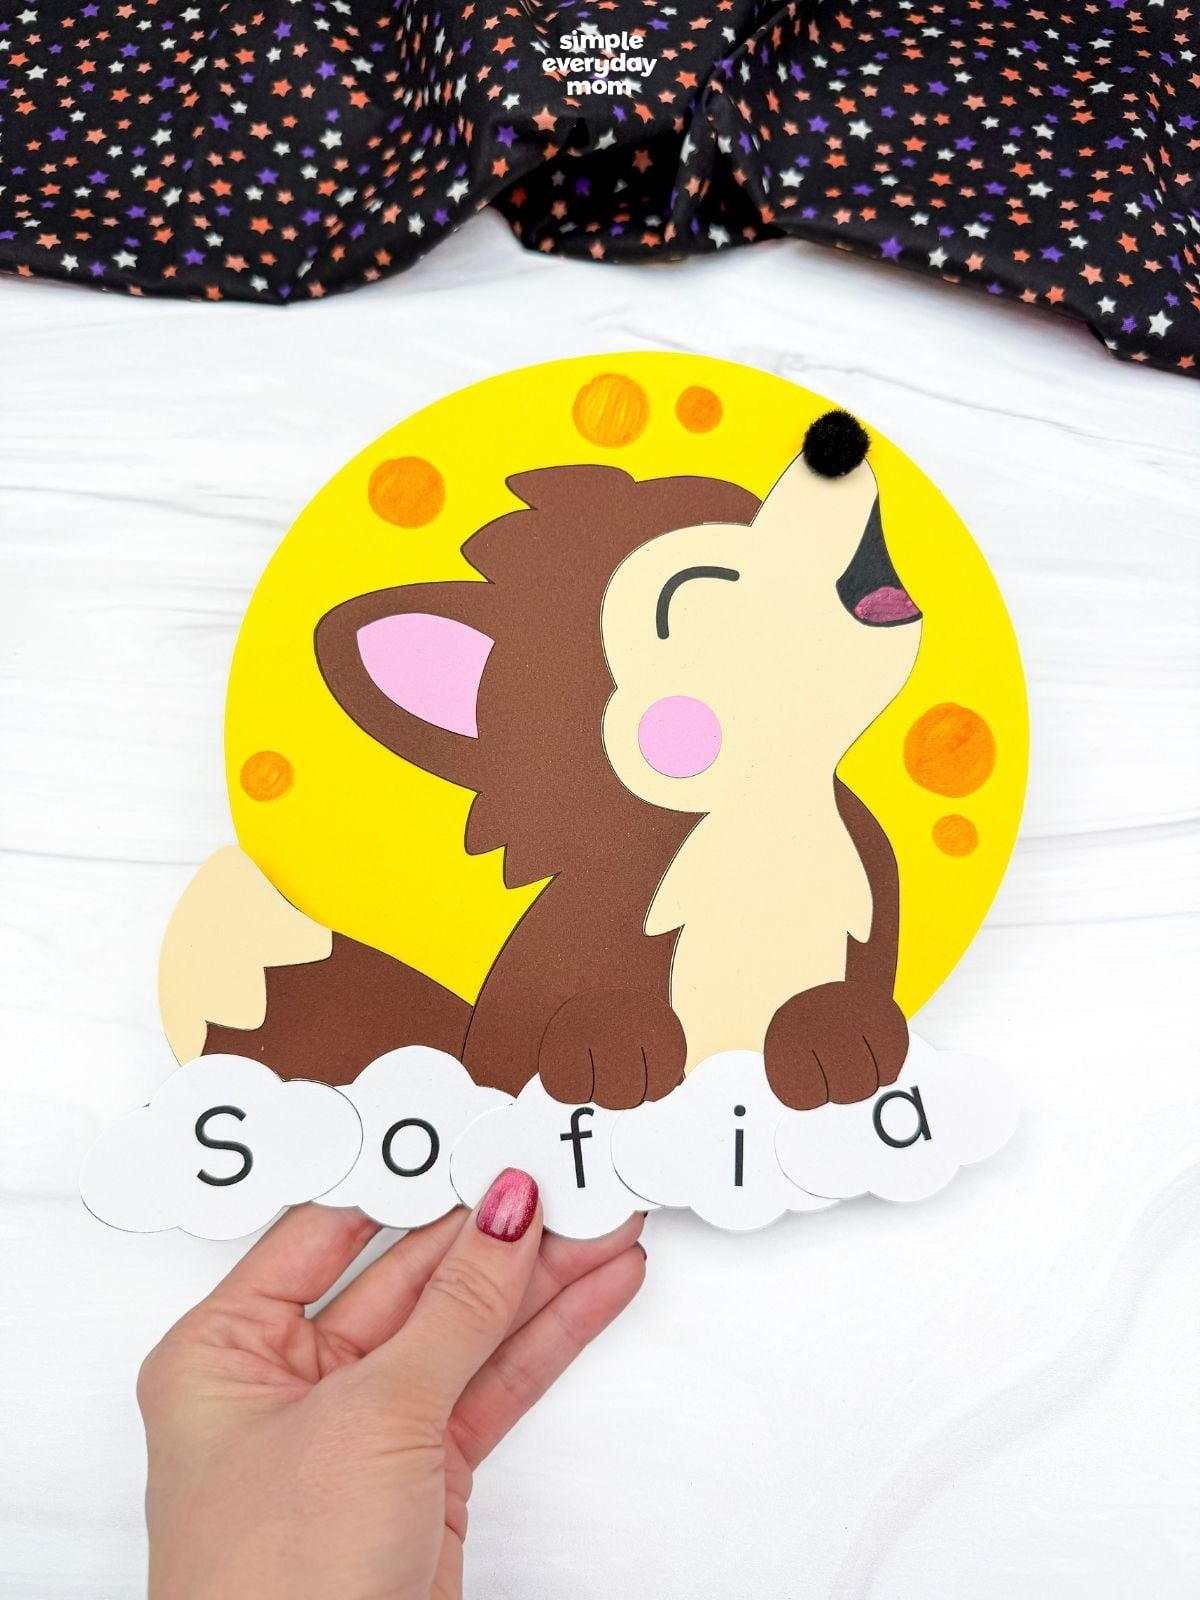
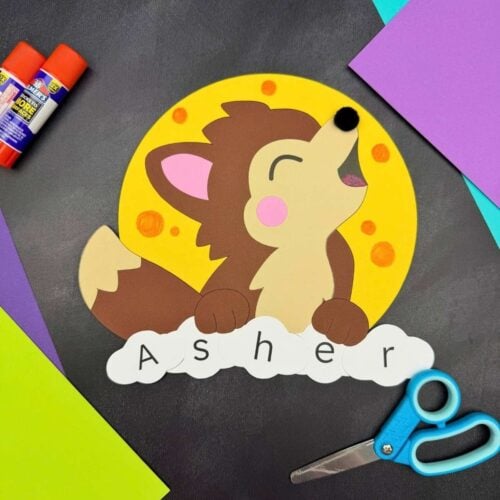
Kids build the brown werewolf in front of a bright full moon, then add the letters of their name across the clouds underneath. I especially like the little black pom-pom nose and the orange moon spots because they give the finished craft a bit more dimension without making it complicated.
There’s some useful practice happening while kids are busy assembling everything, too. Cutting and gluing the paper pieces keeps their hands working, while arranging the cloud letters in the right order gives them a chance to work with the letters in their own name.
The printable pieces take care of the tricky shapes, so kids can focus on putting their werewolf together and adding the personalized name at the bottom. A few basic craft supplies are all they need to make a Halloween project that looks great on a classroom bulletin board or at home.
Supplies
- Colored cardstock or construction paper
- Scissors
- Glue
- Crayola Bold & Bright markers
- Markers
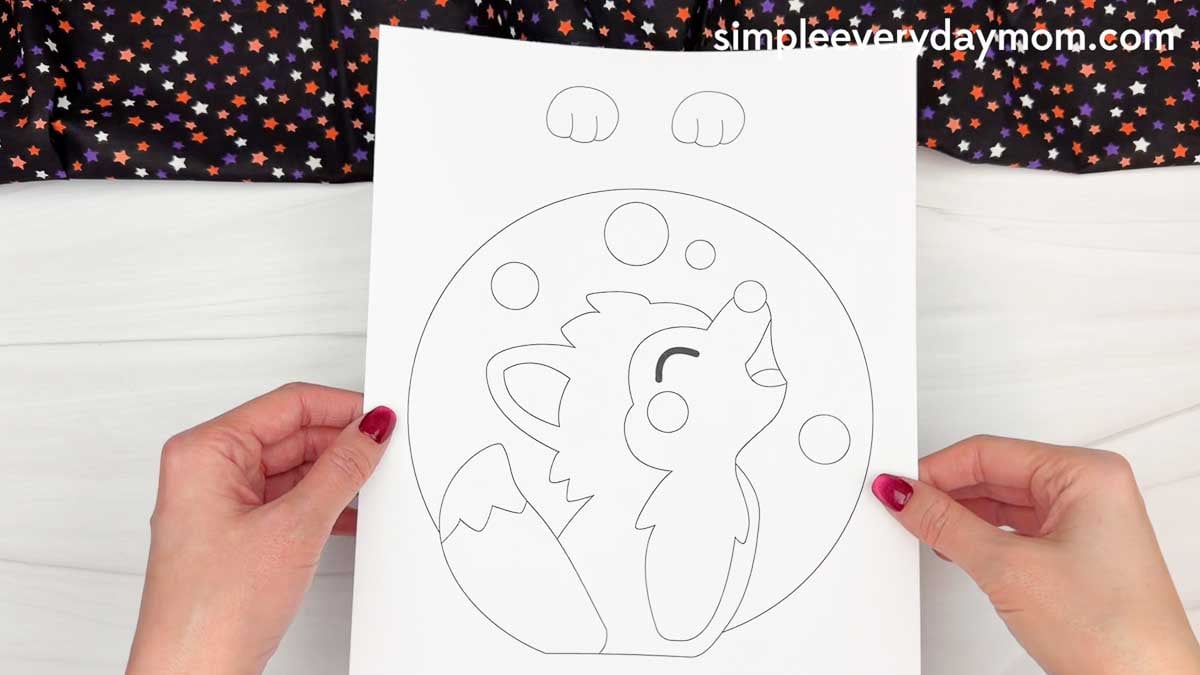
- Werewolf name template (click the “click here to get your freebies” image at the end of the post)
Directions
Start by printing the template, then gather the materials for this fun activity. Get those scissors ready, and let’s help the kids bring this little werewolf to life!
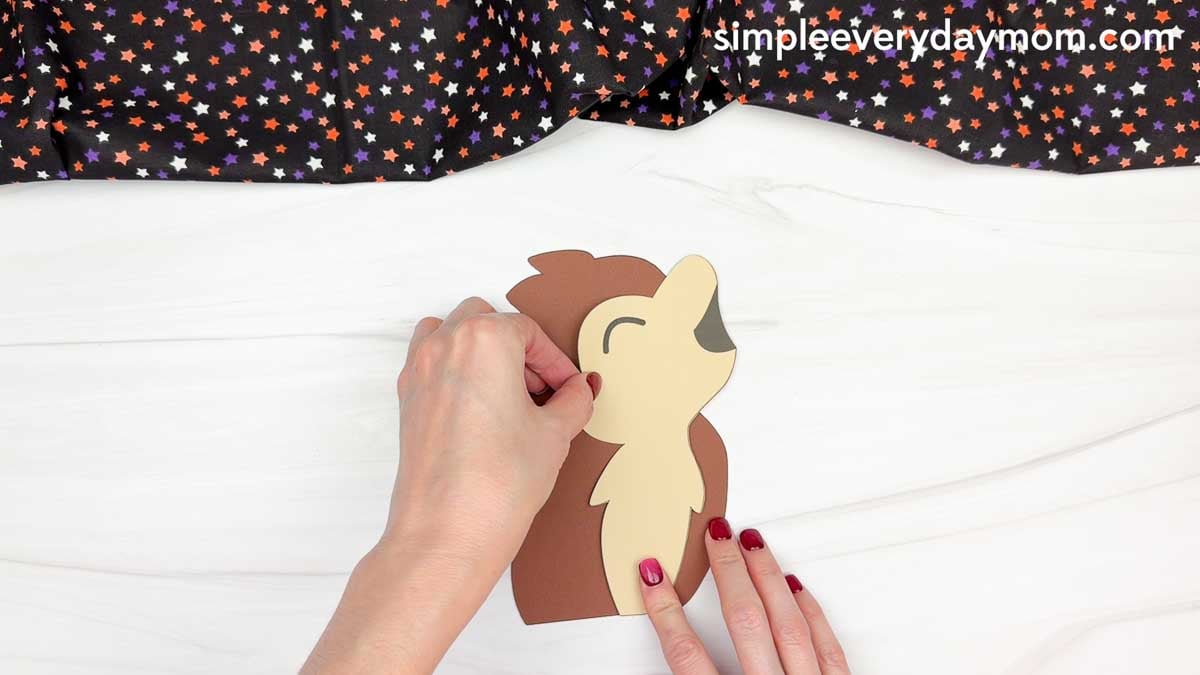
Take the head/belly piece and glue it onto the right side of the body, lining up the bottom edges and leaving the brown fur visible along the left side and top of the head.
Grab the cheek piece and glue it onto the werewolf’s face, just below the eye. This little detail makes our howling werewolf look extra cute!
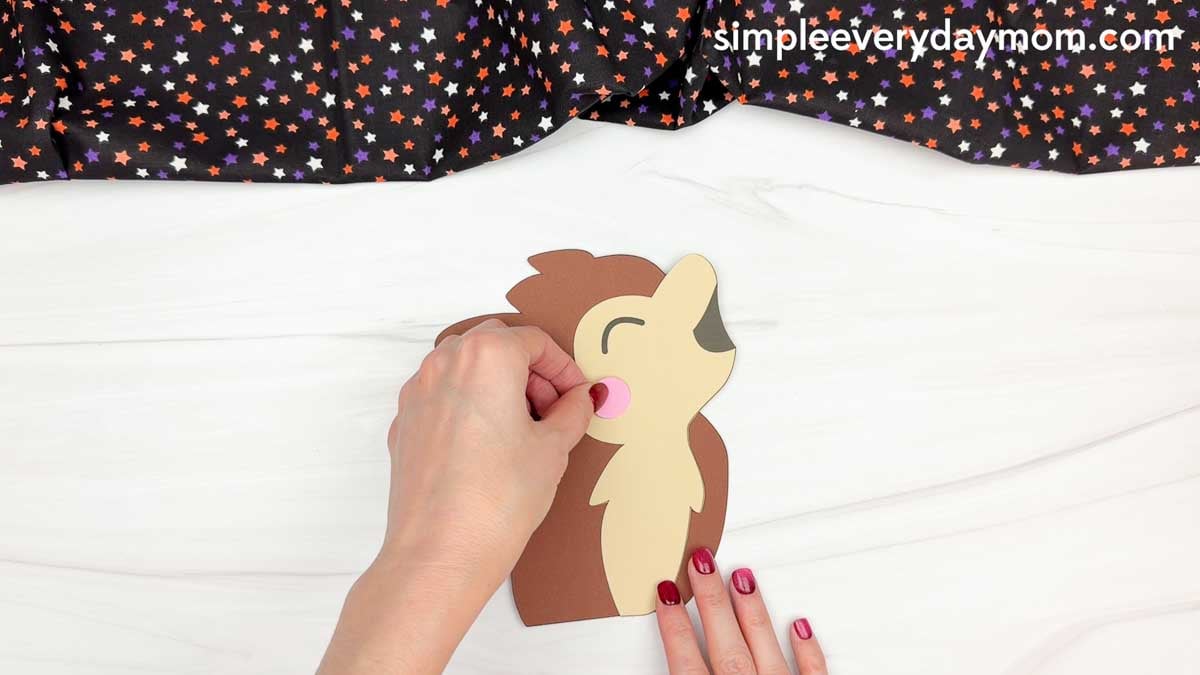
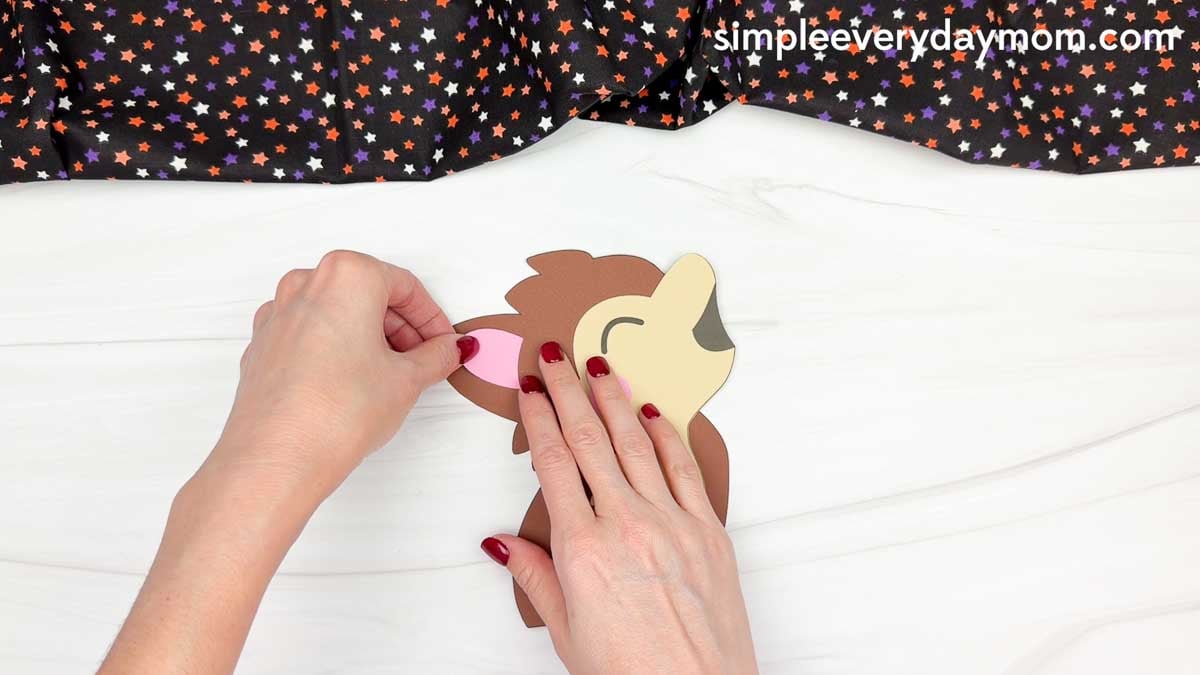
Look for the inner ear piece and glue it inside the werewolf’s ear on the left side of the head. Line it up so the brown outer ear creates a border around the pink piece.
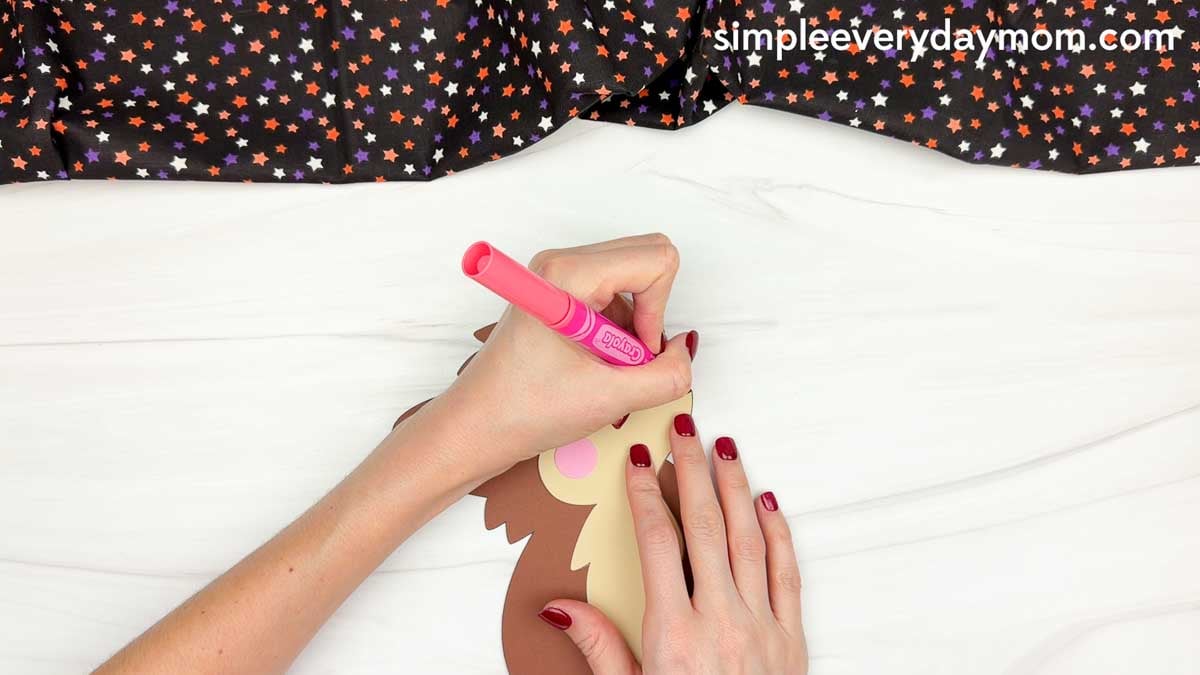
Use a bold & bright marker and let your child color in the tongue inside the werewolf’s open mouth. It’s a fun chance to talk about how wolves howl to communicate with one another.
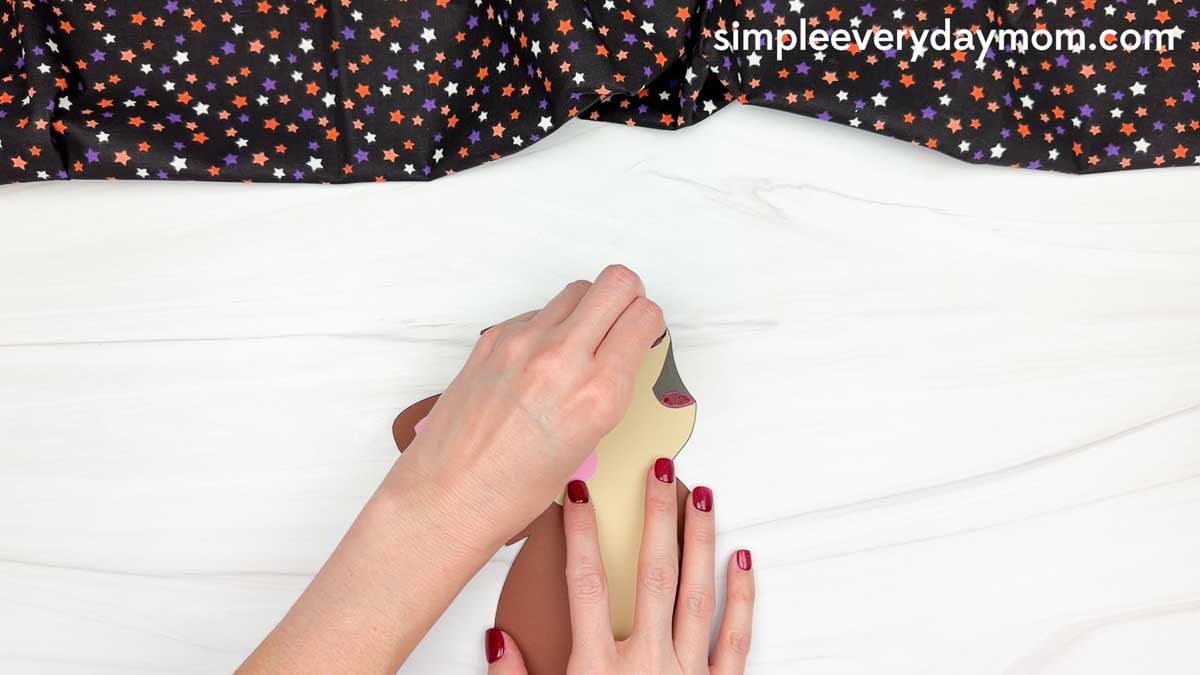
Grab the nose piece and glue it onto the tip of the werewolf’s snout.
Take the moon piece and glue the werewolf onto the lower center of it, leaving the top and sides of the moon visible. Let your child imagine their werewolf howling at the bright full moon!
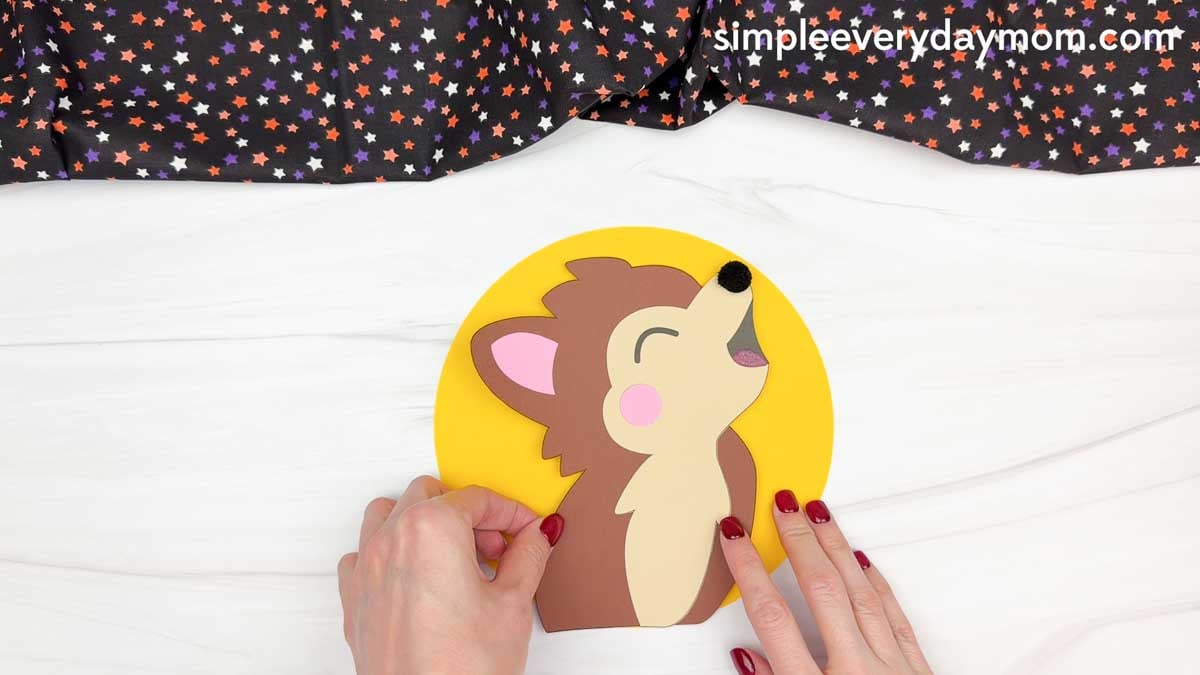
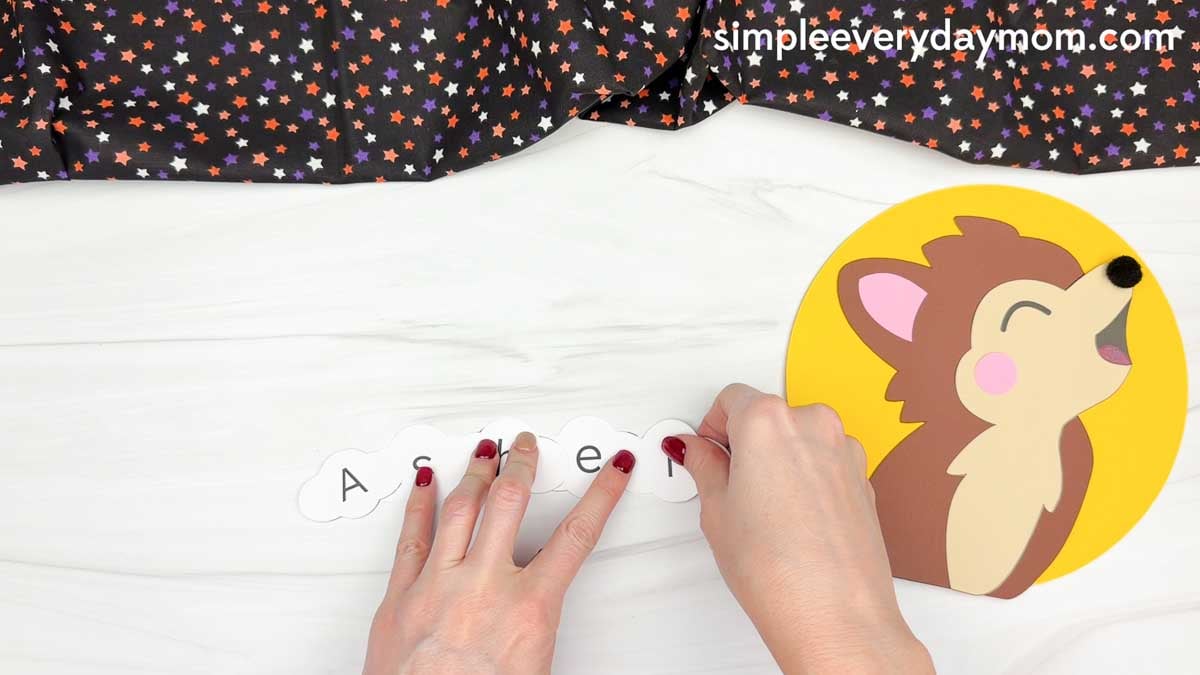
It’s time for some name practice! Take the cloud letters and help your child arrange and glue them side by side in the correct order to spell their name. Encourage them to say each letter aloud as they glue the pieces together.
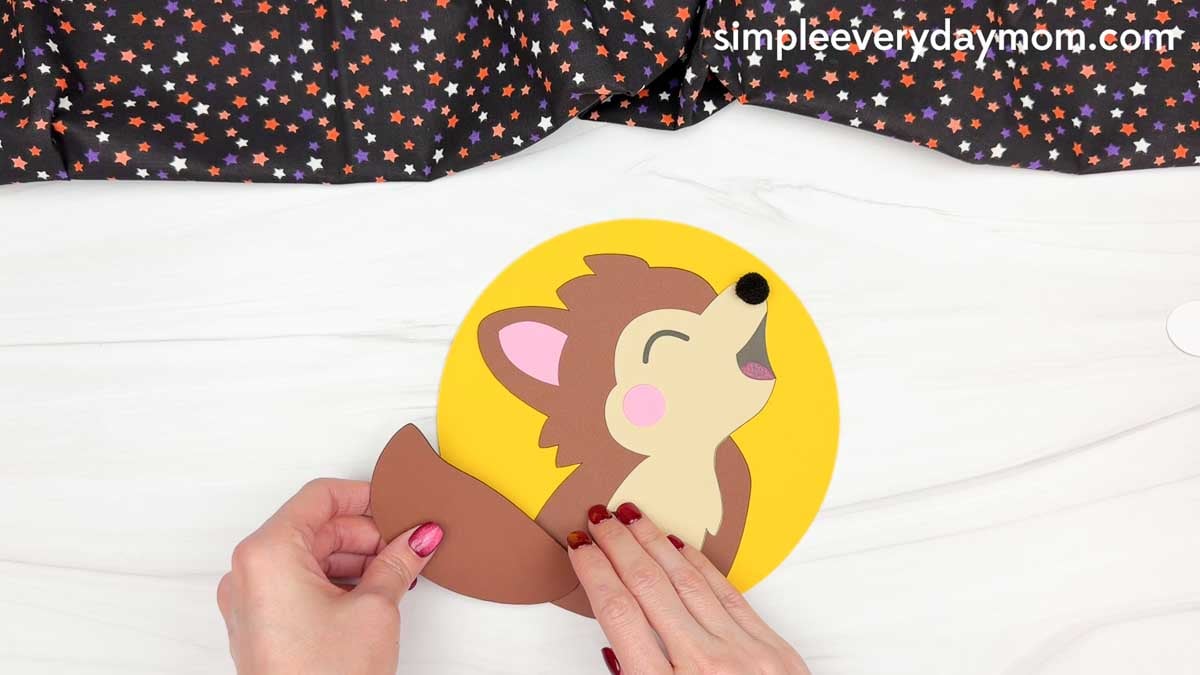
Glue the tail piece to the bottom left side of the werewolf’s body, letting it extend past the moon. This gives our little werewolf its fluffy tail!
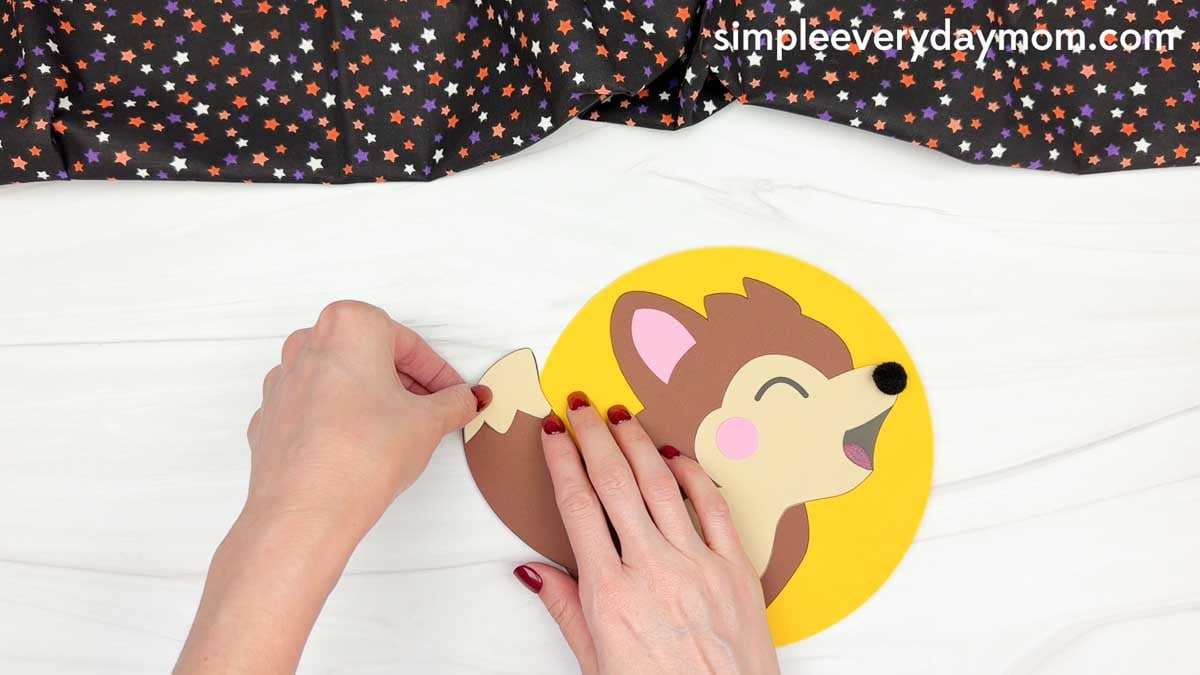
Glue the tail tip piece onto the end of the tail.
Let’s add your child’s name! Glue the arranged cloud letters along the bottom of the werewolf, overlapping the lower edge of the body and moon.
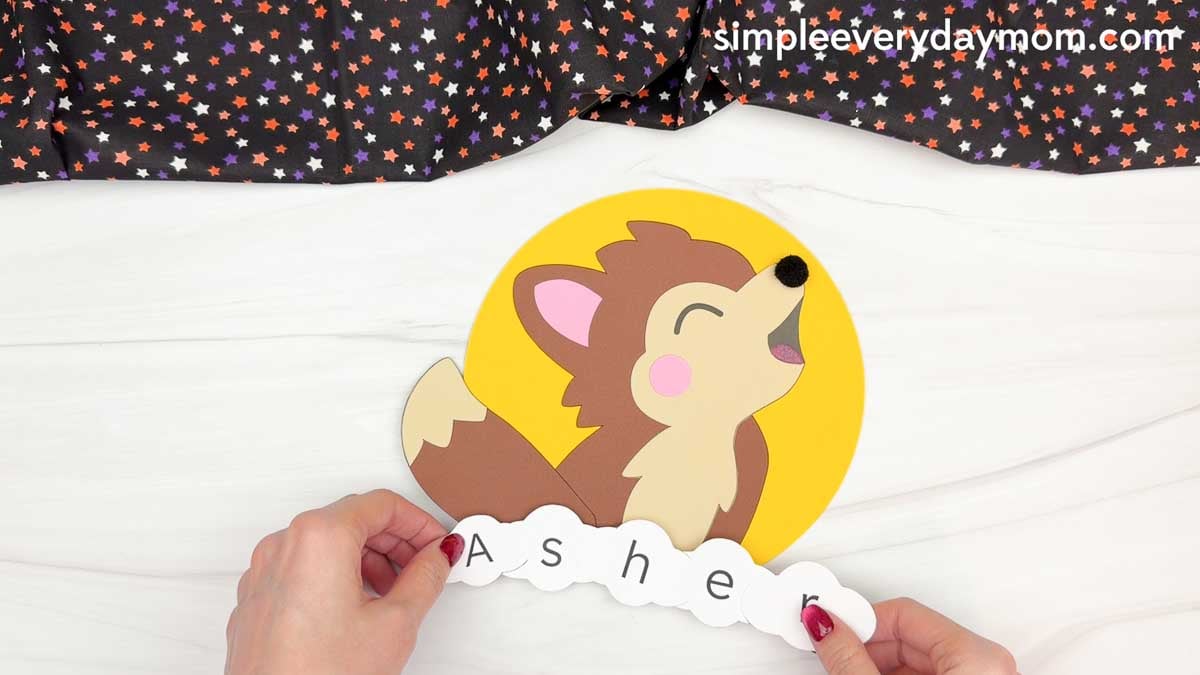
Take the paws and glue one on each side of the werewolf’s lower body, overlapping the top of the cloud letters. Position them so it looks like the werewolf is resting its paws on your child’s name.
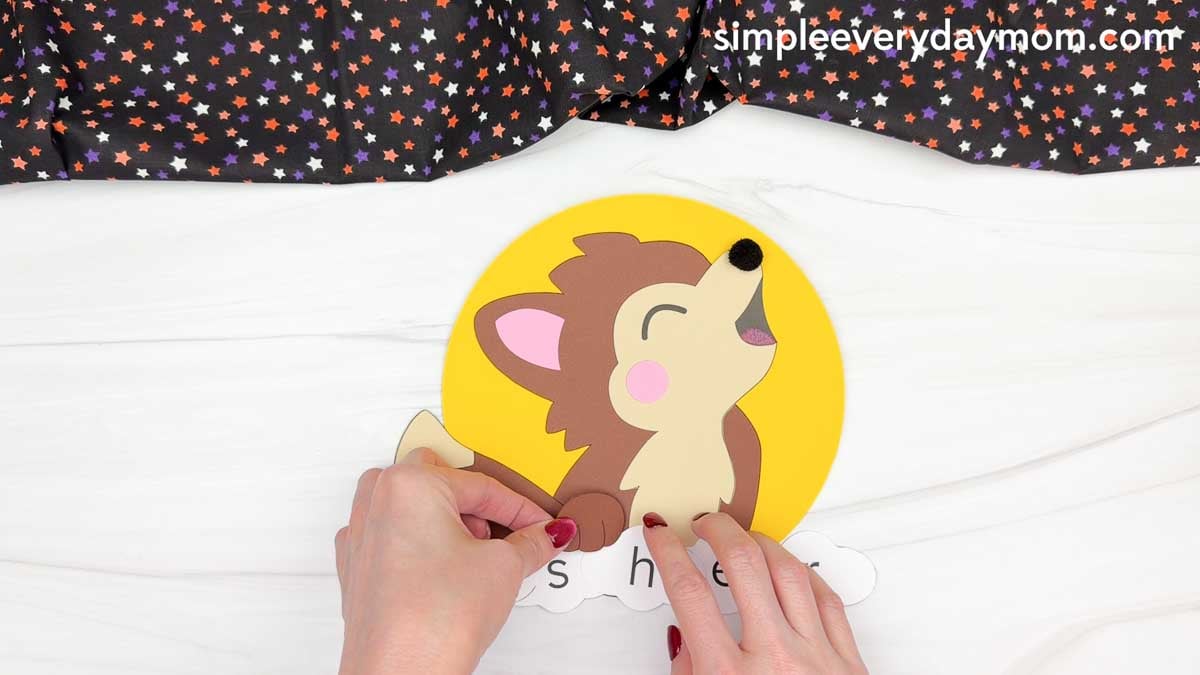
Finally, grab an orange marker and let your child color circular spots around the moon.
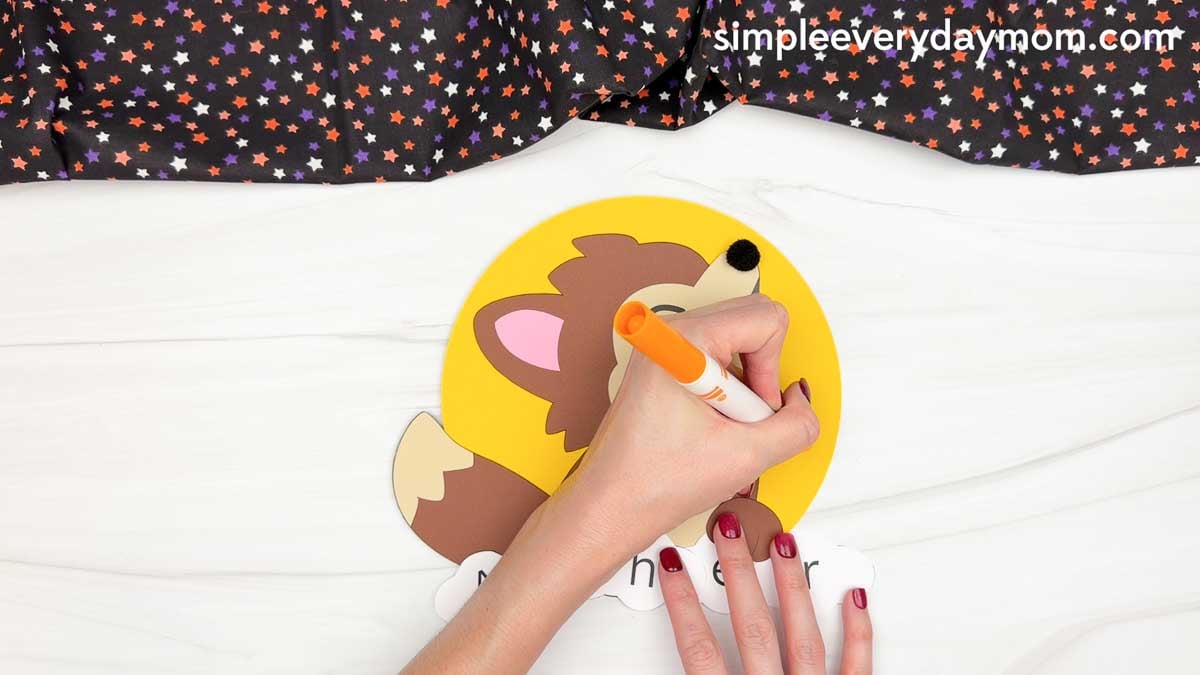
They can make some spots bigger and others smaller to create a fun crater effect, giving their werewolf name craft the perfect finishing touch!
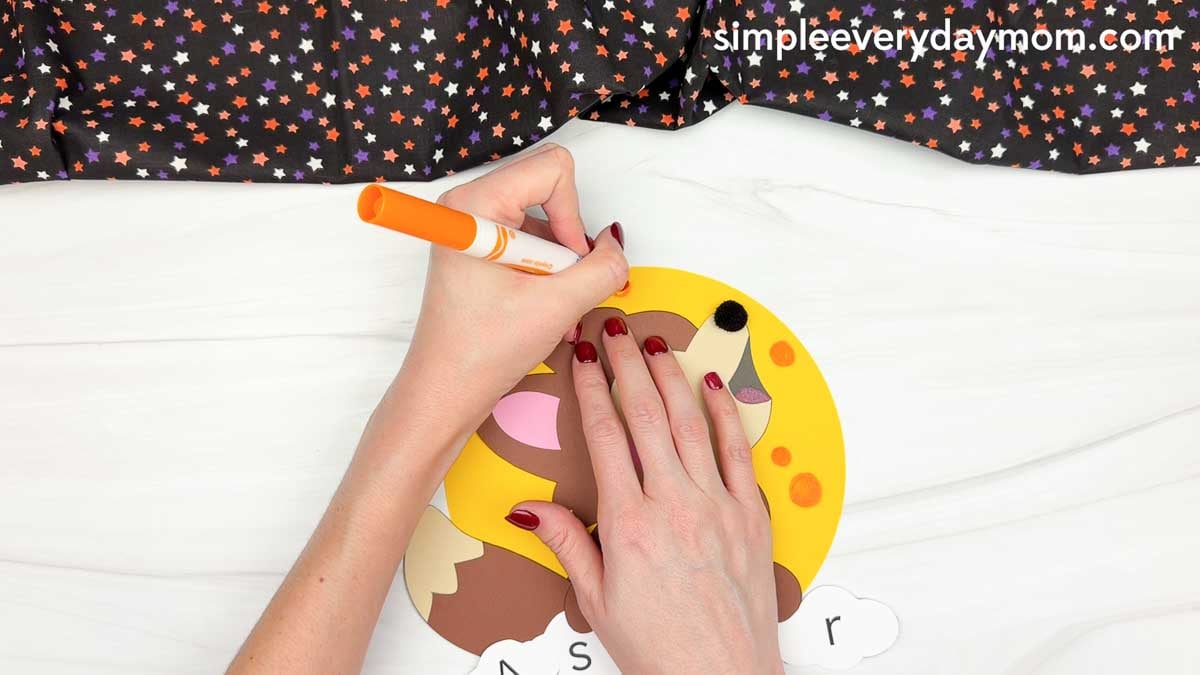
Your little werewolf is ready to howl with excitement! This hands-on Halloween activity gives kids a playful way to practice spelling their names, recognizing letters, and developing fine motor skills.
There’s more spooky fun waiting below! Browse the related Halloween crafts and printables to find easy activities for preschool, kindergarten, or your next themed classroom lesson.
Halloween Books for Children


Room On The Broom: This has to be one of our favorite Halloween books of all time! The story follows a witch and her cat as they happen upon some animals who help the witch. There’s danger, mystery, and friendship in this adorable children’s story.
The Good, The Bad, And The Spooky: Halloween is the Bad Seed’s favorite holiday, but when he can’t come up with the perfect costume, he decides trick-or-treating should be postponed for everyone! Kids will love following his funny quest to find a show-stopping costume before the big night. With plenty of humor and Halloween fun, this is a great seasonal read for fans of The Bad Seed and the Food Group series.
Ten Timid Ghosts: This is a fun countdown book about a witch who moves into a haunted house where 10 ghosts already live. The witch scares the ghosts out one by one until they devise a scheme to get her out of their house. This Halloween children’s book is good for kids who love rhyming stories!
Spooky Fun Craft Ideas
Haunted House Torn Paper Craft: Tearing paper on purpose is probably the easiest way to get kids interested in a craft. They use those rough black pieces to build the haunted house, and the uneven edges actually make the finished house look MORE appropriate for Halloween.
Frankenstein Name Craft: Frankenstein gets his own little science experiment in this one, with each letter of the child’s name appearing on a test tube. Kids can even choose the colors for the liquid inside, which is such a fitting place to let them get a little creative with it.
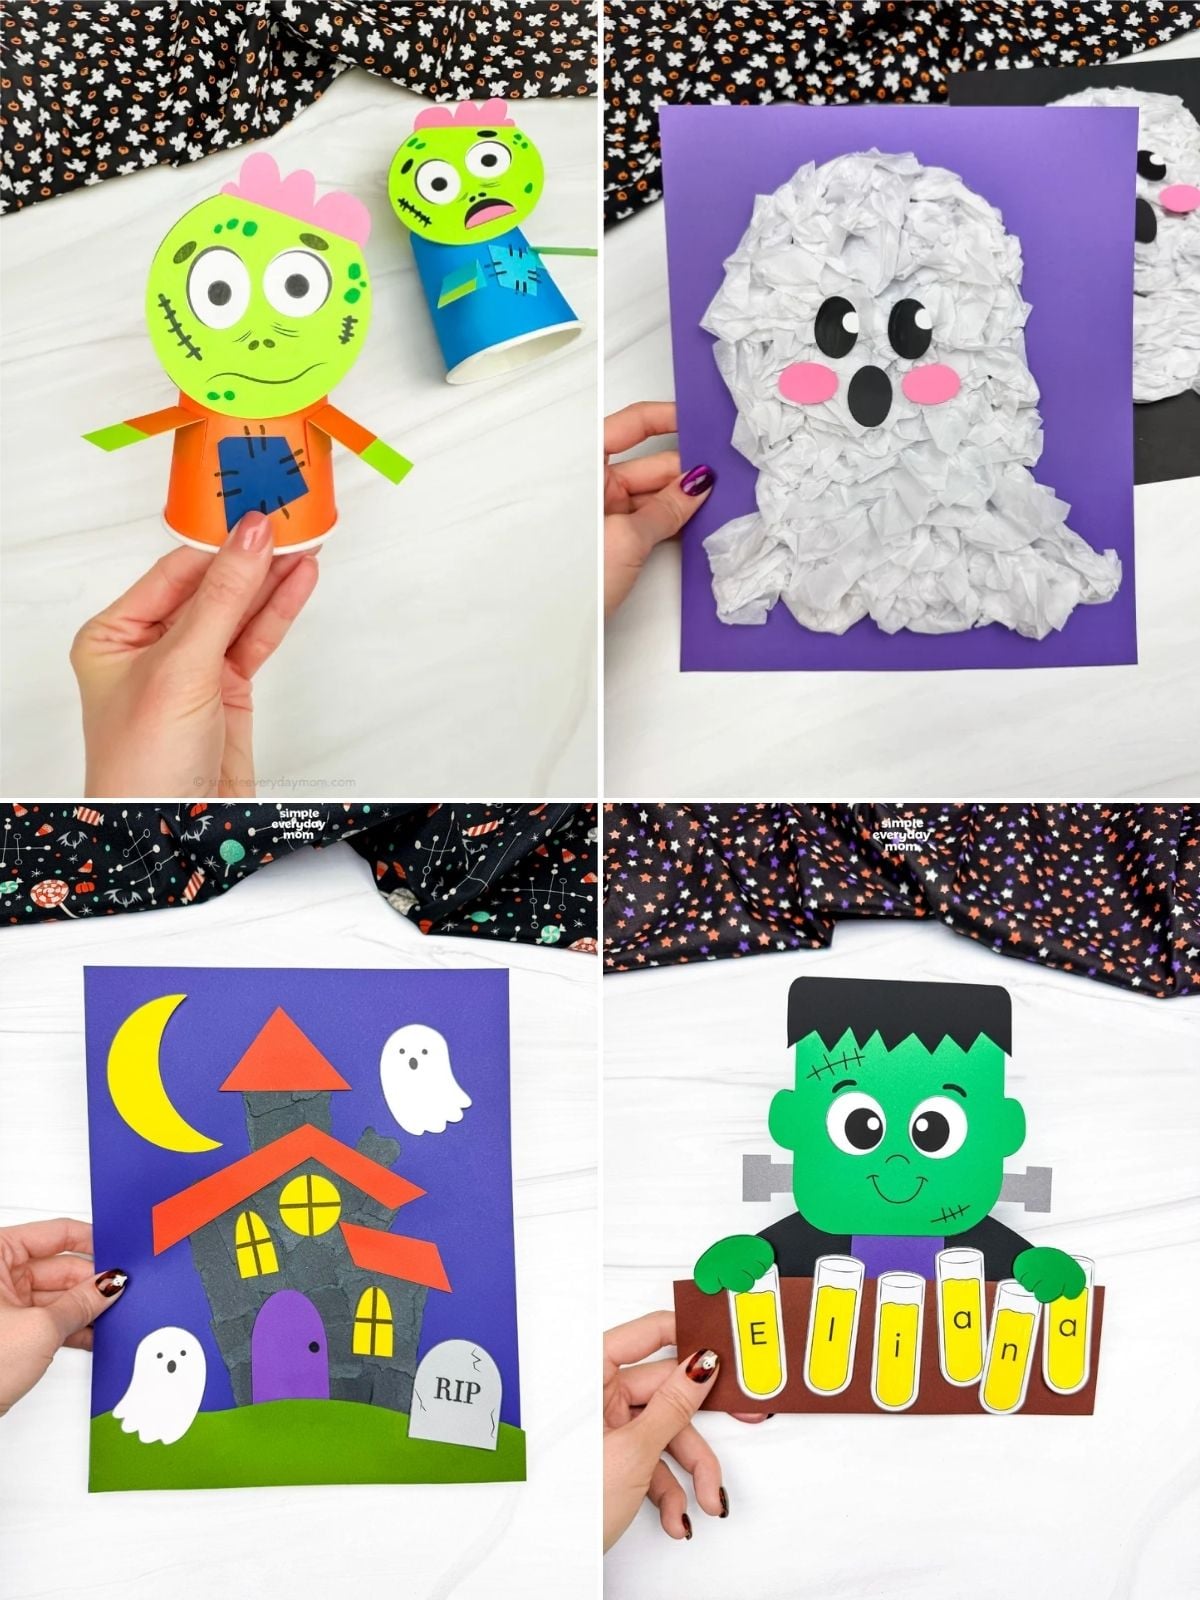
Zombie Paper Cup Craft: A paper cup makes a surprisingly good zombie body. Kids add the zombie’s head and arms, then draw on details like stitches and skin spots to give their character that slightly scruffy undead look.
Tissue Paper Ghost Craft: Scrunching tissue paper is one of those simple craft steps that kids can happily repeat over and over. They fill the ghost with little white tissue paper pieces, then add the face to turn all that texture into a friendly Halloween ghost.


October Learning Pages
These bat tracing worksheets make prewriting practice feel a lot more October-ish. Kids can trace the bat, work on the letter Bb, and follow different lines while getting extra practice controlling their pencil.
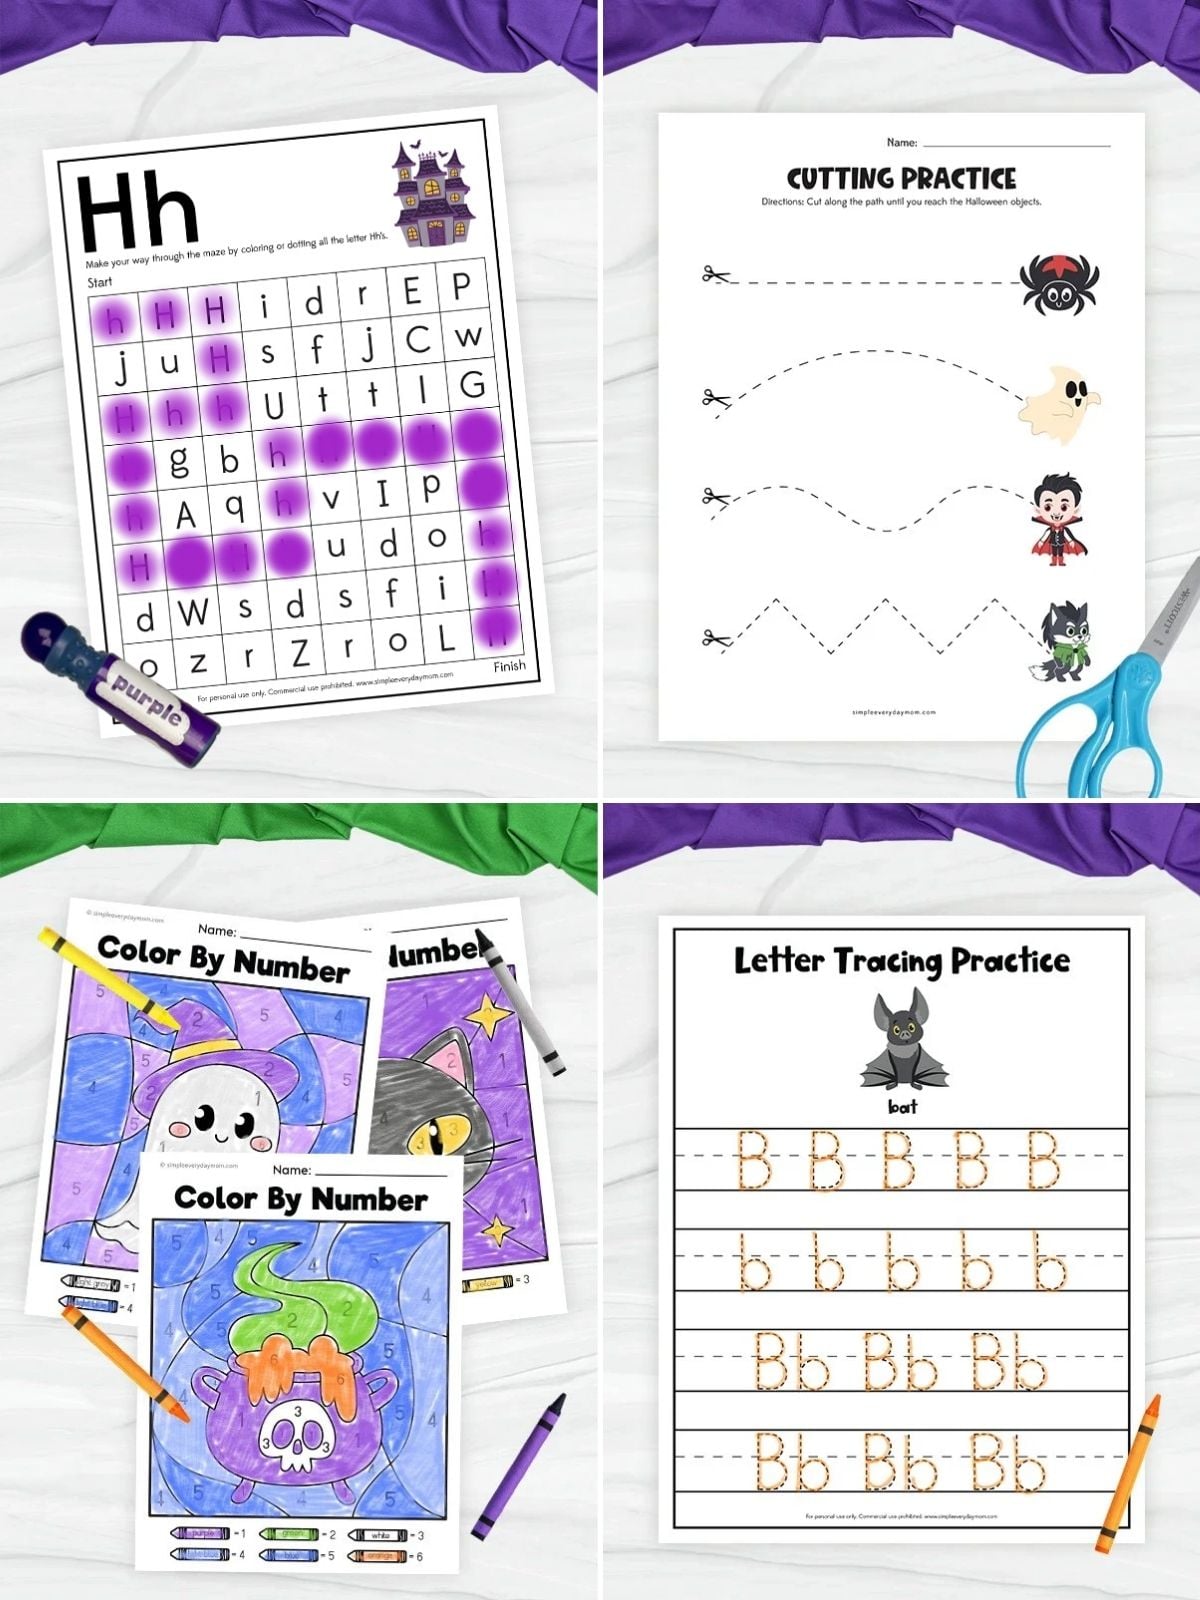
Scissor practice is much more interesting when the lines actually lead through a Halloween activity. These Halloween cutting practice worksheets have kids cut along straight, curved, and zigzag paths, so they get several different movements to work on.
There’s a lot packed into these Halloween theme printables, but the letter mazes are especially fun. Kids hunt for uppercase and lowercase Halloween-themed letters and mark a path through the page, which feels much more like solving something than ordinary letter practice.
Since there’s already a werewolf on the craft, these werewolf worksheets are an easy match. The label the werewolf page has kids cut out the words, place them around the character, and then color him when they’re finished.
More Halloween Ideas For Kids
Share With Us
Did you make this activity with your kids or students? We’d love to feature them on our social media!
For a chance to have your child’s project featured, simply snap a picture of the completed project and post it to our Facebook page, email it to us directly by clicking here, or use #simpleeverydaymom on your social media!
Werewolf Name Craft
Video
Materials
- Colored cardstock or construction paper
- Scissors
- Glue
- Crayola Bold & Bright markers
- Markers
- Black pom pom
- Werewolf name template
Instructions
- Open the PDF in Adobe Reader and edit the template to add your child’s name. Alternatively, you or your child can write the letters on the cloud pieces.
- Print the template and gather the materials for this fun activity.
- Begin by gluing the head/belly piece onto the right side of the body.
- Glue the cheek piece onto the face, below the eye.
- Take the inner ear piece and glue it onto the ear.
- Use a pink Bold & Bright marker to color in the werewolf's tongue.
- Glue the pom pom nose onto the tip of the snout.
- Glue the body onto the moon background.
- Arrange and glue the cloud letters side by side to spell the child’s name.
- Look for the tail and glue it onto the bottom left side of the body.
- Glue the tail tip onto the end of the tail.
- Glue the completed name clouds along the bottom of the werewolf’s body.
- Glue the paw pieces over the top edge of the name clouds.
- Finally, use a marker to draw circle craters around the werewolf on the moon background.
Notes
Did you make this?
Don’t forget to leave a comment below and make sure to follow on Pinterest, Facebook and TikTok for more!
Free Werewolf Name Template


Meet Sam
Sam is the crafter and founder of Simple Everyday Mom. She has been featured in Oprah Mag, Good Housekeeping, The Spruce Crafts, Country Living, The Bump, and more.