All activities require adult supervision. By using this site, you agree to our terms of use. This post may contain affiliate links. As an Amazon Associate and a participant in other affiliate programs, I earn a commission on qualifying purchases. Read our disclosure policy.
Ready for some cozy creativity? These pumpkin art projects are just right for fall, whether you’re at home, in a classroom, or planning a weekend activity. They’re simple to set up, use everyday supplies, and work great for various ages.
Some even sneak in science or sensory fun! For seasonal inspiration, check out our favorite fall crafts that celebrate leaves, pumpkins, and everything autumn.
Pin
Pumpkin Art Projects
Pin
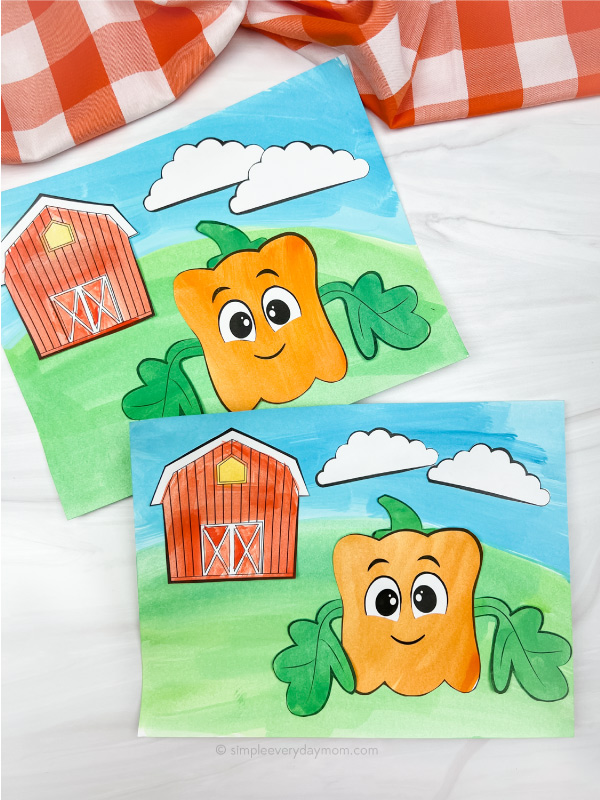
Spookley The Square Pumpkin
Little artists use watercolors and a handy template to create a friendly square pumpkin character from the Spookley story.They paint the cut-out Spookley pieces (like the square pumpkin body, eyes, and a little barn backdrop) and glue them together onto a scene, practicing scissor skills as they go. It's a fun fall art that combines storytime with art, letting kids bring a favorite pumpkin pal to life in their painting.
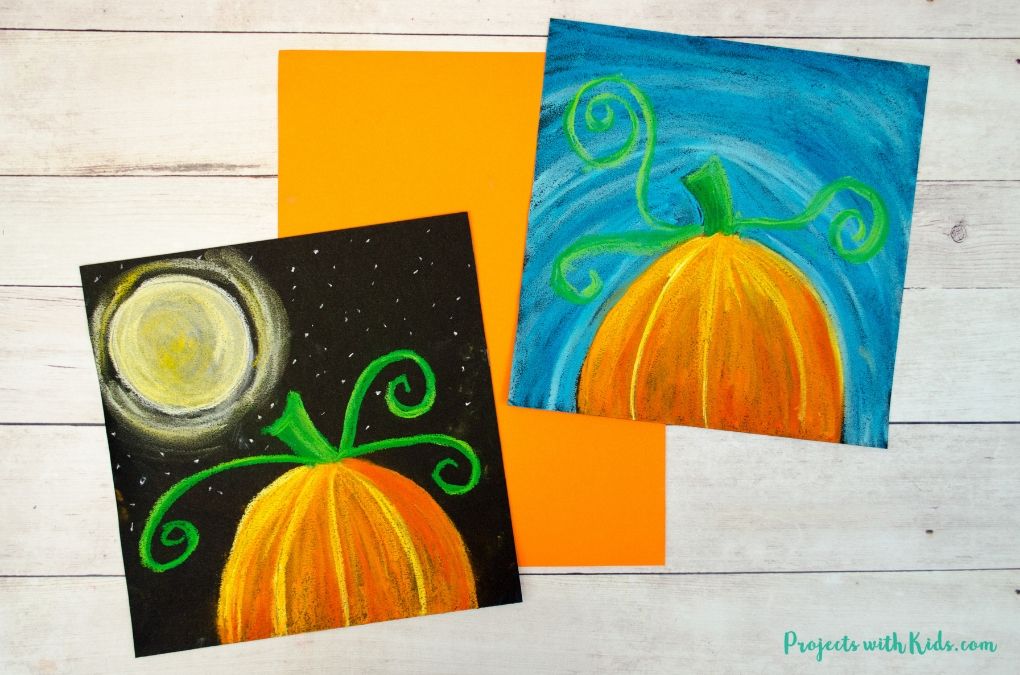
Kids can explore chalk pastels with a pumpkin drawing that is customizable for fall or Halloween. Using easy pastel techniques, they color a pumpkin and then choose a background: a bright autumn day or a spooky night sky with bats.Blending and smudging the chalk is super satisfying, and it teaches them about shading and color mixing while they end up with display-worthy pumpkin artwork.Related: Pumpkin Tracing Worksheets
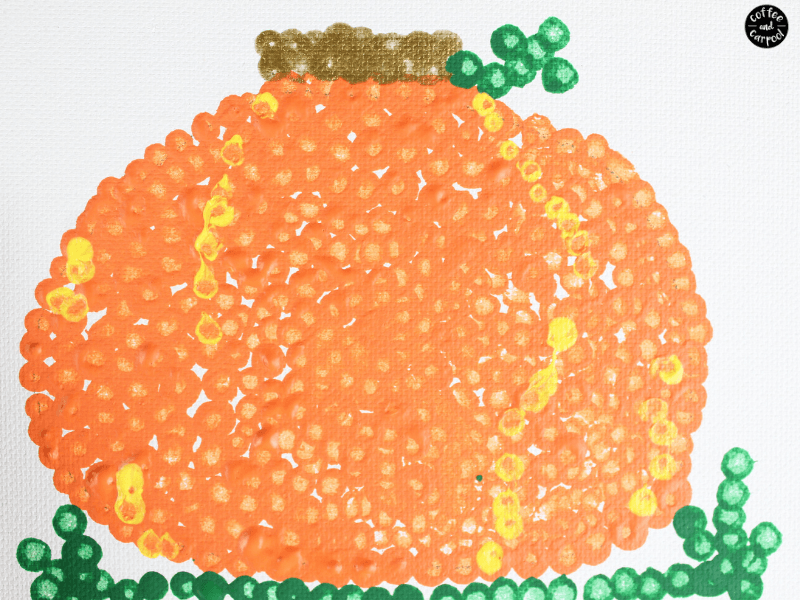
Budding artists try the pointillism technique by painting a pumpkin picture entirely out of colorful dots. Using cotton swabs (Q-tips) dipped in paint, kids fill in their pumpkin outline one dot at a time, which is excellent for fine motor practice and patience.The result is a vibrant dotted pumpkin design inspired by a famous art style, turning a simple fall shape into a masterpiece of little points of color.
Little artists can cover a big pumpkin drawing with tissue paper to create bright, layered artwork. They brush a glue-and-water mix over orange and yellow tissue scraps, which stick to the paper and blend into new shades as the colors overlap.The process is open-ended and sensory (lots of sticky, brushy fun), and the finished pumpkin collage comes out vibrant and textured—perfect to hang up for fall.Also try: Pumpkin Activity Sheets
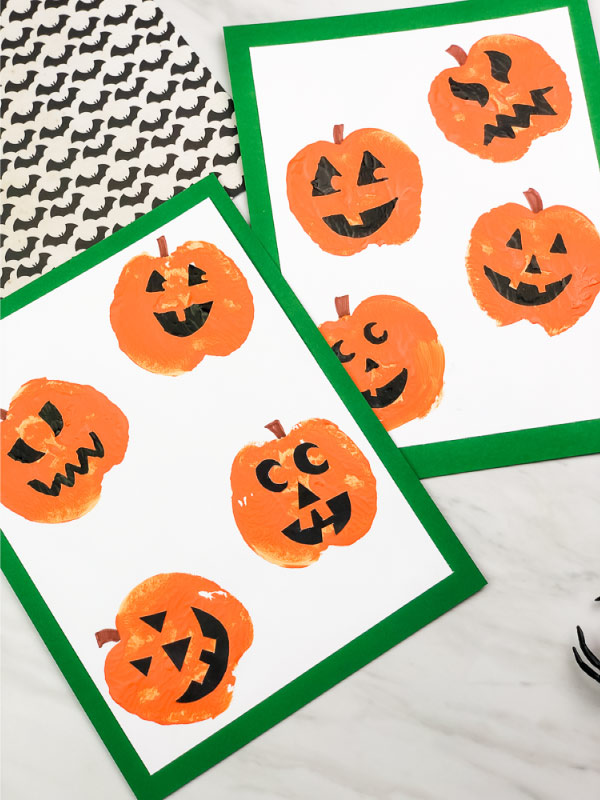
A simple construction paper project that's perfect for preschoolers to practice cutting and gluing. Using a free template, little hands can cut out their own pumpkin shape and face pieces (like eyes and a smile) and glue them together to make a jack-o'-lantern.It's an easy fall project that keeps kids engaged while building fine motor skills, and they'll be proud of their cute paper pumpkin decoration.
This project uses a raised salt painting technique to make a gorgeous watercolor pumpkin. Kids (and adults) draw a pumpkin with glue on paper, sprinkle salt over the glue lines, and gently touch watercolor paint to the salty outline.The colors magically spread along the salt, creating a textured, dimensional pumpkin painting with an almost sparkly, 3D look – a beautiful fall art experiment with science mixed in.
Here's a fun collage project: kids fill a pumpkin template with torn paper pieces. Preschoolers will love ripping up bits of colored or shiny paper and gluing them inside the friendly jack-o'-lantern outline.They can use classic orange shades or any crazy colors they like, and even add a painted background scene, making each pumpkin collage unique while practicing fine motor skills and creativity.Related: Pumpkin Headband Craft
Kids can create polka-dotted pumpkin art inspired by the famous artist Yayoi Kusama's style. Following a simple step-by-step tutorial (or using provided templates), they draw pumpkin shapes and cover them in bold patterns of dots and vibrant colors.It's a wonderful blend of art and art history – children learn about Kusama's love of dots and pumpkins while having fun making their own eye-catching, spotty pumpkin masterpieces.Also try: Pumpkin Cutting Worksheets
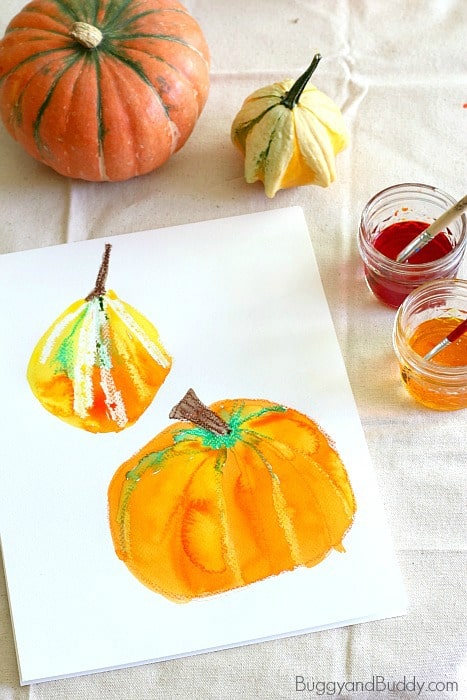
Young artists set up a real pumpkin and painted or drew it as a still life, combining oil pastels and watercolors for a special effect. First, they sketch and color their pumpkin with oil pastels, capturing details like the curved lines and stem, then they brush watercolor paint over the drawing.The oil pastel resists the watercolor, so the outline and details stay bold, and the background fills with lovely washes of color – it's a calm, creative way to observe nature and end up with a frame-worthy fall painting.Related: Pumpkin Do A Dots For Fall
This clever activity turns solid paint sticks into beautiful watercolor paint for a pumpkin project. Kids color in pumpkin shapes on cardboard using quick-drying tempera paint sticks, then use a wet paintbrush to blend the colors with circular strokes.Once they dry, the cardboard pumpkins have a gorgeous, soft watercolor look—they can be cut out and displayed as vibrant fall decorations, and it's all done with very little mess.Also try: Spookley the Square Pumpkin Torn Paper Craft
Kids use crayon rubbings to give their paper pumpkins a cool, textured look. They place paper over various textured objects (like leaf veins, mesh, or wood surfaces) and rub with orange crayons, creating patterns on the paper.Then, they cut out a pumpkin shape (or draw one on the textured paper), ending up with unique pumpkin artwork filled with real-life patterns—an easy fall activity that mixes art and exploration of textures.Related: Pumpkin Counting Worksheets
A classic marble painting activity gets a festive twist as kids roll paint-covered marbles around to decorate pumpkin shapes. Children place a paper pumpkin cutout in a shallow box or tray, drop in a couple of marbles dipped in orange (and other fall colors) paint, and tilt the box so the marbles spin and zigzag across the paper.When they stop and lift out their paper, they'll discover a one-of-a-kind abstract pumpkin design made of crazy paint streaks—process art full of motion and surprise.Also try: Torn Paper Pumpkin Craft
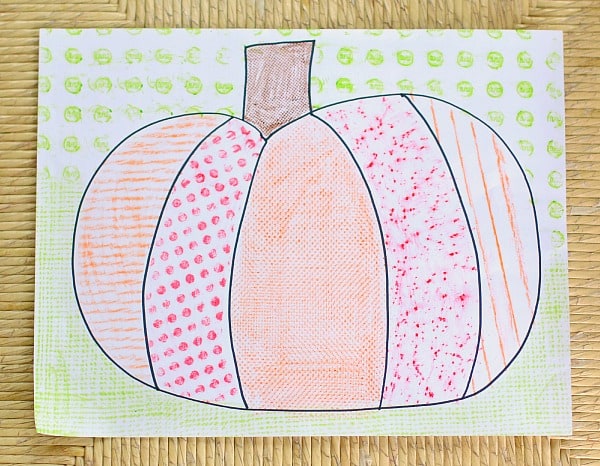
Kids can turn a simple pumpkin outline into a striking piece of line art. Using a provided template divided into sections, children draw different patterns or lines in each section – straight lines with a ruler, zigzags, swirls, or any doodles – and then color them in with crayons or markers.The result is a vibrant, mosaic-like pumpkin design of many little patterns, which looks impressive and allows each young artist's style to shine.
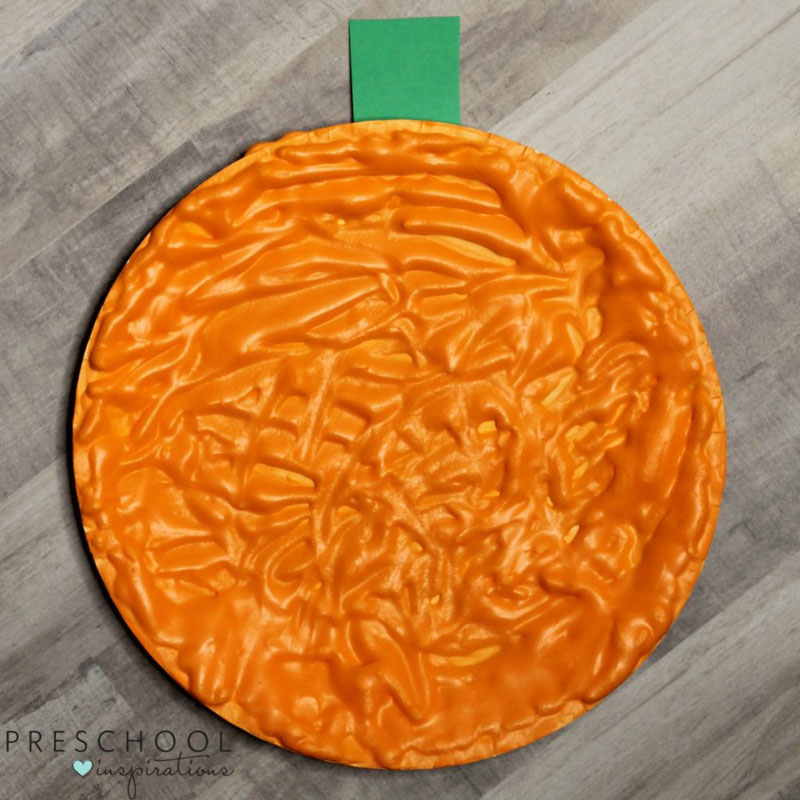
This activity lets kids whip up their puffy paint and make a pumpkin with a delightfully squishy texture. They create a fluffy paint mixture by mixing shaving cream, white glue, and a bit of orange color (and even a dash of pumpkin spice for scent).Children then spread the puffy paint onto a paper plate or cut-out pumpkin shape, and as it dries, it stays raised and puffy – a fun sensory art experience that looks like a frosted pumpkin treat.Also try: Silly Pumpkin Craft
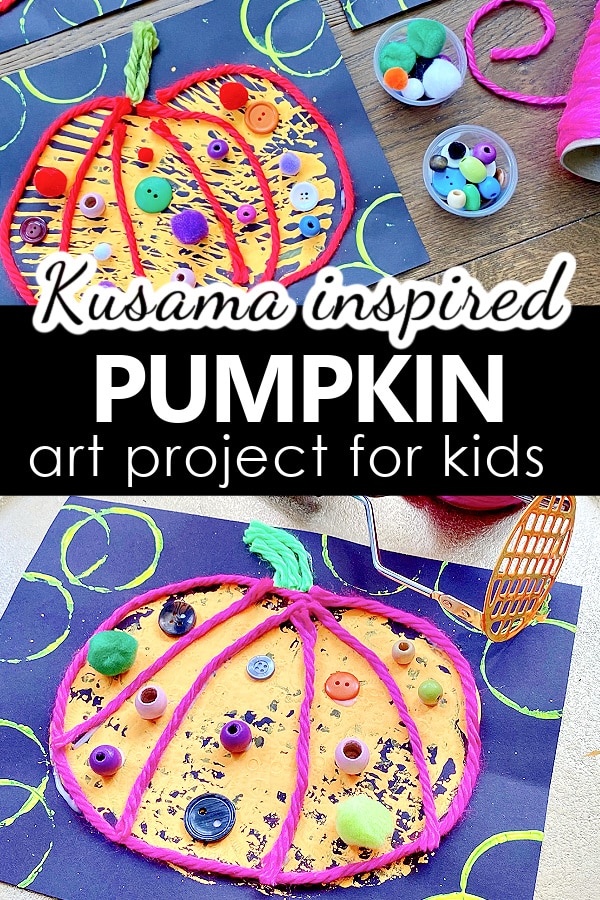
This vibrant mixed-media project is inspired by Yayoi Kusama's dotty pumpkins. First, kids stamp a pumpkin shape on black paper using a potato masher dipped in neon orange paint, and add polka dots around it by stamping with a cup and yellow paint.After it dries, they outline the pumpkin with yarn glued and decorate it with fun loose parts like pom-poms, buttons, or beads as extra dots. The result is an eye-popping collage full of texture, color, and Kusama's signature polka-dot flair.
Instead of carving, kids can have a blast painting real pumpkins with vibrant designs. They start with a plain pumpkin as their canvas and use brushes or sponges to cover it in whatever colors they like.Then, they add details – for example, painting the pumpkin's vertical lines (its “ribs”) in a contrasting color to accentuate its shape. This activity lets children get creative (with patterns, funny faces, or stripes) while keeping the mess low, and they end up with a personalized pumpkin decoration that shows off their artistic touch.Related: Pumpkin Paper Plate Craft
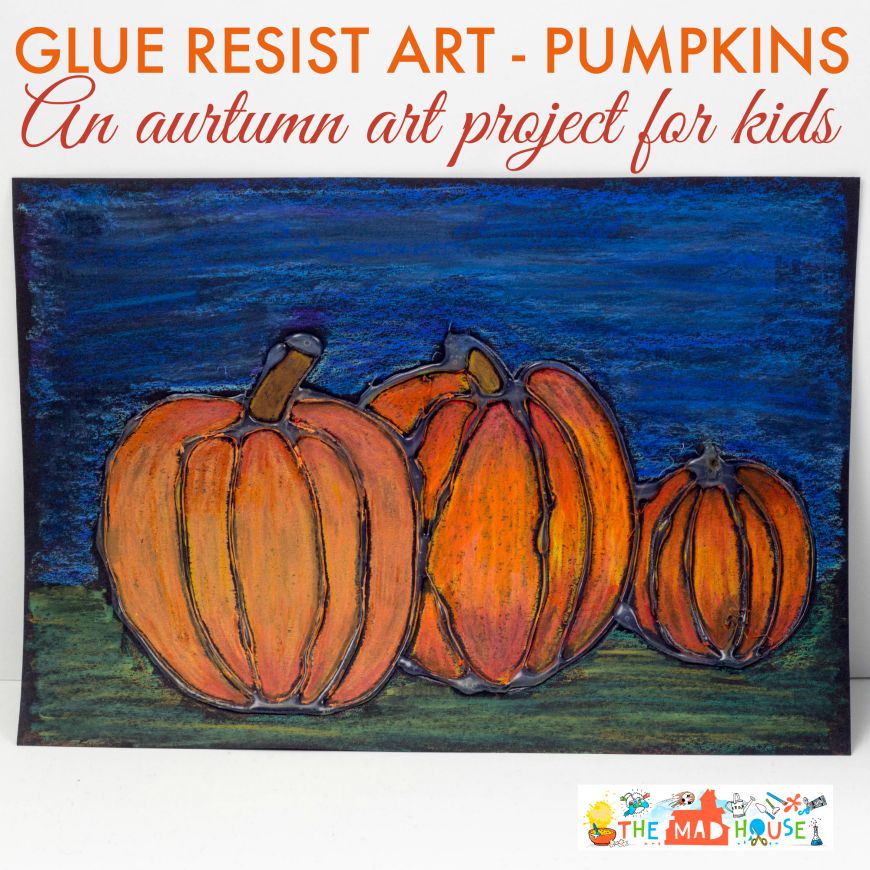
This project uses a simple glue resist technique to make a brilliant pumpkin picture. Kids draw a pumpkin on dark paper with a pencil and trace the lines with white glue, letting the glue dry into a raised outline.Then they color over the whole page with chalk pastels or watercolors – the dried glue lines resist the color and stay visible as bold outlines, revealing the pumpkin's shape and details against the colorful background. It's like magic seeing the design pop out, and the finished art really “pops” with its striking contrast.Also try: Pumpkin Puppet Craft
These pumpkins combine drawing and painting for a neat resist effect. Kids start by drawing and coloring a pumpkin on paper with oil pastels (for example, orange and green pastels for the pumpkin and stem, plus maybe black for outlines or a jack-o'-lantern face).Next, they brush over the drawing with watercolor paint – the watery paint slides off the waxy pastel area, filling in the background while the pastel pumpkin stays bright and sharp. It's the best of both worlds, resulting in a vibrant pumpkin artwork with a lovely watercolor sky or backdrop behind it.
Why not let gravity do the painting? In this activity, kids create drip art pumpkins by dripping paint down the sides of a pumpkin. Place a pumpkin (real or foam) on a tray, then have kids pour or spoon thinned paint in various colors over the top and watch as it runs down.The paints blend and streak as they drip, covering the pumpkin in a rainbow of glossy colors – it's a messy, mesmerizing process art project, and when it dries, you have a one-of-a-kind abstract pumpkin decoration.Related: Pumpkin Name Craft
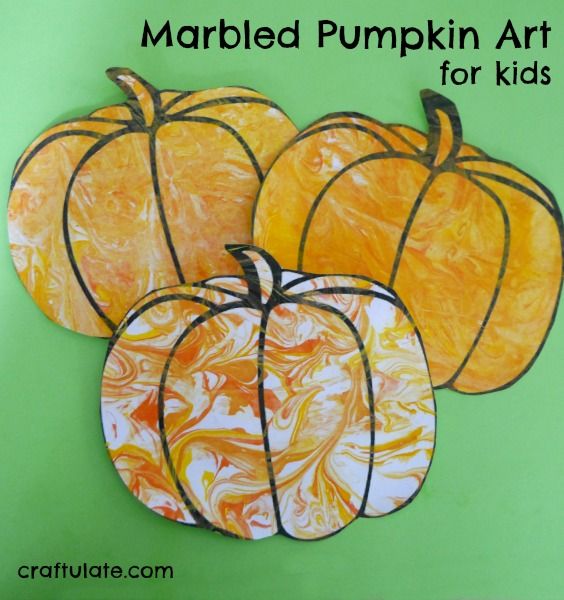
Kids will be amazed at making these marbled pumpkins with shaving cream. They squirt a layer of shaving foam in a tray and drizzle orange (plus maybe a bit of yellow or red) paint on top, then use a stick to swirl the color gently.Next, they press a paper with a pumpkin outline onto the swirled foam and lift it off to reveal a beautiful marbled pattern on their pumpkin. After scraping away the excess foam, each print shows unique swirls and streaks – a gorgeous tie-dye effect that's super fun to create.
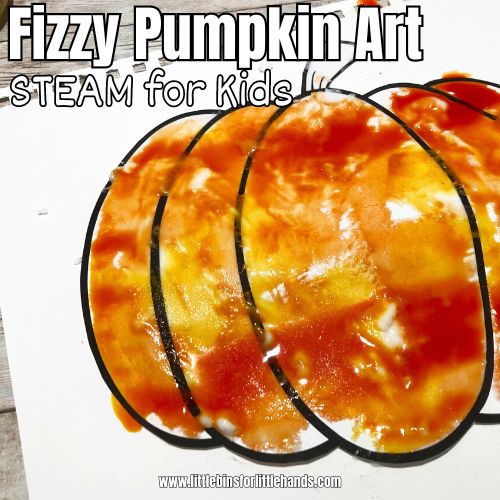
This experiment mixes art and science for a fizzy painting experience. Kids paint a paper pumpkin cut-out with baking soda and water paste, covering the pumpkin shape in the thick baking soda paint. Then comes the fun part: using a dropper, they drip vinegar that's been colored orange (and a bit of green for the stem) onto the pumpkin.The vinegar reacts with the baking soda, making the paint bubble and fizz while spreading color. Once it dries and the fizz is gone, they'll have a cool watercolor-like pumpkin pattern – and they'll have enjoyed a mini science lesson.Also try: Pumpkin Emotions Craft
Here's a mess-free painting activity toddlers and preschoolers will love. You take a pumpkin coloring page and slip it inside a zip-top plastic bag, then add a couple of blobs of red and yellow paint into the bag. Seal it up, and let the kids press, squeeze, and spread the paint around through the plastic – their hands stay clean while they mix red and yellow into orange and cover the pumpkin shape.Once the kids finish smooshing, they take the paper out to dry and reveal a beautifully painted pumpkin with no mess on their hands or the table.Related: Popsicle Stick Pumpkin Craft
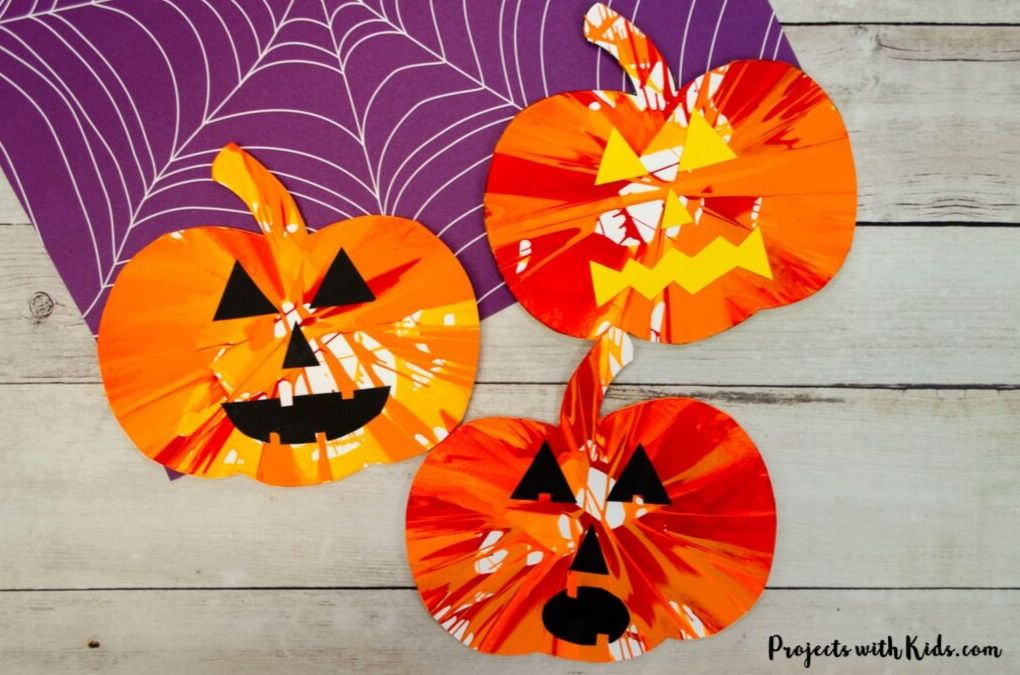
Get your salad spinner out for this spin art pumpkin art! After cutting out a paper pumpkin shape (great scissor practice), kids place it in a salad spinner and drizzle some orange and yellow paint.Close the lid and spin, spin, spin – when it stops, they'll find the paint has splattered in crazy patterns all across the pumpkin. Each one comes out different, and it's an exciting, active way to make art (we love hearing the giggles when they peek at the spin-painted pumpkin).
Why paint with a brush when you can paint with a rolling pumpkin? In this significant action art activity, kids dip small round pumpkins in trays of paint and then roll them down a ramp onto a large sheet of paper on the floor. As the pumpkins tumble and roll, they leave bold paint tracks everywhere, mixing orange, yellow, and red into an abstract design.It's messy (smocks recommended!) but so worth it – children combine art with gross motor play and see gravity and color in action, ending up with a huge collaborative pumpkin painting.Also try: Pumpkin Worksheets
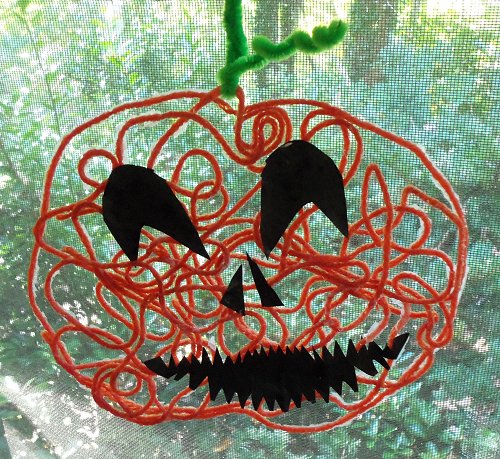
This project makes a 3D yarn pumpkin perfect for hanging up as decor. With an adult's help, kids inflate a balloon and wrap it in lots of glue-soaked orange yarn (criss-crossing in all directions to cover the balloon).After the yarn dries hard, someone removes the balloon, leaving a hollow pumpkin-shaped web of yarn. Add a green pipe cleaner curly stem, and you have a lovely homemade string pumpkin ornament—a messy project, but the results are worth it.
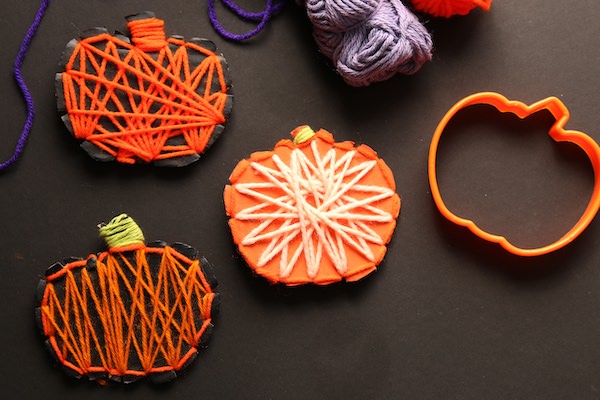
Kids can make these adorable yarn-wrapped pumpkins with cardboard and yarn—no nails or boards needed. They can criss-cross in any pattern or just go wild, wrapping it up. It's a great fine-motor activity, and the finished string art pumpkin looks fantastic displayed on a shelf or mantle.Related: Paper Plate Spookley The Square Pumpkin Craft
Pour painting is a mesmerizing way to decorate pumpkins with swirls of color. Start with a small white pumpkin (real or artificial) set on a tray, and let the kids slowly pour different colors of paint over the top of it.The paints flow down the sides and mix into beautiful marbled patterns, covering the pumpkin in bright, happy colors. It's a no-carve decorating idea that feels like magic – each pumpkin has a unique tie-dye/rainbow look and many wow factors.
Turn a pumpkin into a doodle canvas! In this fun decorating idea, kids use markers or paint pens to draw over a pumpkin's surface, creating doodle art designs. Starting with a clean white or orange pumpkin, they might add patterns like stripes, polka dots, spirals, or even little cartoons and words – whatever their imagination comes up with.It's mess-free and straightforward (just drawing!), and the result is a super cool, personalized pumpkin covered in amazing hand-drawn designs that look almost professionally done.Also try: Pumpkin Craft For Preschoolers
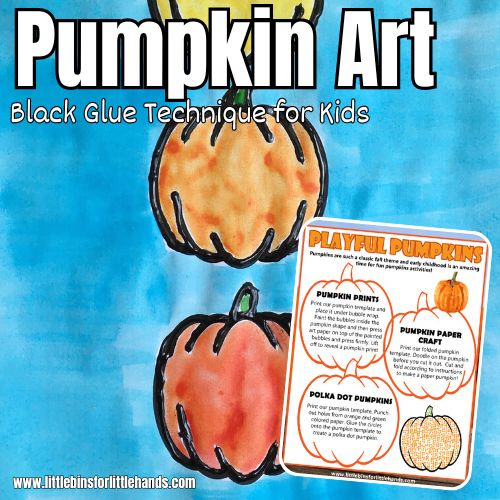
Kids make black glue by mixing black paint or ink into white school glue, then squeeze it out to trace a pumpkin outline on paper (there's a printable template to help). Once the glue lines dry, they paint inside the pumpkin shape with watercolors.The black glue forms bold raised outlines that keep the watercolor in each section, so the finished painting has vivid colors with dark glossy outlines – just like a bit of pumpkin “stained glass” window.
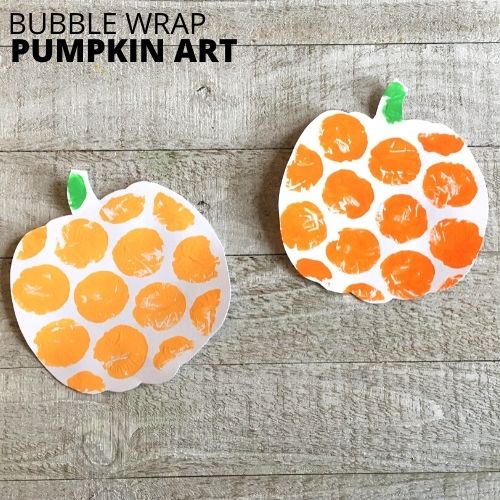
This art activity uses bubble wrap as a stamp to create a textured pumpkin picture. Kids brush or roll orange paint onto a piece of bubble wrap and then press it onto paper (cut in a pumpkin shape or on a pumpkin coloring page).After adding a green stem and leaf, you have a cute pumpkin print full of dotty texture – and the process of popping and printing with bubble wrap is so much fun.Related: Spookley The Square Pumpkin Craft
Kids put a few blobs of paint on paper (for example, white paint in the shape of a ghost or orange for a pumpkin) and then take a squeegee or old credit card and drag it across the paint. As they scrape, the paint spreads into a neat silhouette – think gho— with trailing tails, or pumpkin with swirly edges.The result is an artsy, streaked Halloween scene (ghosts, jack-o'-lanterns, bats, etc.), and the process is quick, surprising, and satisfying.Also try: Paper Plate Mummy Pumpkin Craft
Sam is the crafter and founder of Simple Everyday Mom. She has been featured in Oprah Mag, Good Housekeeping, The Spruce Crafts, Country Living, The Bump, and more.