All activities require adult supervision. By using this site, you agree to our terms of use. This post may contain affiliate links, sponsored links, and ads. As an Amazon Associate and participant in other affiliate programs, I earn from qualifying purchases.. Read our disclosure policy.
When the weather starts to warm up, it’s the perfect time to bring bright colors indoors. These flower crafts for kids are great for parents, teachers, and caregivers who want simple activities that feel cheerful without needing fancy supplies.
From handprint keepsakes to recycled craft ideas, this collection includes fun activities for preschoolers and elementary-aged children using easy-to-find supplies. Pair them with our spring crafts collection to plan a whole week of seasonal activities everyone will enjoy.
Pin
Garden Theme Activities
Pin
Handprint Bouquet
Kids cut colored cardstock pieces from the printable template and glue on smiley faces to build a cheerful cluster of blooms. Layer green paper stems on top, then add a traced hand-and-forearm cutout at the bottom to make it look like someone is holding the bunch.Finish it with a slight pink ribbon bow, and kids will love choosing the colors and seeing their own hand turn into part of the artwork.
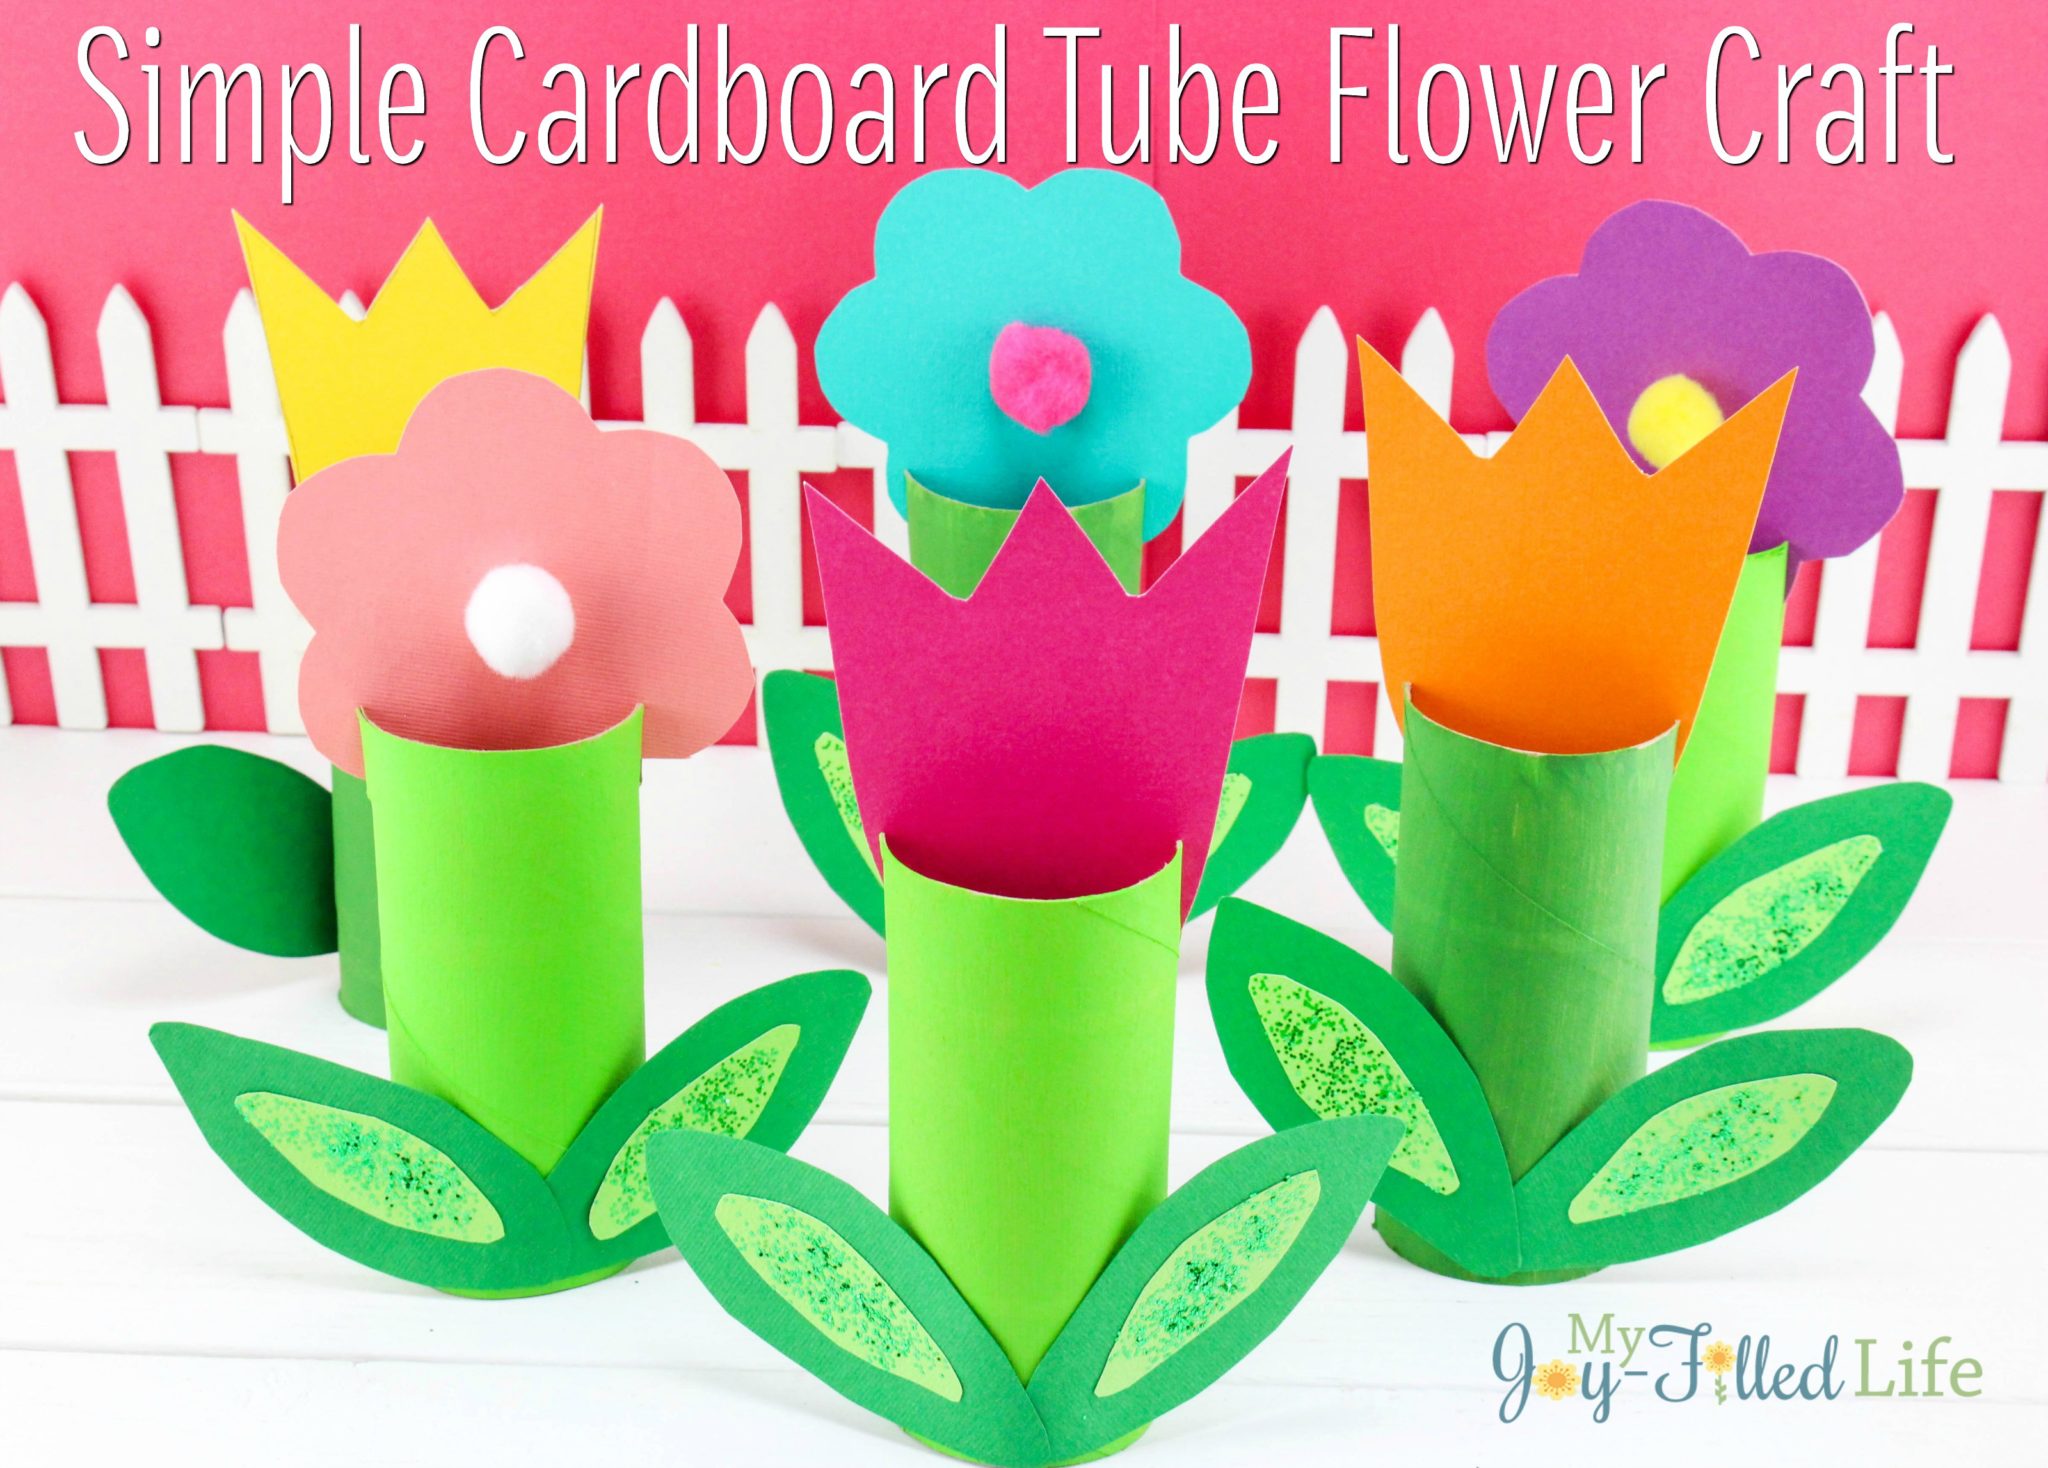
Empty toilet paper rolls get painted green with a foam brush, turning them into sturdy little “stems” that won't wilt. Kids cut simple petal shapes from colorful paper, slide them into small slits at the top, and add pom-poms and a touch of glitter for the center.The mix of painting, cutting, and decorating makes it feel like a full art session without requiring many fancy supplies.Related: Flower Photo Preschool Craft
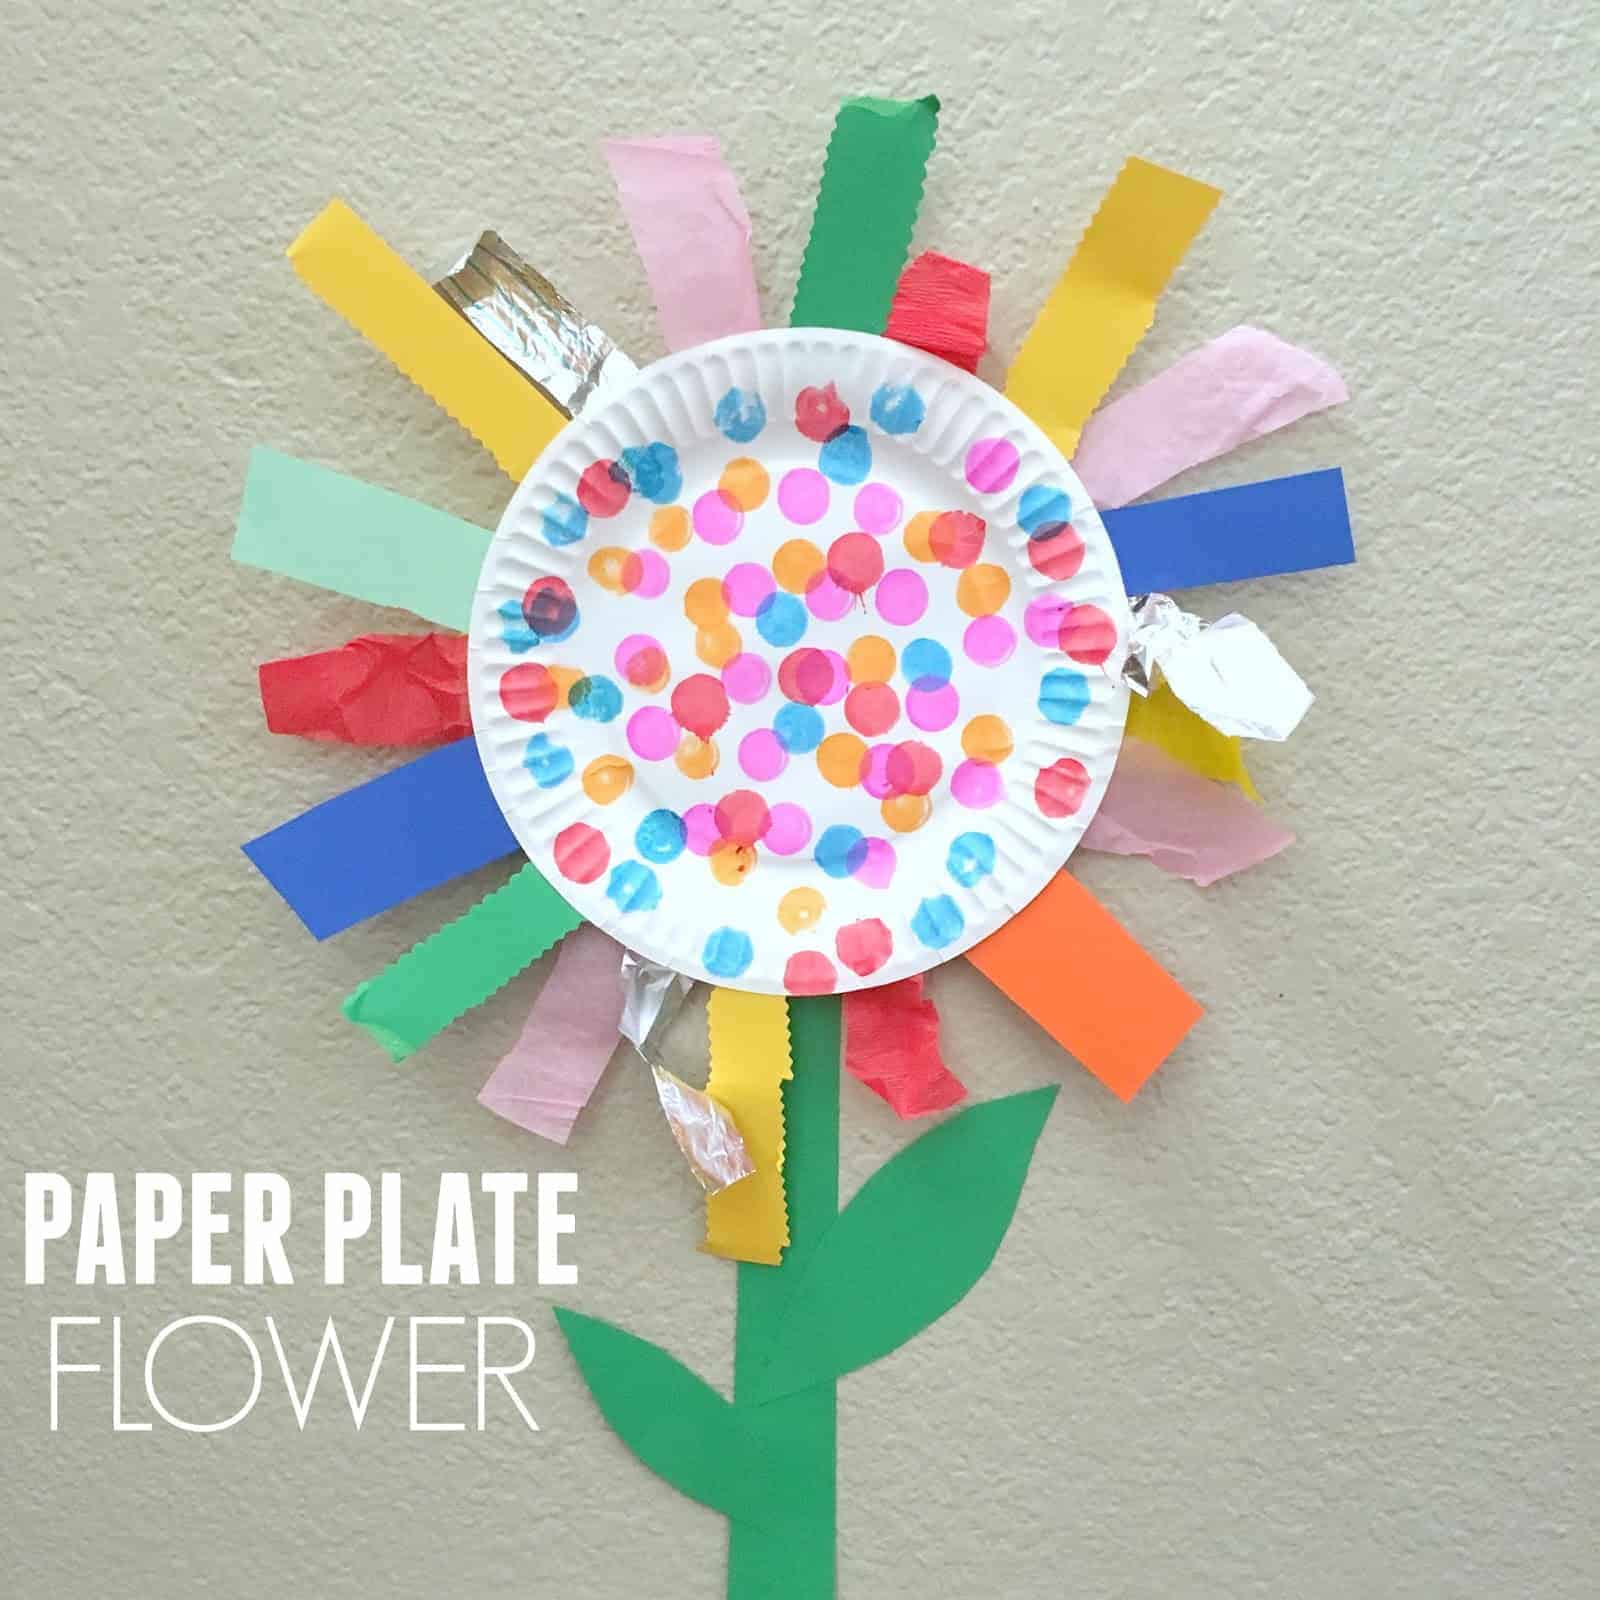
Set out a “creation station” with a paper plate, double-sided tape, markers, and lots of different papers like foil, tissue paper, streamers, and even newspaper. Kids cut and snip pieces using a variety of scissors, then tape them onto the plate to build bold shapes and textures.It's open-ended in the best way, so every project turns out different while quietly building scissor skills.Also try: Spring Math Worksheets
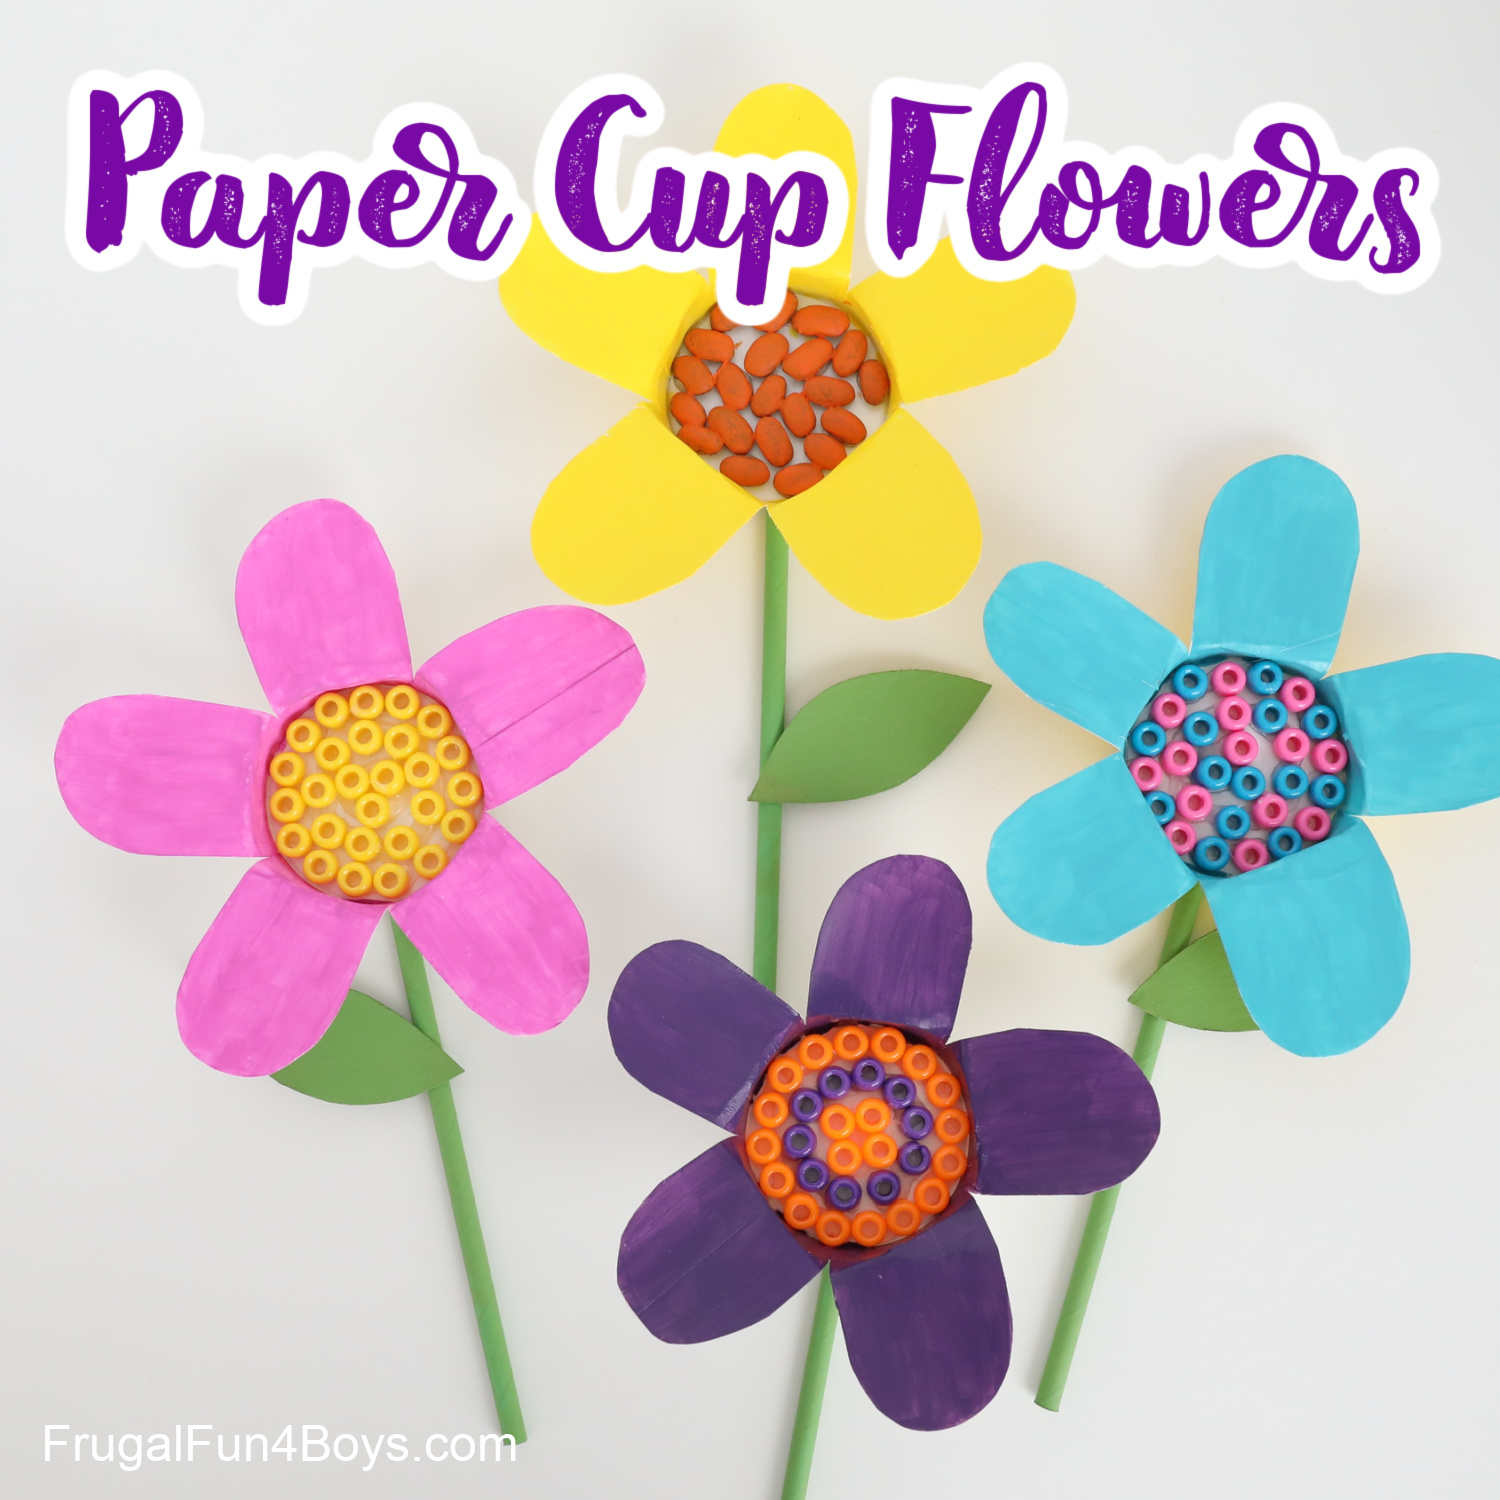
Paper cups turn into 3D blooms when kids cut slits down the sides, fold the sections out like petals, and paint them with acrylics. Use a straw to create the stem, then fill the center with playful “seed” options like pony beads or dried beans. Have an adult handle the hot glue for this step.The result is sturdy enough to display, and kids enjoy customizing petal shapes—rounded, pointy, or anything in between.Related: Spring Pattern Worksheets
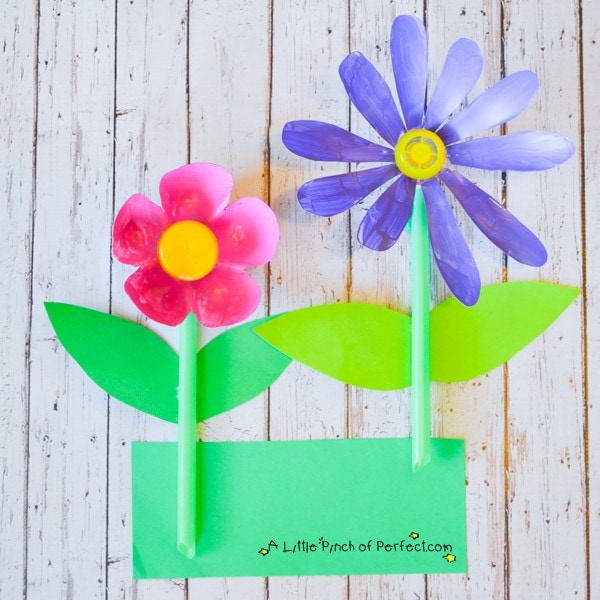
A 2‑liter soda bottle gets cut into two pieces and trimmed into scalloped edges, creating clear, bendable petals kids can paint with acrylics. A green straw becomes the stem, and a milk cap or food pouch cap gets hot-glued into the center to finish the look (adult help for the glue gun).It's a clever upcycle that feels extra “wow” because the finished blooms are shiny, sturdy, and truly three-dimensional.Also try: Spring Color By Letters
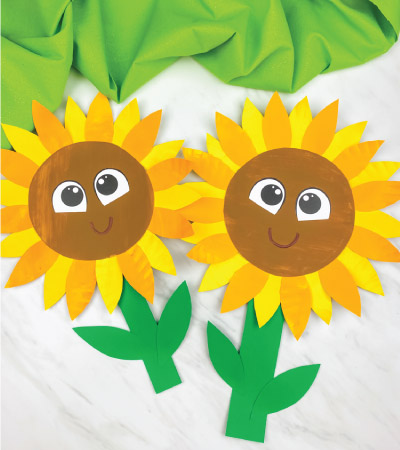
Three paper plates become a bold, layered bloom when kids paint them brown, bright yellow, and golden yellow, then cut and glue the petal shapes together. The printable template adds easy extras like leaves and a cute face, and a marker finishes the smile.It's a fun mix of painting and assembling, with a big finished piece that looks great on a wall or bulletin board.
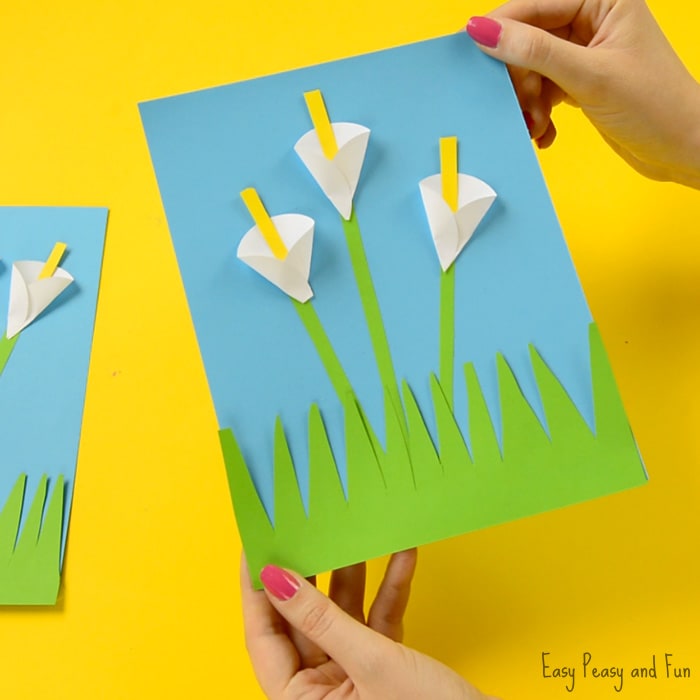
Kids punch white paper circles, glue a strip of yellow paper down the middle, then fold and glue the circle into a simple trumpet shape. Thin green strips make easy stems, and everything gets glued onto a blue background with a bit of green “grass” for the finish.The circle-punching step is oddly satisfying for kids, and the clean shapes make the result look polished in a hurry.Related: Spring Tracing Worksheets
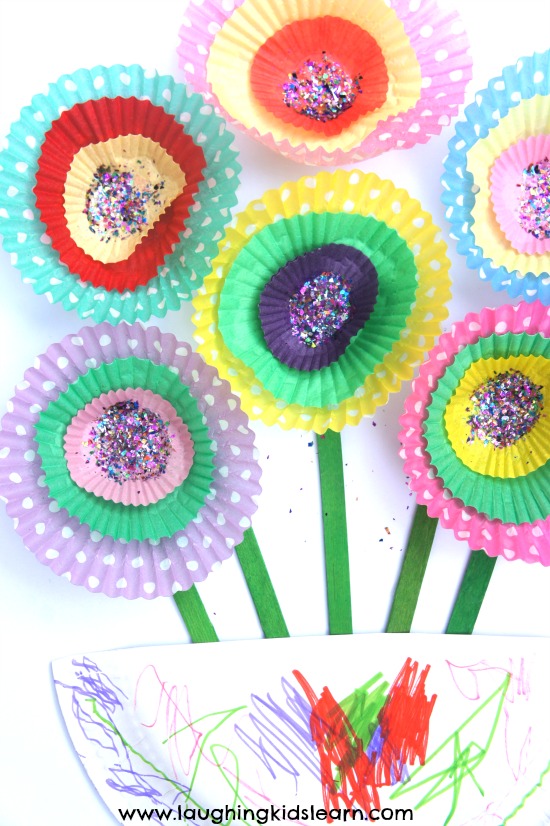
Layer a small cupcake liner inside a larger one, glue a button in the center, and you've got an instant bloom with lots of color and texture. Green glitter paper strips become stems, and leaf shapes plus a ribbon bow turn the whole page into a pretty “arrangement” on white backing paper.Kids love mixing and matching liner patterns and buttons, so no two sets ever look the same.Also try: Spring Activity Sheets
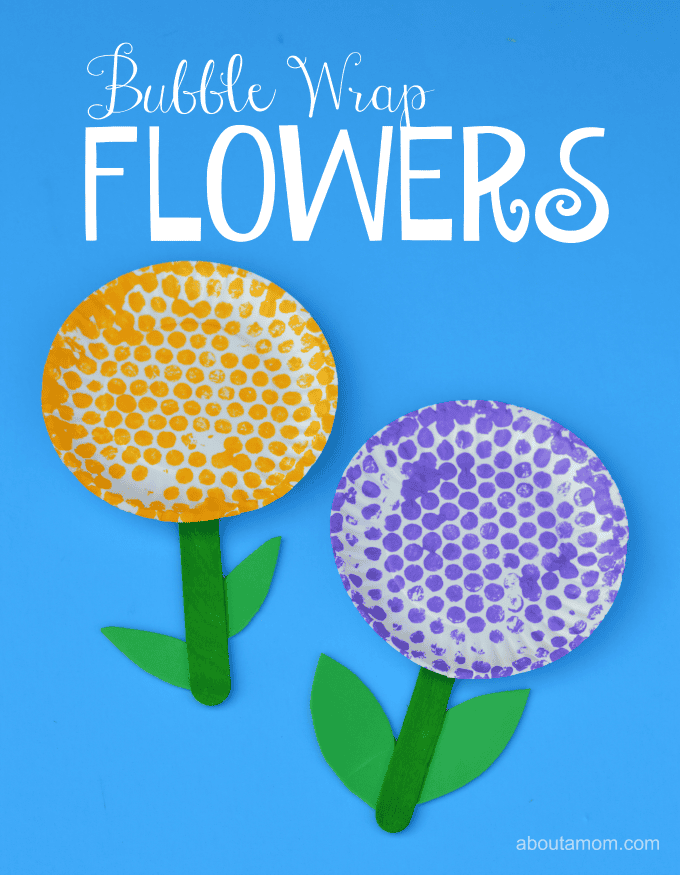
Bubble wrap becomes the “stamp” when kids press it into paint and transfer the bumpy pattern onto a small paper plate. A stick painted green is glued or taped to the stem, and two leaf shapes cut from green cardstock or foam paper finish it off.The squishy printing step is always the highlight, especially for kids who like sensory art.Related: Spring Do A Dot Printables
Kids drip liquid watercolors onto newspaper with droppers or pipettes, then let the paper dry into a beautifully mottled, colorful sheet. After that, they cut circles (or simple petal shapes) and layer them onto construction paper, gluing on stems for a 3D look.The dropper painting feels like a science-meets-art activity, and kids love watching colors blend into the newsprint.Also try: Spring Pattern Block Mats
With a free template, kids cut and glue cardstock pieces to create a folded card base that opens up for a message inside. Petals and centers get layered into a small “bundle,” then a ribbon strip and bow dress up the front like a wrapped gift.The best part is that it looks impressive once assembled, but it's still just scissors, glue, markers, and paper.
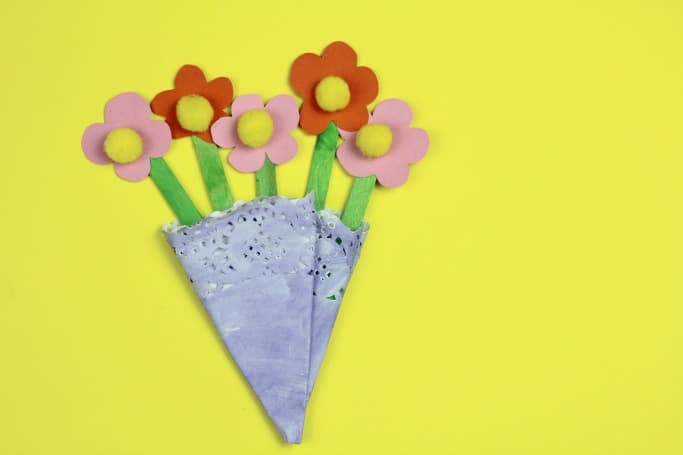
Cupcake liners stack into layered blooms, then kids decorate them with glitter and drawing tools like pens, paint, or pencils. Popsicle sticks make easy stems, and a cut paper plate becomes a simple “vase” that kids can color however they want.It's toddler-friendly but still looks detailed, thanks to those liner layers that add instant texture.Related: Spring Connect The Dots
Paper straws get cut, notched, and stacked like little Lincoln Logs, then glued into a bright crisscross design with a button on top. A popsicle stick painted green becomes the stem, and a green pipe cleaner shapes quick leaves on the back.Kids love how unusual the building method feels, and the finished piece looks bold enough for the fridge.Also try: Spring Cutting Practice Pages
Kids trace and cut petal shapes from cardstock using a template, then glue a photo face into the center for an extra-personal touch. Green sticks (or popsicle sticks painted green) become stems, and optional jewels or glitter glue add sparkle without much effort.Arrange the finished blooms in a mason jar with tissue paper or Easter grass for a giftable display kids are proud to hand over.Related: Spring Worksheets
Start with a bold-outlined template printed on white cardstock, then cut tissue paper into small pieces and scrunch them into tiny balls. Kids glue the textured bits into each section until the whole design looks puffy and colorful.The scrunch-and-stick process is excellent for little hands, and the raised effect makes the finished art stand out on display.Also try: Spring Bird Craft
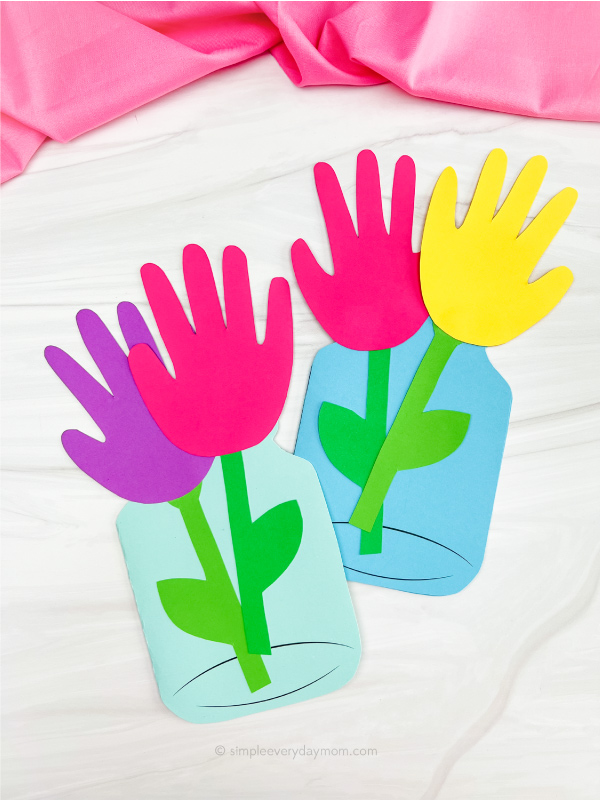
A printable mason jar card base folds into a greeting card, making the “card part” easy for kids to start. They trace and cut two handprints from colored paper, glue them onto paper stems, and arrange everything so the shapes sit neatly above the jar.Kids love that it's personal, and adults love that it doubles as a keepsake without using paint.
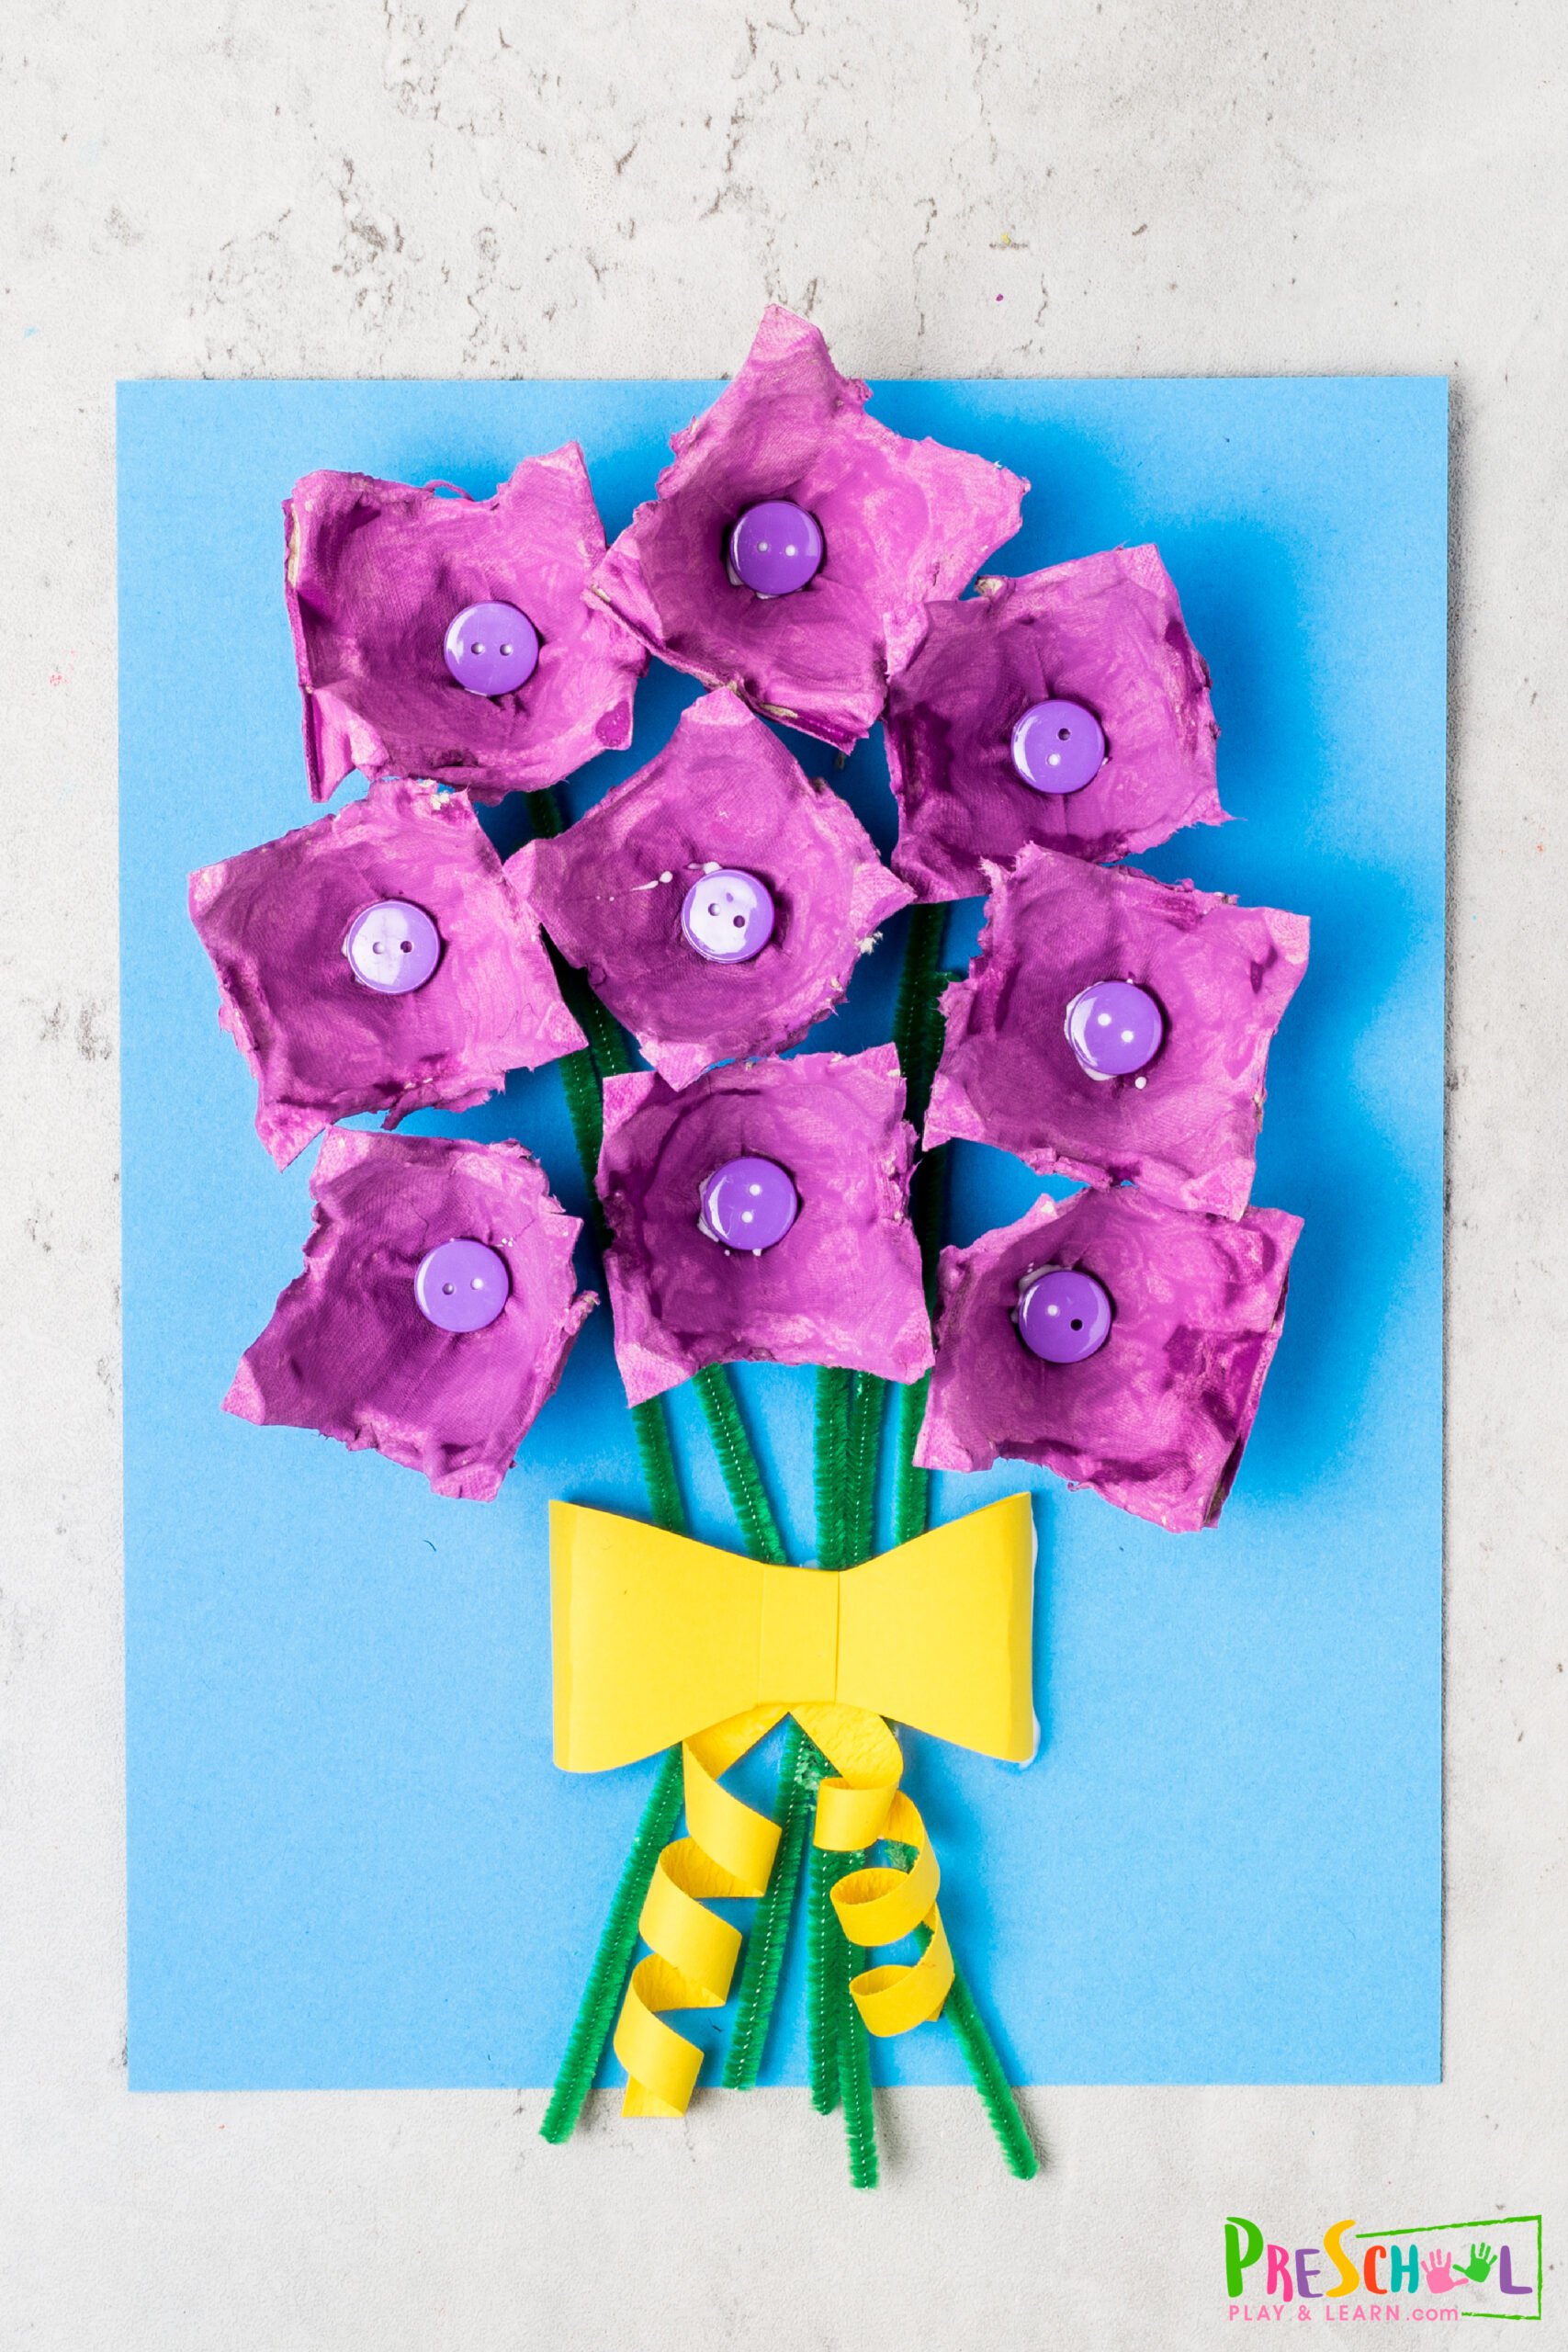
Egg carton cups get cut apart, painted any color kids choose, and glued onto cardstock to create sturdy, dimensional blooms. Buttons add a pop in the center, and green pipe cleaners become quick stems (with twisted leaves if you want).Making several at once feels even more exciting because grouping them creates a realistic bouquet of blossoms.Related: Spring Name Craft
Tiny paper doilies get glued onto construction paper, then kids paint the centers yellow for quick, cheerful pops of color.Green paint adds simple stems and grass, keeping the steps easy even for toddlers. It's a great “low-prep” option that still looks bright and finished when it dries.Also try: 6 Fun Spring I Spy Printables
Kids paint a sheet of paper with red, orange, and yellow, then cut it into strips and staple the loops onto the back of a painted paper plate. The green paper becomes the stem and leaves, and everything gets glued together into a big wall-hanging piece.The looped petals add a cool 3D effect, so it feels more like “real” art than a flat coloring page.Related: Spring Color By Number Printables
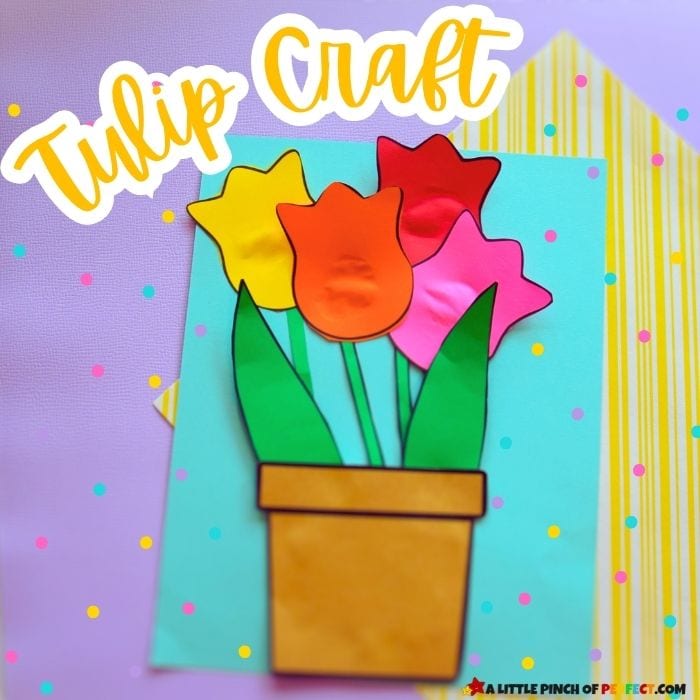
Print the template, cut the pieces from paper, and glue the pot down while leaving a pocket opening at the top. Tuck the stems and leaves inside so they look like they're growing up from within, then glue the tops in place to complete the scene.Kids like that they can make one or many, and the pocket-style base gives it a fun layered look.Also try: Ladybug Paper Craft
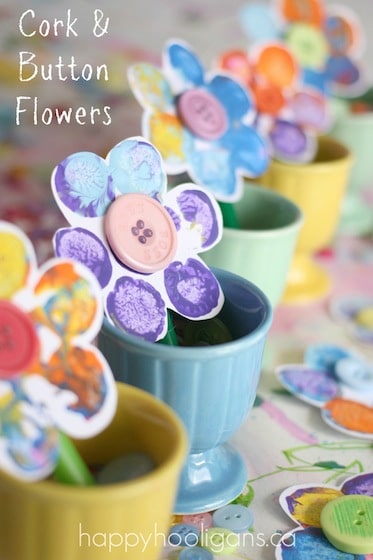
Bundle wine corks with rubber bands to create homemade stamps, then dip them into acrylic paint on a styrofoam tray and press prints onto white cardstock. Buttons get glued in the centers, and green drinking straws (or pipe cleaners or sticks) turn the prints into stems.Kids love the stamping motion, and the cork bundles make bold shapes that look “fancy” without being hard.Related: Bee Kind Craft
Water bottle caps become the petals and center once kids paint them bright colors and let them dry. After gluing the caps onto blue cardstock, a popsicle stick and green paper leaves finish the stem.It's an easy way to turn recyclables into art, and kids get a kick out of using caps as building pieces.Also try: Bee Color By Numbers
Scrapbook paper and a heart punch do most of the work—kids punch out hearts, add holes with a single hole punch, and slide them onto green paper straws. With three hearts per stem, plus a green one for the “leaf,” the finished look is clean and colorful without much cutting.It's quick to repeat so that kids can make a whole bunch in a hurry for a table display or a gift wrap topper.Related: Bee Paper Craft
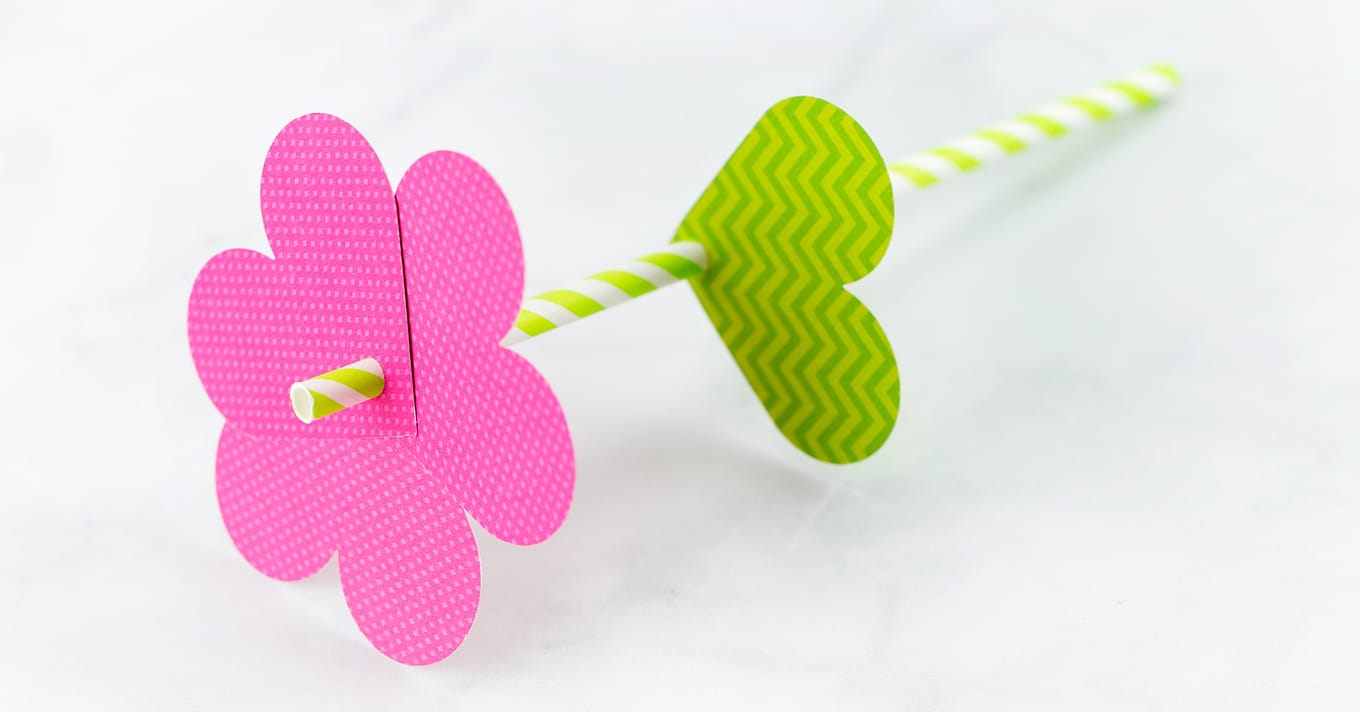
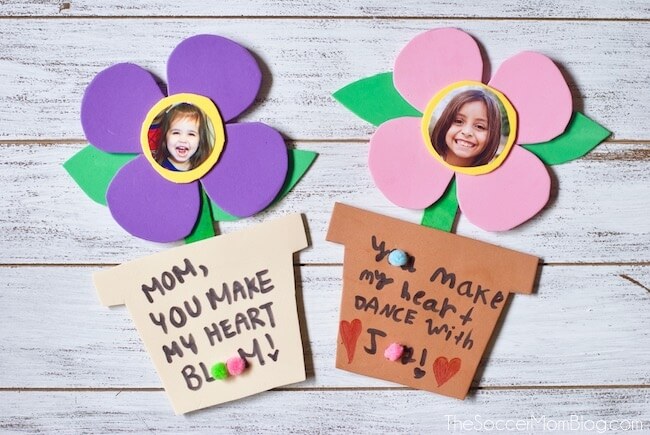
Foam (or thick cardstock) and a printable pattern make it easy to cut out a pot and a big bloom, then add a child's photo in the center. A jumbo stick slides behind the pot through a small foam tab, creating a fun wiggle effect when kids move it.The motion makes it instantly playful, and kids love testing it again and again once it's assembled.Also try: Chick Paper Cup Craft
Kids paint a paper doily with watercolor paints, then fold it into a simple vase shape once it dries. Cardstock blooms get glued onto green sticks, topped with pom‑pom centers, and then “arranged” inside the doily vase.The mix of painting and building feels fresh, and the finished piece looks sweet as a card front or classroom display.Related: Butterfly Torn Paper Craft
Colorful construction paper pieces roll into lots of tiny loops, which kids glue onto an oval base for a bumpy, textured top. A green paper rectangle becomes the stem, and leaf shapes finish it off (a template is optional if you prefer tracing).Making all those little rolls is oddly fun for kids, and the final texture looks impressive up close.Also try: Beehive Craft
Kids cut and fold the template shapes, then glue the folded pieces together to create thick, 3D bloom tops. A sheet of green paper is accordion-folded and stapled to form a fan-like stem, and the tops are stuck on with glue dots before tying yarn or ribbon into a bow.It's a simple build with a big payoff, especially when kids make a mini bunch in different colors.Related: 3D Dragonfly Craft
A salad spinner turns paint into instant spin art when kids add yellow and gold paint (plus a sprinkle of gold glitter) onto yellow cardstock circles and give it a whirl. After the paint dries, they cut the spin art into a petal shape and glue on a green stick stem and a leaf.The spinning step feels like magic, and every design comes out different—no “perfect” painting required.Also try: Bee Photo Craft
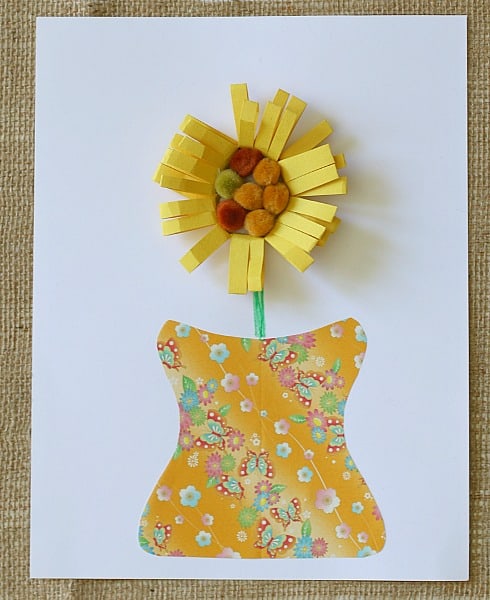
Fold patterned origami or scrapbook paper and cut a curvy shape to “reveal” a symmetrical vase when it opens up. Kids can choose between a rolled construction-paper bloom (stapled and snipped for fringe) or a tissue-paper version made by crumpling squares and gluing them on.The cut-paper symmetry makes the vase look extra polished, so it's a great keepsake for the fridge or a card cover.Related: 3D Ladybug Craft
Cut a cardstock circle, tape yarn to the back, and let kids wrap it in all directions until it becomes a colorful “web.” A jumbo stick gets wrapped in green yarn for the stem, then a button and a paper leaf finish the center and greenery.Kids love the wrapping motion, and it's a great way to use up random yarn bits while making something that looks textured and artsy.Also try: Butterfly Name Craft
Using the printable template, kids cut out shapes from construction paper and fringe the basket base, making it ready for weaving. Weave three paper strips in an over-and-under pattern to create a realistic woven look.Glue the finished weave onto a background sheet, then add the cut-out blooms and leaves on top. The weaving step makes it feel like a “big kid” project, and the finished basket looks great on a wall.Related: Handprint Butterfly Craft
Print the template on colored cardstock, cut out the circle wrap and bloom shapes, then trace extra blossoms onto scrap cardstock for more variety. A hole punch makes quick little yellow centers, and green cardstock strips turn into stems before everything gets glued into a layered arrangement.Finish by folding the wrapper flaps and tying with a string, which gives kids a fun “real bouquet” moment without any mess.Also try: Butterfly Headband Craft
Kids color a white doily red with do-a-dot markers (or dye/food coloring), then cut it into a spiral strip for rolling. Twisting the spiral into a loose coil creates the petal look, and a glue gun (with adult help) secures the base, while a green pipe cleaner becomes the stem.It's a clever way to turn one inexpensive doily into a surprisingly realistic-looking bloom kids will want to make in bunches.Related: Butterfly Toilet Paper Roll Craft
Kids trace a hand on white cardstock, cut it out, and curl the fingers around a pencil to create natural-looking “petals.” A green straw becomes the stem, and a yellow or orange chenille stem tucked into the straw adds the center detail before gluing everything together.The handprint element makes it extra special, and kids love seeing their own hand shape turn into a 3D bloom.Also try: Fork Painted Bee Craft
Sam is the crafter and founder of Simple Everyday Mom. She has been featured in Oprah Mag, Good Housekeeping, The Spruce Crafts, Country Living, The Bump, and more.