All activities require adult supervision. By using this site, you agree to our terms of use. This post may contain affiliate links. As an Amazon Associate and a participant in other affiliate programs, I earn a commission on qualifying purchases. Read our disclosure policy.
Summer is the perfect time for bright, hands-on fun with your kids! July crafts are a great place to start if you’re searching for ways to keep them entertained. From patriotic projects to sunny paper plate creations, these simple ideas use everyday supplies you likely already have at home.
They’re fun, festive, and great for boosting fine motor skills, too. Whether crafting for the 4th of July or just enjoying a slow summer afternoon, you’ll find something entertaining here. For even more inspiration, head to Simple Everyday Mom for year-round creative fun!
Pin
July Crafts For Kids
Sun
Pin
Paper Plate Sun
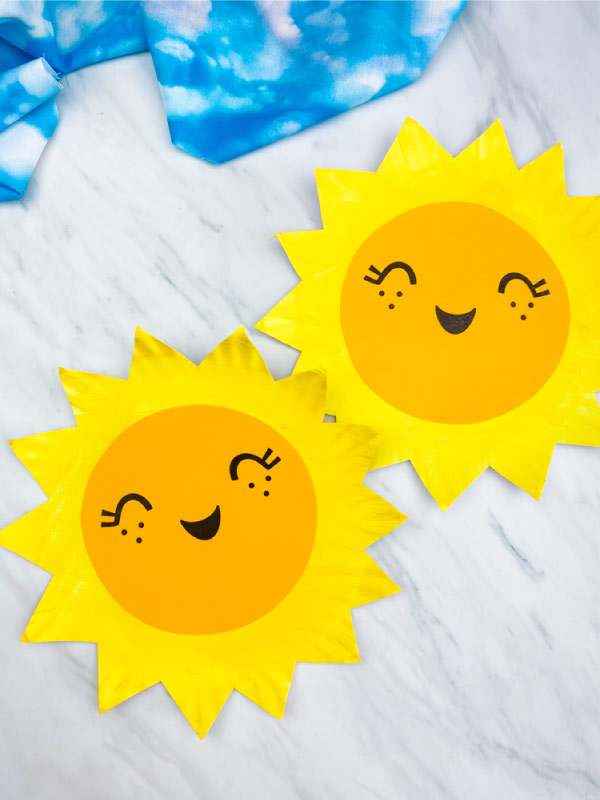
Using paint and paper rays, kids can transform a plain paper plate into a bright, smiling sun. Little hands will enjoy painting the plate yellow and gluing on cheerful rays around it to resemble sunshine. The result is playful yet straightforward art that captures the joy of a sunny day.
Kids can create their mini sun with rays using a bright yellow cupcake liner. They flatten the liner onto paper as the sun's center and add construction paper rays or drawings around it for a cheery effect.The project comes together quickly with everyday supplies, letting kids creatively celebrate sunny weather.
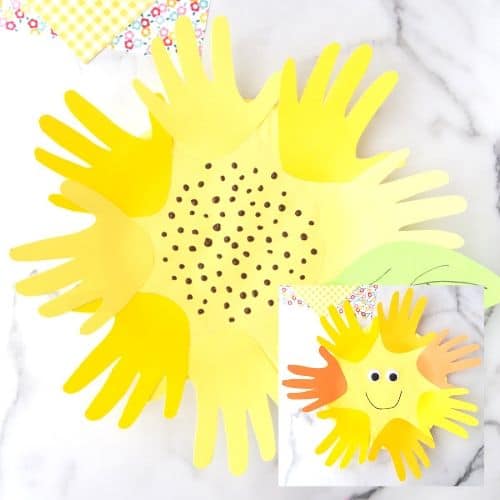
Little hands make this sun activity special by becoming the sun's rays. Kids trace their hands on yellow paper (or dip their hands in paint) and cut out the hand shapes to arrange around a circle, creating a smiling sun.The result is a sweet keepsake that engages kids hands-on and celebrates their creativity.
For a sun with a bit of dimension, kids use an upside-down paper bowl to create a shining su for a sun with a bit of dimension. They paint the bowl yellow, add cut-out paper triangles around the edge for rays, and finish with a friendly face using googly eyes and a drawn smile.The result is a bright summer project that kids will be proud to hang up as a sunny decoration.
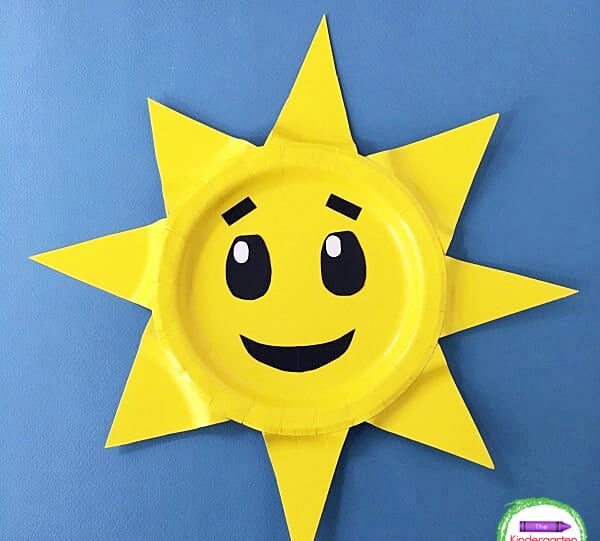
Kids can practice using scissors by turning a paper plate into a sunny decoration. They cut another plate into triangle wedges to make the sun's rays, then glued those around a whole plate and added a happy face in the center.This bright art is easy to make and looks great hanging up or displayed on a bulletin board.
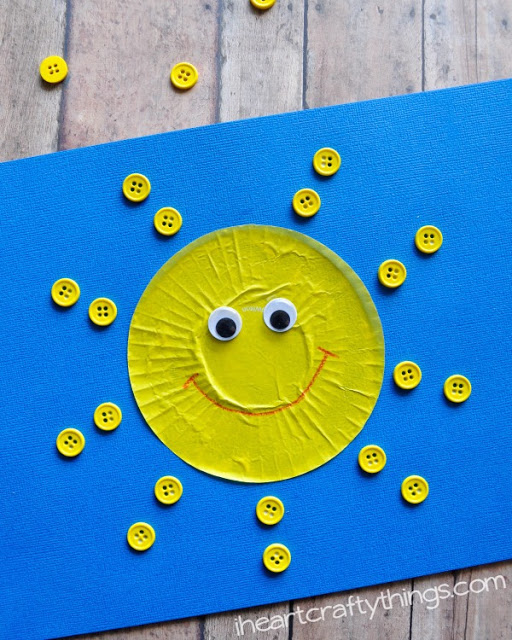
An ordinary cupcake liner becomes the sun in this cheerful project. Kids glue a yellow cupcake liner onto a piece of paper, surround it with bright yellow buttons as the sun's rays, and add a smiling face with googly eyes and a drawn-on grin.The art is simple enough for toddlers, and the mix of textures (soft paper and chunky buttons) makes it extra fun for little hands.
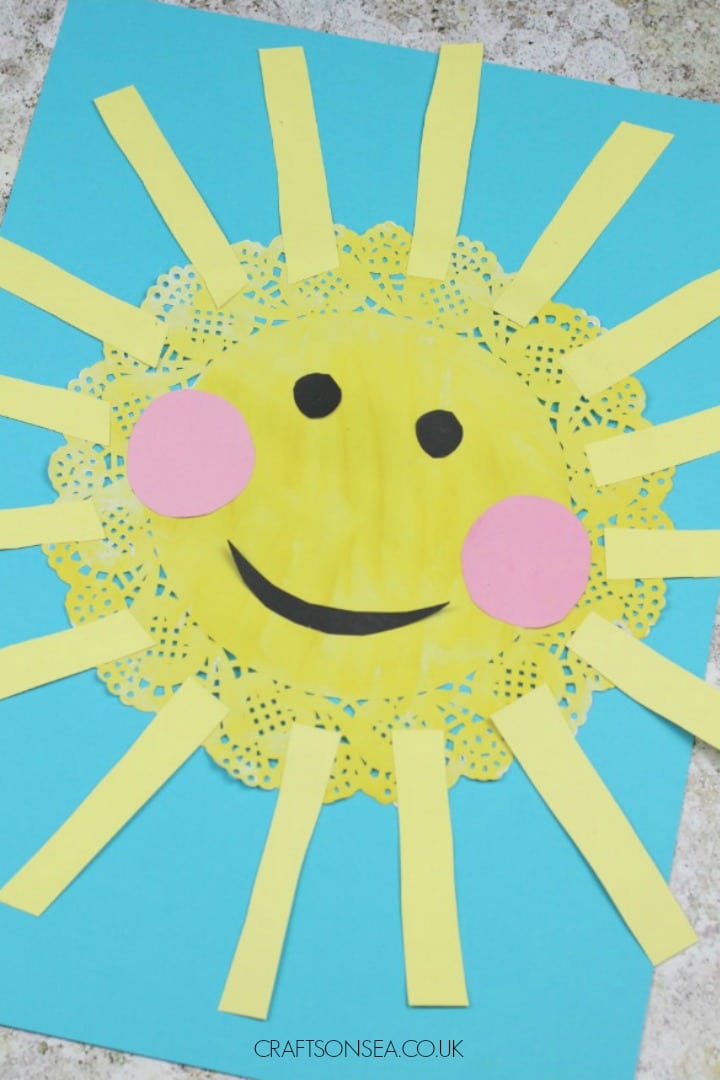
A simple paper doily transforms into a shining sun in this cute art. Kids paint the frilly white doily bright yellow and glue it onto a blue background so their sun stands out like a clear sky.The doily's lacy edges make perfect sun rays, and the whole project is cheerful and sure to brighten up any room.
Clothespins turn into sunshine rays in this clever, hands-on activity. Kids color mini wooden clothespins bright yellow, then clip them around a cardstock circle to form the sun's rays and add a happy face in the middle.Little ones will love squeezing the clothespins on, and it's a perfect way to practice fine motor skills while brightening their day.
Kids use a plastic fork instead of a paintbrush to create this textured bald eagle art. They dip the fork in brown paint and stamp it to make the eagle's feathers look extra fluffy, then add cutout pieces like the eagle's white head and yellow beak to complete the bird.The technique is easy and fun, and the finished eagle makes a proud patriotic decoration for the 4th of July.
Kids can make patriotic “blower” toys using recycled cardboard tubes and streamers. They paint or wrap an empty toilet paper roll in red, white, and blue designs, then glue long strips of red and white crepe paper to one end.When the kids blow through the tube or run with it, the paper streamers flutter like fireworks, making this project as entertaining to use as it is to create.Related: Patriotic Color By Number
Kids can make a mini American flag using popsicle sticks and paint. They glue several sticks side by side, paint red and white stripes, and add a blue corner with white stars (using paint or star stickers) to complete the look.Once it dries, this homemade flag is ready to be waved or displayed proudly – a patriotic creation kids will be excited to show off.Also try: American Flag Card Craft
A sweet treat meets patriotic flair in this fun project. Kids assemble a paper ice cream cone stacked with red, white, and blue scoops (using a printable template to cut out the pieces) and can even decorate it with stars or glitter.It's an adorable 4th of July project that looks good enough to “eat” and brings a cool twist to traditional patriotic decorations.
Kids create an adorable Uncle Sam using simple cut-out shapes and a bit of glue, with a free template to guide them. They put together Uncle Sam's iconic top hat with red-and-white stripes and a blue starry band, then add his friendly face and fluffy white beard (made from a textured paper towel).This patriotic project is easy to make with some help and will get kids excited to celebrate the 4th with their very own Uncle Sam decoration.Related: Uncle Sam Puppet Craft
Kids can also create Uncle Sam with just paper and a handy template. They cut out and glued all the pieces (hat, face, beard, and outfit) to assemble the famous red, white, and blue character.The finished Uncle Sam makes a fun patriotic decoration and gives kids a hands-on connection to an American symbol.Also try: Popsicle Stick Uncle Sam Craft
With this personalized patriotic art, kids see their name in red, white, and blue. Using a printable template, they cut out the letters of their name and decorate each one with stars, stripes, and other patriotic designs.It's a fun way to practice spelling and letter recognition, and the finished name display makes a great Fourth of July decoration for the fridge or wall.
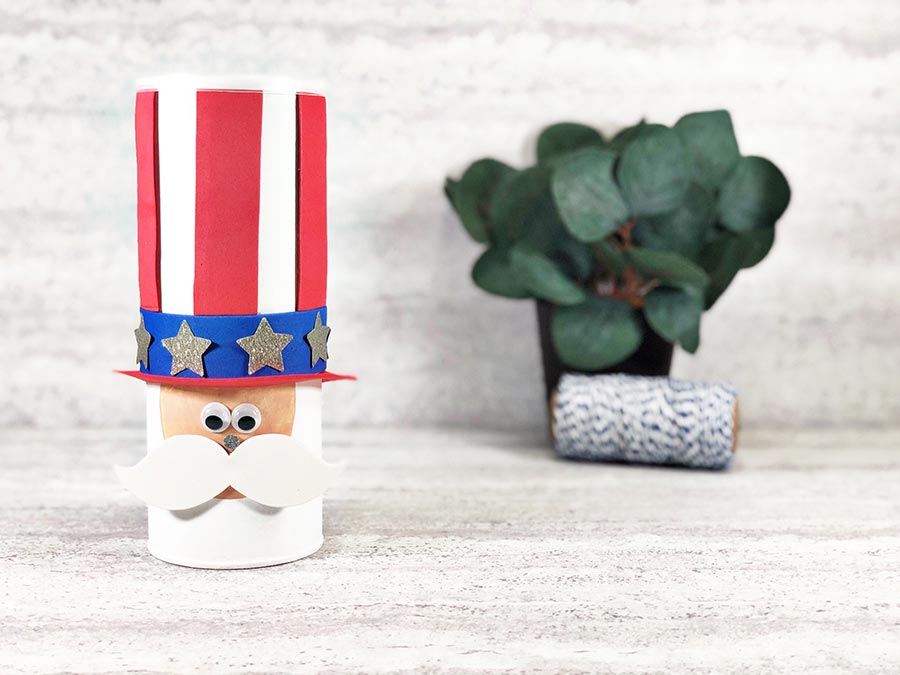
Kids turn an empty chip can into a patriotic Uncle Sam for a fun upcycling project. They wrap the can with construction paper and standard art supplies to create Uncle Sam's red, white, and blue outfit, complete with a white cotton-ball beard and a tall striped hat on the lid.In about 20 minutes, you have an adorable Fourth of July decoration that kids will be proud to display—plus, you've recycled a can in the process!
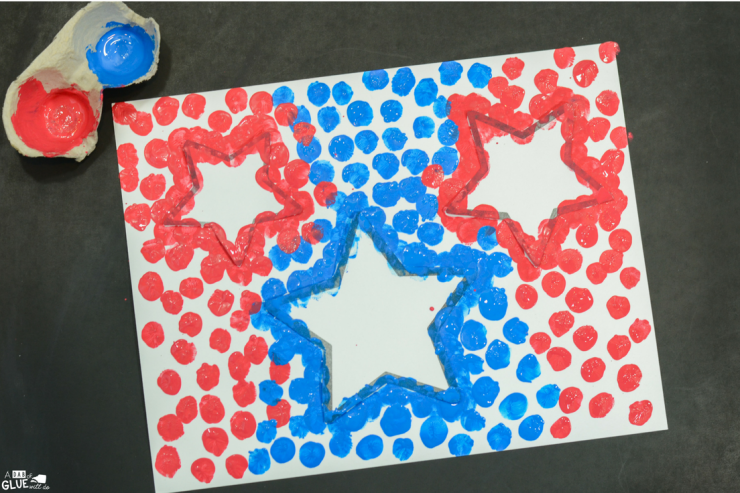
Kids create patriotic art using just their fingers in this thumbprint star art. They use red, white, and blue paint to stamp colorful thumbprints all over star cutouts, making a speckled flag-inspired pattern.Each star is unique and makes a lovely Fourth of July decoration—perfect for the fridge or framing as a keepsake.Related: 4th Of July Mazes
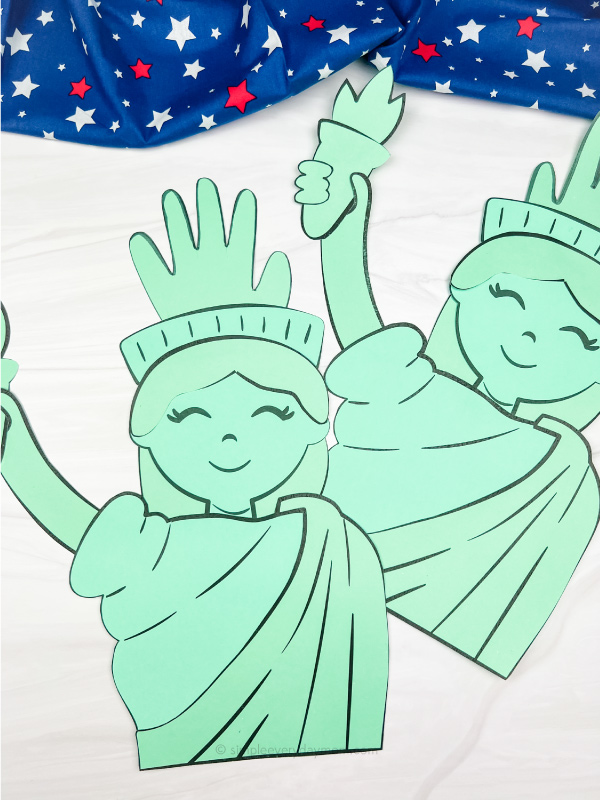
Kids can make their own Lady Liberty with this clever handprint art. Using a simple template, they trace and cut out their handprint from green paper to form the Statue of Liberty's crown, then add the statue's face and iconic torch to complete the look.This patriotic project feels personal (featuring your child's handprint) and makes learning about the Statue of Liberty extra fun.
Even little ones can safely “light up” the sky with this easy printable fireworks project. Print out the fireworks template and let kids decorate it by coloring in the bursting shapes or gluing on bright paper and glitter.It's a fun, mess-free way for kids to celebrate the holiday's excitement with their own colorful fireworks artwork.
Kids can create their patriotic crown from a simple paper plate. With a few snips, the plate turns into a wearable crown shape (resembling Lady Liberty's tiara), and then kids decorate it with red, white, and blue paint or star stickers.It's a quick, simple art that doubles as a fun dress-up accessory for July 4th celebrations.Also try: 4th of July Dot To Dots
Kids assemble a cute little red, white, and blue paper gnome. Using a printable template, they cut out the gnome's parts – from his star-spangled hat to his fluffy beard – and glued them together.It's an adorable way for kids to decorate for Independence Day and get creative with a fun patriotic character.
Grab a paper plate and some yarn for this artful twist on the American flag. Kids practice beginner sewing skills by threading red, white, and blue yarn through holes in the plate, creating a cool flag-inspired pattern of stars and stripes.It's a clever way to build fine motor skills and end up with a patriotic decoration to hang or display.Related: 4th of July Do a Dot
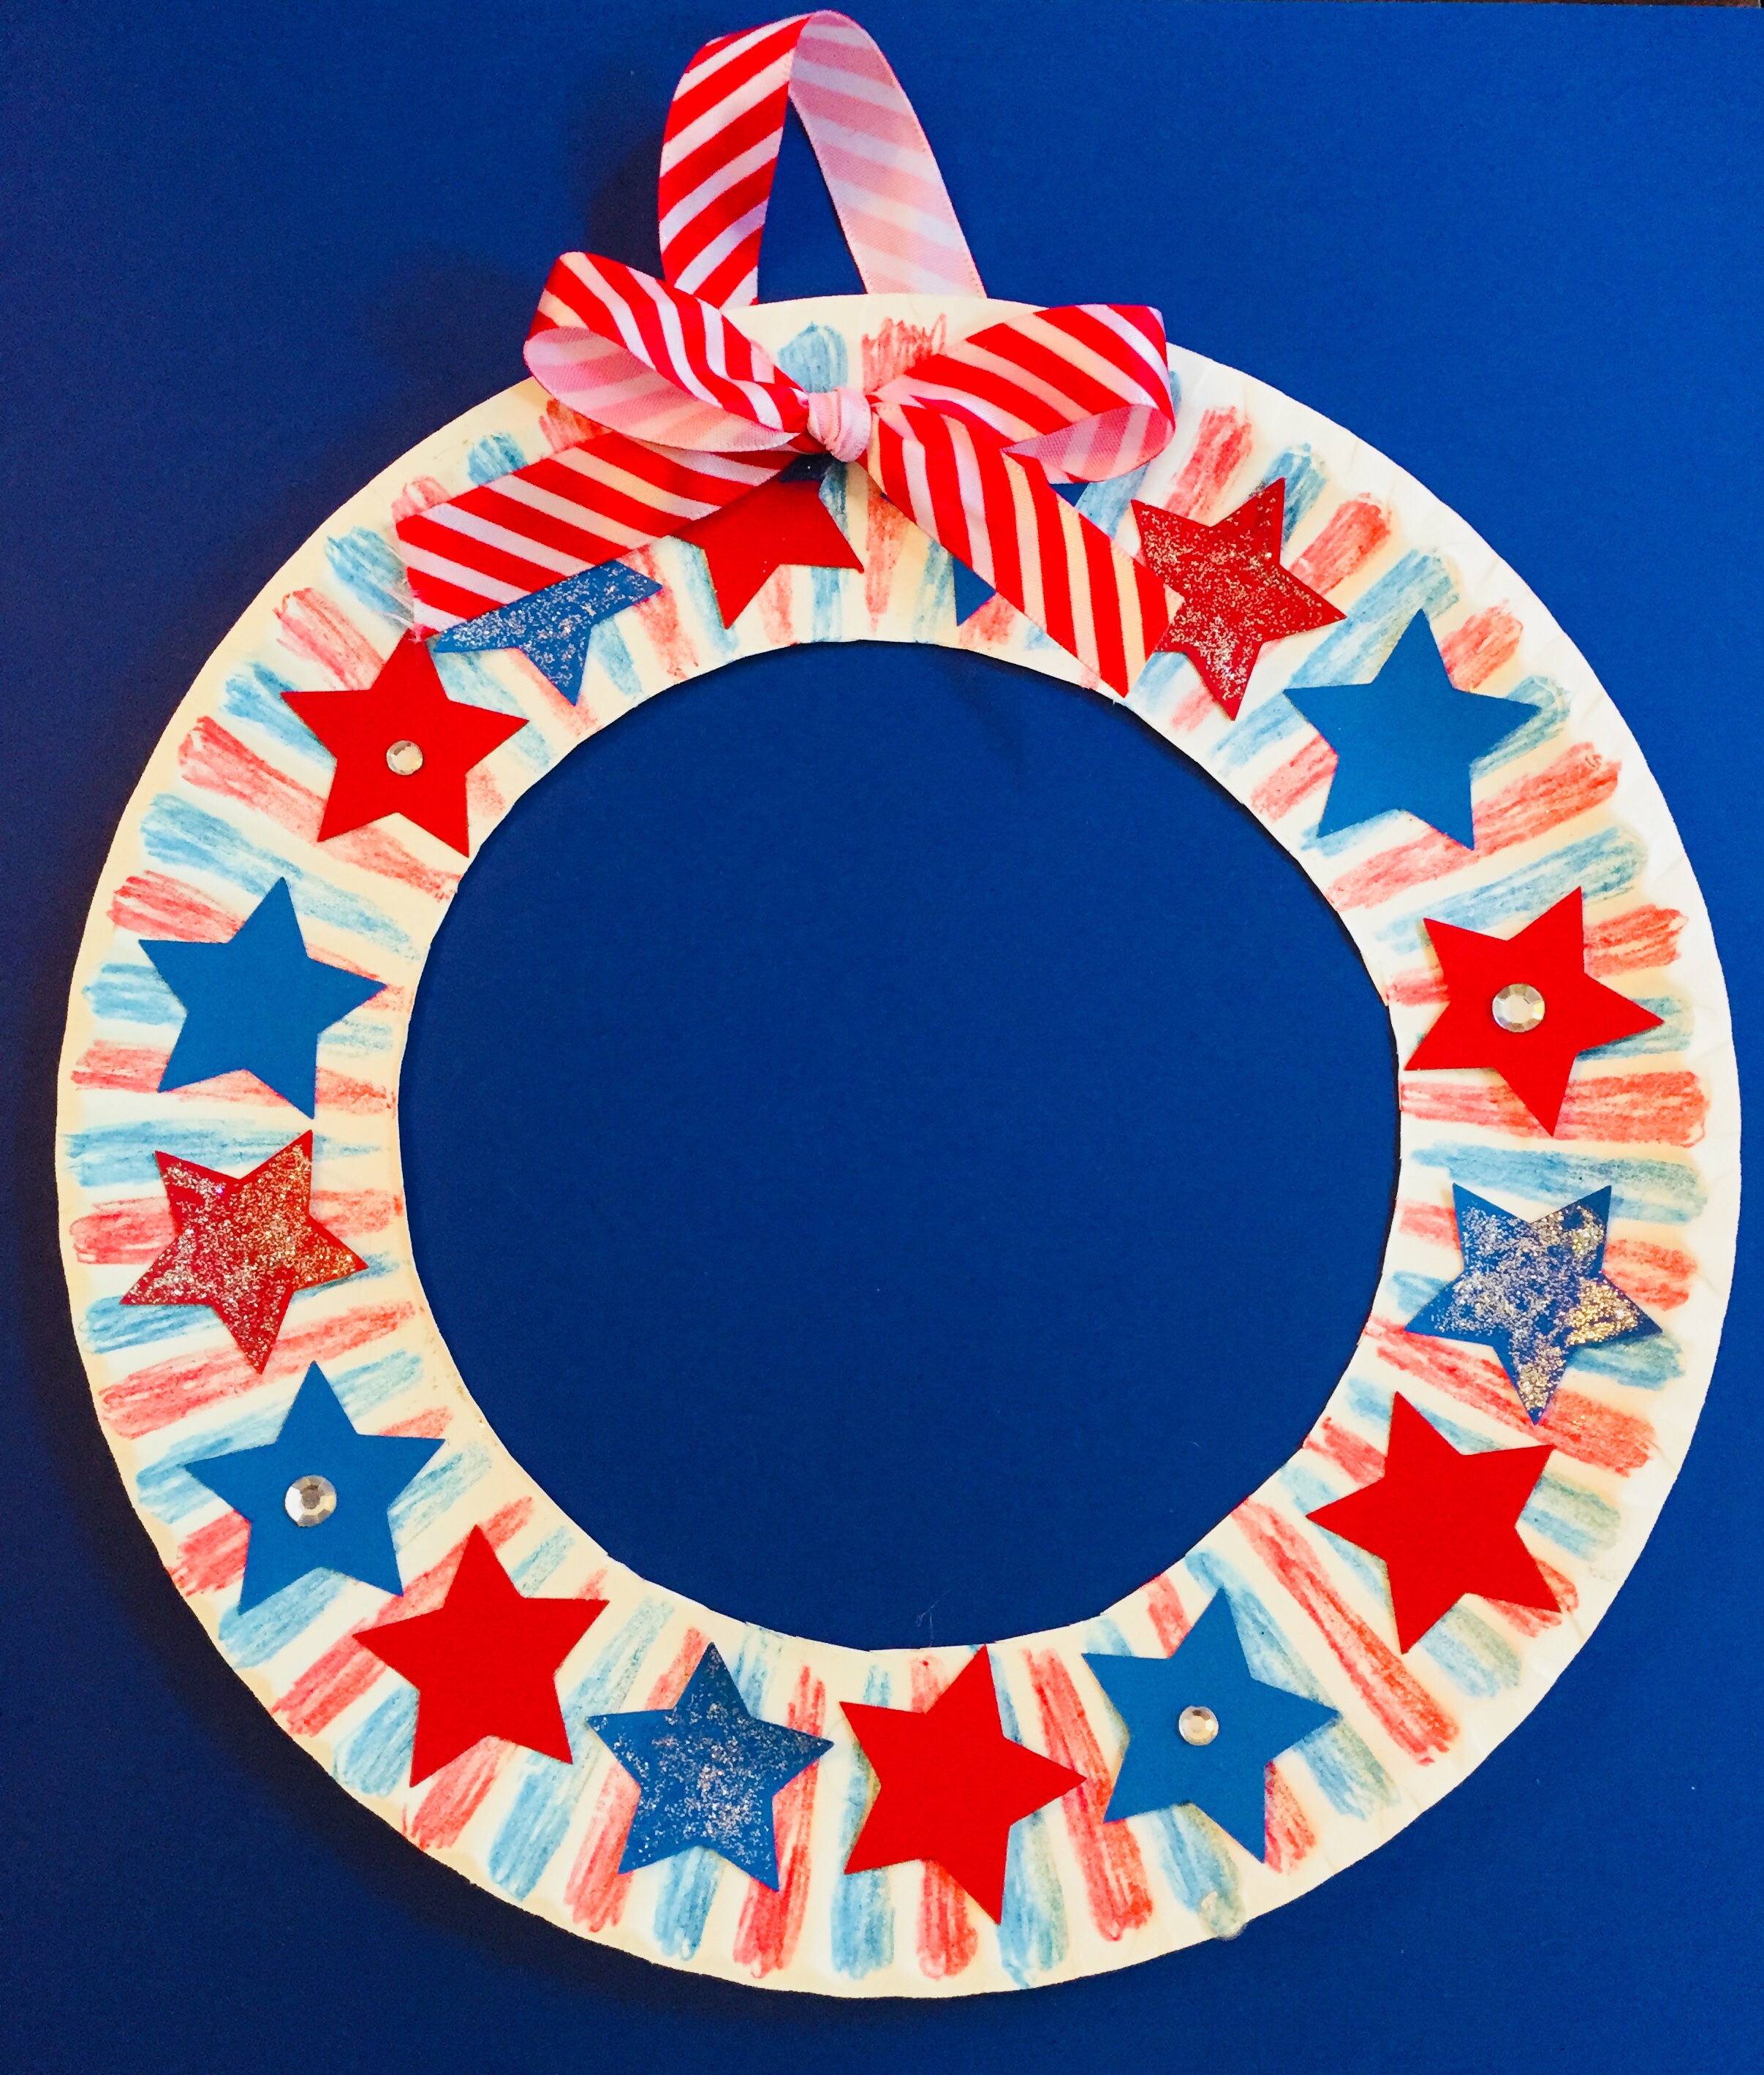
Kids can make a festive wreath using a paper plate as the base and lots of stars. First, they cut out the center of a paper plate, leaving a ring, and color or paint it; then they glue red, white, and blue paper stars all around that ring to form the wreath shape.A little glitter glue or some shiny stickers can be added for extra sparkle, making this patriotic wreath a fun decoration to hang up for the holiday.Also try: Fourth of July Activity Sheets
Kids can even become Uncle Sam with this creative art that doubles as a photo prop. They assemble Uncle Sam's signature pieces – a tall striped hat with a blue starry band and a big white beard – out of paper, then attach them to a stick or simply hold them up to their face.Little ones get a big kick out of pretending to be Uncle Sam, making this activity as fun to play as it is to create.Related: Handprint Uncle Sam Craft
Kids will enjoy creating a bright feathered friend complete with its own pirate hat and eye patch. This easy project involves cutting and gluing colorful paper pieces (using a handy template) to assemble a parrot that can perch on their shoulder.The result is a vibrant pretend pet for imaginative adventures on the high seas.
Every young buccaneer needs a trusty ship to brave the ocean waves, and this art lets kids build one out of paper. Using a free template, they cut out and assemble the boat's hull and sails, finishing it with a Jolly Roger flag to create a mini pirate ship ready to set sail.Children will love personalizing their vessel and launching it into imaginative adventures on the high seas.
This fun project lets kids make their pirate puppet for hours of imaginative play. Using a printable template, they cut out a cartoon pirate's head, hat, and outfit and glued them onto a paper lunch bag to form a talking pirate character.Once assembled, their swashbuckling puppet is ready to come alive—children can put on pirate voices and stage their mini high-seas adventure.
This project turns your child's handprint into a swashbuckling pirate keepsake. Kids trace their hand on paper and cut it out to form the pirate's body or face, then use a template to add a pirate hat, eyepatch, and even a beard or hook to the handprint shape.It's an adorable way for little ones to combine their hand shape with imaginative art, leaving them with a personalized pirate pal to show off.
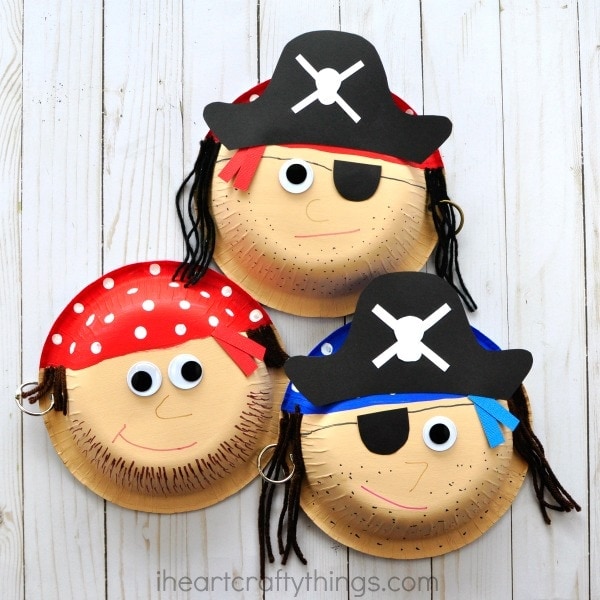
A plain paper bowl is cleverly turned into a pirate's face, painted skin-tone and adorned with yarn hair, a scruffy beard, and the iconic hat and eye patch (they can even add a little earring!). The curved bowl gives a cool 3D effect, making the pirate's head nicely rounded and lifelike.Kids will have a blast designing their one-of-a-kind pirate character and then sailing him off on pretend adventures.Related: Swashbucklingly Fun Pirate Tracing Worksheets
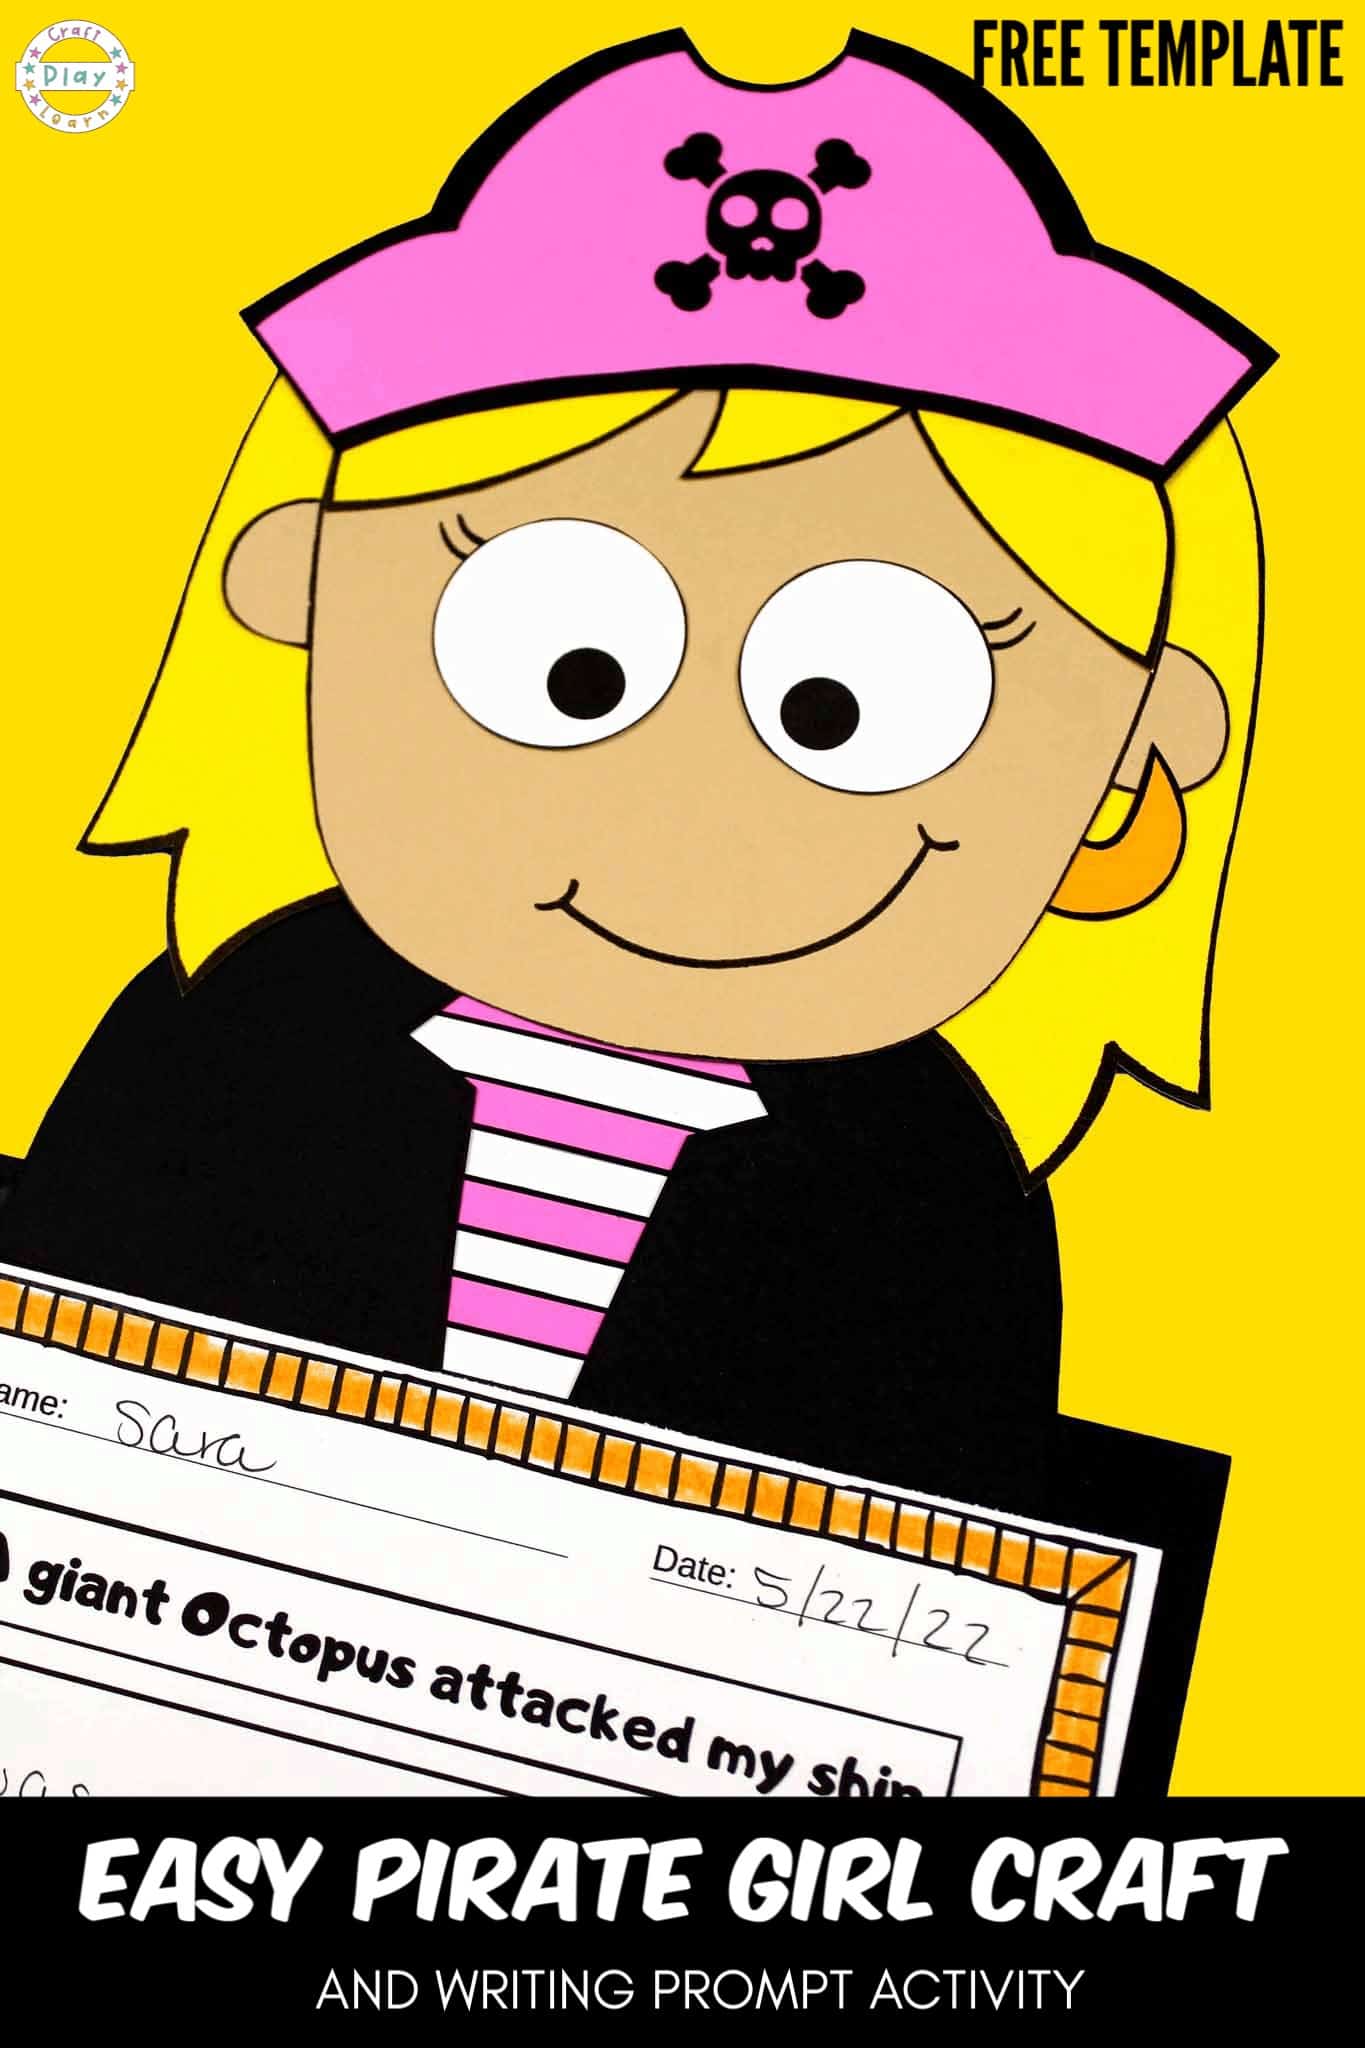
This easy activity celebrates girl pirates by letting kids create a lady buccaneer character with a free printable template. Little ones color and cut out the pirate girl's pieces (like her hat, outfit, and boots) and then glue them together to assemble a spunky pirate figure.It's a quick, fun activity that encourages creativity and pretend play with their new swashbuckling heroine.Also try: Pirate Photo Craft
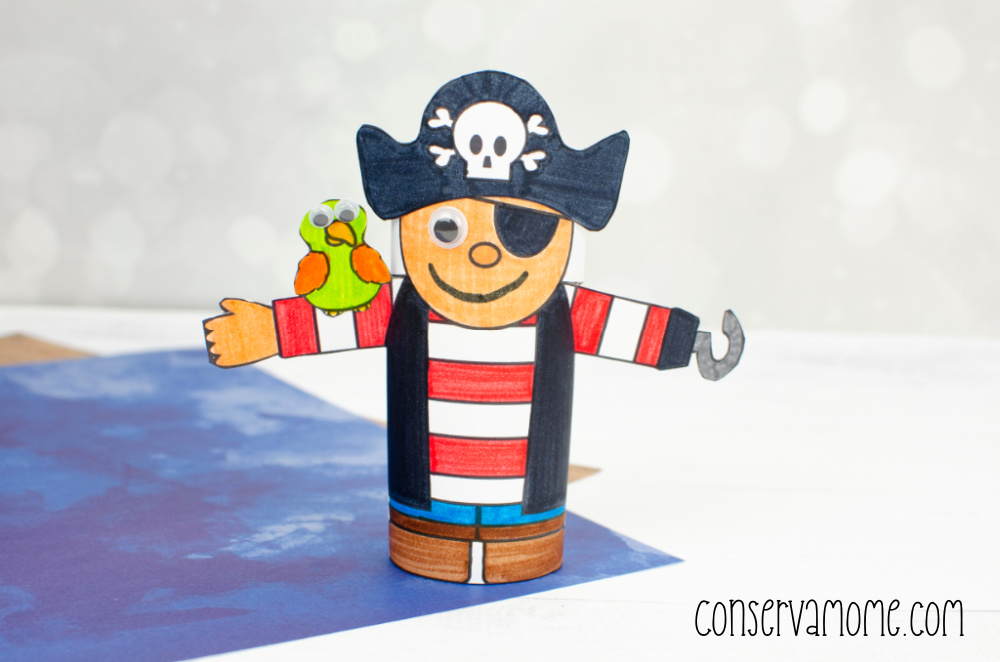
This artful upcycling project makes an empty toilet paper roll a standing pirate figurine. Kids can paint the tube to give their swashbuckler a colorful outfit, then add a paper hat, eyepatch, and even a little hook or sword (cut from cardboard) for that authentic pirate look.The finished pirate is cute and sturdy—perfect for pretend play adventures or as a decoration in their pirate cove.Related: Pirate Chest Craft
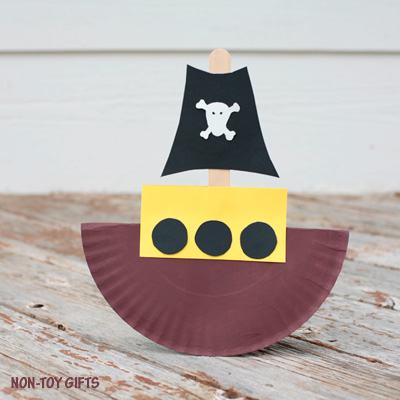
Kids create a pirate boat ready to sail the pretend seas by turning a paper plate into the ship's hull, cutting it in half, and painting it brown or black. They attach a mast with a paper sail, add a Jolly Roger flag, and bring their pirate ship to life.After building it, they can explore storytelling adventures or use it as a swashbuckling decoration.Also try: Torn Paper Pirate Craft
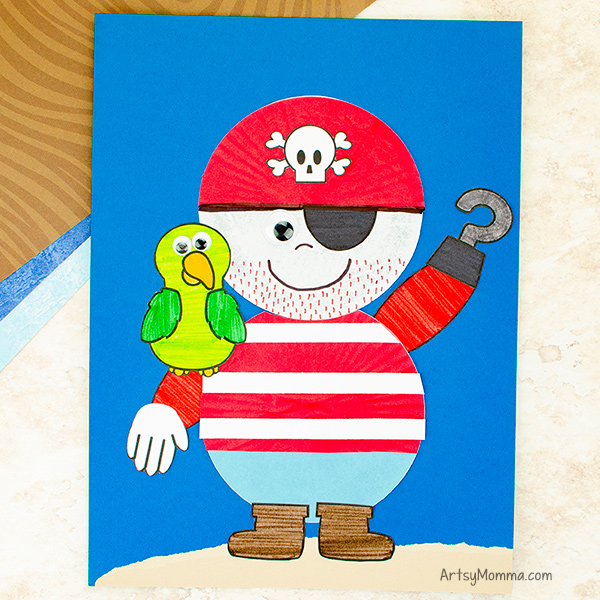
Here's a simple cut-and-paste project to make a cute pirate entirely from paper. Kids use basic shapes (a circle for the head, triangles for a hat and bandana, etc.), either hand-drawn or from a template, and assemble them into a friendly pirate with an eyepatch and striped shirt.It's easy enough for young children, and they can have fun customizing their paper pirate's outfit or expression, then use him as a puppet or decoration for pirate play.Related: Pirate Color By Number
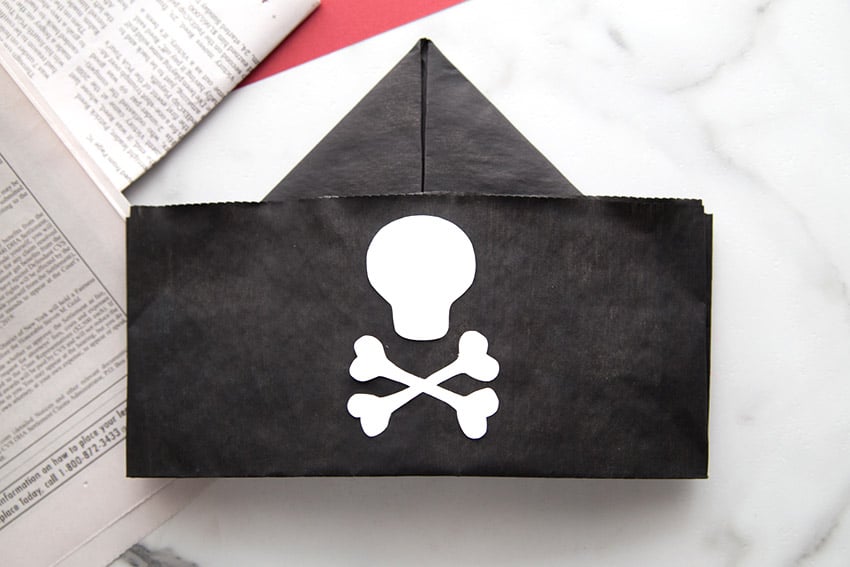
In this classic activity, kids turn a sheet of newspaper into a wearable pirate hat with just a few folds. Following a few simple origami-like steps, they'll end up with a sturdy paper hat that they can even decorate with a skull-and-crossbones or colorful paint.It's a quick, playful activity that sparks imaginative play—once the hat is on, don't be surprised if they start talking like a pirate and searching for treasure!Also try: Pirate Coloring Pages
A couple of ordinary cupcake liners become a colorful pirate character in this unique art. Kids flatten and glue the crinkled liners to form the pirate's round face or parts of his outfit, then add a paper pirate hat, eye patch, and other details using a printable template.The liners give the pirate a fun textured look, and children will love creating their jolly buccaneer from such an unexpected material.Related: Pirate Worksheets
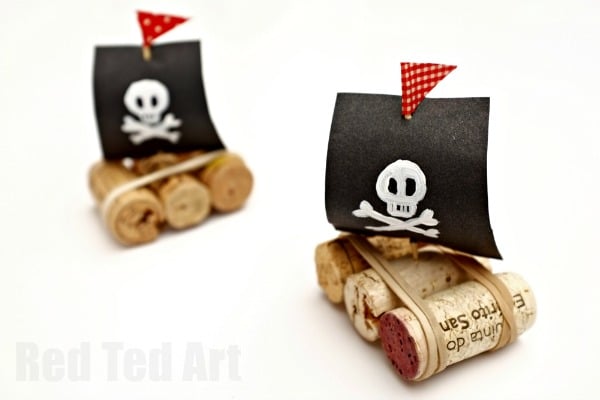
This clever project recycles a few old corks into a mini toy boat that floats on water. Kids simply bind two or three corks together (with glue or rubber bands) to form the boat's base, then insert a stick or straw as a mast and attach a paper sail (which they can decorate with a pirate flag or their design).It's an exciting hands-on project—children will love sailing their little cork boat in a tub or puddle and imagining they're captaining a ship on the high seas.Also try: Paper Plate Pirate Craft
This fun art transforms an empty cardboard tube into a vibrant parrot (just like a pirate's feathered sidekick). Kids paint the tube bright colors, attach wings made from paper or foam, and glue on a parrot head with a beak and googly eyes at the top.The result is a cute 3D parrot that can stand independently, perfect as a pretend pet for their pirate games or a cheerful decoration on a shelf.Related: Pirate Headband
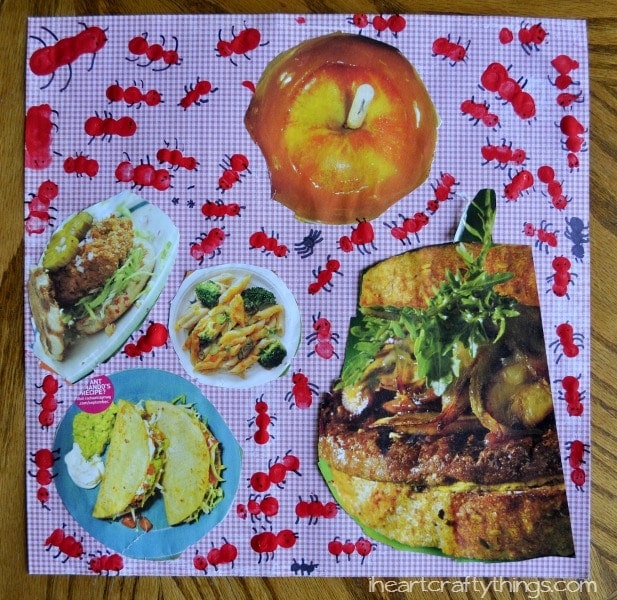
Kids create a picnic scene on a checkered paper “blanket” by gluing on pictures of yummy foods from magazines, then stamping little fingerprint ants crawling around.After adding marker details like legs and antennae to each ant, the result looks like a bunch of busy bugs marching off with treats, which is silly and creative. It's a project that's just as fun to make as it is to admire, since children get to pick their pretend picnic foods and enjoy a bit of messy finger-painting.
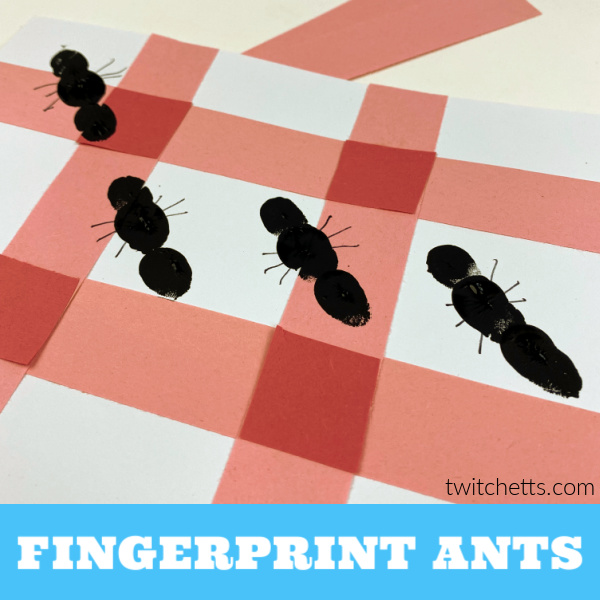
This simple spring project begins with making a little paper picnic blanket and letting kids stamp on tiny ants using their fingerprints dipped in paint.It's easy enough for preschoolers and even sneaks in some scissor practice and fine motor skill-building while they create cute ants marching in a row. Children will love getting messy with the fingerprint art and be proud of the adorable picnic scene filled with their tiny ant friends.
Kids can make a cute little ant by curling paper strips into round segments and gluing them together like a tiny paper chain. The result is a 3D ant with a segmented body that stands up, with little bent paper legs and antennae.It's a fun way to introduce children to a basic quilling-like technique, and they'll love how their critter looks like it's scuttling across the table.
This pretend-play activity lets kids create a delicious-looking sandwich out of paper. They cut out and stack paper “ingredients” — slices of bread, cheese, lettuce, tomato, and any other toppings they fancy — building a layered sandwich that looks good enough to eat.It's bright, colorful, and great for imaginative play; kids will enjoy “making” their lunch and serving up their paper sandwiches during playtime.
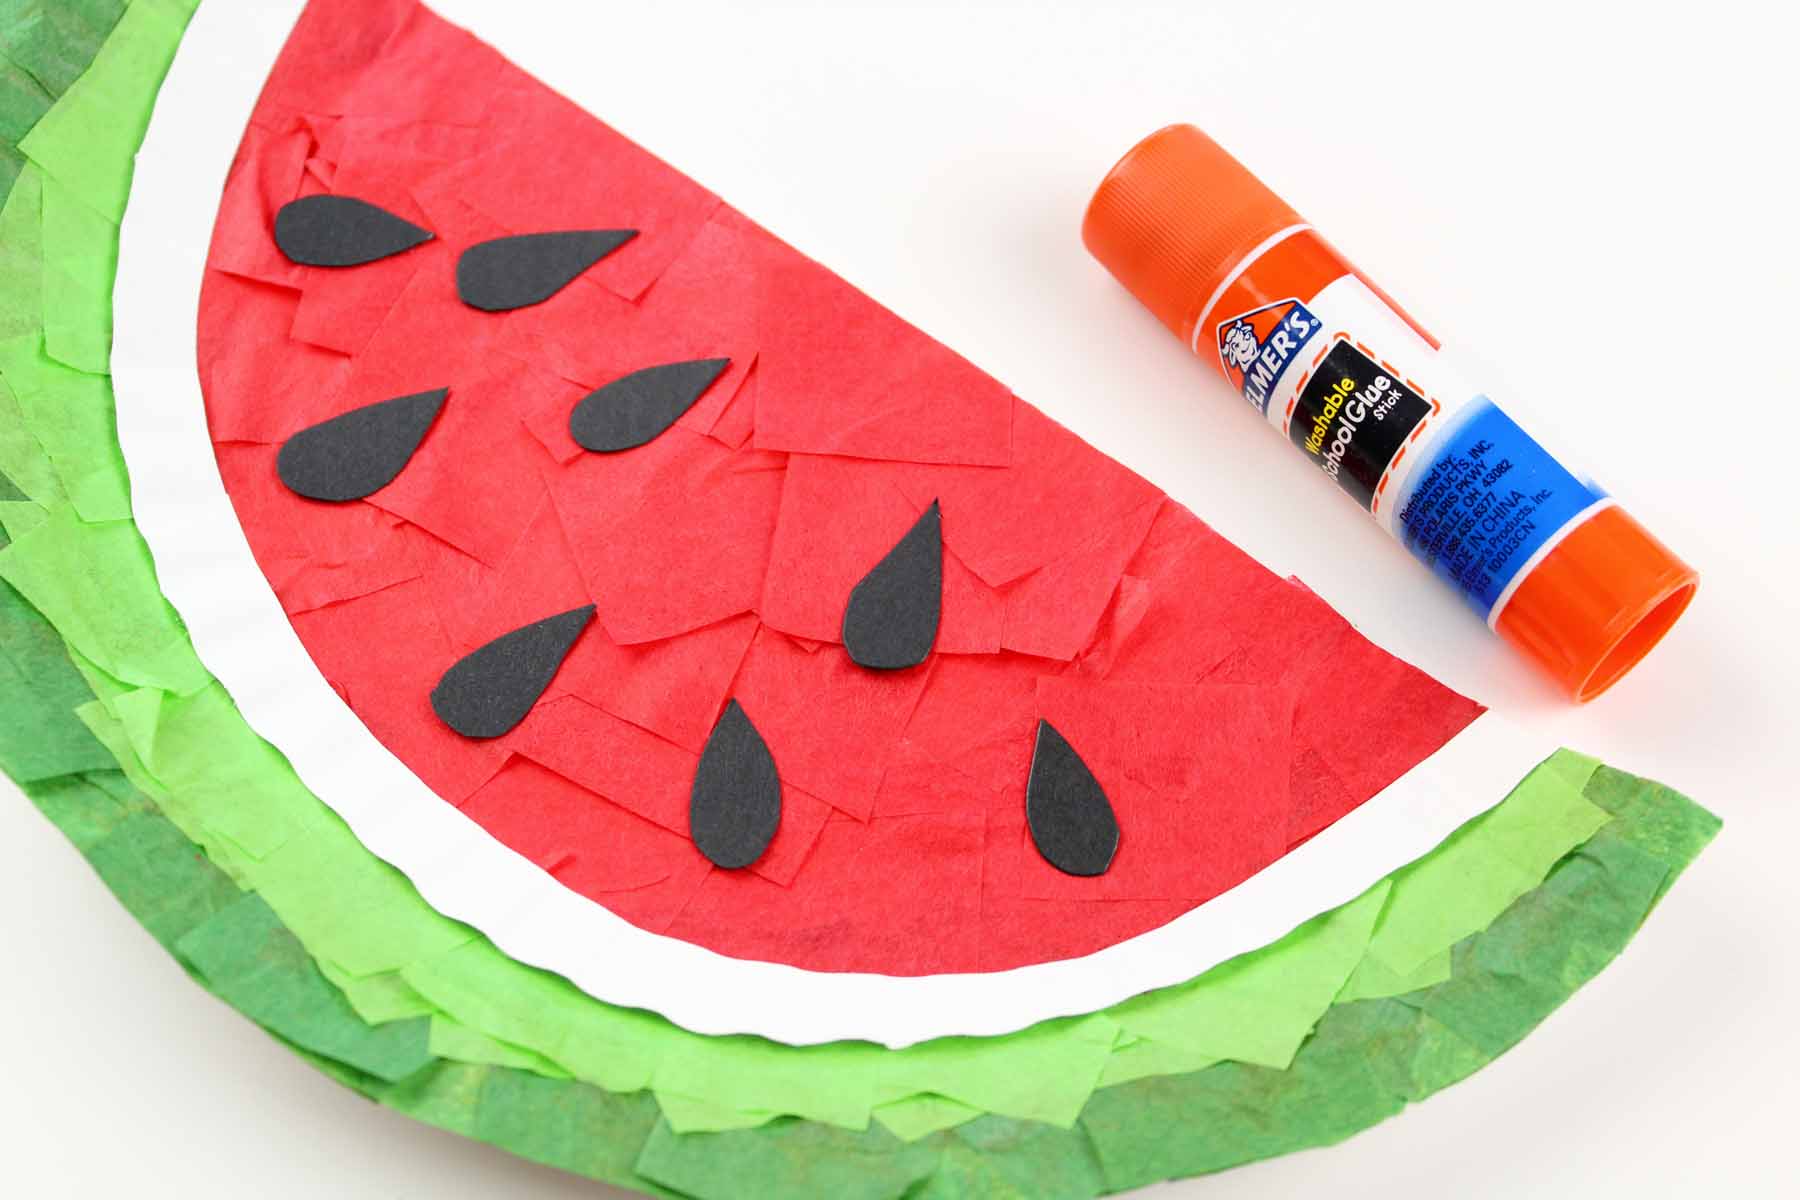
Kids create a sweet slice of watermelon from paper as a fun summer art project. They cut out a big red semi-circle for the juicy part and a green rind to go around it, then add black paper or fingerprint dots as seeds.It's simple but looks adorable, and children enjoy practicing their cutting and gluing while making a bright, summery decoration that reminds them of picnic treats on sunny days.
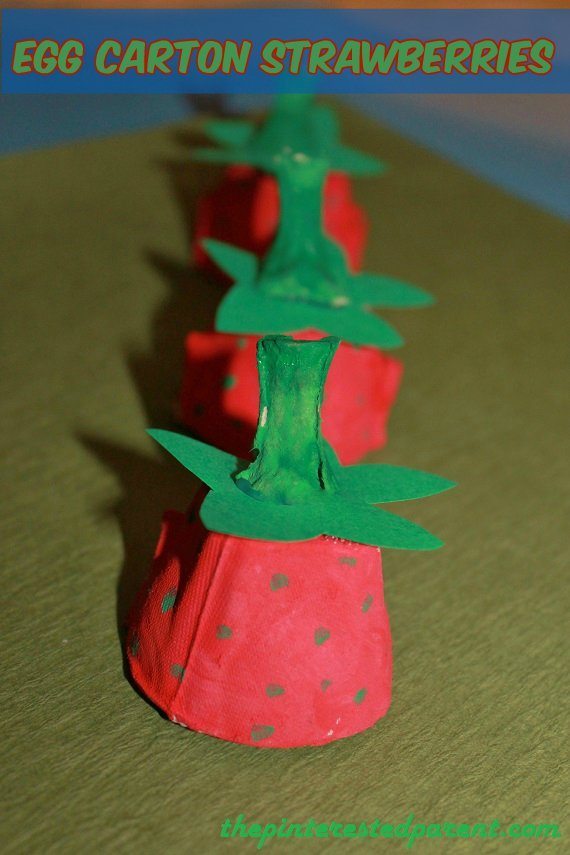
This project turns recycled egg carton cups into a bunch of adorable strawberries. Kids (with some adult help) separate the egg carton sections and paint them a bright red, then add tiny black dots for seeds and green paper leaves on top.The finished strawberries look super cute, and kids will love using them for pretend grocery play in their toy kitchen or as a cheerful summer decoration.
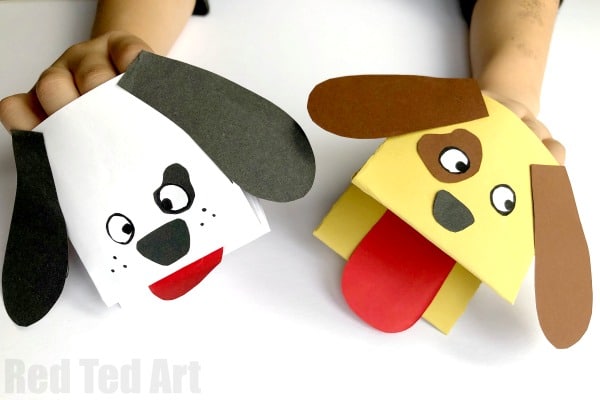
This adorable project turns a child's handprint into a cute puppy dog. Kids trace their hand on paper and cut it out, then use a template to add the dog's face, floppy ears, and spotty patches to the handprint shape.It's a fun way for little animal lovers to make personalized pet art, doubling as a sweet keepsake of their hand that parents can cherish.
This clever project shows kids how to fold a single sheet of paper into a cute dog hand puppet that can “talk.” After folding the paper into a simple mouth shape (so it opens and closes like a puppet), kids decorate it by adding paper ears, a dangling tongue, and drawing on eyes and a nose to give their puppy a personality.They'll have a blast playing with the finished paper dog, making it bark, wag its paper tongue, and put on little puppet shows.Related: Toilet Paper Roll Dog Craft
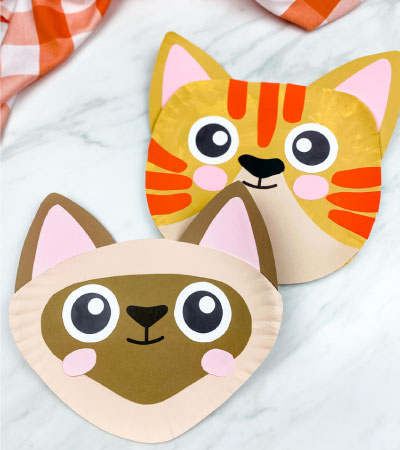
A plain paper plate becomes a friendly cat face in this simple activity. Kids paint or color the plate in their cat's favorite color (gray, orange, black, etc.), then attach paper ears at the top and add details like whiskers, a button nose, and big eyes (drawn or googly).They can even give their kitty a few spots or a bow tie. Children will enjoy creating a feline friend to display or use for pretend play.
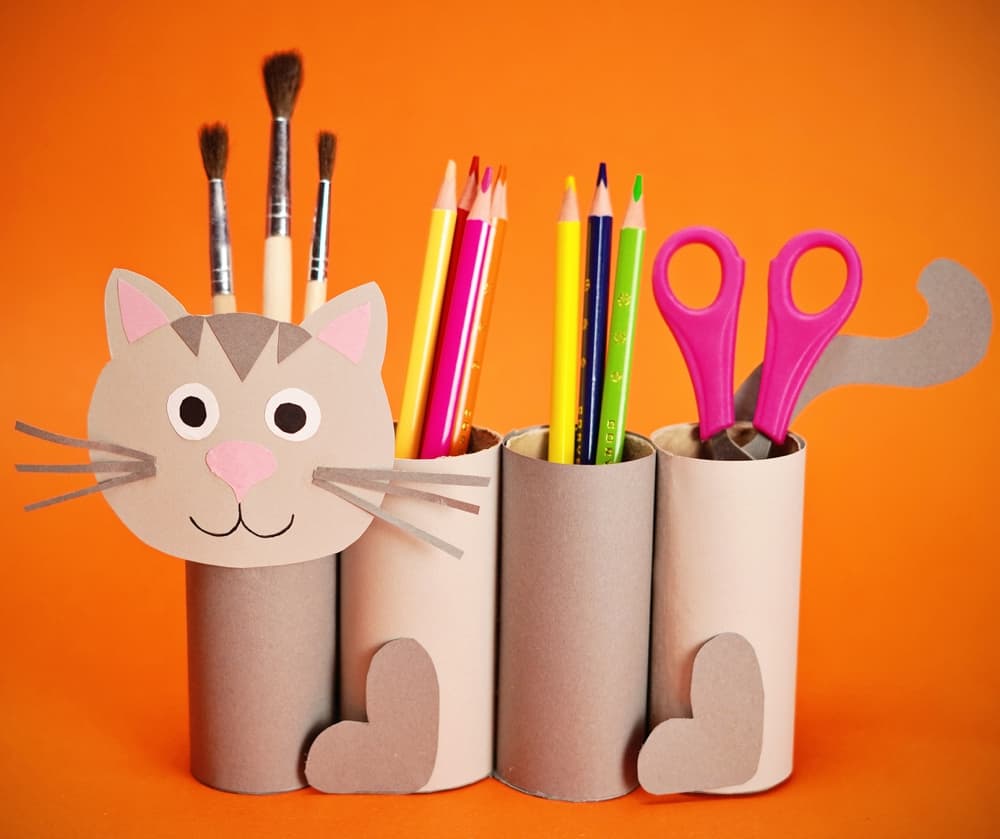
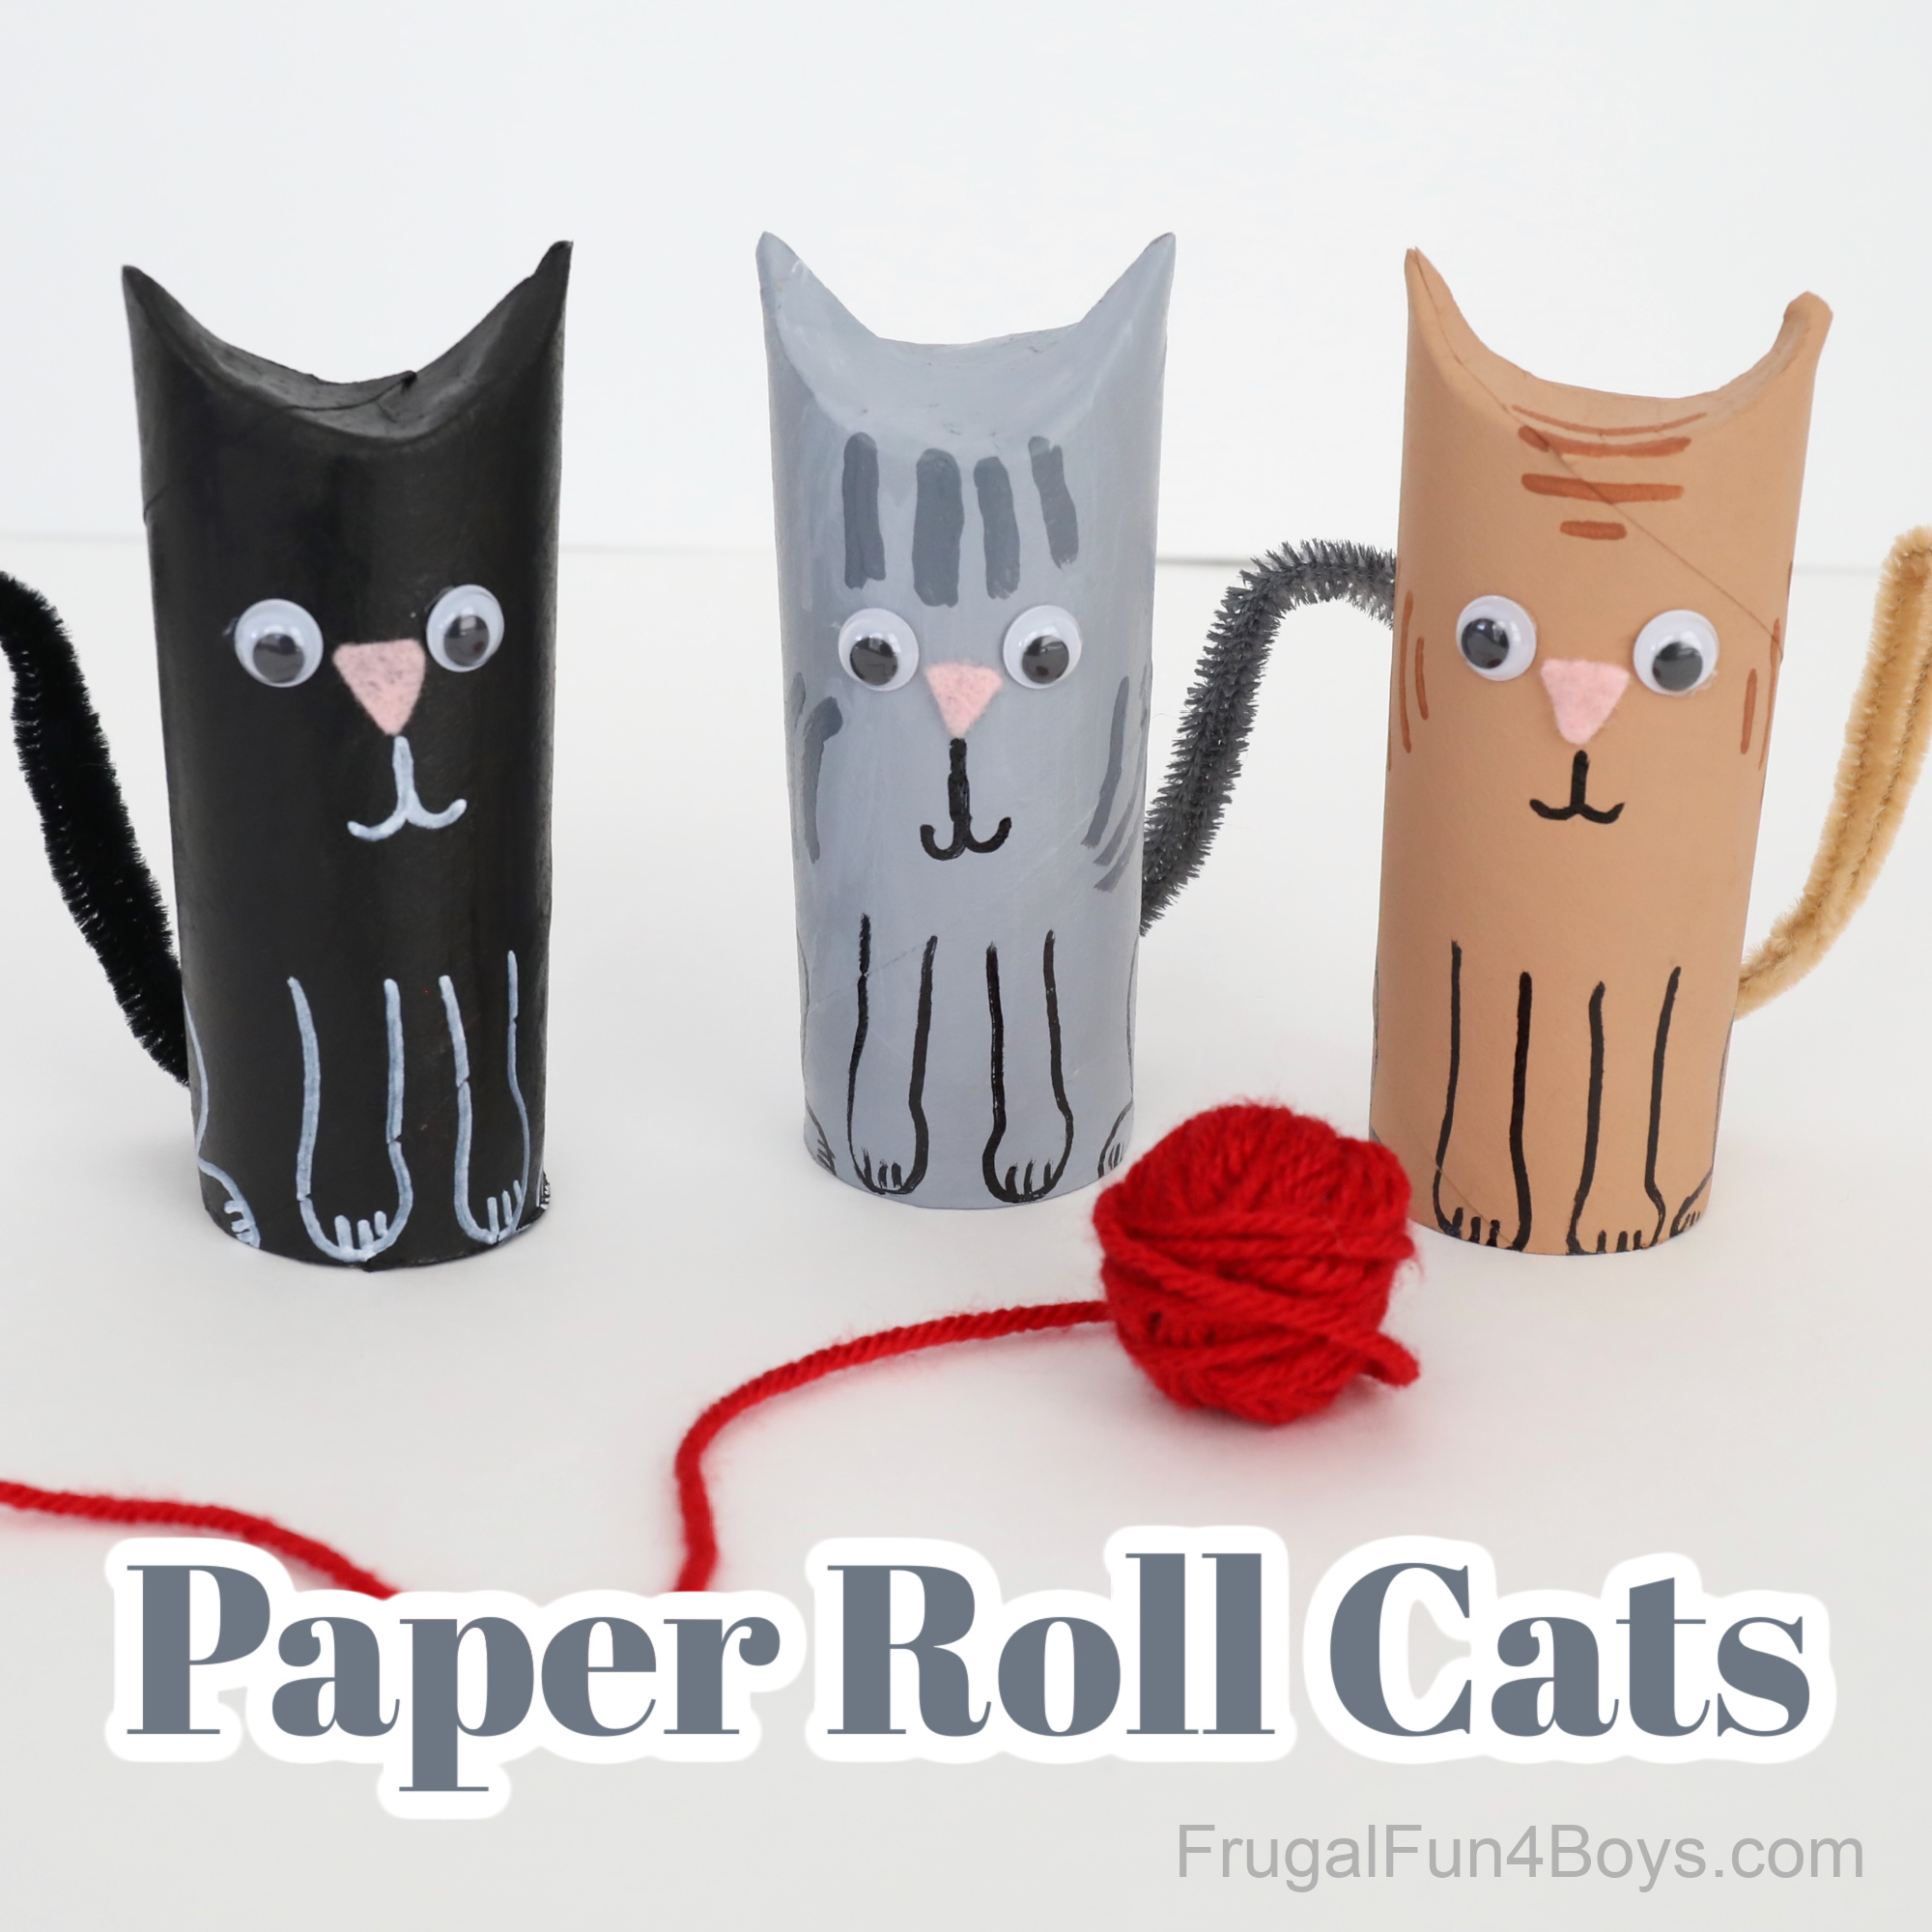
This cute project doubles as a pencil holder and a pet! Kids recycle a toilet paper tube by wrapping it with colored paper (or paint) to make the cat's body. Then, they use a template to add a friendly cat face, pointy ears, and little paws.Once they finish it, kids can pop some pencils or crayons inside, letting their adorable paper roll cat sit on the desk holding supplies—fun to make and handy for back-to-school time.
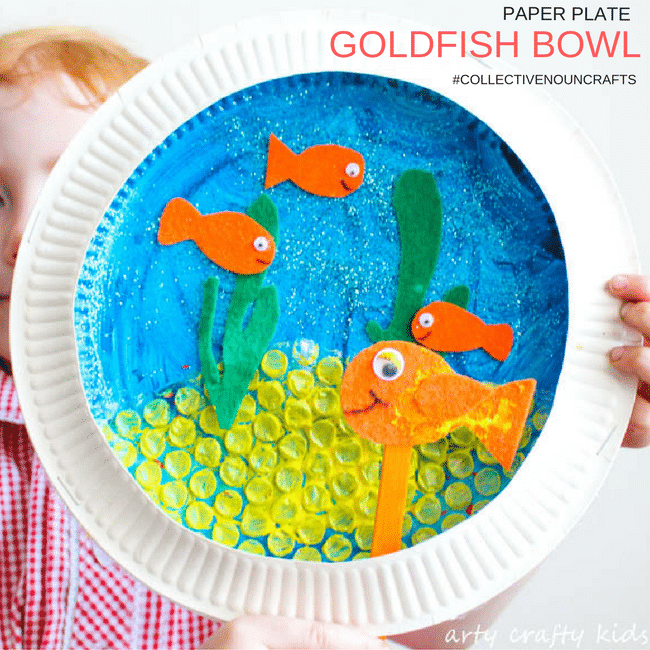
Kids transform a simple paper plate into a pretend fishbowl filled with colorful fish and seaweed. Using a printable template, they cut out a paper fish, green seaweed shapes, and a few bubbles, then glued them onto the plate, which they can paint or color blue to look like water.Children will have fun creating their mini aquarium scene and showing off their new fishy friend—no water or upkeep required!
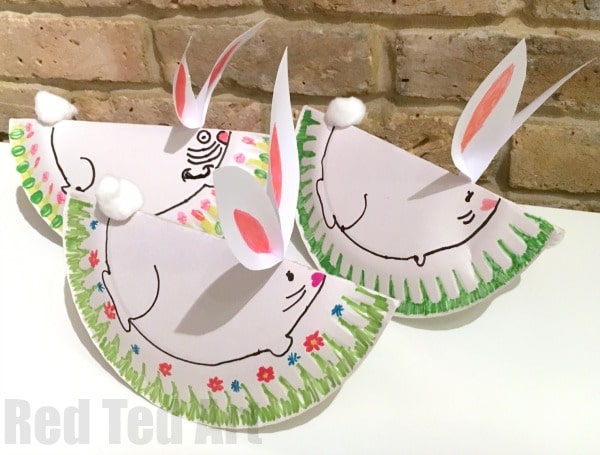
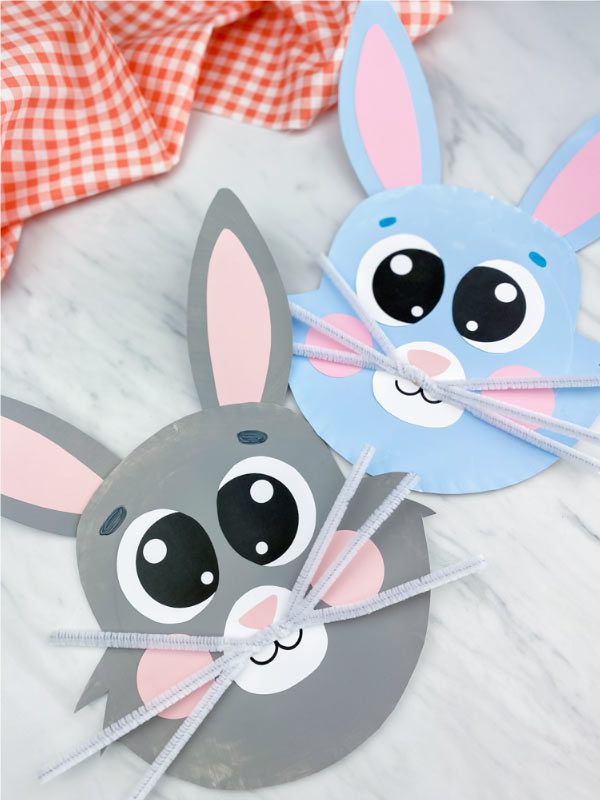
This adorable bunny activity uses a paper plate to create a rocking rabbit that can wobble back and forth. Kids cut a paper plate and decorate one half with a cute bunny face and big paper ears. Then, they balance the plate on its curved edge so it gently rocks like a hopping bunny.It's super easy and perfect for little ones—toddlers and preschoolers will giggle seeing their bunny sway as if it's alive.Also try: Paper Bag Bunny Craft
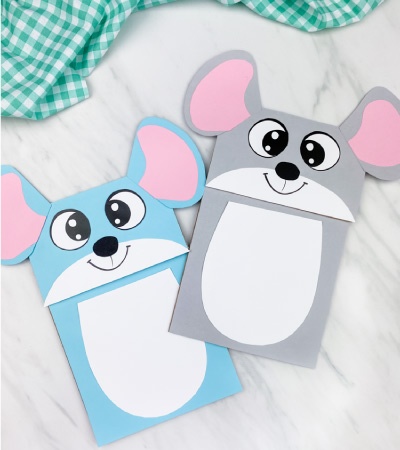
A brown paper lunch bag becomes an adorable mouse puppet with a few cut-out additions. Kids glue on big round ears, a little pink nose, and paper whiskers to the bag's folded flap (which becomes the mouse's face), and can draw a tiny mouth and eyes.Once they finish making it, kids can slip their hand inside, make the little mouse “talk” and scurry around, sparking lots of giggles and imaginative play.
Kids can transform an empty toilet paper roll into an adorable cat with this fun upcycling art. They fold down two sides of one end of the roll to create pointy ears, paint the tube their favorite kitty color, and then add all the details: googly eyes, a tiny pink nose, whiskers drawn on, and a curled pipe cleaner tail.The finished kitty stands independently and makes a great homemade toy or decoration for any young cat lover.
This wearable art turns kids into galloping horses! Using a free template, children cut out a cartoon horse face and ears and glue them onto a paper headband that fits around their head.Once they put on their new horse headband, they'll love prancing around and neighing, pretending to be ponies on the farm or wild stallions on the prairie.
This easy project makes kids turn a paper plate into an adorable little turtle. They paint the plate to look like a turtle shell (often green with a pattern of spots), then attach a paper turtle head, four stubby legs, and a tiny tail using a simple template.It's fun and tactile—children love how the round plate becomes a shell—and they can even make their turtle “crawl” around during playtime once it's finished.Related: Turtle Handprint Craft
A simple paper bag becomes a slithering snake puppet in this artful activity. Kids attach a snake head with big eyes and a forked red tongue onto the bag's folded top, then decorate the rest with green scales or colorful patterns to look like a snake's body.When they slip their hand inside, the snake comes to life, opening and closing its “mouth” to hiss and playfully pretend-bite as part of imaginative play.
This cute and interactive project turns a paper plate into a goldfish bowl scene that kids can play with. Children decorate the plate to look like a bowl of water and gravel, then create a bright orange paper goldfish to inhabit it, often attaching the fish in a way that it can move or “swim” around (like with a brad fastener or stick).It's perfect for an under-the-sea theme, and kids will love making their goldfish swim and creating their mini aquarium without any real water needed.Also try: Fish Bowl Paper Plate Craft
This paper plate bunny is an adorable spring or Easter activity for kids. Little ones paint a plate pastel pink or white, then add big paper ears, googly eyes, and a cute whiskered nose to create a friendly rabbit face.It's a fun way to celebrate the season—kids will be proud to display their hopping bunny artwork or even use it as a simple mask for pretend play.
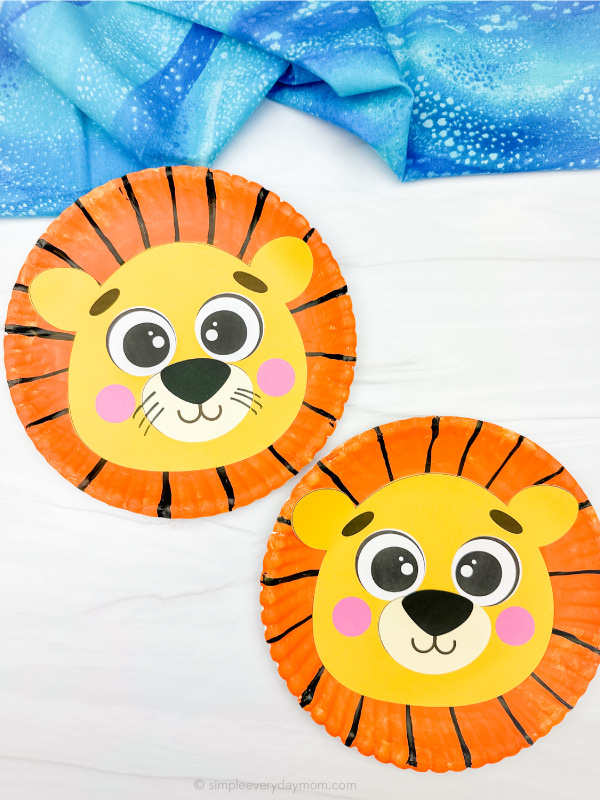
Kids can transform a paper plate into the king of the jungle — a friendly lion! They start by painting the plate a golden yellow or orange, then glue on the lion's facial features (like a snout and eyes) and surround the plate with a mane made of paper strips or cut-out handprints.The lion's mane can be as complete and colorful as they like, and children will love roaring along with their finished lion face once the art is complete.
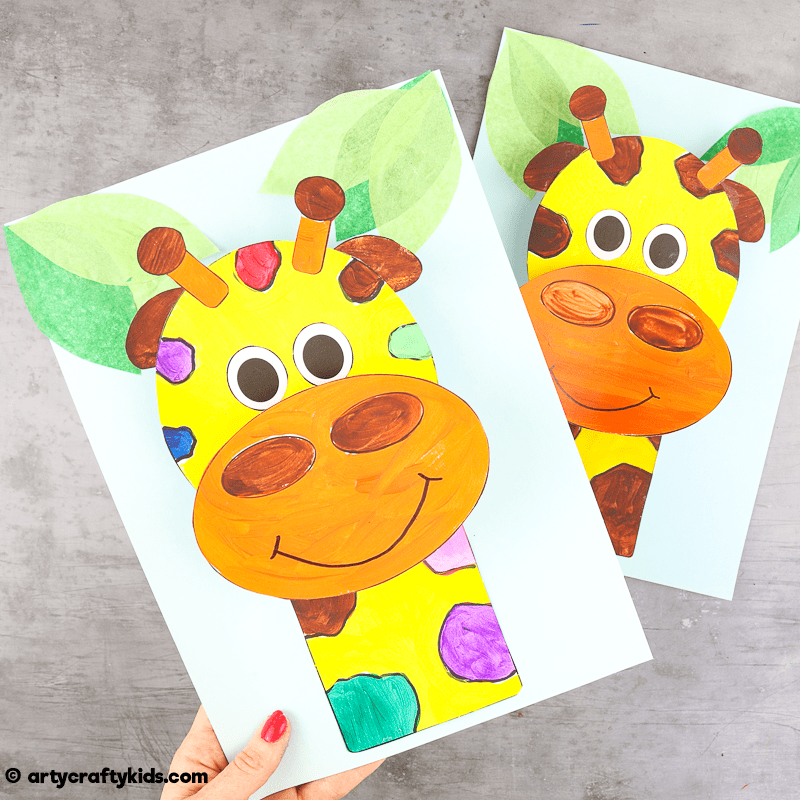
This project adds an extra dimension by making a giraffe that stands up. Kids cut out and assemble the giraffe's body from paper, creating a long neck that pops upright and legs that fold out so the giraffe can stand independently.Once kids put together the brightly spotted giraffe with a tail and little horn-like ossicones on its head, it becomes a playful decoration or toy that looks ready to stroll across the savanna.Related: Giraffe Handprint Craft
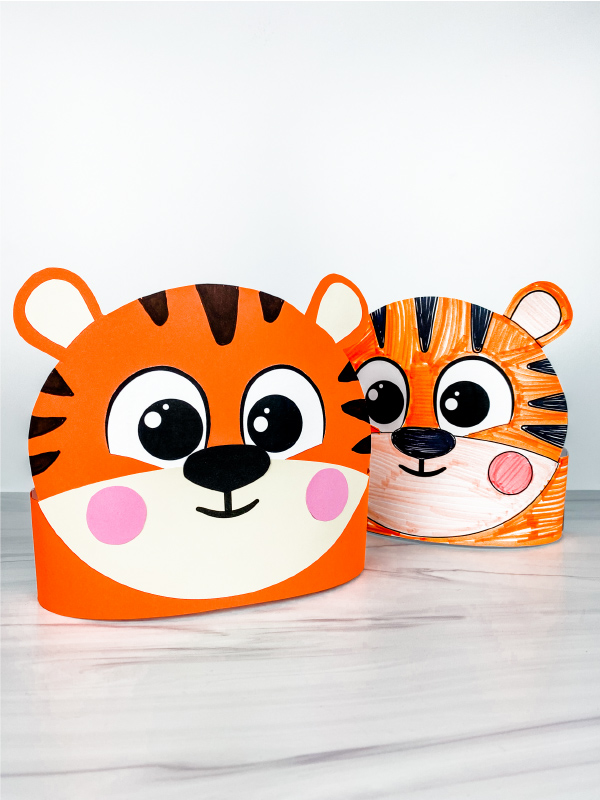
In this activity, kids get to wear their tiger stripes! They use a free template to cut out a tiger's face with pointy ears and a few striped markings, then attach it to a paper band that wraps around their head.Once the headband is on, they can pretend to be a ferocious (or friendly) tiger, crawling around and roaring with delight.
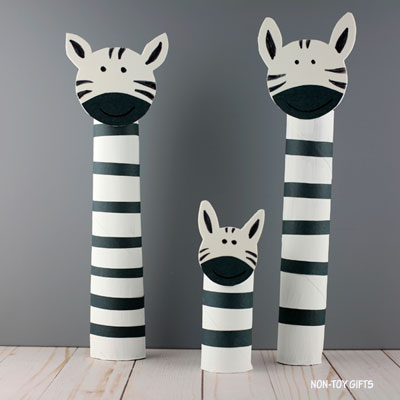
This easy project turns a recycled toilet paper roll into a cute zebra. Kids paint the tube white and add black stripes with paint or paper, then glue on a paper zebra head with ears and a yarn or paper tail on the back.The result is a little zebra figure they can play with — great for adding to a homemade zoo collection or going on a make-believe safari.Also try: Zebra Handprint Craft
Kids can bring some of the zoo home by making an elephant from a toilet paper roll. Using a free template, they wrap the tube in gray paper to form the body and attach big, floppy paper ears and a long trunk to the front. They can even add tusks or a little tail to their creation.They'll stay engaged throughout the activity, and once they finish, they'll have a mini elephant ready to stomp around in their pretend safari adventures.
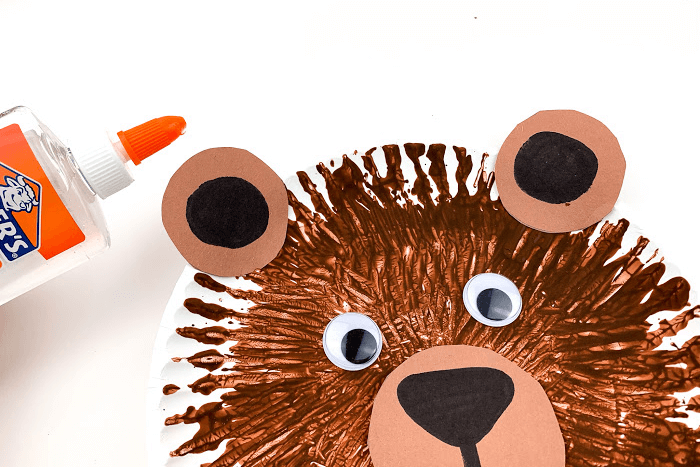
An adorable paper plate art brings the classic “Brown Bear, Brown Bear, What Do You See?” story to life. Using a plastic fork as a painting tool, kids swipe brown paint all over a paper plate to create the bear's fuzzy textured fur, then add construction paper ears, a round snout, and googly eyes to complete the friendly bear's face.It's a simple, sensory-rich activity that pairs perfectly with reading the beloved book, and children get excited seeing their storybook friend come alive in their artwork.Related: Bear Handprint Craft
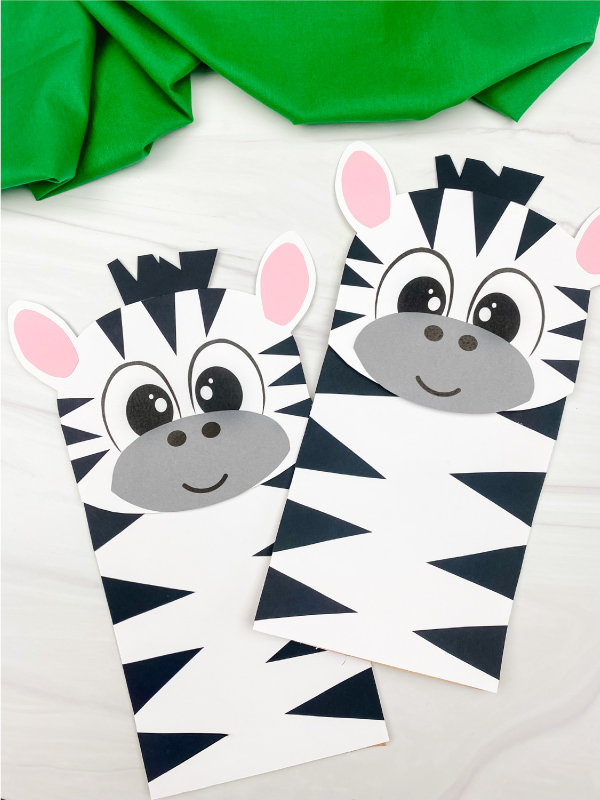
This project turns a paper lunch bag into a playful zebra puppet. Kids cut and color the template pieces — the zebra's snout, ears, and plenty of black stripes — and glue them onto the bag (the face goes on the folded flap, and stripes on the body).The finished puppet is ready to prance into fun: children can make their zebra “talk,” gallop around, and star in their little safari puppet show.
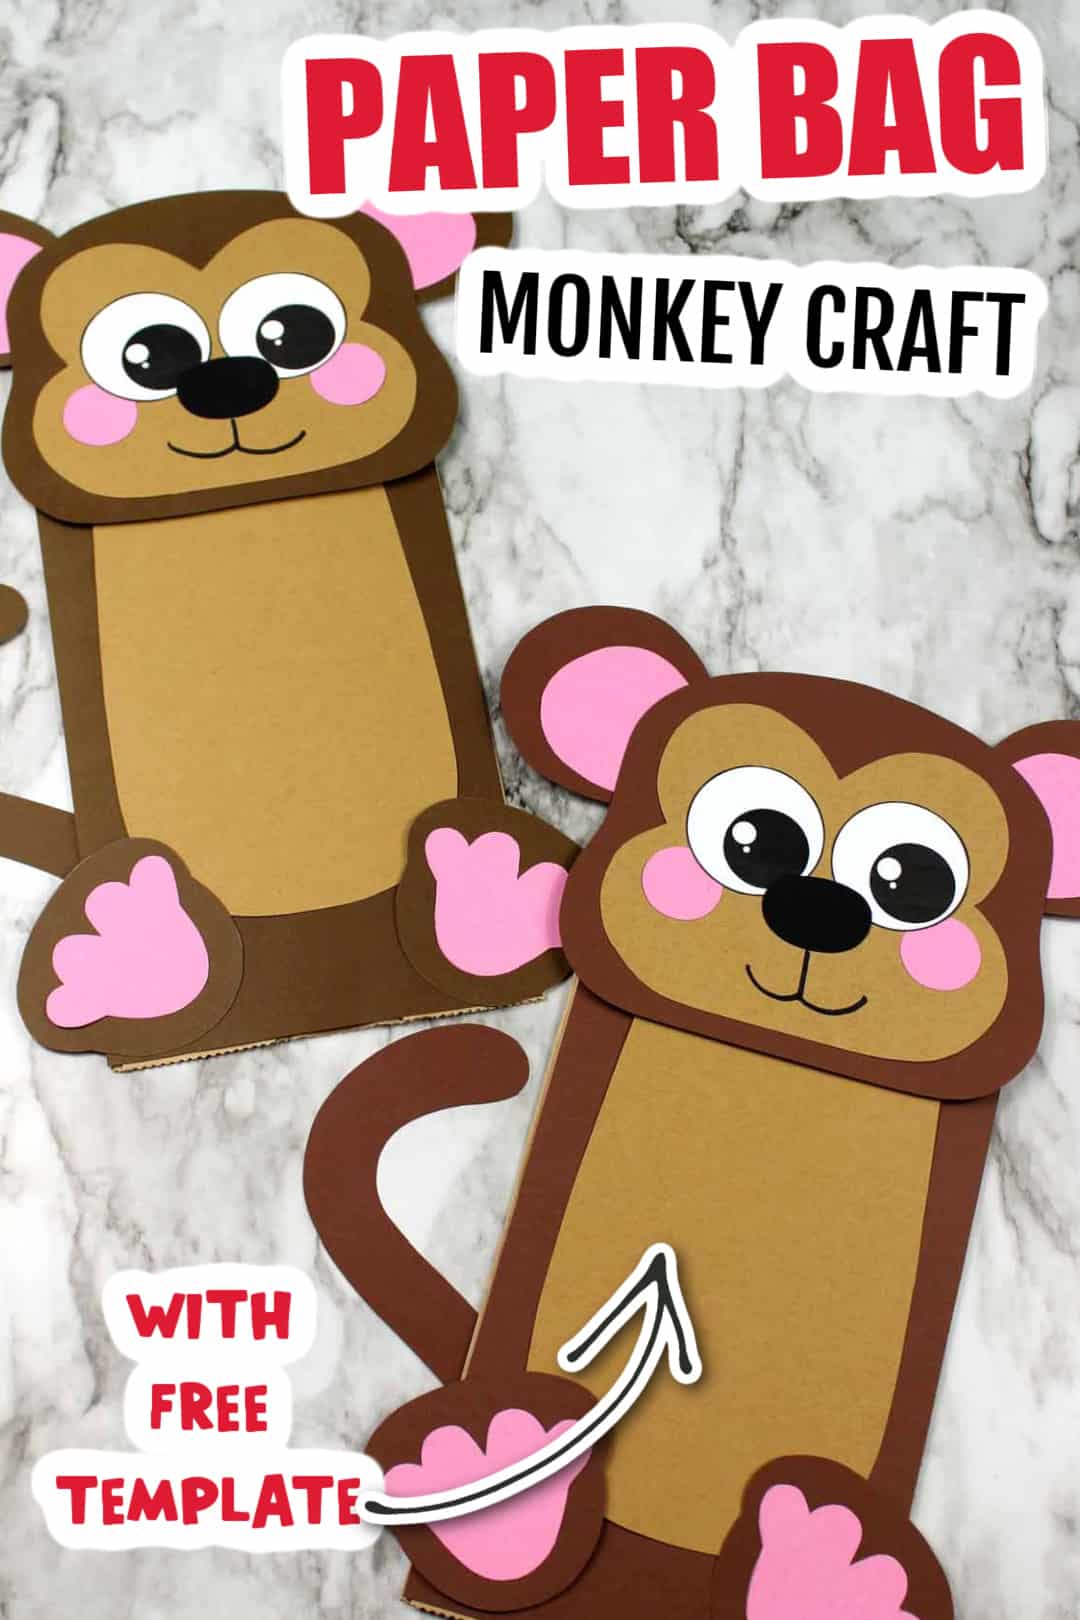
This fun art transforms a plain paper bag into a cheeky monkey puppet. Kids cover the bag in brown (with paint or paper) and glue on a round tan muzzle, a smiling mouth, and big ears to create the monkey's face on the bag. They can also add a curly paper tail to the back.Once dry, it becomes a lovable puppet—kids will enjoy making it chatter, wave its arms, and monkey around with their new friend.Also try: Monkey Paper Cup Craft
This sweet activity uses your child's handprint to create an adorable panda bear. Kids trace their hand on white paper and cut it out (to form the panda's body or head), then use the template to add black paper ears, arms, legs, and the panda's signature black eye patches around some googly eyes.The result is an oh-so-cute panda that's a fun animal art and a memorable keepsake made by hand.
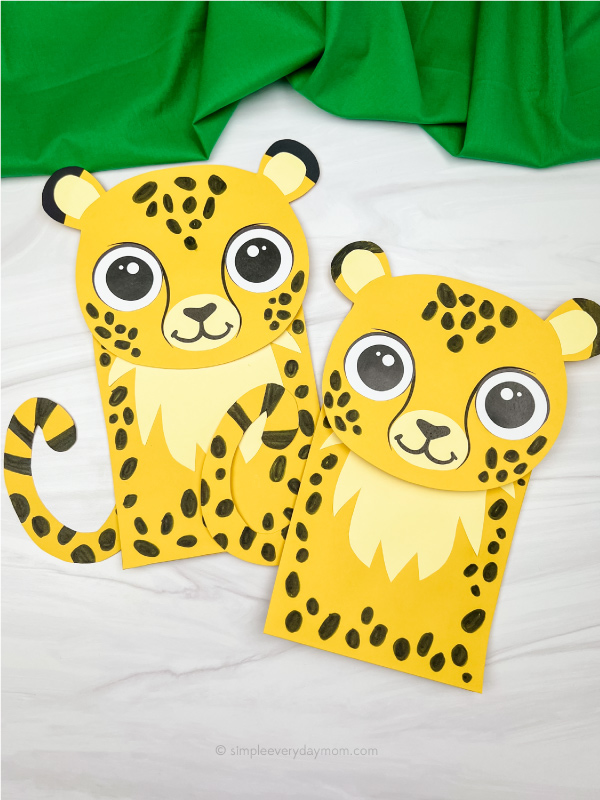
Kids can create a speedy cheetah puppet from a simple paper bag. They cover the bag with yellow or orange paper (or paint) and add lots of black spots, then attach the cheetah's face on the flap, complete with rounded ears and a little snout from the template.Now they have a fierce but friendly big-cat puppet; children will love making it prowl, pounce, and “chat” as they create their jungle adventures.
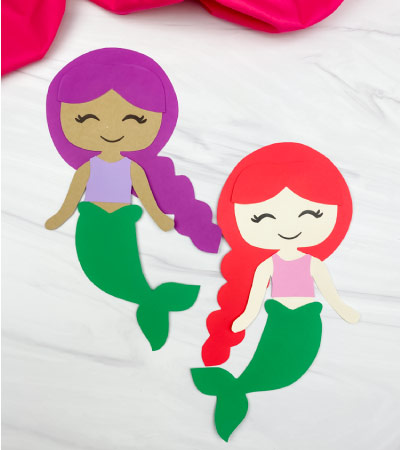
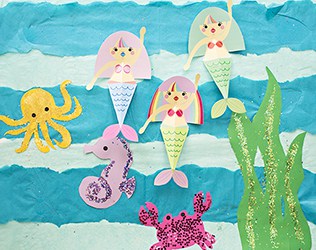
Kids can create their magical mermaid friend using colored paper and glue. Using a free template, they cut out the mermaid's flowing hair, seashell top, and tail and assembled all the pieces into a bright, cheerful undersea character.It's quick and fun summer art that lets little ones imagine ocean adventures, and they can customize their mermaid's colors or add sparkles to make her special.
This entertaining project features a mermaid that rocks back and forth as if she's swimming. Kids color in a cute mermaid printable (or use a pre-colored one) and attach it to a half paper plate folded into a semicircle. With a gentle push, the mermaid sways and “swims” on her rocking plate base.It's an adorable ocean-themed activity that feels almost magical to preschoolers, yet is very simple to make with a bit of cutting and folding.Related: Mermaid Toilet Paper Roll Craft
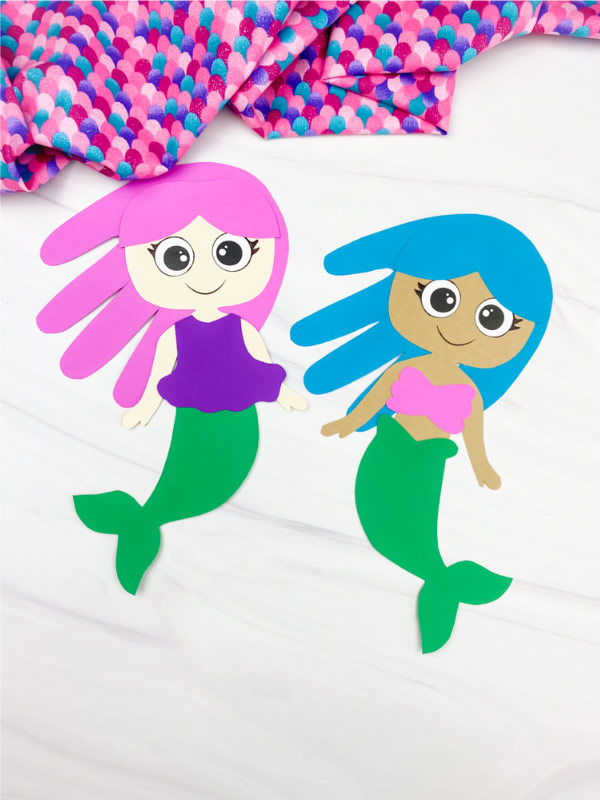
This colorful art uses a child's handprint to form the tail of a mermaid. Kids trace their hand on glittery or colored paper (with fingers splayed to look like tail fins) and cut it out, then attach a paper mermaid upper body and head above it, using a template for the face, hair, and seashell top.The finished mermaid is bright, personal, and oh-so-cute—children love that their hand becomes the mermaid's tail, making it a special keepsake and a fun pretend-play character.
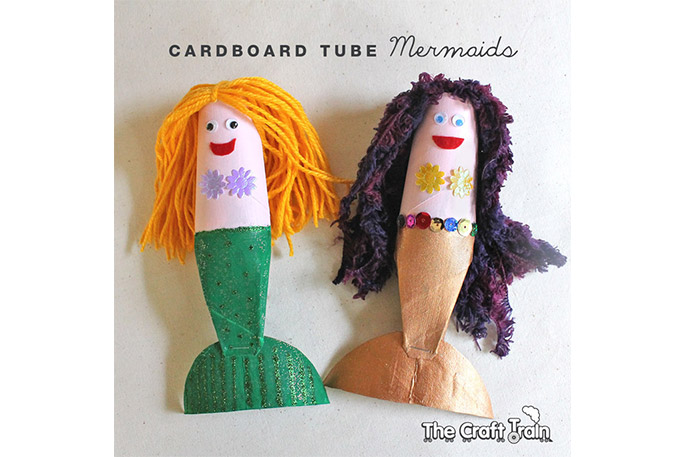
These DIY mermaid dolls are made from cardboard tubes, creating a sturdy 3D project that kids can play with. Each child paints a toilet paper roll in fun colors to become the mermaid's tail and body, then adds a paper tail fin at the bottom and a mermaid head and arms at the top (with yarn or paper hair flowing down).The result is an adorable little mermaid figurine that stands up, perfect for undersea pretend play or displaying on a shelf.Also try: Popsicle Stick Mermaid Craft
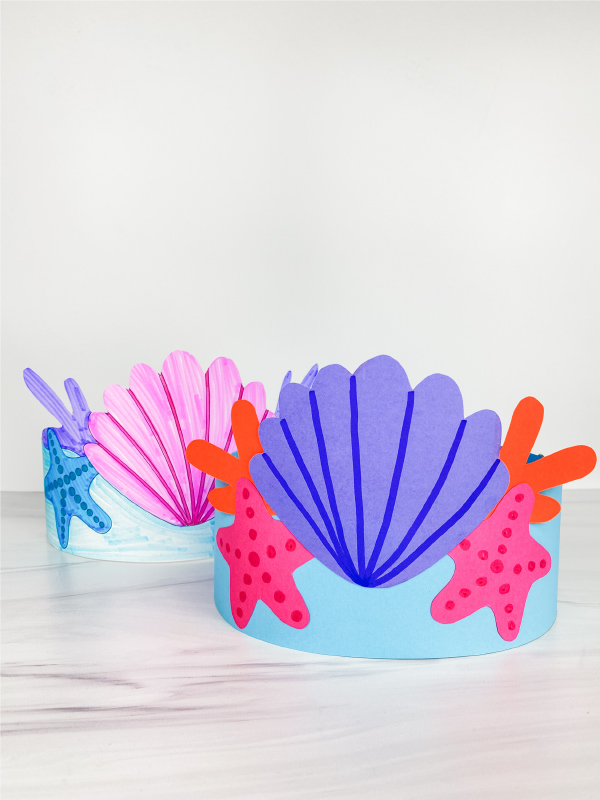
This artful project lets kids wear a bit of mermaid magic. Using a printable template, they cut out mermaid-themed decorations—like seashells, starfish, or even a cute mermaid cartoon—and glue them onto a paper band that fits around their heads.The finished headband is colorful and fun, turning your child into an ocean princess (or prince) ready for under-the-sea pretend play or a mermaid dress-up day.
Have some under-the-sea fun with this moving mermaid art. Kids use a free printable to cut out a pretty mermaid (a few designs, including one they can color themselves), then make a couple of clever folds and cuts so that her tail fin can flap.With a gentle touch, the paper mermaid “swims” by fluttering her tail, making this project as interactive as it is cute. Children will love playing with their mermaids and even setting up an imaginary ocean scene to explore.Related: Mermaid Tail Craft
Sam is the crafter and founder of Simple Everyday Mom. She has been featured in Oprah Mag, Good Housekeeping, The Spruce Crafts, Country Living, The Bump, and more.